APRIL 29, 2018
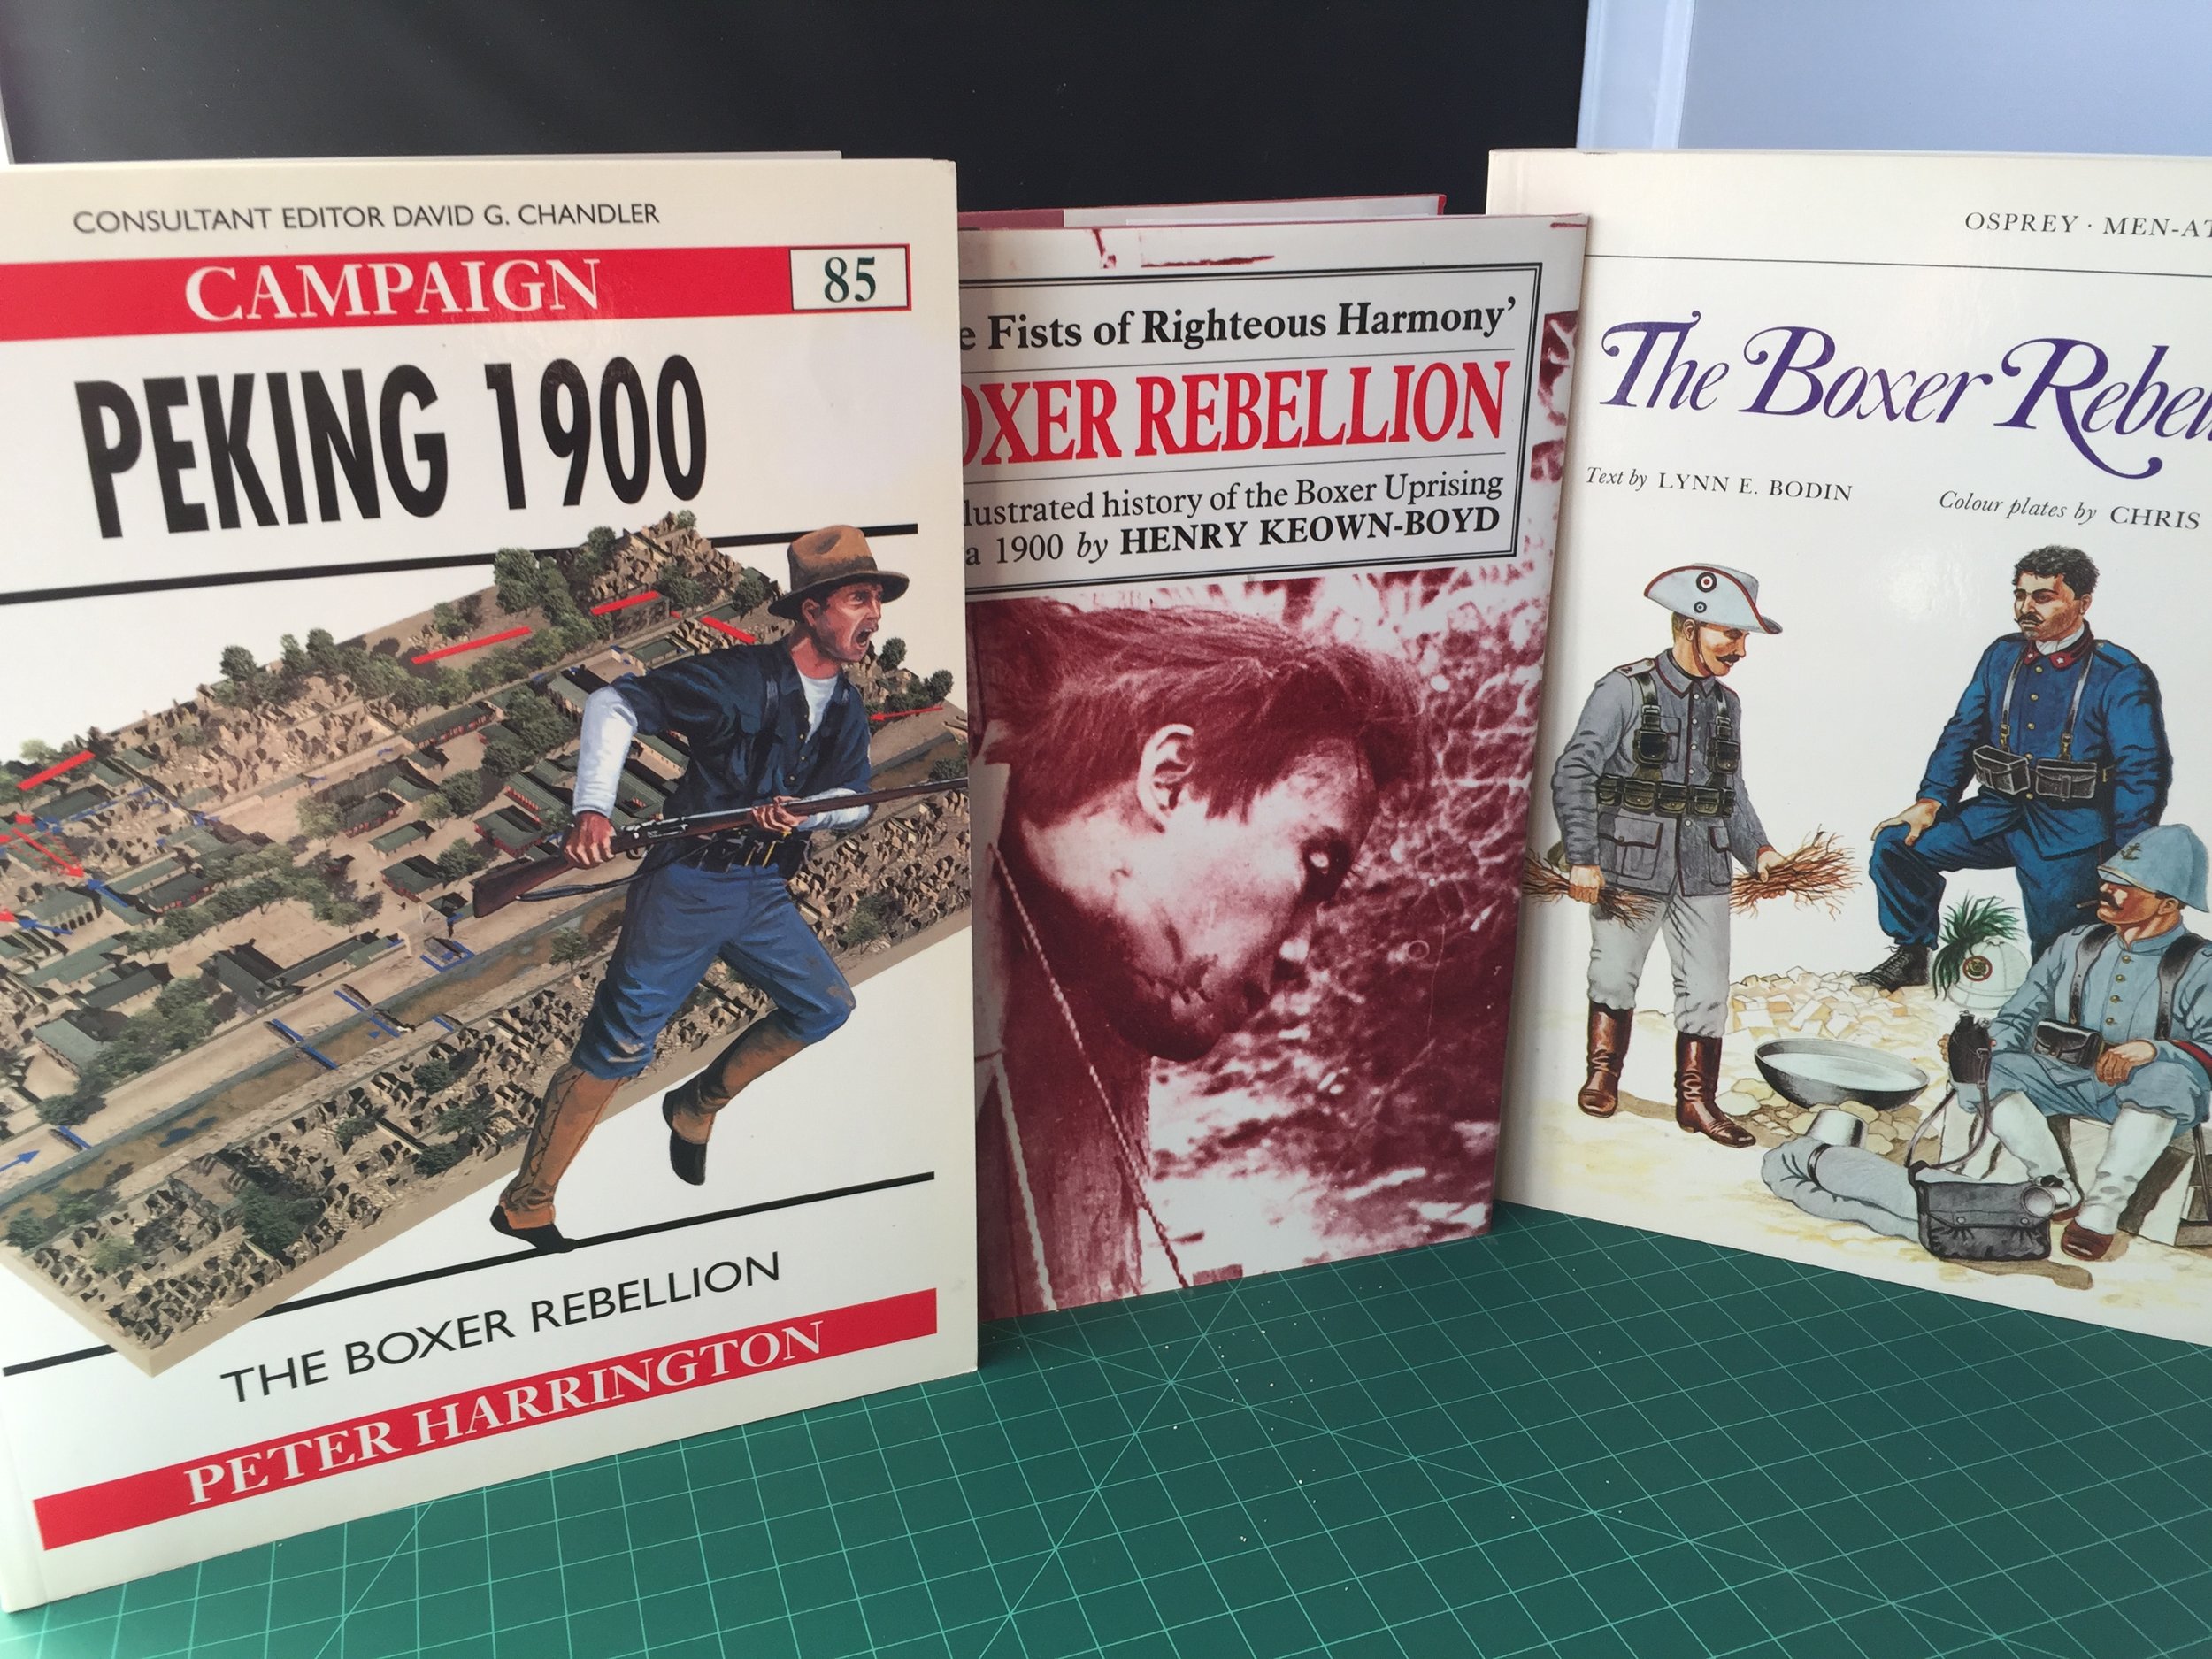
This week’s workbench marks the first week dedicated to a new project. I expect that for the next nine months I will be working on my 15mm collection of the Boxer Rebellion. Most of the figures and terrain for this collection are by Blue Moon. Very little of my work on this project this week has actually taken place at the workbench. Most of my time has been dedicated to research; I haven’t looked at this material for several months and needed some serious refreshing so I hit the books… two by Osprey and one entitled “the Fists of Righteous Harmony” Boxer Rebellion by Henry Keown-Boyd. At the recommendation of FifteensAway/Lead Adventure Forum member, I have also ordered The Boxer Rebellion by Diana Preston which FifteensAway says is the best book he’s read on the subject. I should mention that FifteensAway is currently working on the same project using very much the same collection/Blue Moon of figures and buildings. It’s nice to have someone to confer with on one of my projects.
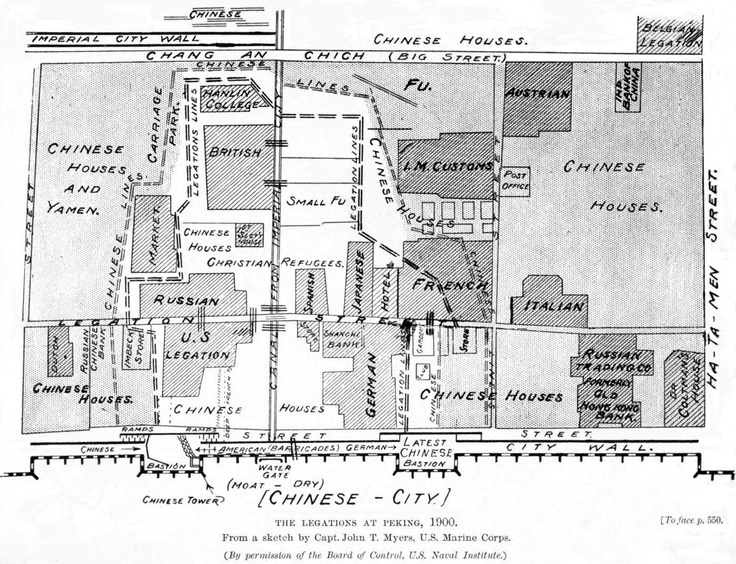
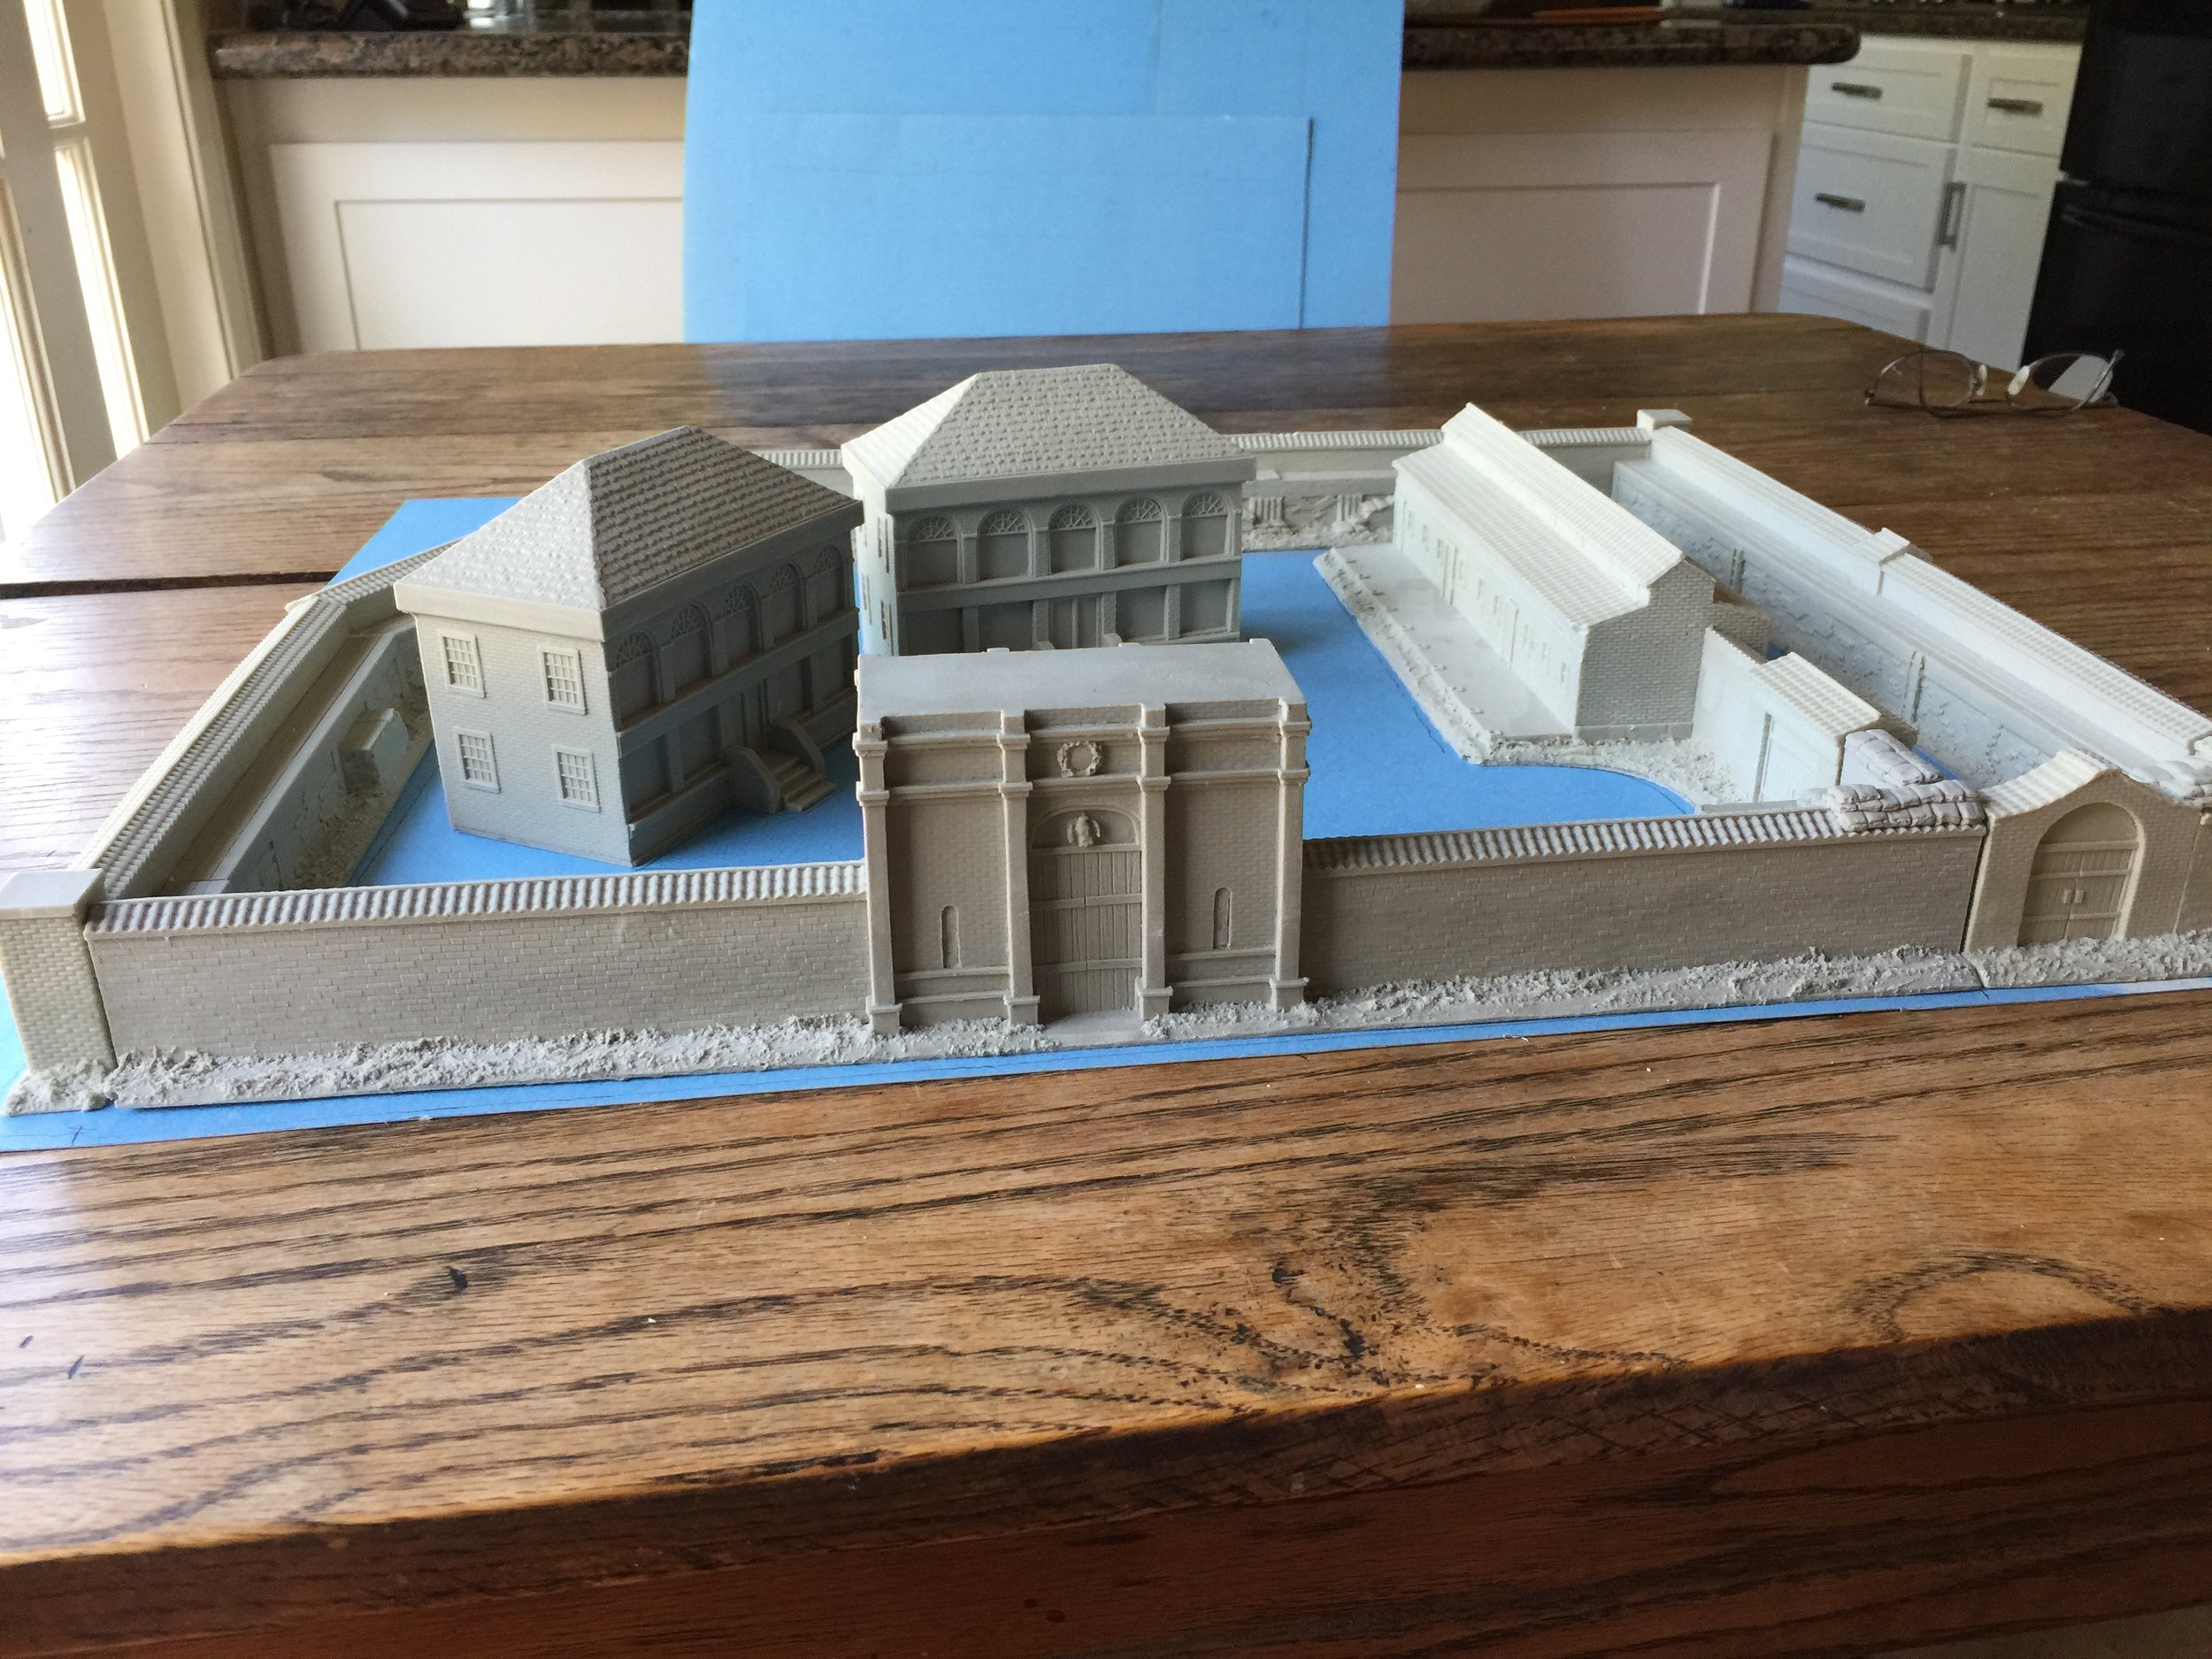
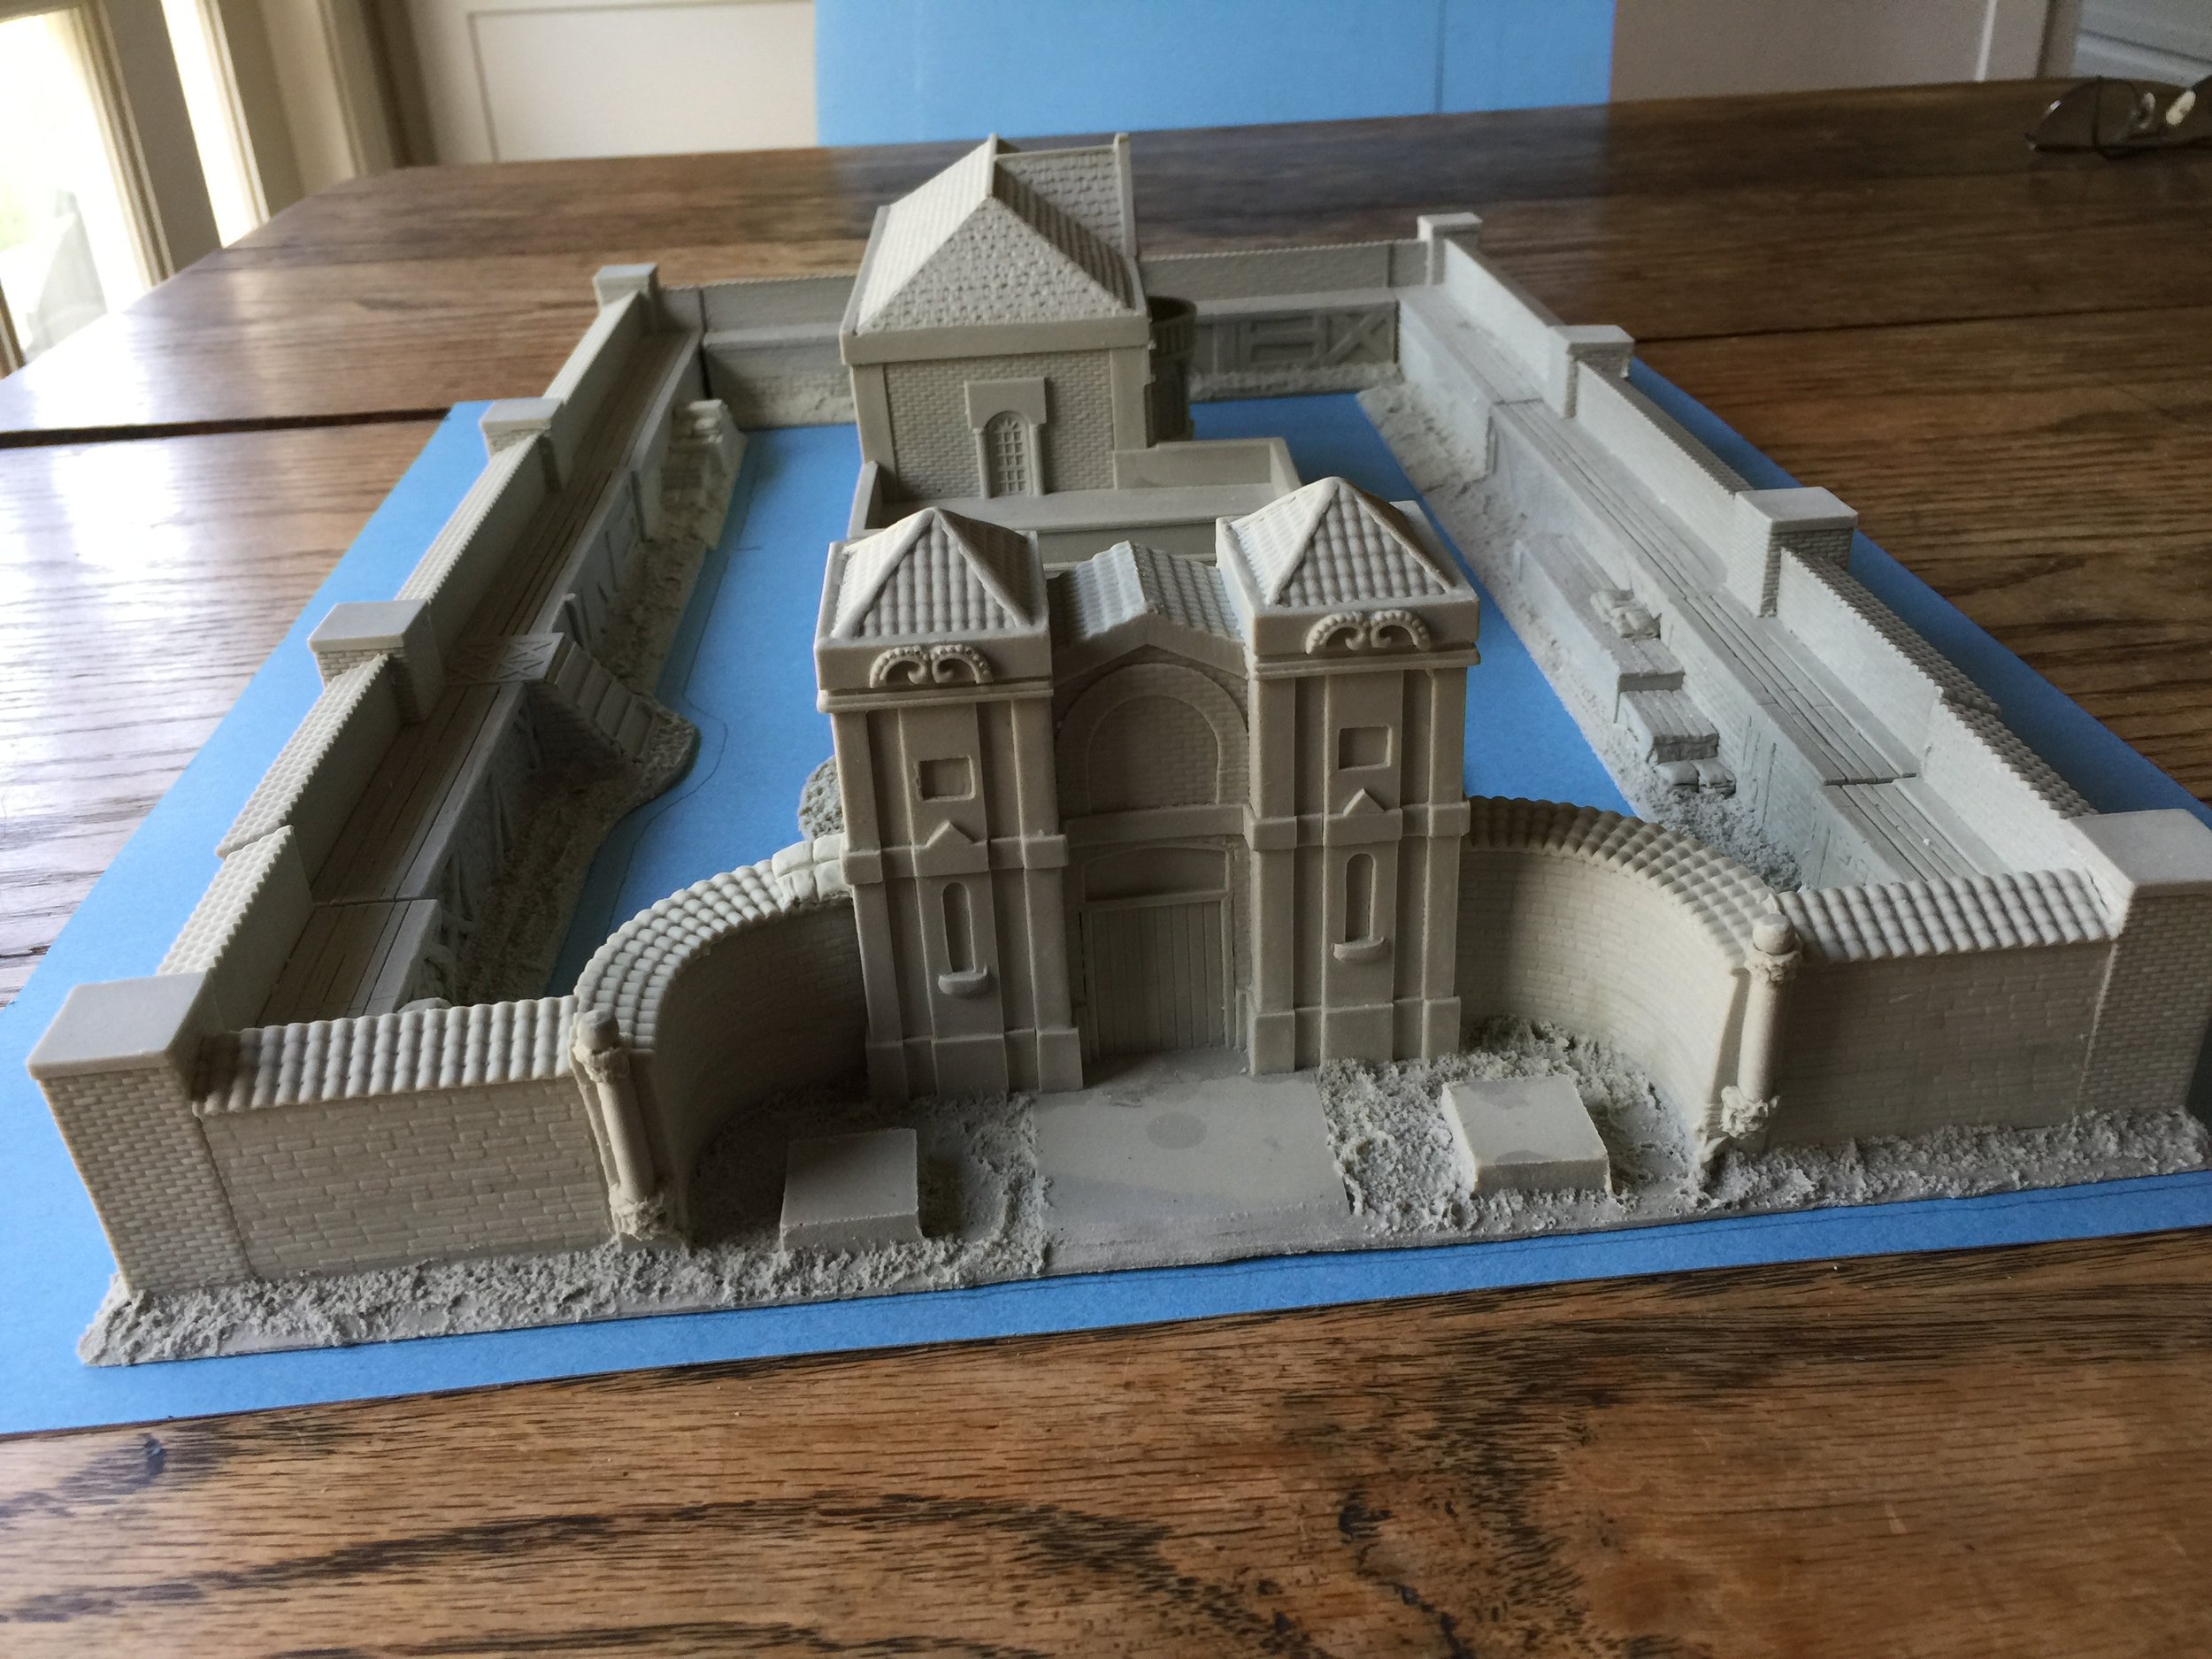
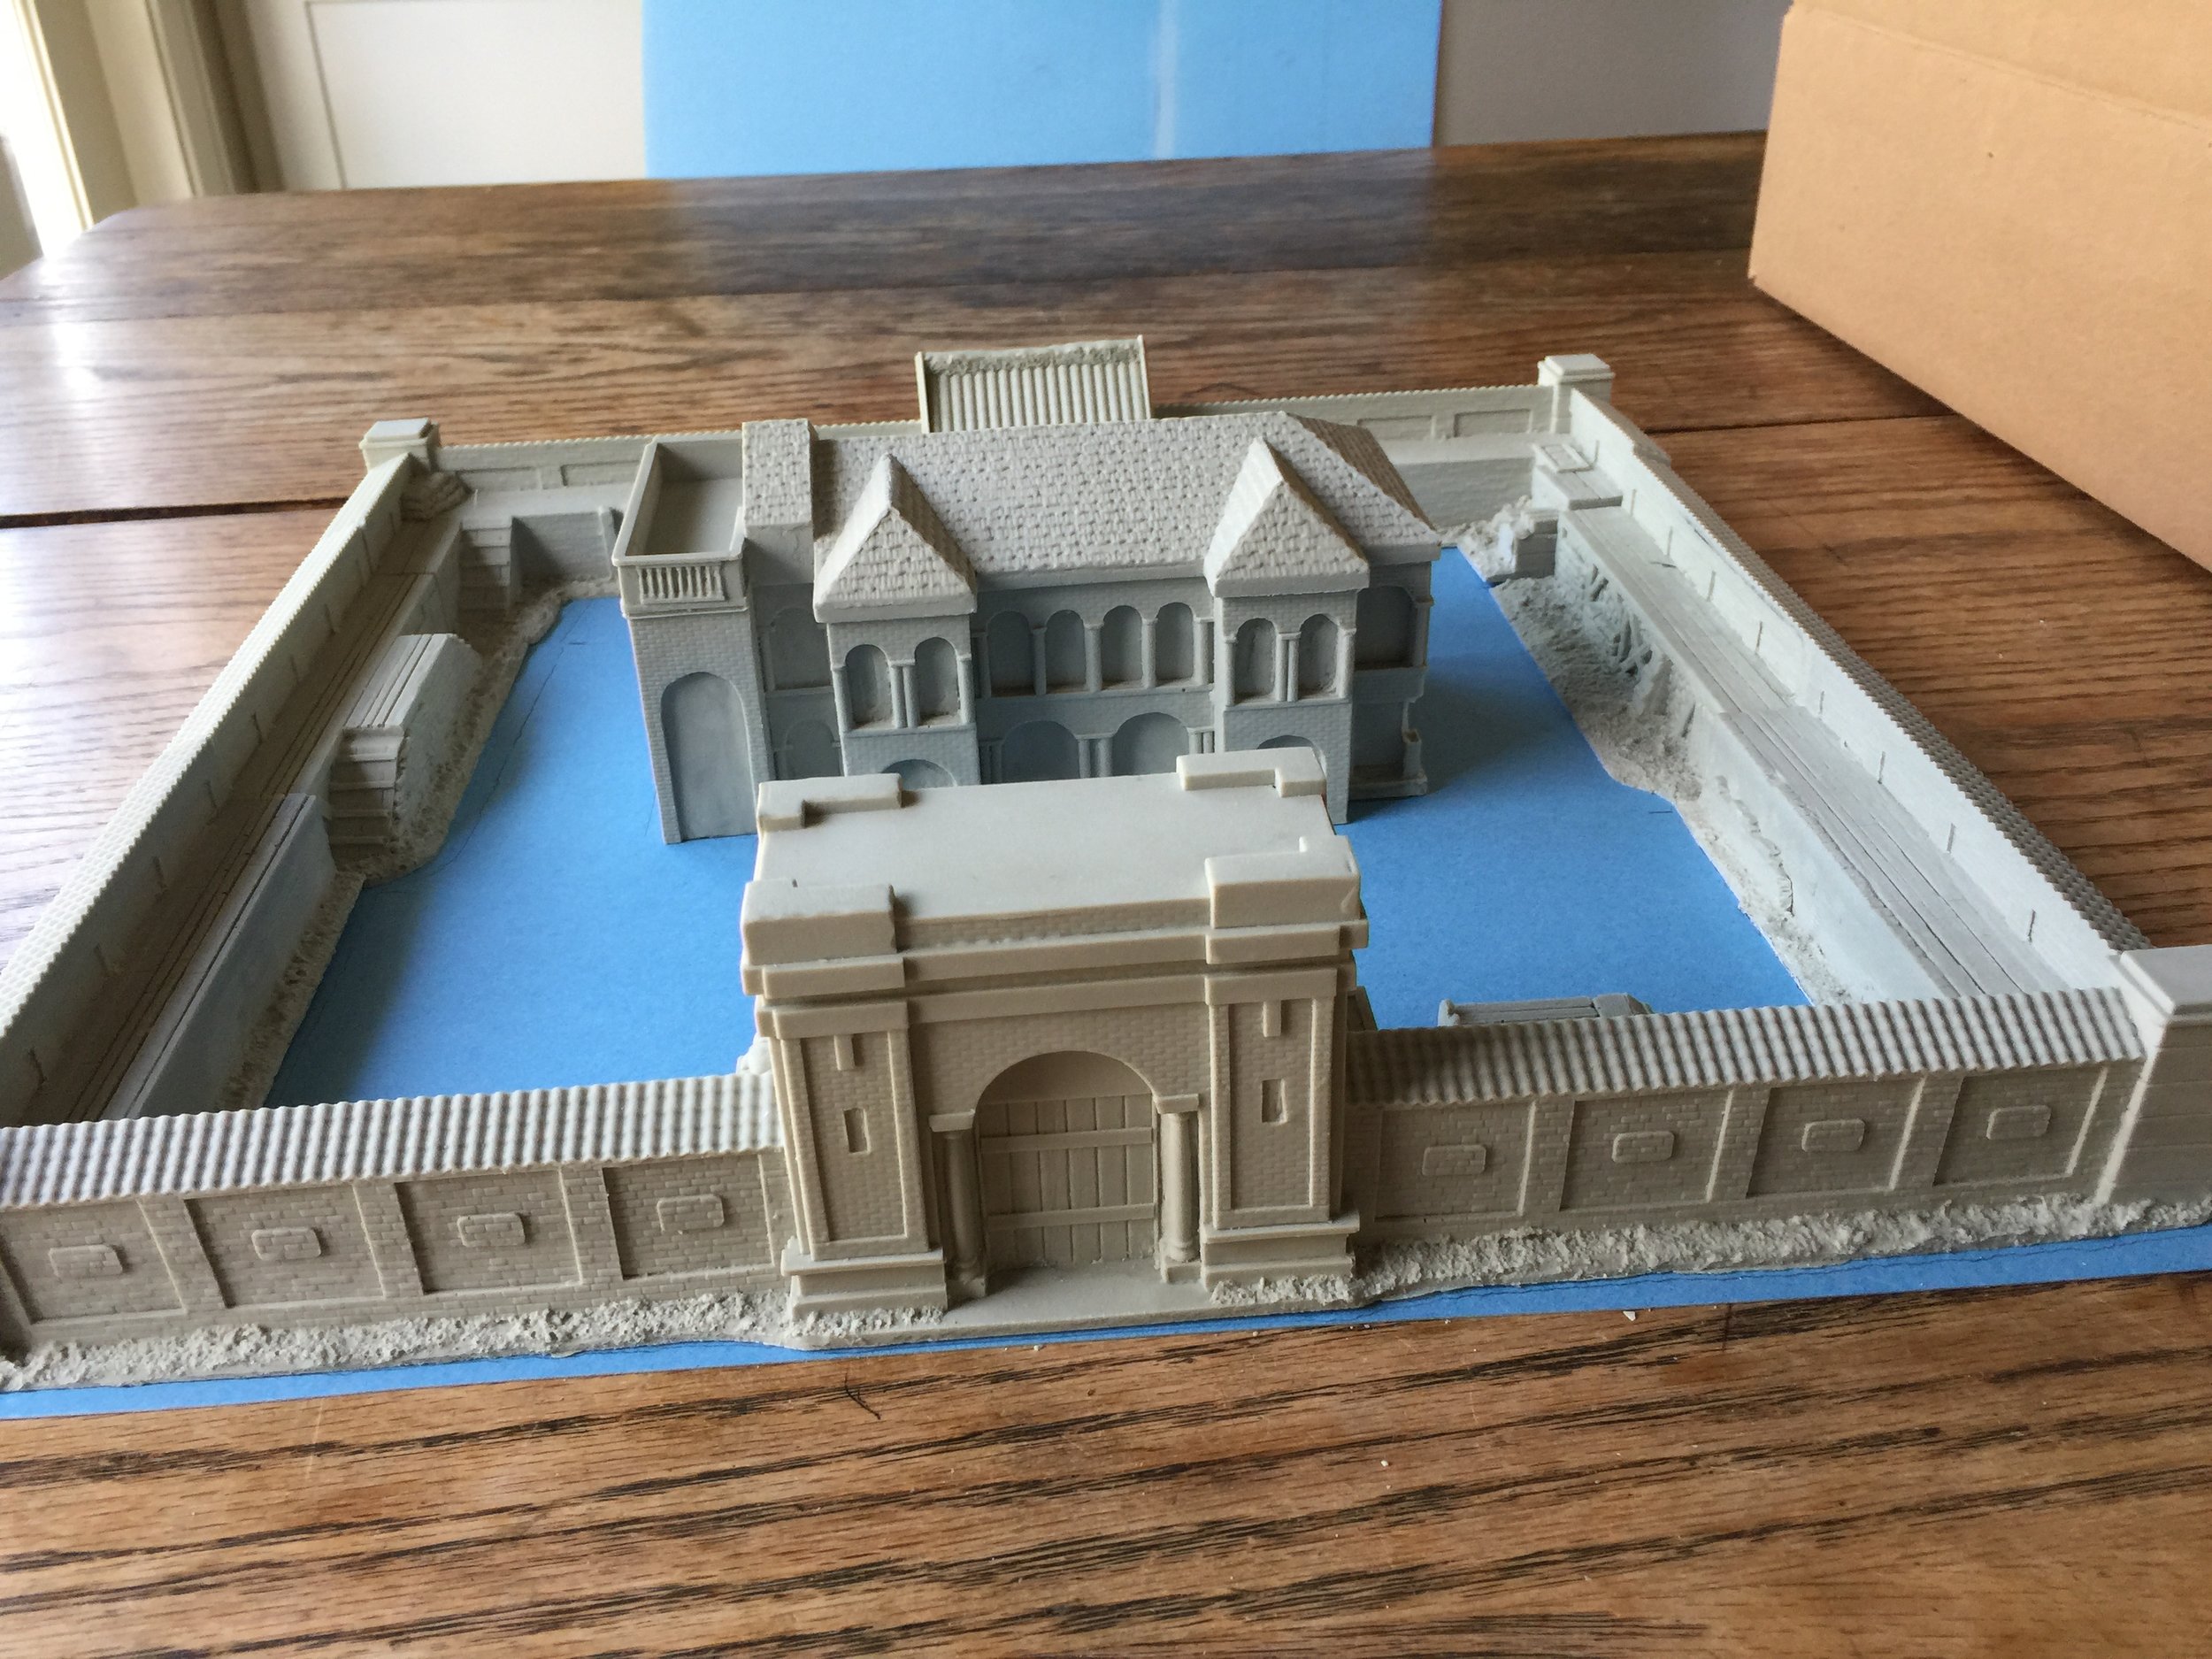
My first non-reading activity of the week was to unpack the five European legations that will form the bulk of the terrain for this collection. It is my plan to keep this layout restricted to one 5 ft. x 7 ft. table. I unpacked each legation one at a time and arranged each on a separate piece of poster board. I identified by number the arrangement of each piece of each legation using a black Sharpie on the bottom of each piece and then outlined the same of their outer walls on the poster board and identified where each numbered piece of each legation was located. I then cut out these outlined pieces of poster board so that I had a template for each legation and thus did not have to completely set up each legation each time I wanted to do some location planning.
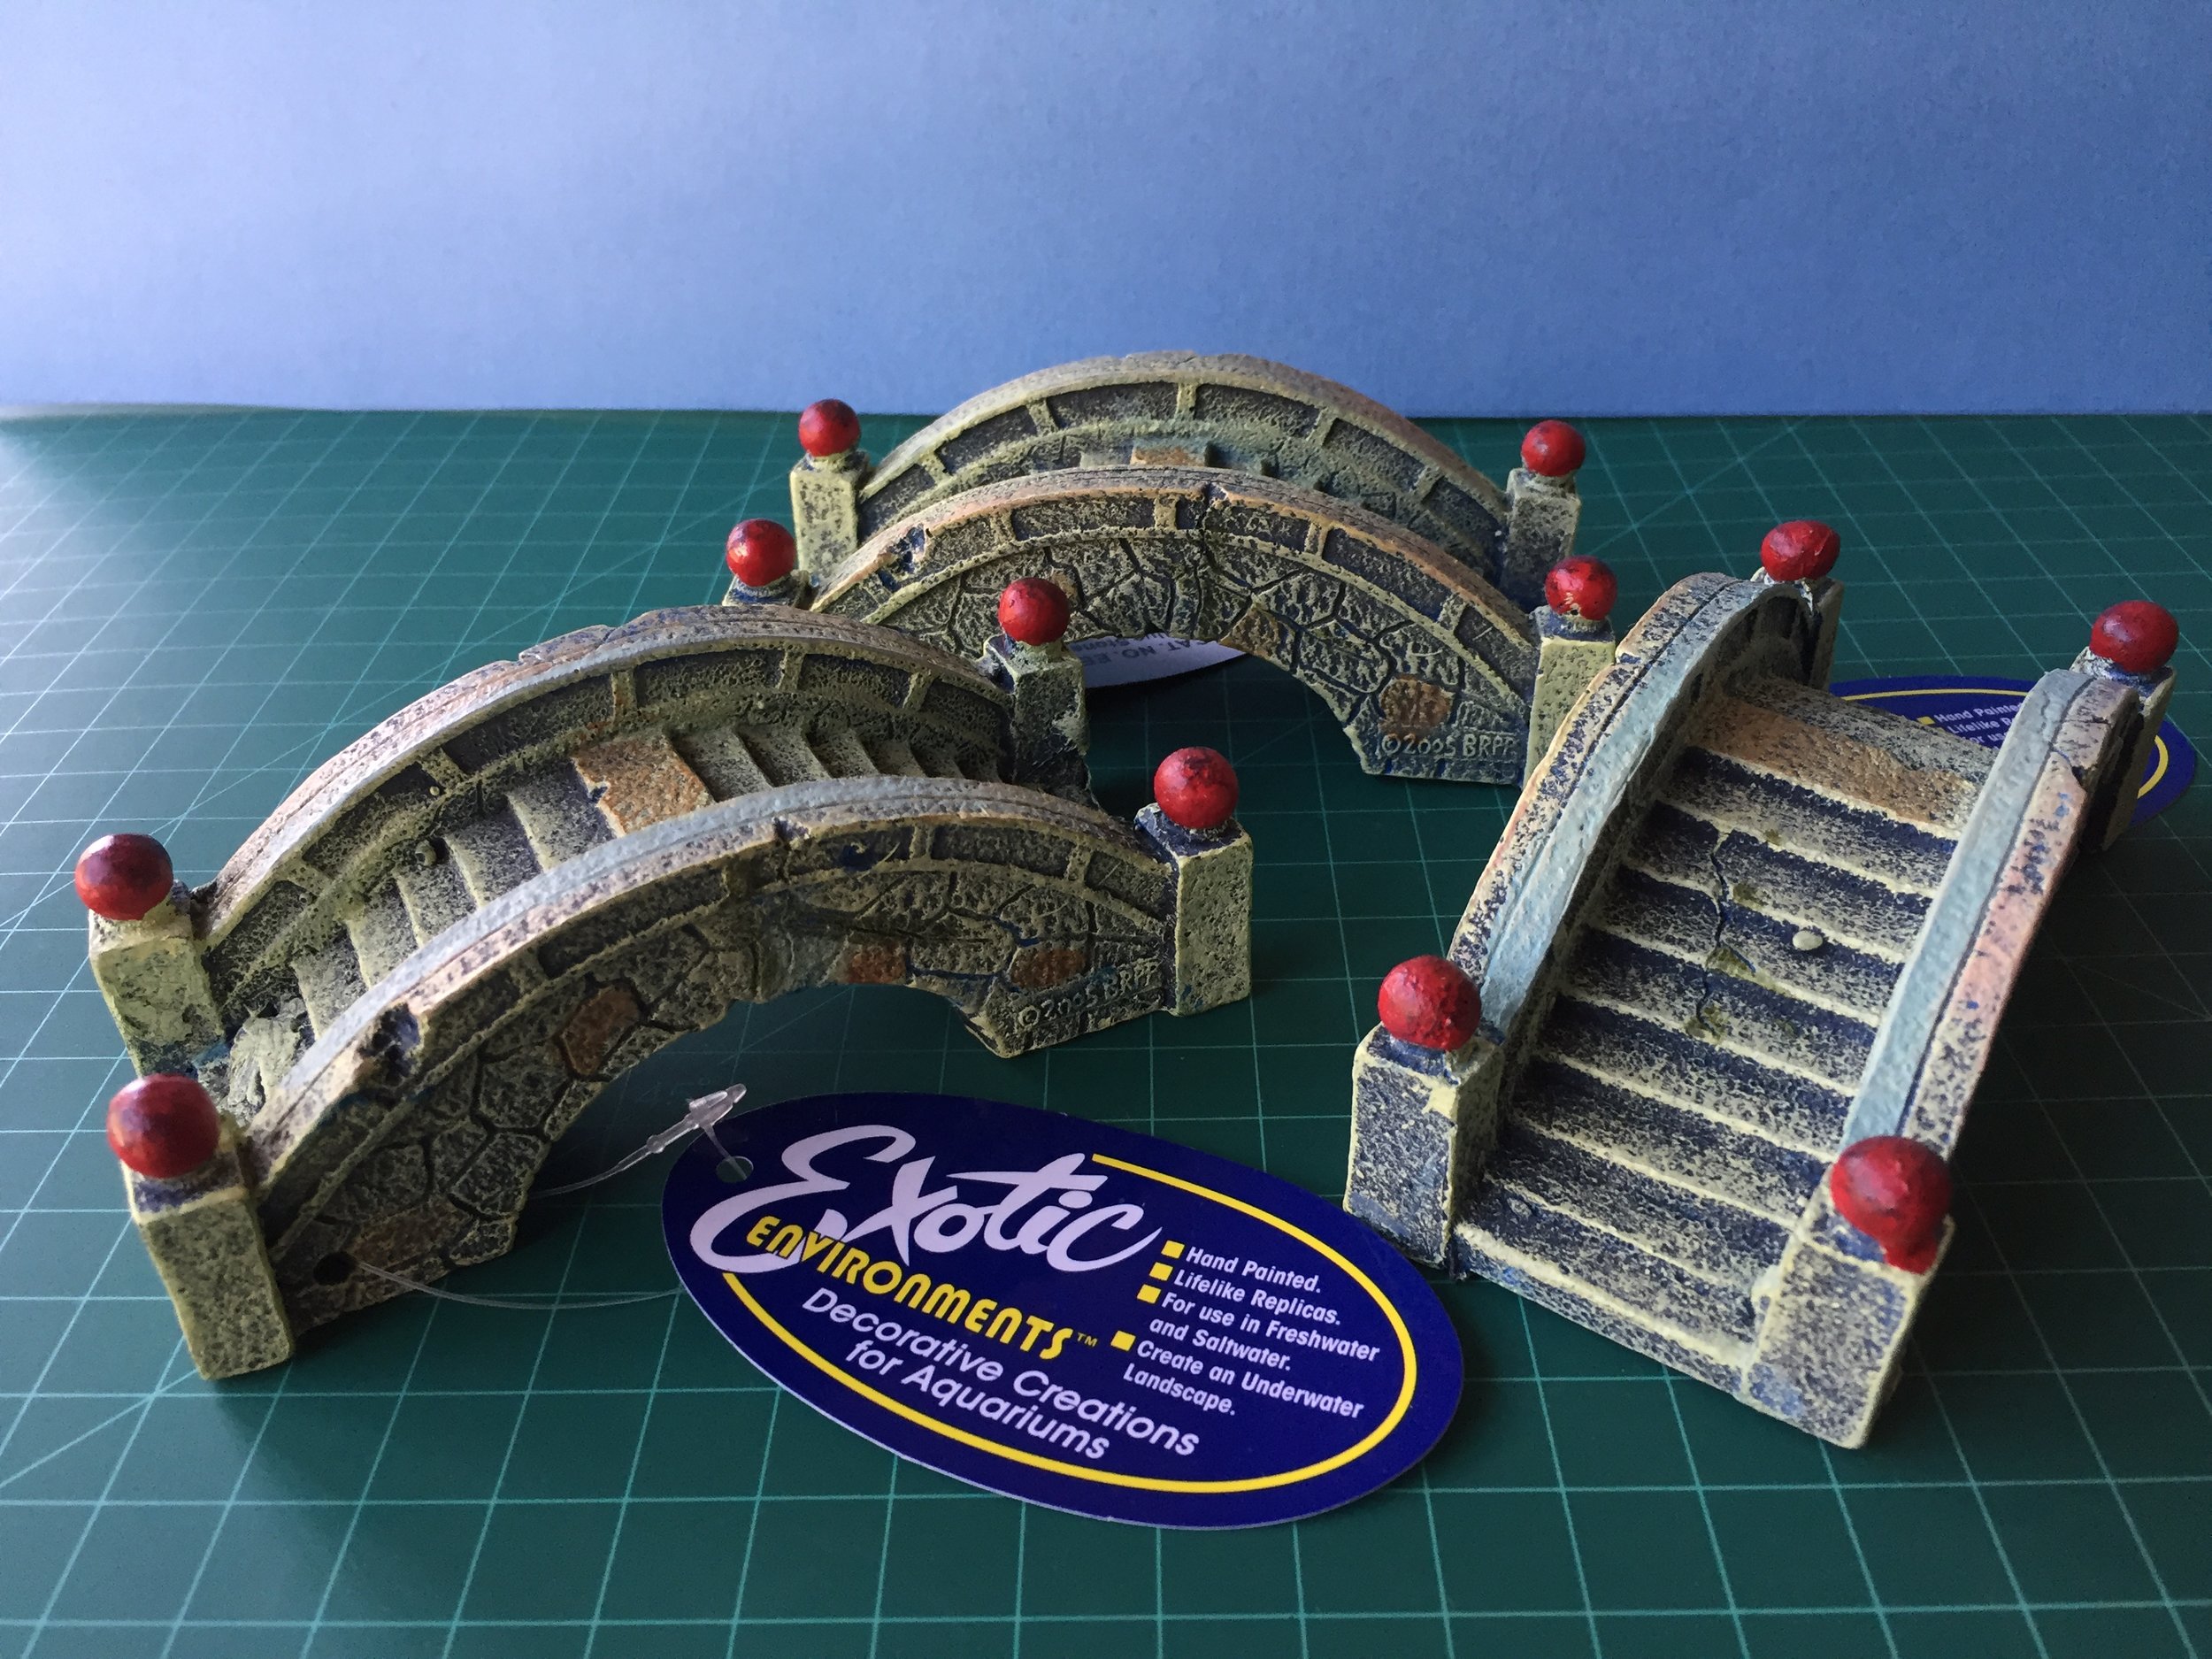
My next project for the week was to find bridges that could be used over the Imperial Canal. Unfortunately Blue Moon did not/has not made either bridges or the Tartar Wall for their collection. I found good bridges in the fish tank area of Petco. Because the bridges came with steps better suited for 28mm, I used Milliput to cover the steps and make the bridge a smooth road surface.
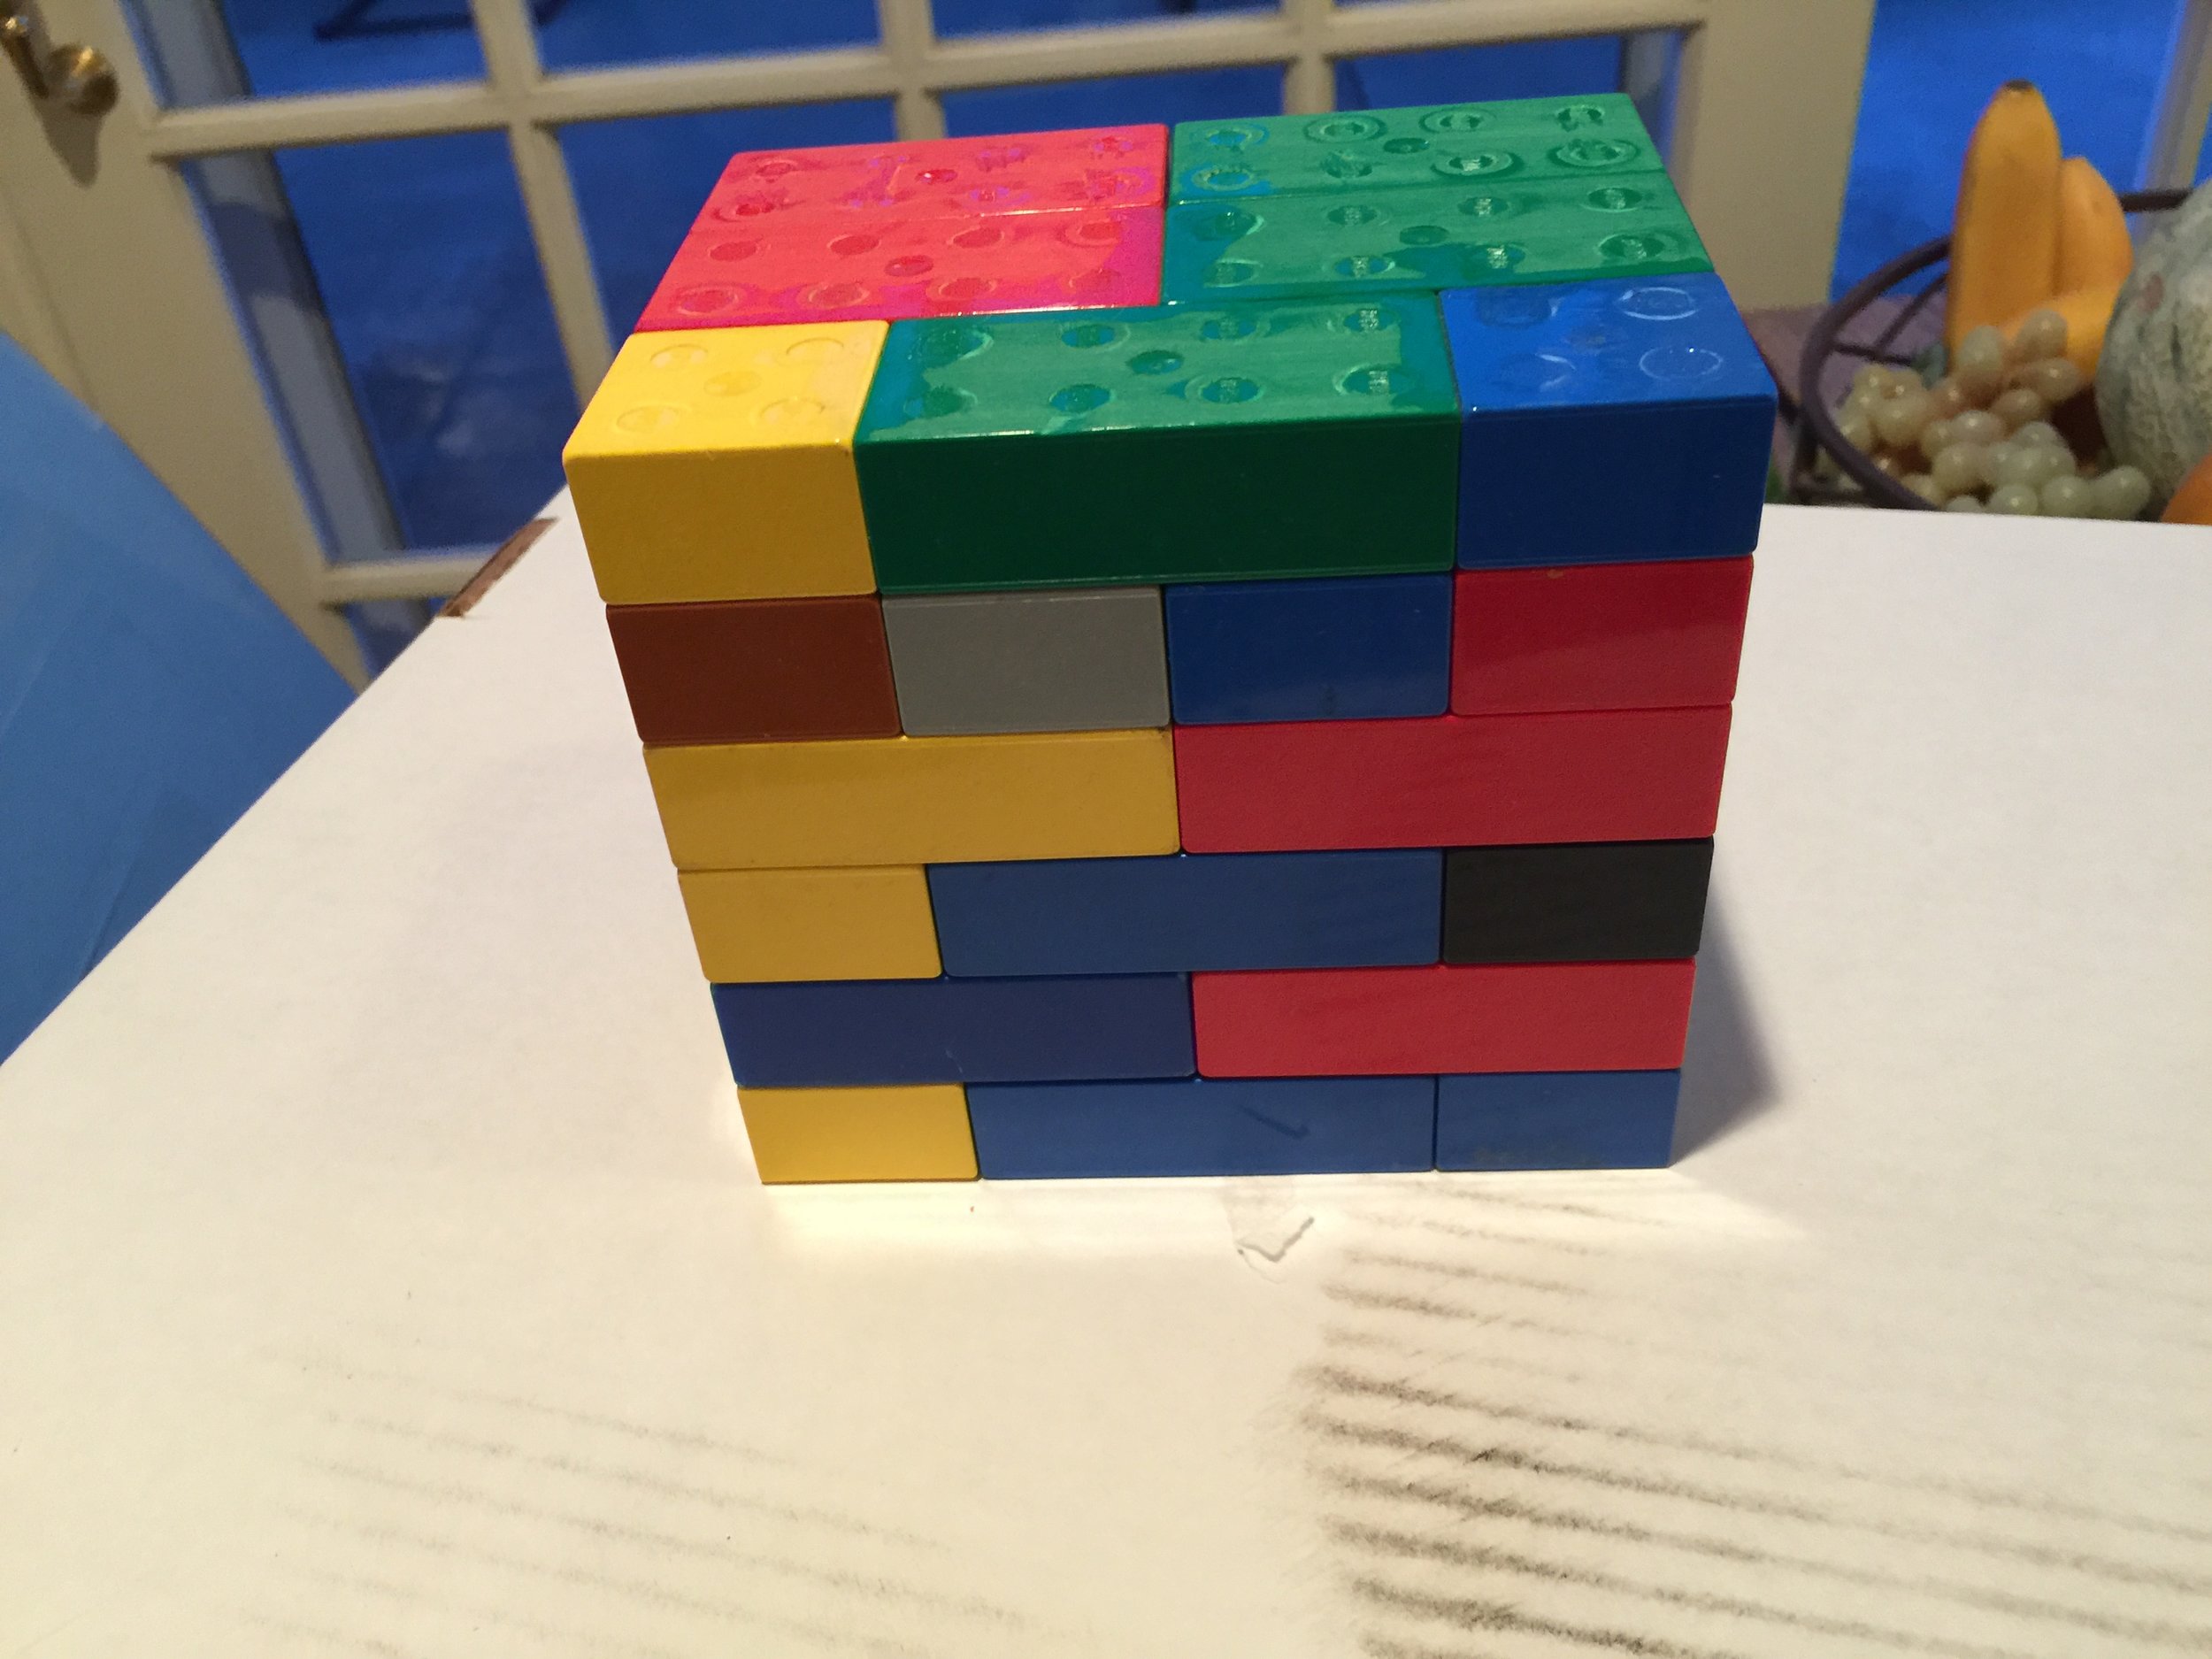
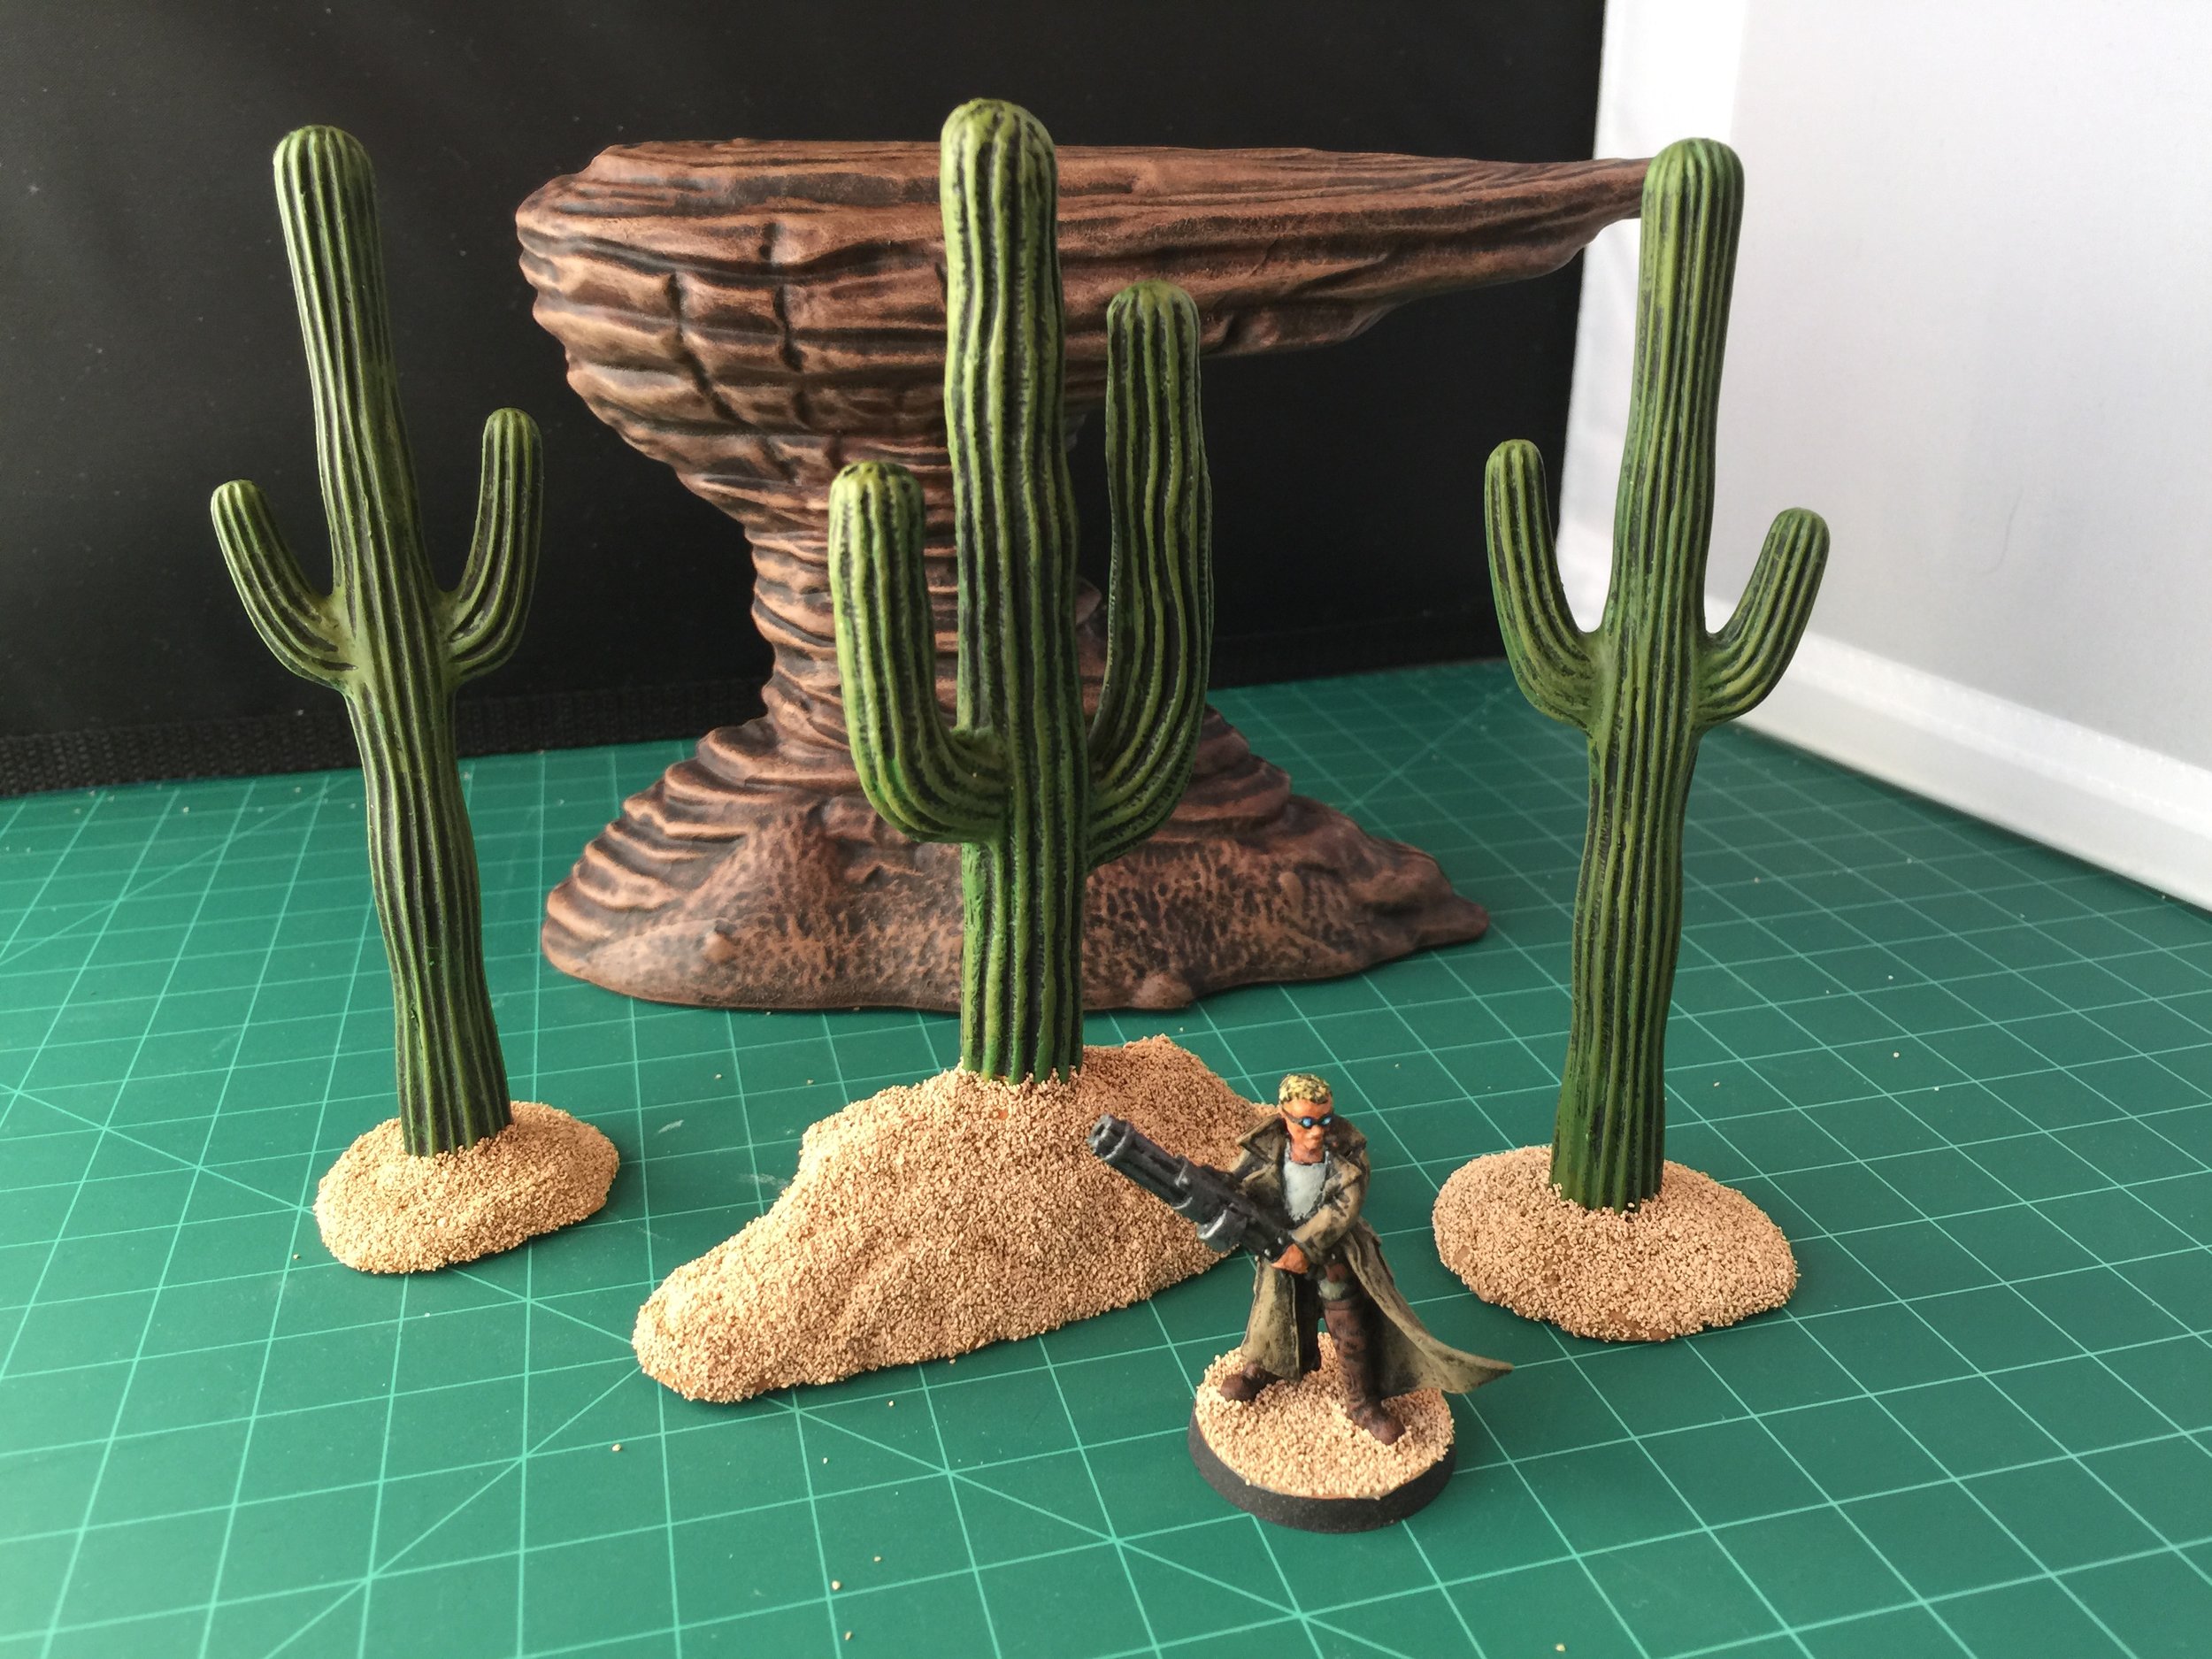
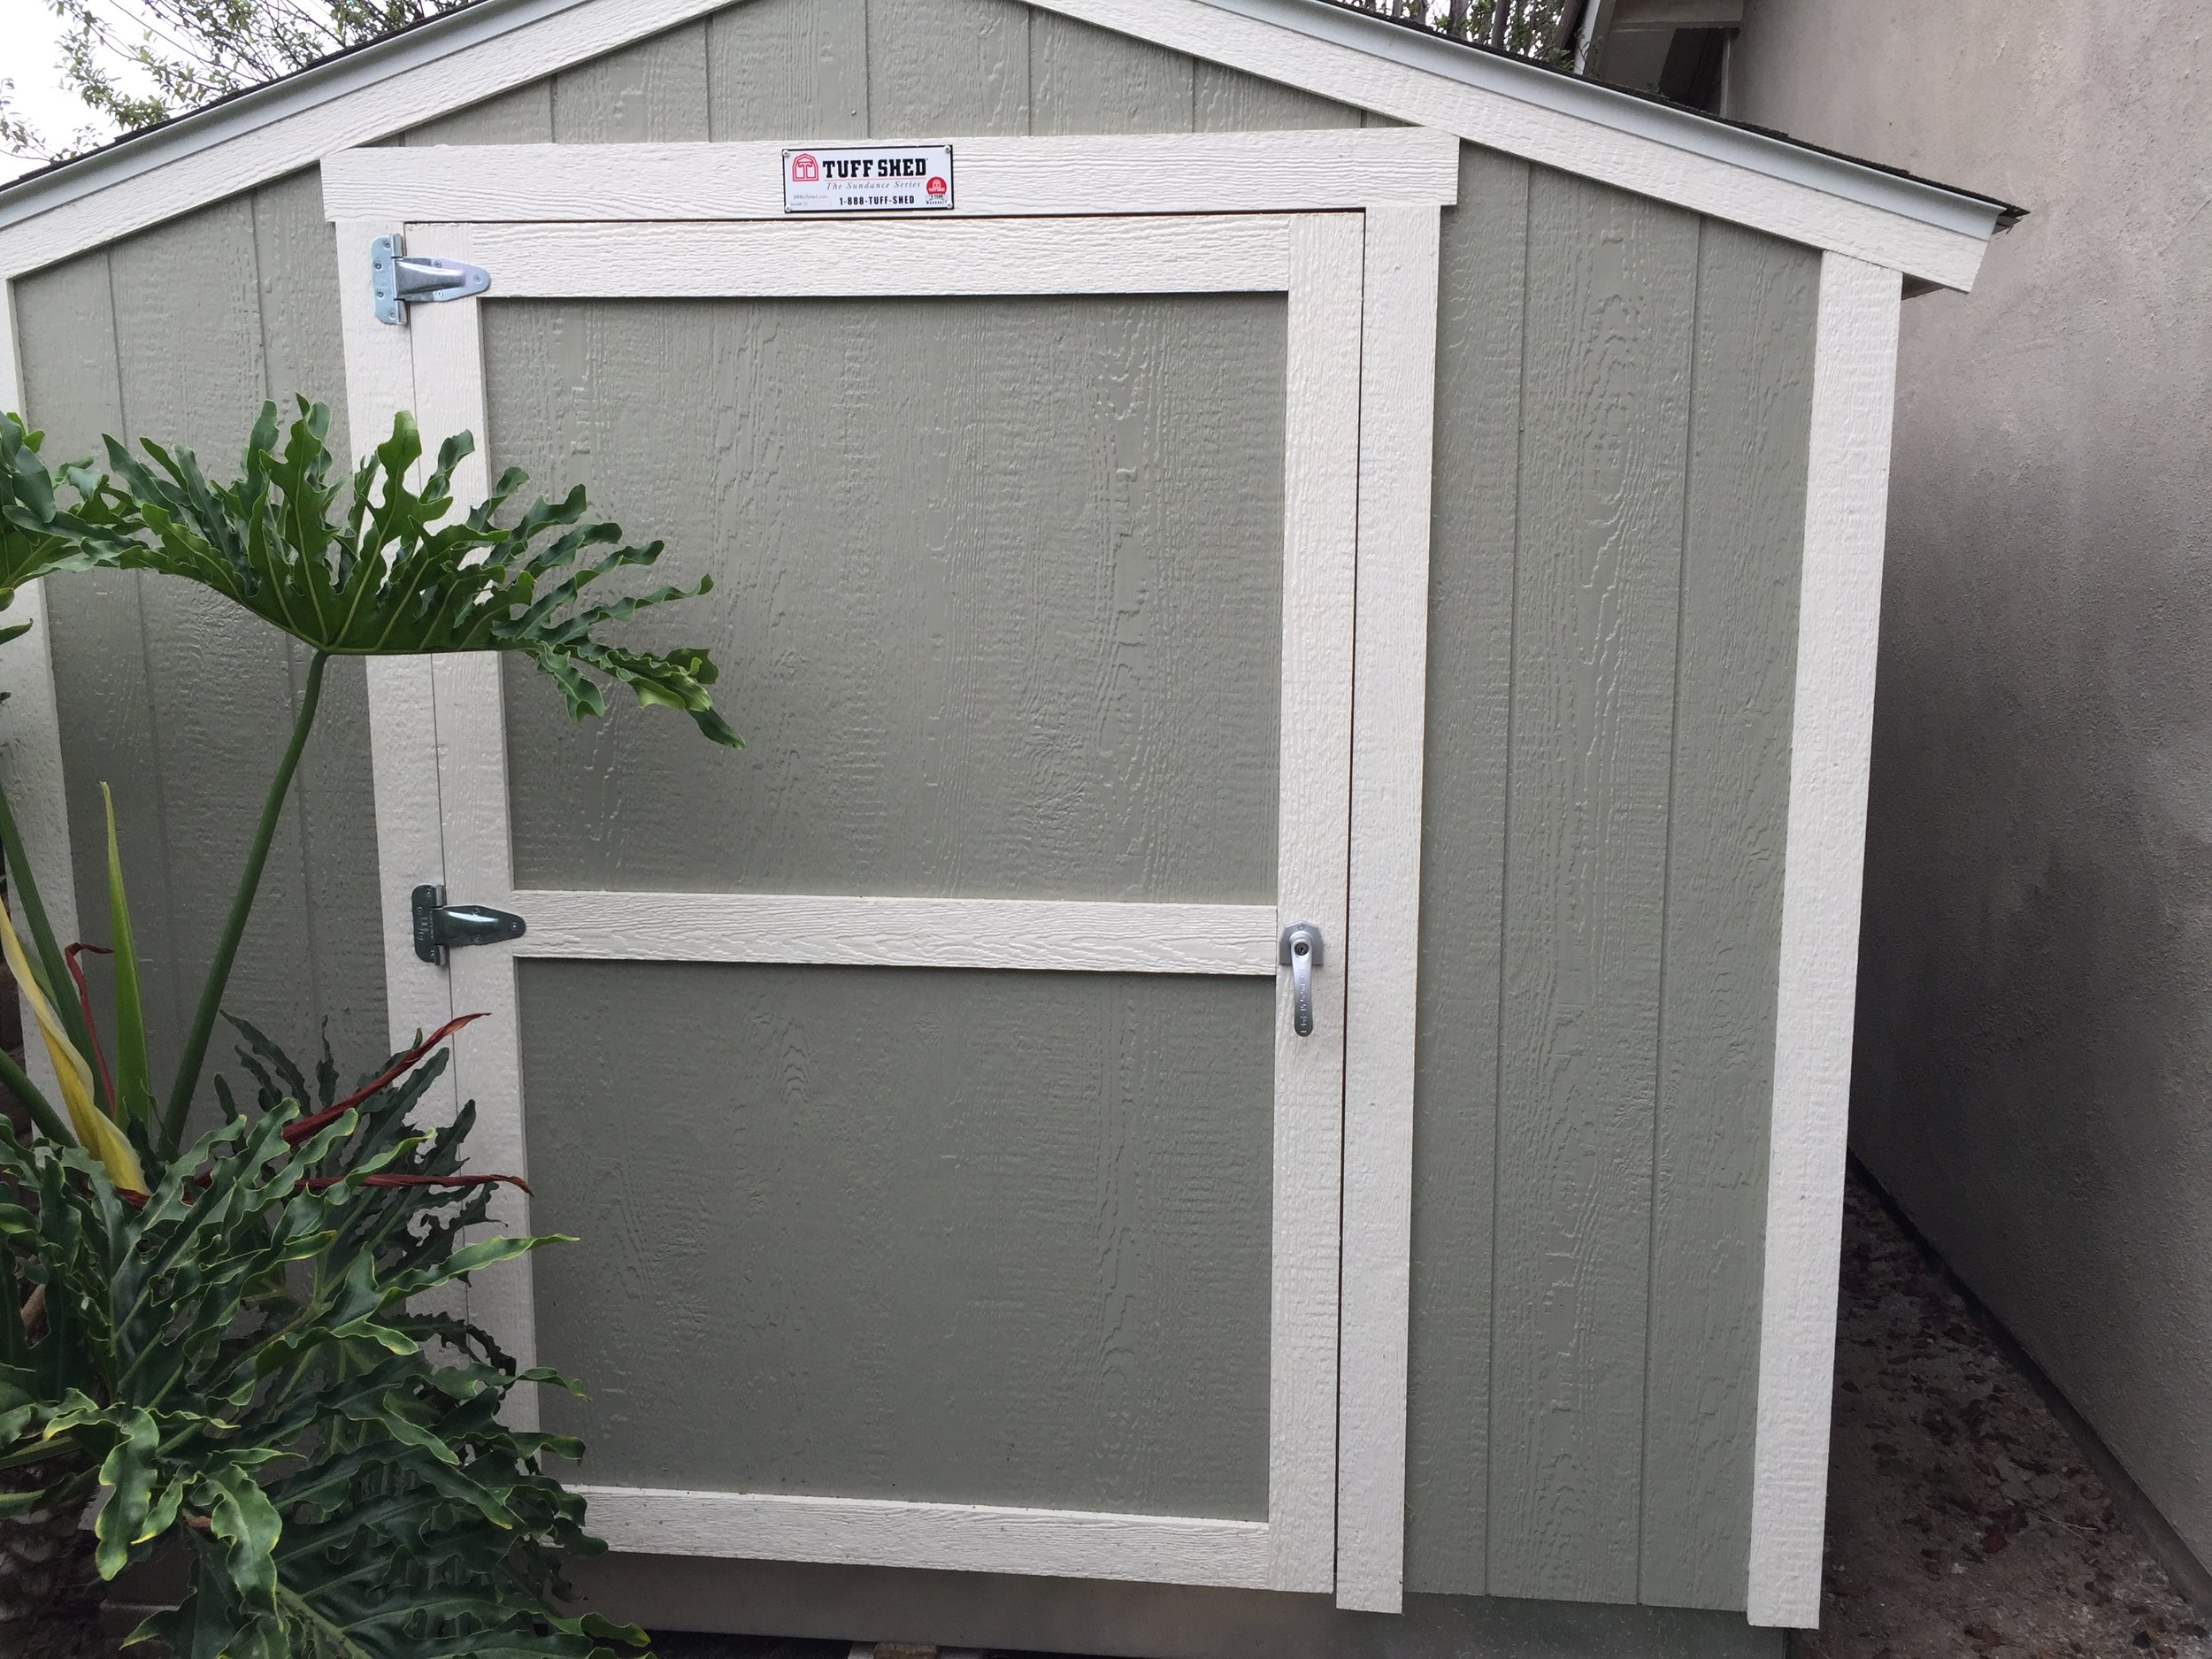
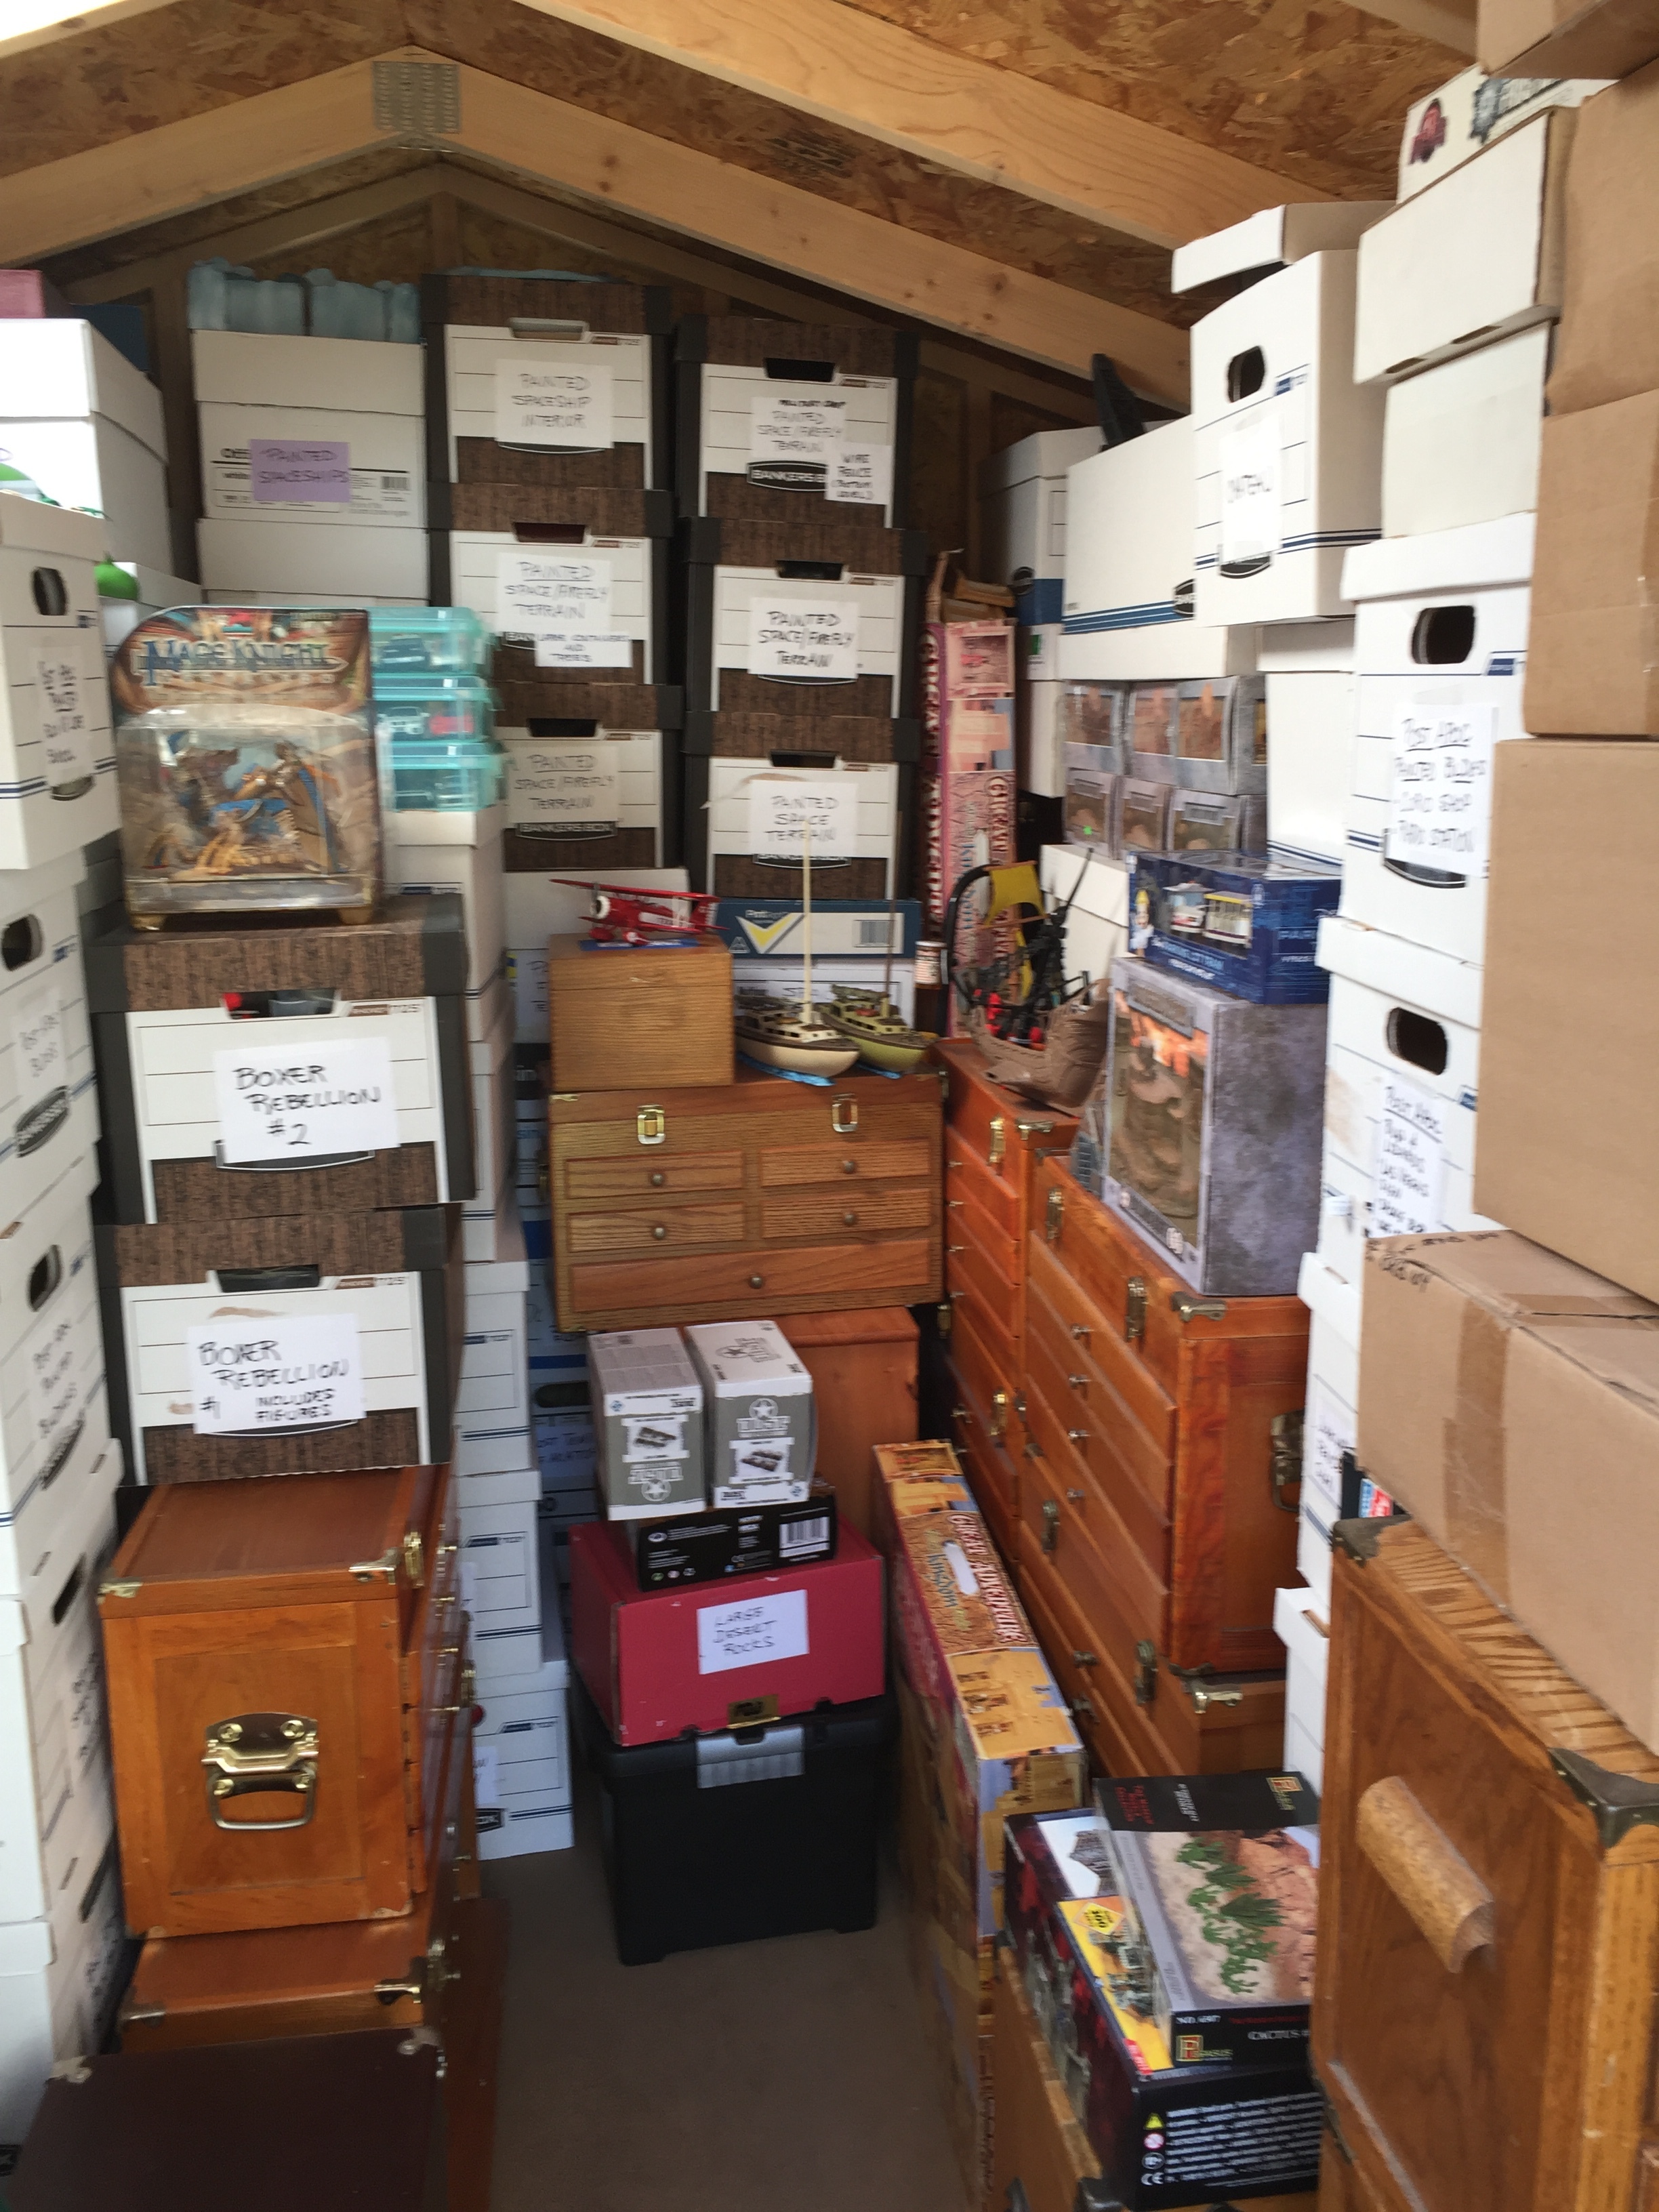
My final Boxer Rebellion task for the week was to build the Duplo skeletons for what will become my Tartar Wall. As it turned out I had just enough Duplos for the twelve 5” Duplo blocks that will give me the five feet of wall I require. I will need more Duplos for the ramps to the top of the wall but over the next few months I should have no trouble finding those at a good price at the swap meet. My only detour from the Boxer Rebellion was painting three large cactus and a plastic rock outcropping I got at the swap meet on Sunday and may use with my post apoc collection. I wrapped up the week by doing a Tuff Shed search for missing ceramic Asian structures. I picked these up at the swap meet several years ago, packed them away for use with my Boxer Rebellion project and unfortunately lost track of where I put them. Fortunately an hour-long search of my storage shed turned them up once again.


APRIL 22, 2018
For the first time in seven months, my workbench has not been focused on anything post apoc. While I still need to put the decals on all the signs for that project, the design layout, painting, building, and repurposing are done. As of this writing my plan is to start my next project soon… probably next week, and that project will likely be my 15mm Boxer Rebellion collection. But with no new project officially on the workbench I can allow my attention to wander to things I want to do just for the sake of doing them, and that’s where the Weekly Workbench took me this week. During a trip to the swap meet about a month ago, I found two plastic racing sloops (identical when new) that were intended as pond sailboats, but were long past their prime… broken and dirty and cast off. They are 16 inches from bow to stern and looked to me to be potentially perfect for use with 28mm miniatures. For purposes of showing scale I placed a Heroclix figure on the deck of one of the sloops I have pictured. All they needed was some repurposing: remove the weighted keel, create new masts, spars, cabin rails, and a hatch cover using Evergreen plastic, cut the hull to waterline, use Milliput to make the reefed sails and waterline bases, add reefing lines using floral wire, and add boat wheels/helms to each boat using the wheels off two Heroclix Unsuccessful Dirk Anger figures. I’ve attached a picture of one of the sloops in the condition I found it, and a second picture of the other sloop repurposed but not yet repainted, and two more pictures of the sloops repainted and done. The final picture is of a removable machine gun position I made for the bow of the sloop. The machine gun base is made from Evergreen Plastic, the small rail is taken from the Unsuccessful Dirk Anger Heroclix figure and the gun is by Pulp Figures. Given the fact that I got the pair of sloops for just $8 ($4 each) and have since located one on eBay in what appeared to be like-new condition for $82, I think the two I got for $8 are pretty good finds.


APRIL 15, 2018
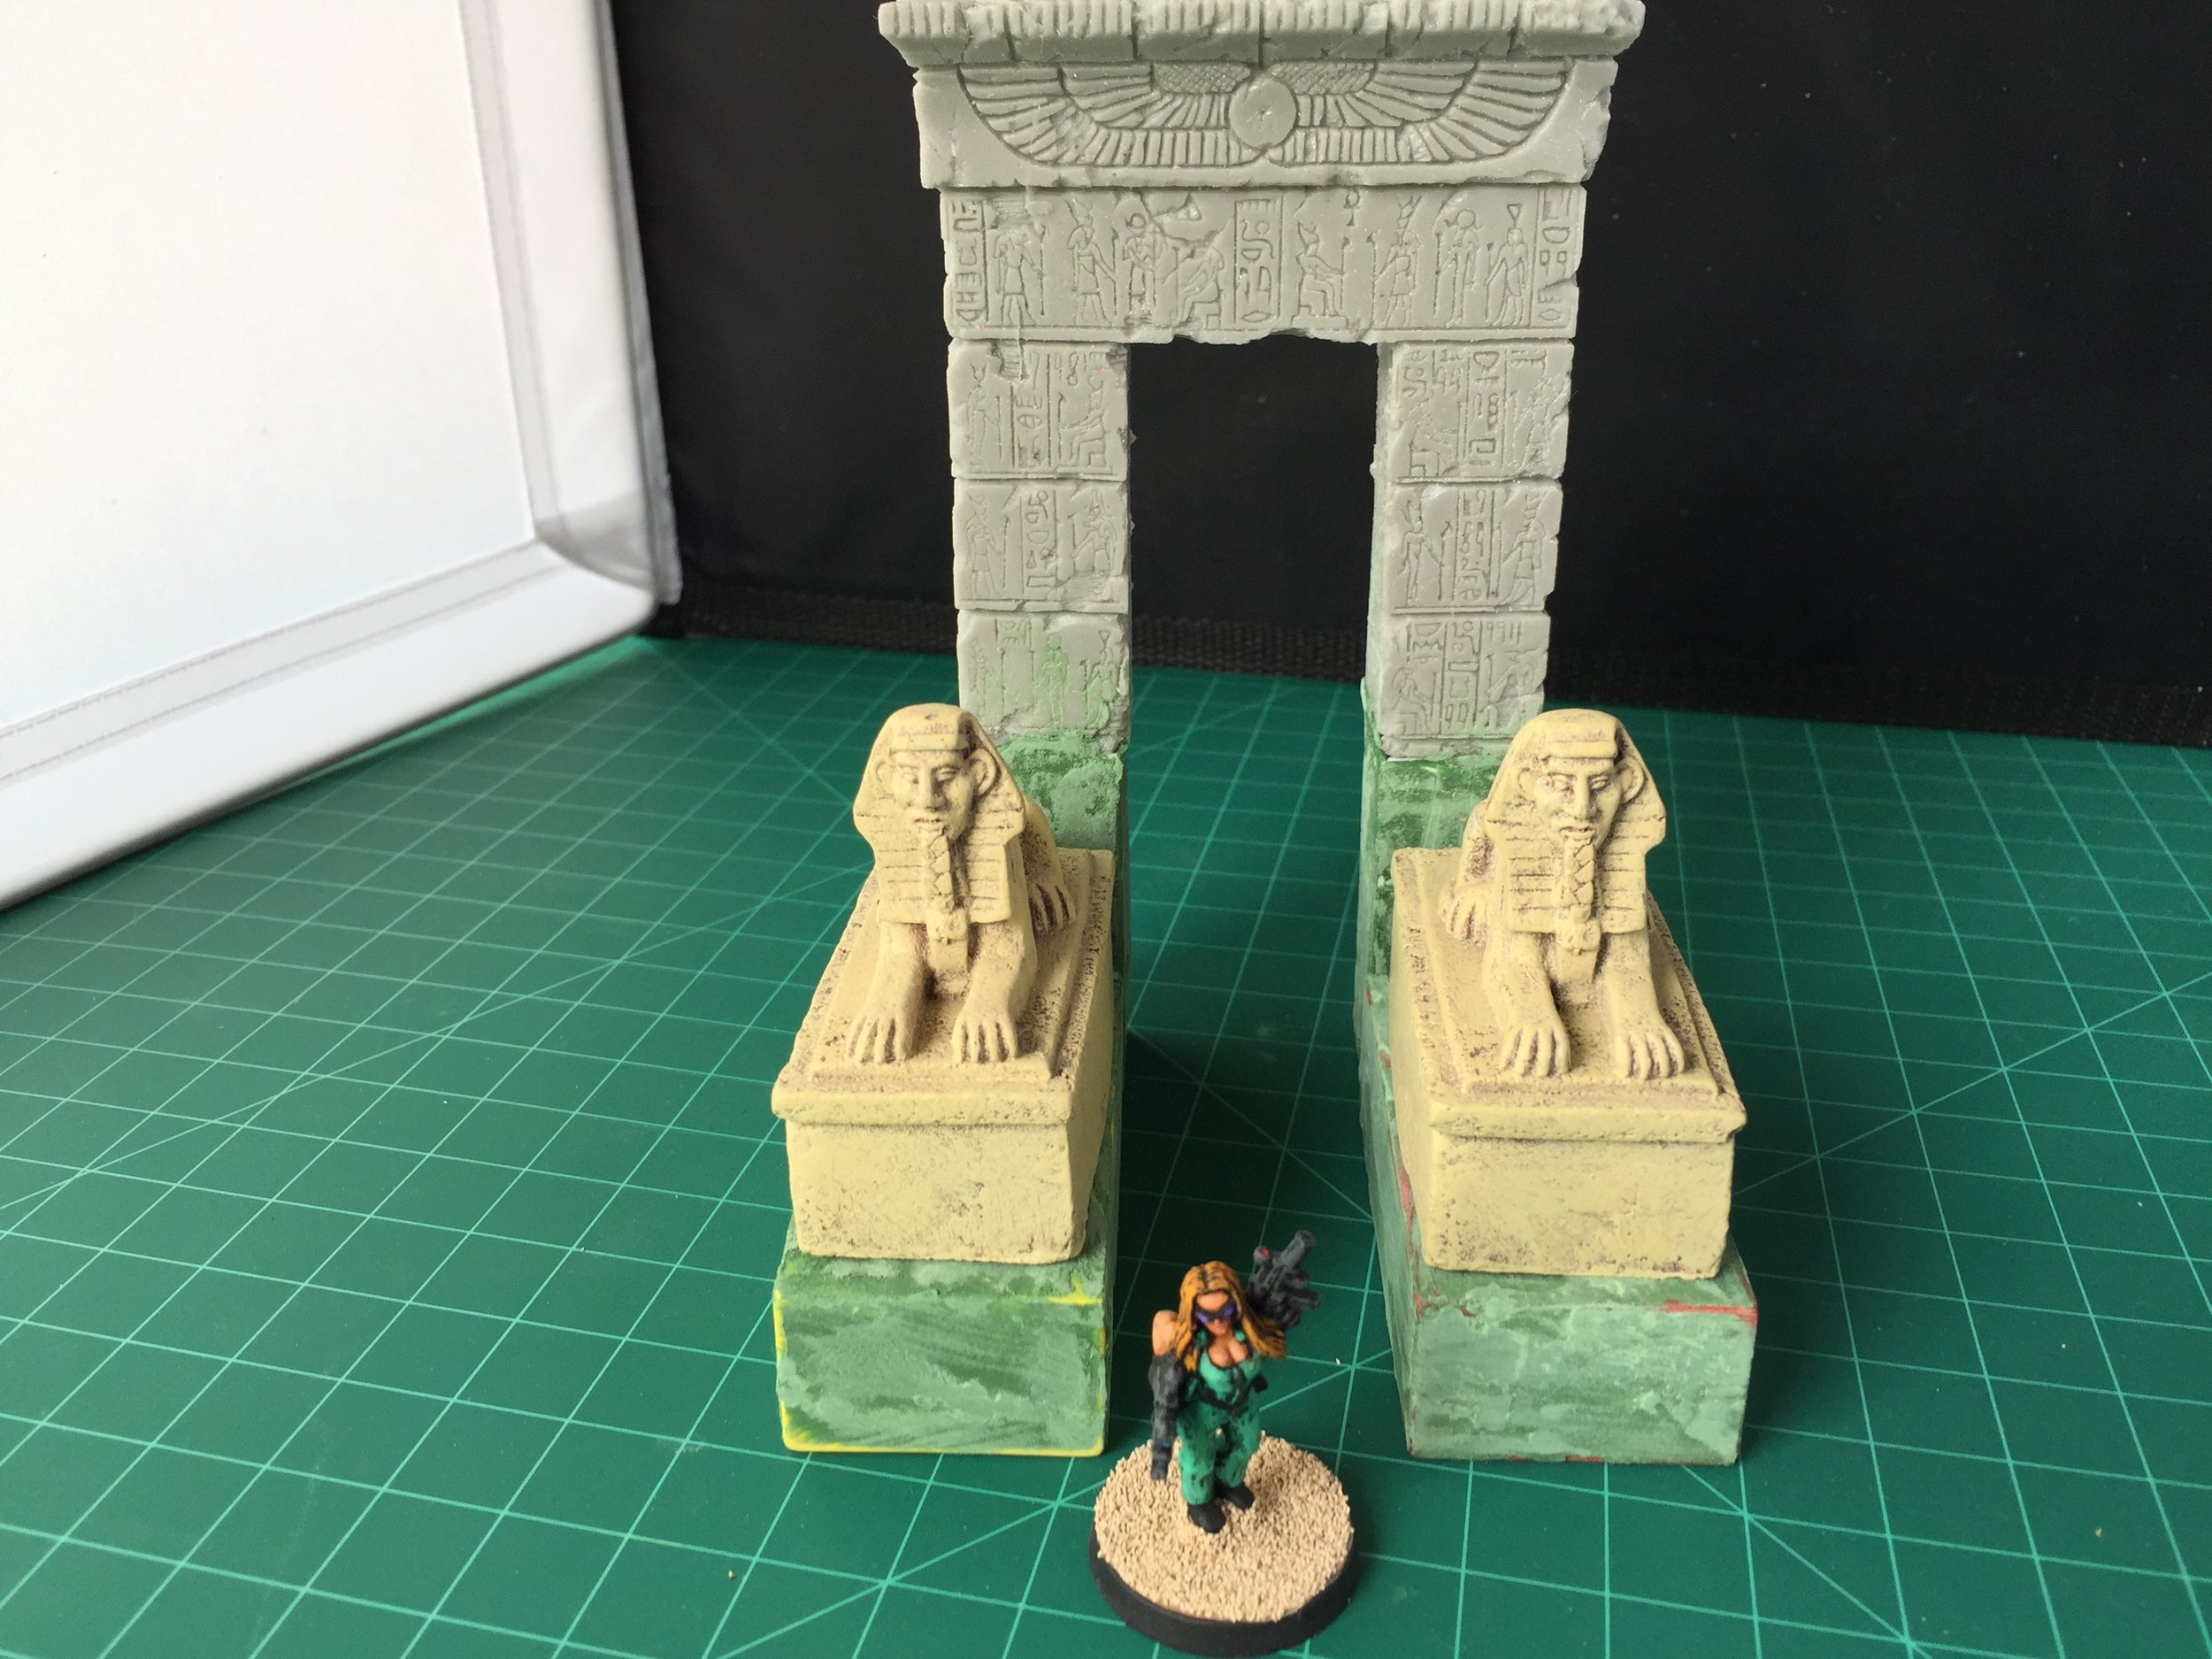
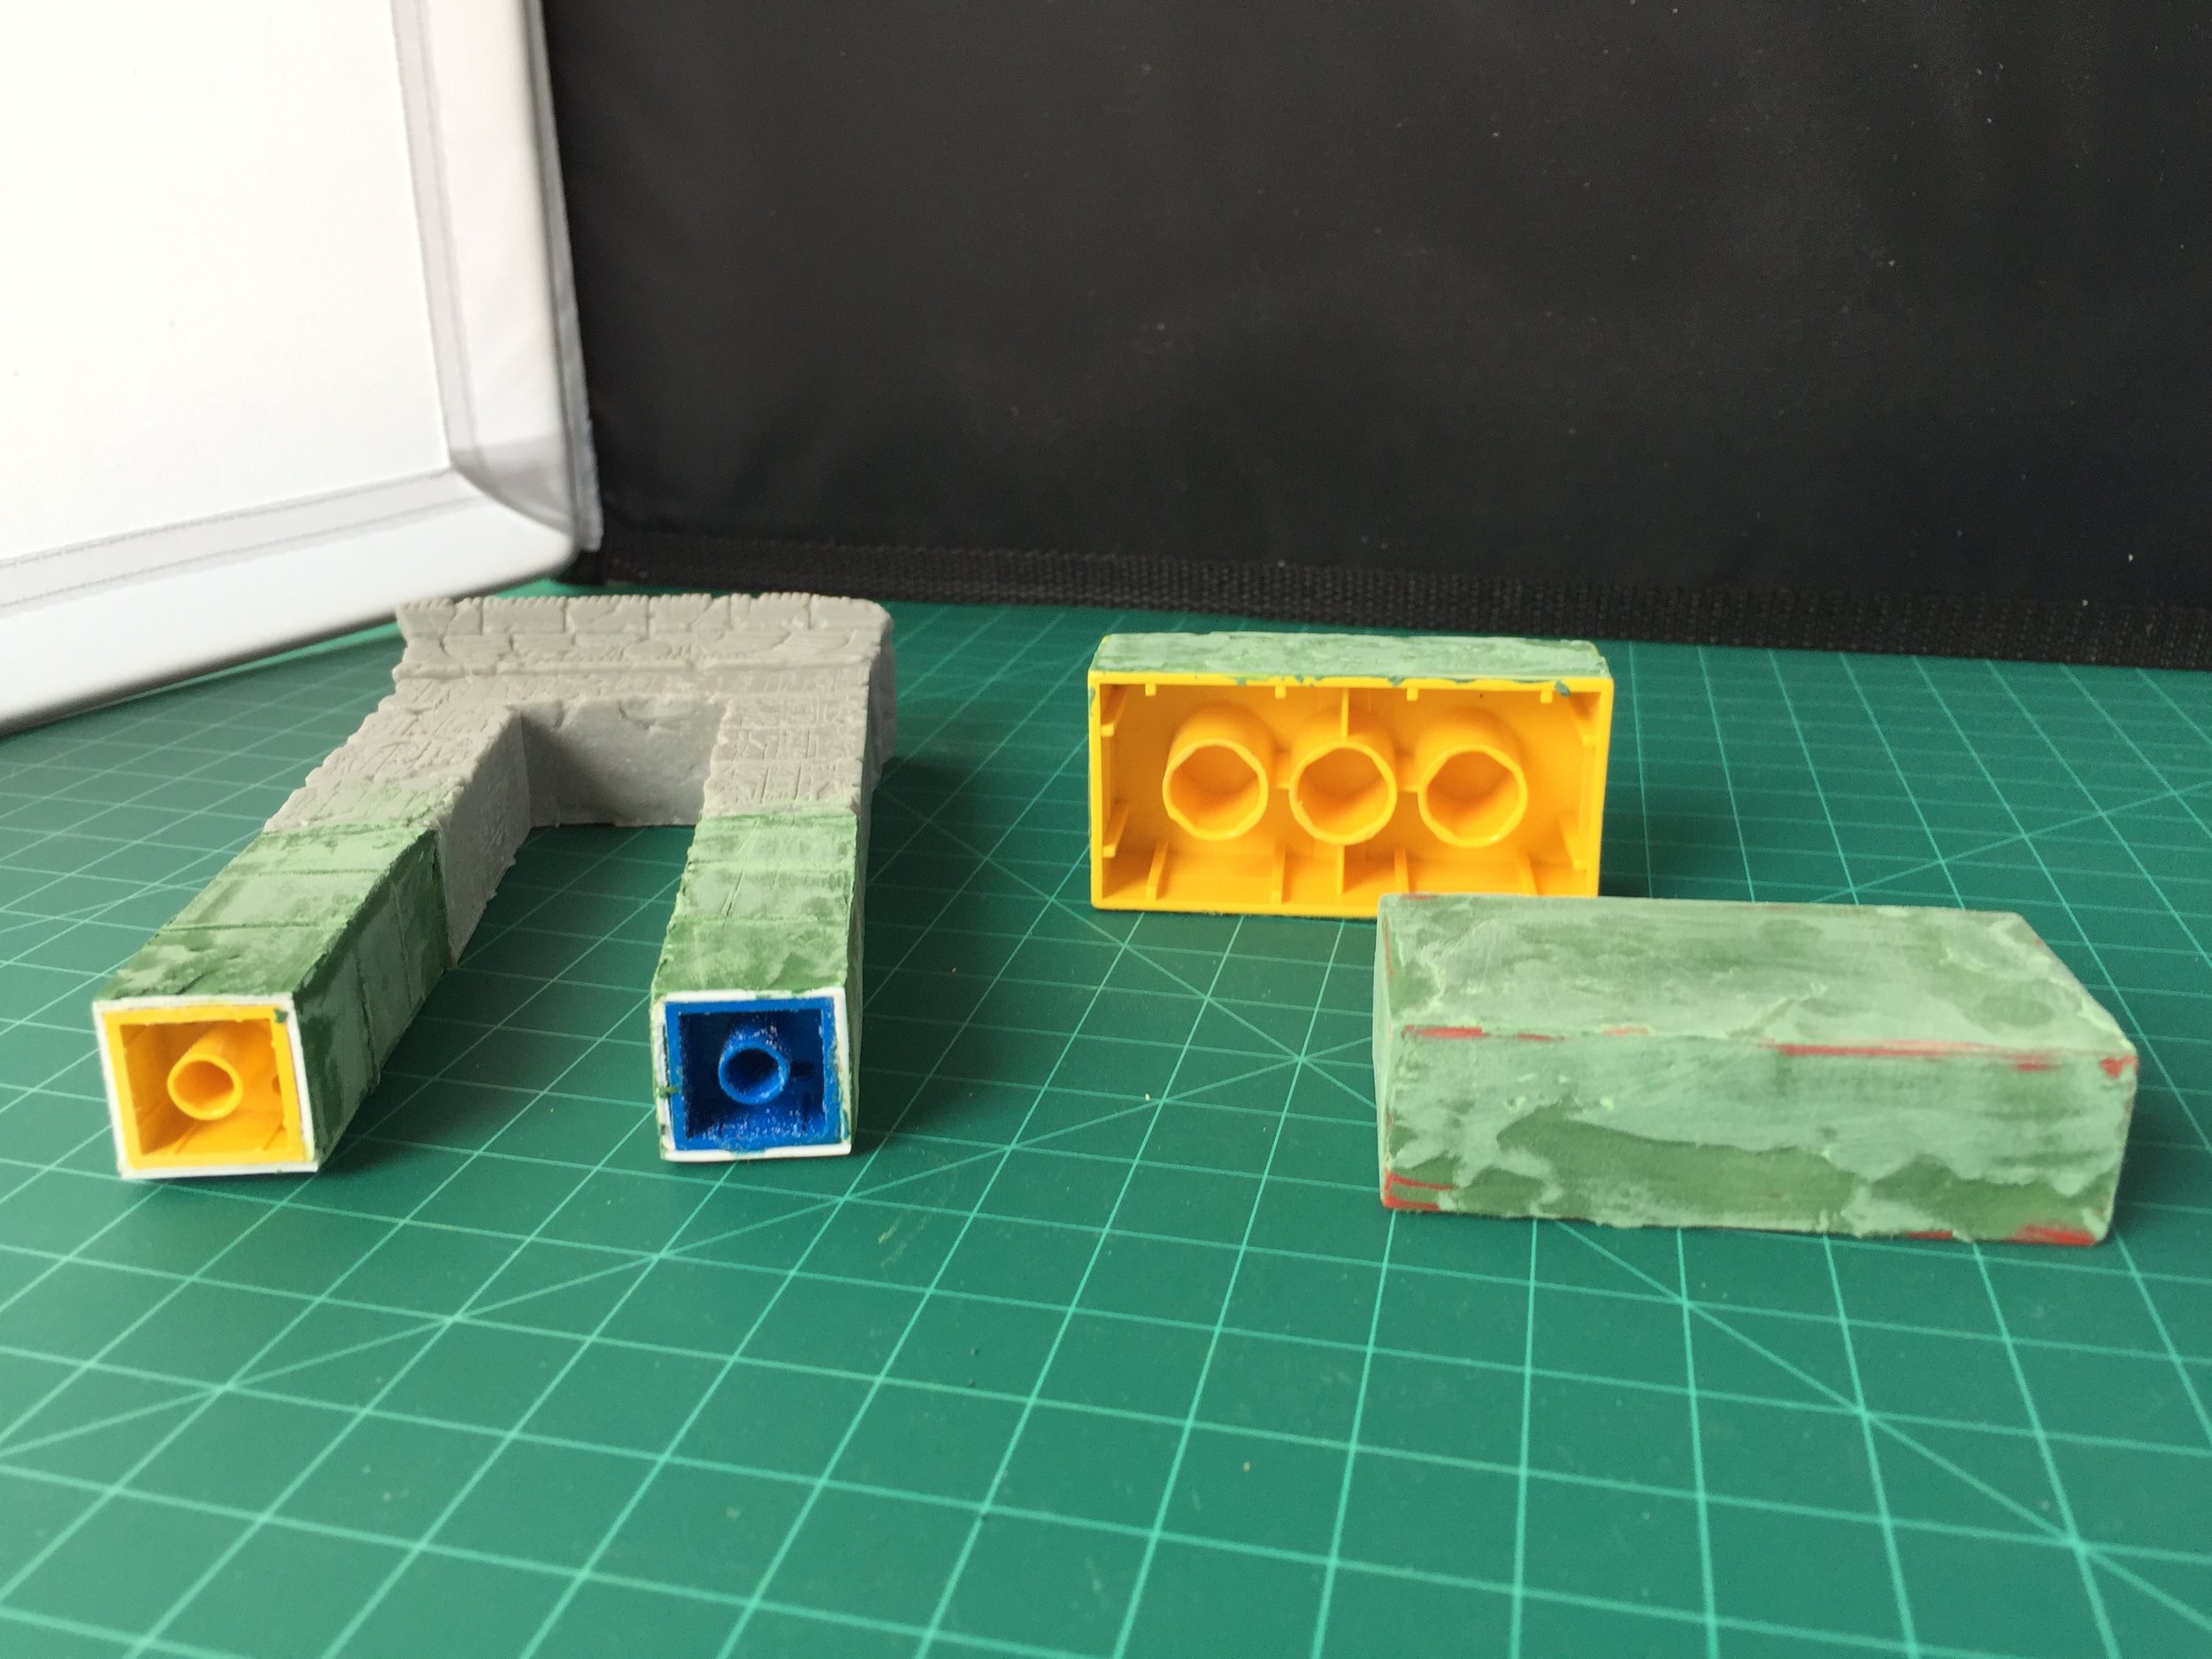
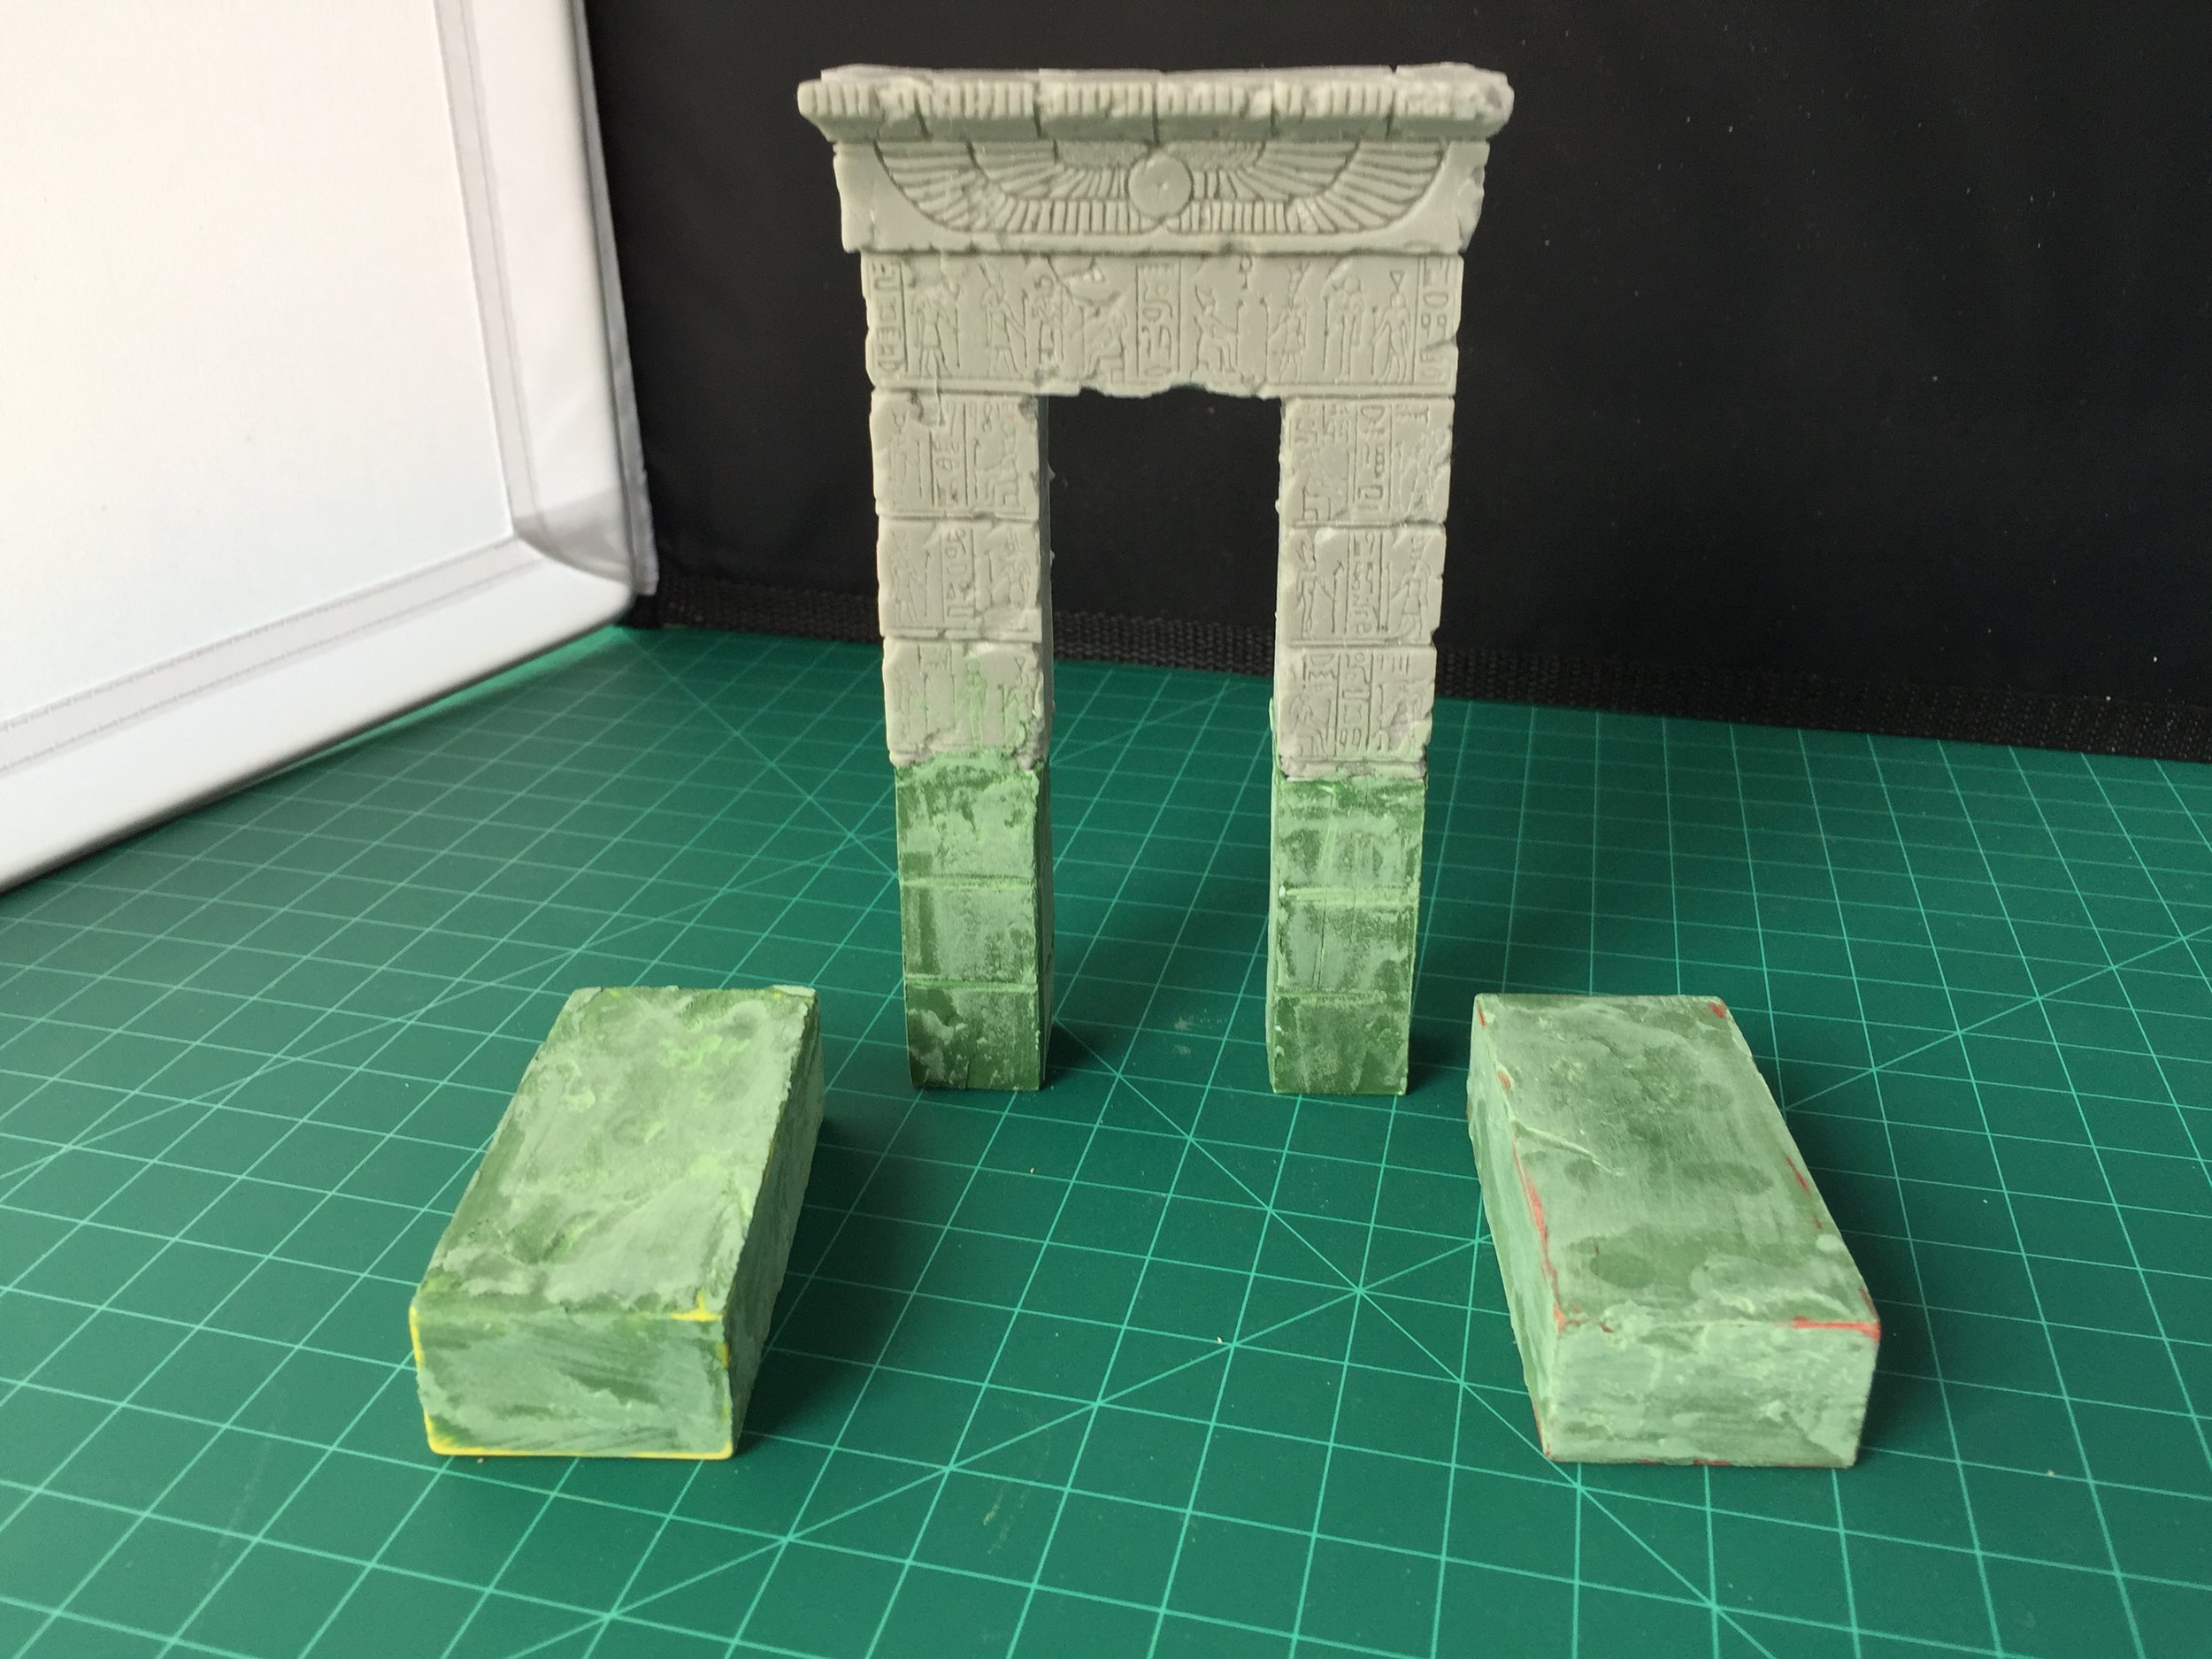
This Weekly Workbench is a reflection of what my workbench looks like as a project comes to a close. At this point there is very little left to do on this project, and so my mind begins to wander to future projects and other things of interest in terms of the hobby. For about a year now I’ve been putting together pieces for a Stargate project I plan to do, and during the ongoing collection for the Stargate project I purchased an Egyptian gate from Scotia Grendel. I intend to use it as the entrance piece for the inner temple that is part of the Soma Great Adventure of the Lost Kingdom Playset. The Scotia Grendel Egyptian gate is very nice but too short so this week with not much pressing on the post apoc project, I decided to raise the gate’s height by about an inch and a half using Legos. Once the Legos were attached and covered with Evergreen Plastic to add thickness to the Lego blocks, I spread Squadron Green Putty over the Lego area and scored that section into blocks the same size as the original supporting blocks of the Scotia Grendel Egyptian gate. Since the Lego area doesn’t have the artwork of the original piece, I’m hiding much of the Lego area with two sphinx statues set on Duplo plinths. I think it looks pretty good. I’ll hold off the painting until I’m actually working on the whole project.
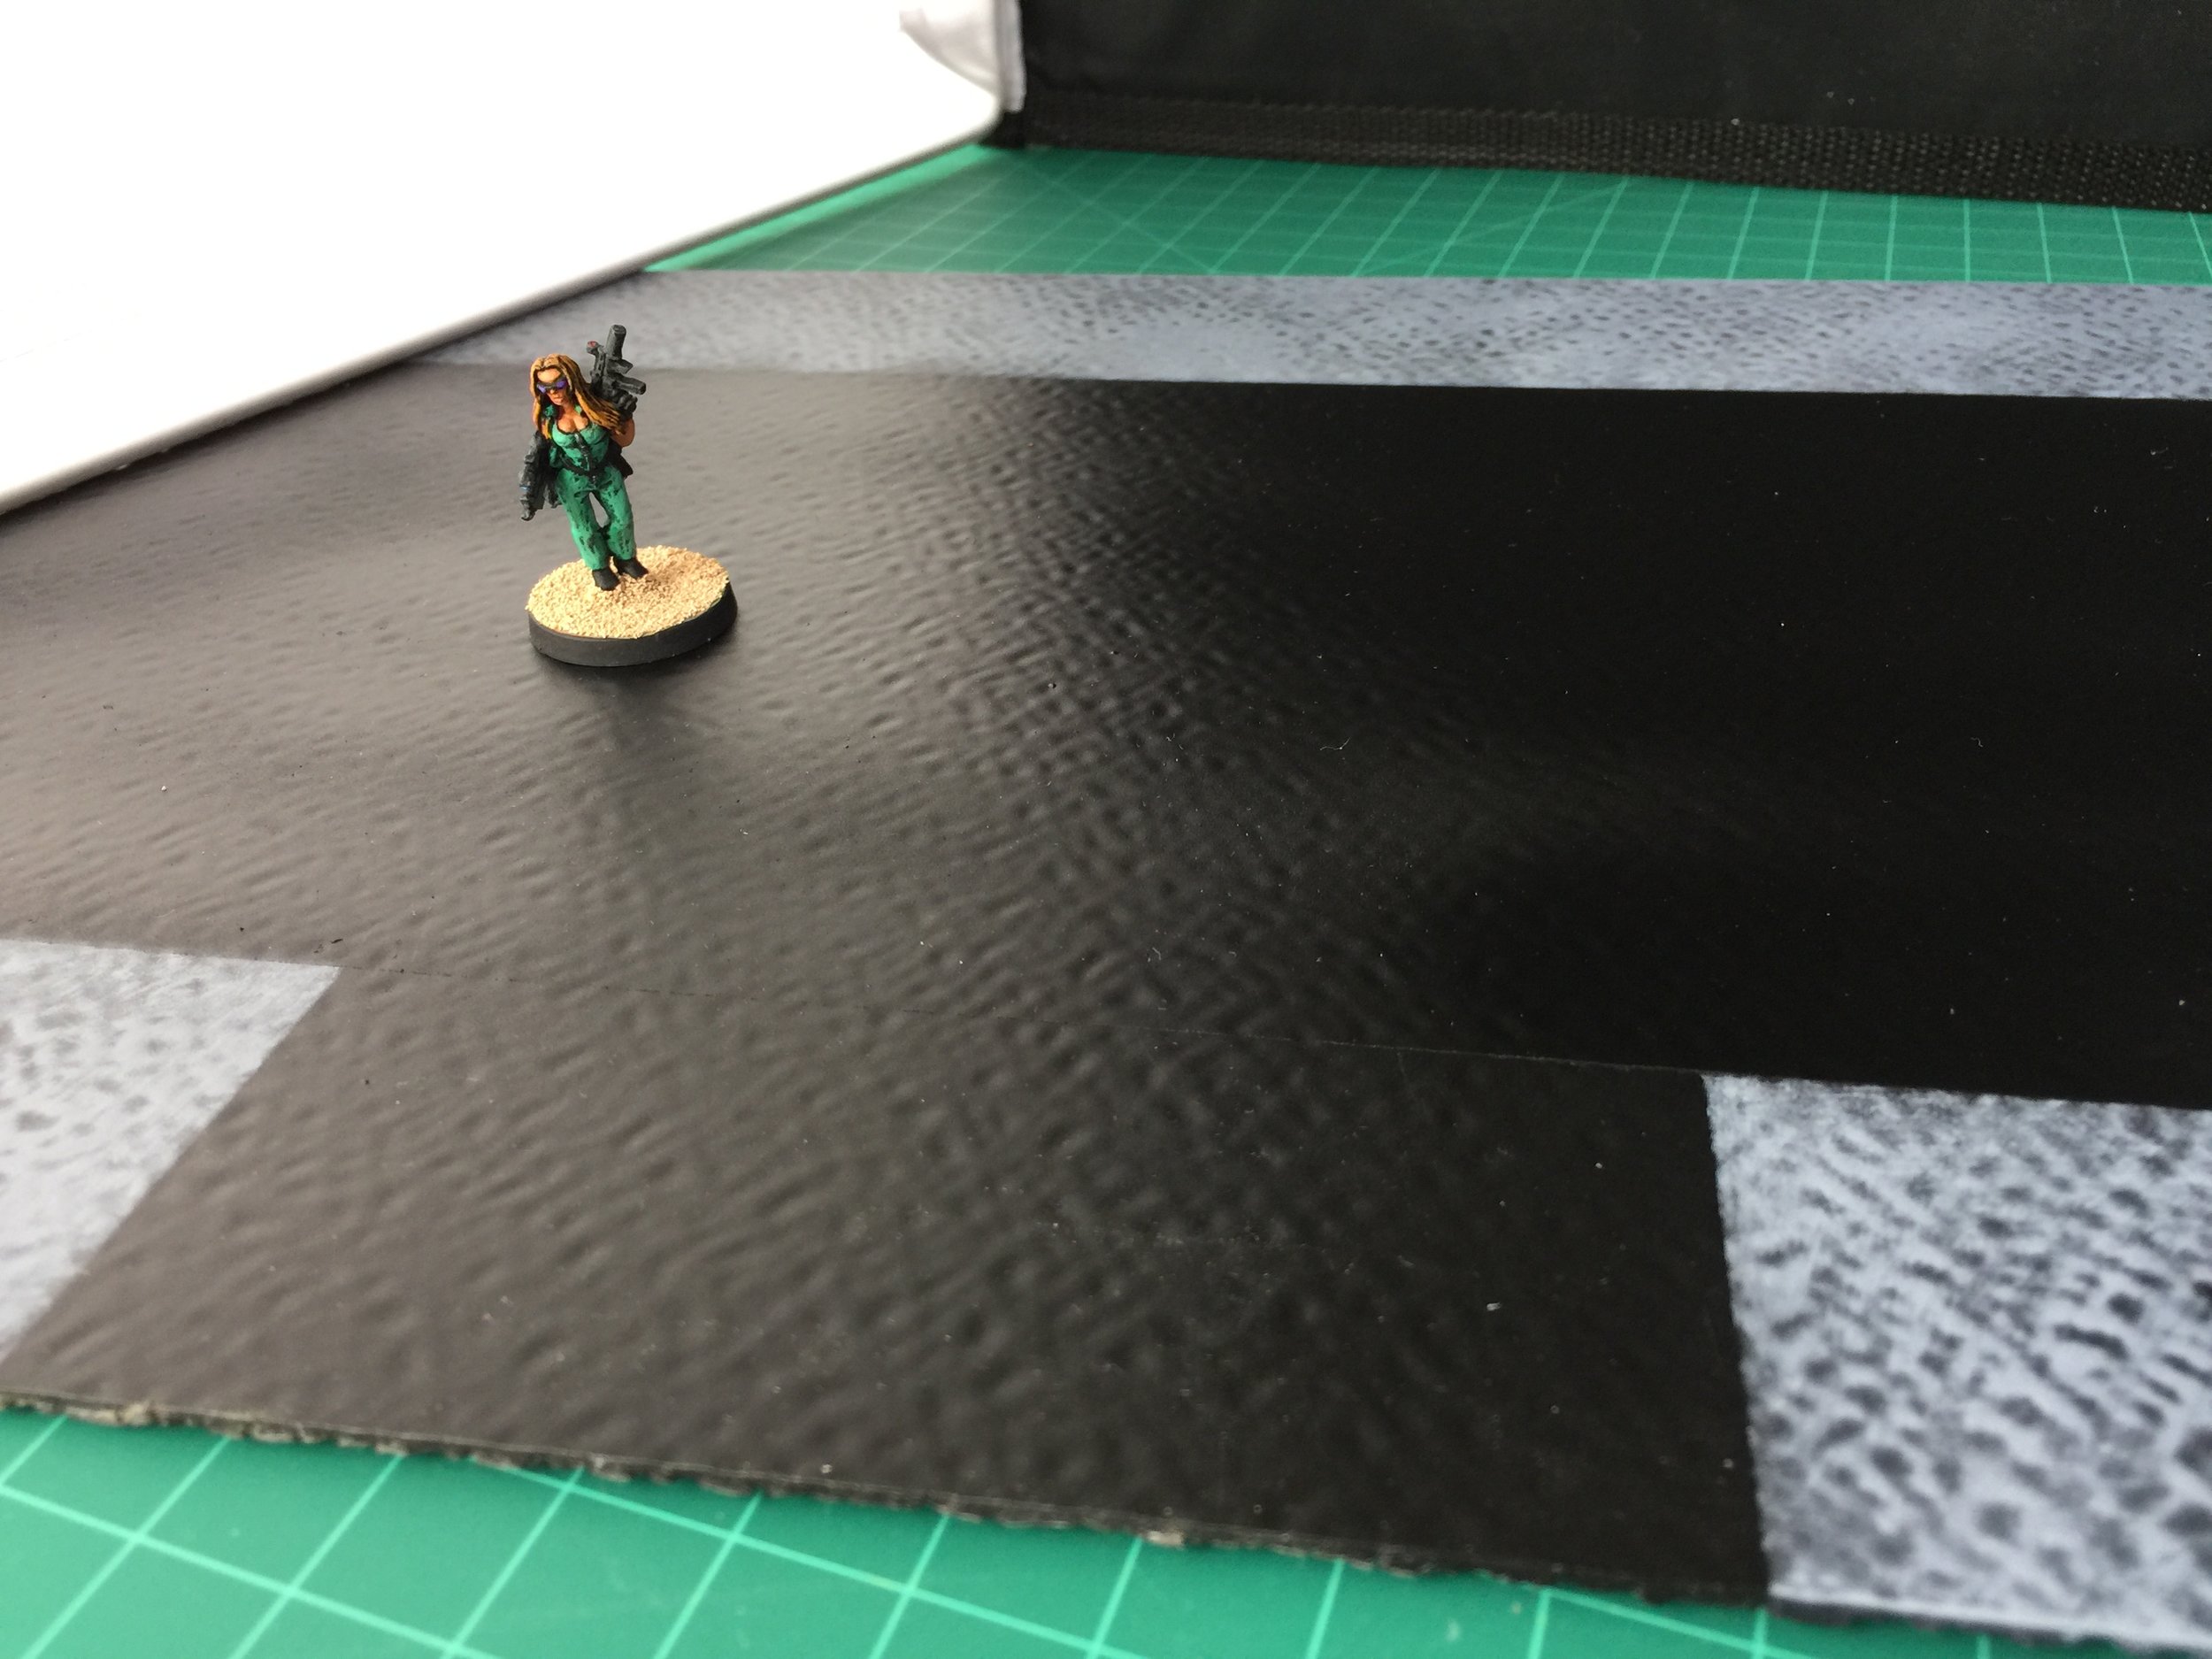
With the modification of the Egyptian gate complete, my attention returned to the post apoc project. I had a few days to think about the table layout since my practice set up. As a result I decided to make a couple of arrangement changes in terms of where buildings would be placed, and that took me to the next step… constructing the streets. Years ago I discovered the 2 ft. x 4 ft. sheets of plastic typically used in kitchen ceiling to hide ceiling lighting. It’s reasonably strong and reasonably easy to cut. Given the amount of plastic involved (a 2 ft. x 4 ft. sheet), it is also reasonably inexpensive. I have found that by selecting the smoother side of the sheet, it makes for excellent material for use as streets, roads and water. In the case of my post apoc collection, I am using it for my desert road and town street. I cut it using an Xacto blade along a long metal straight edge… the scraping with the blade along that edge continues until the plastic is cut… usually takes about 10 repeated pulls along the straight edge. I then spray painted the cut pieces with flat black. Once the black was dry, I masked off the street so that only the area that will serve as the sidewalk remained uncovered. That done I dry brushed the sidewalk area with Vallejo London Grey and then highlighted that with Vallejo Light Grey. Because there are more than 14 feet of roads/streets & sidewalks, I am only taking a picture of one section for this posting on the Weekly Workbench.
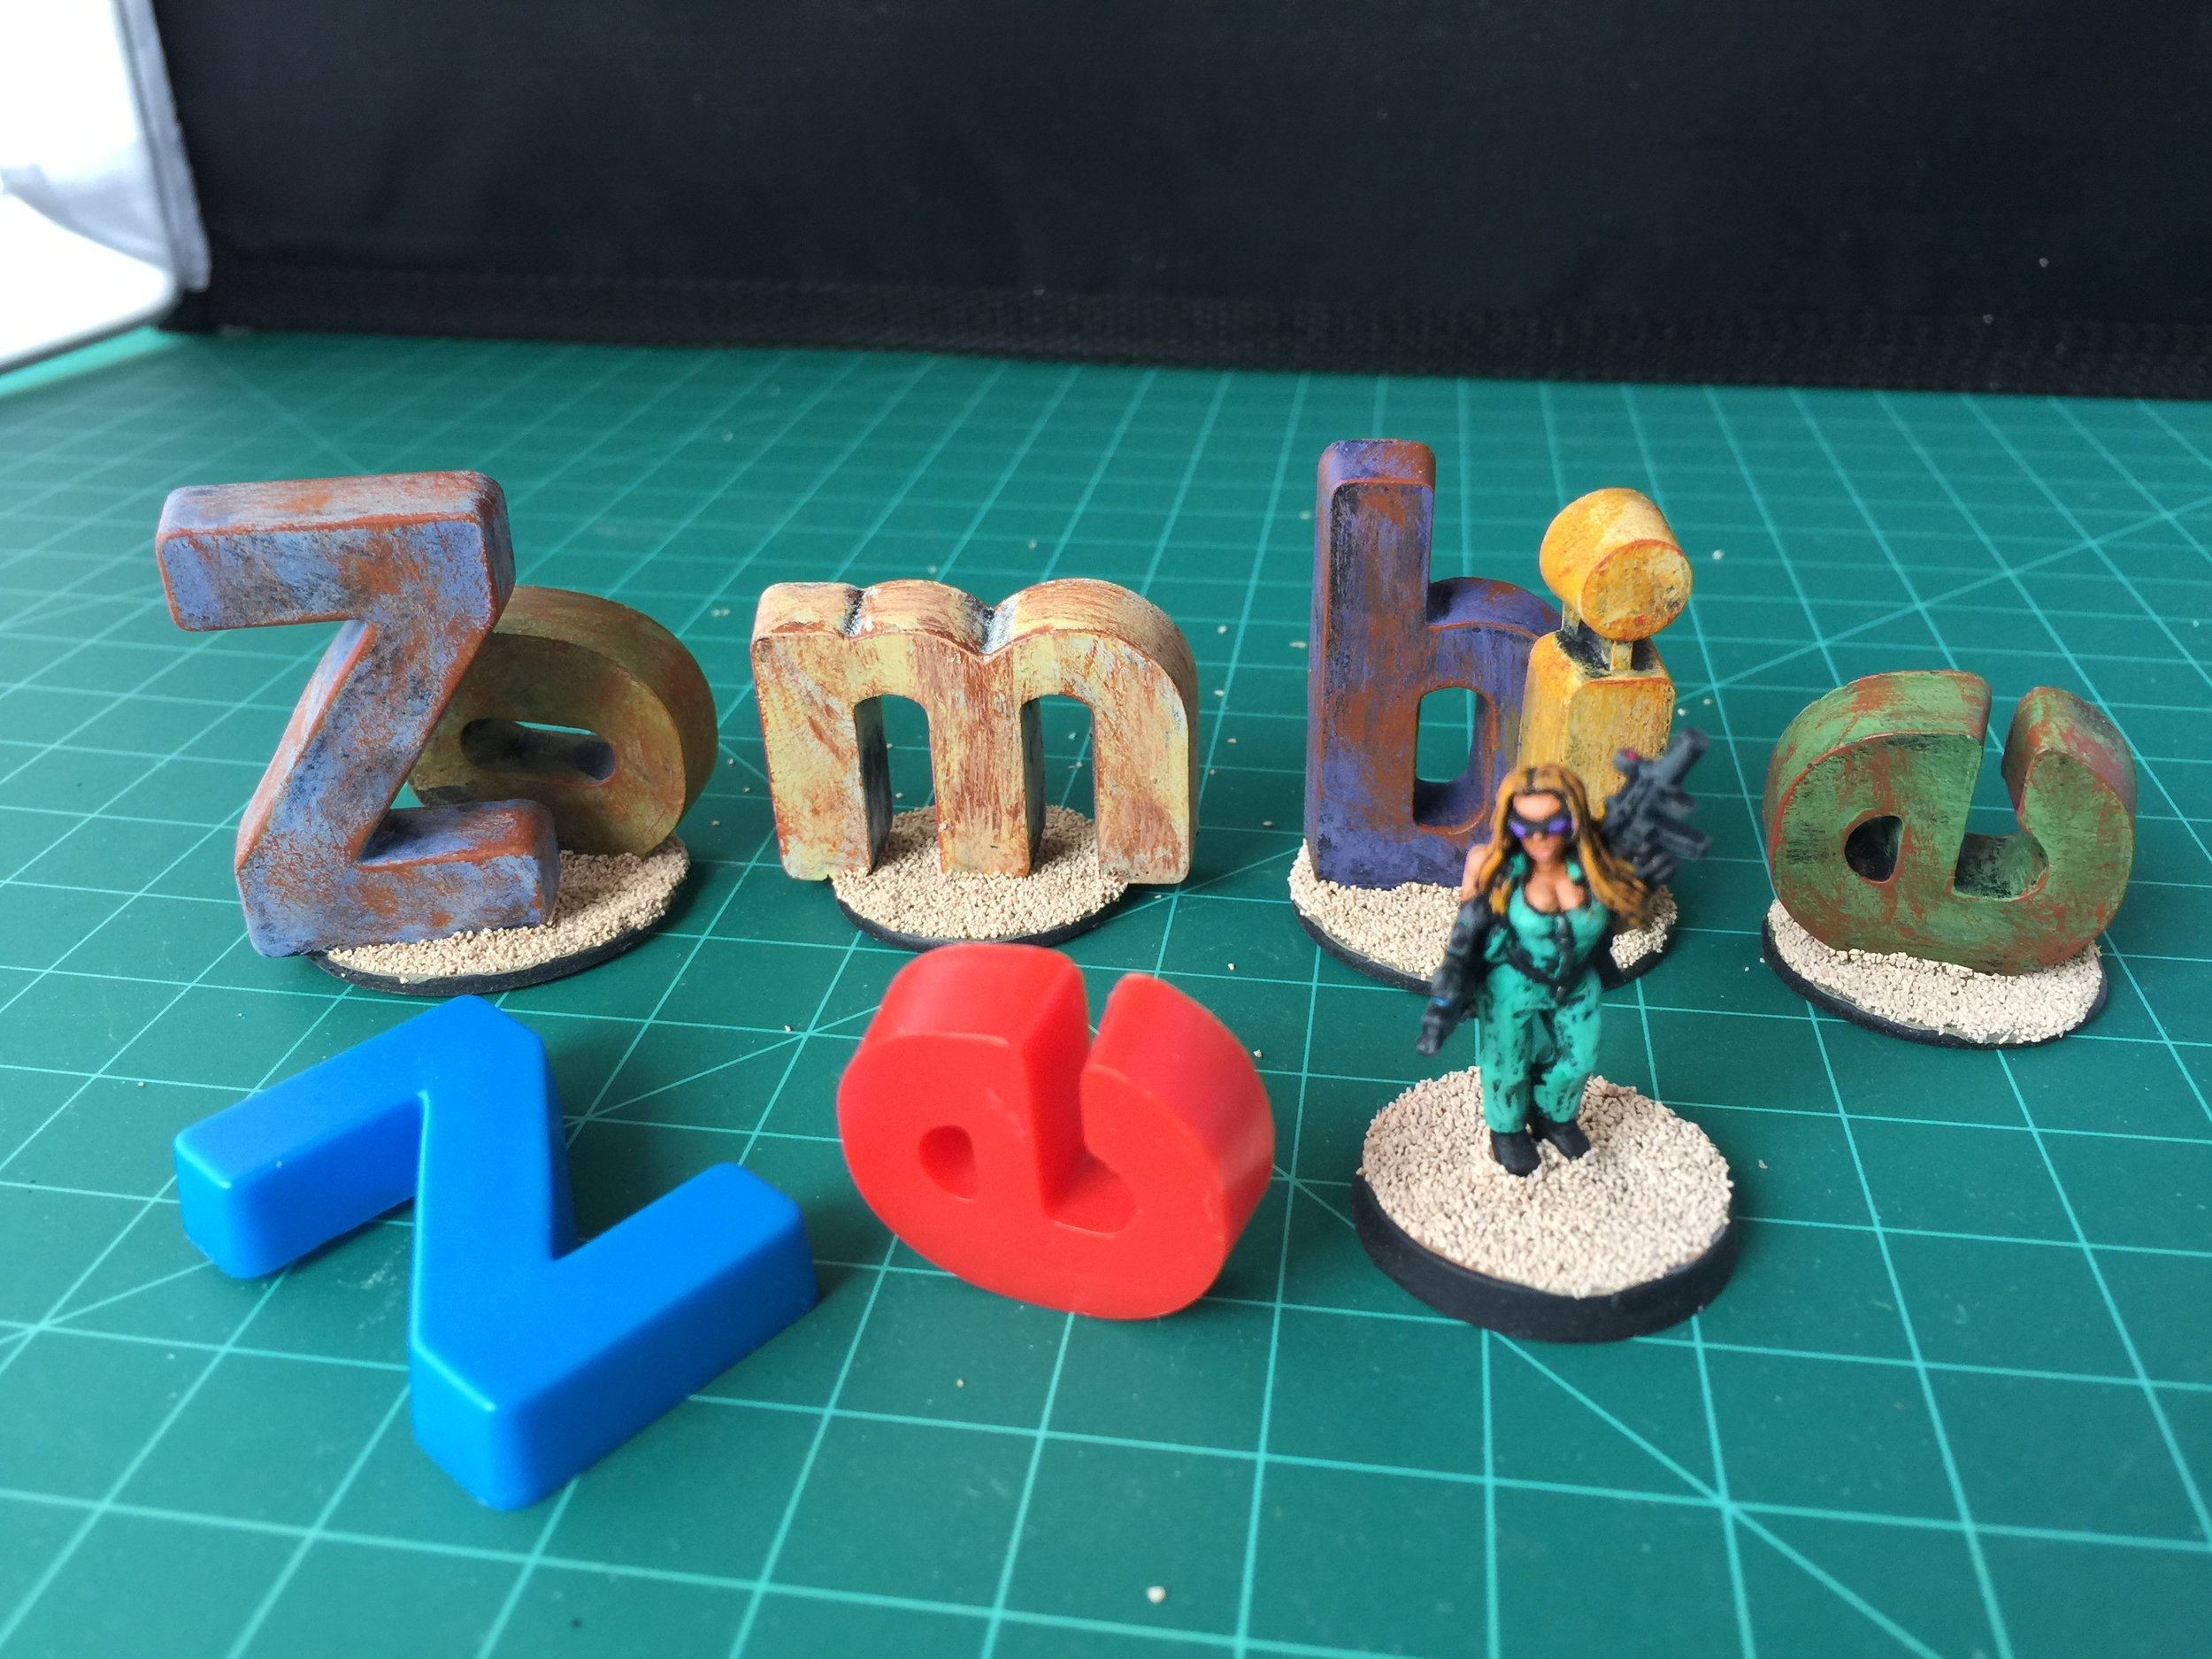
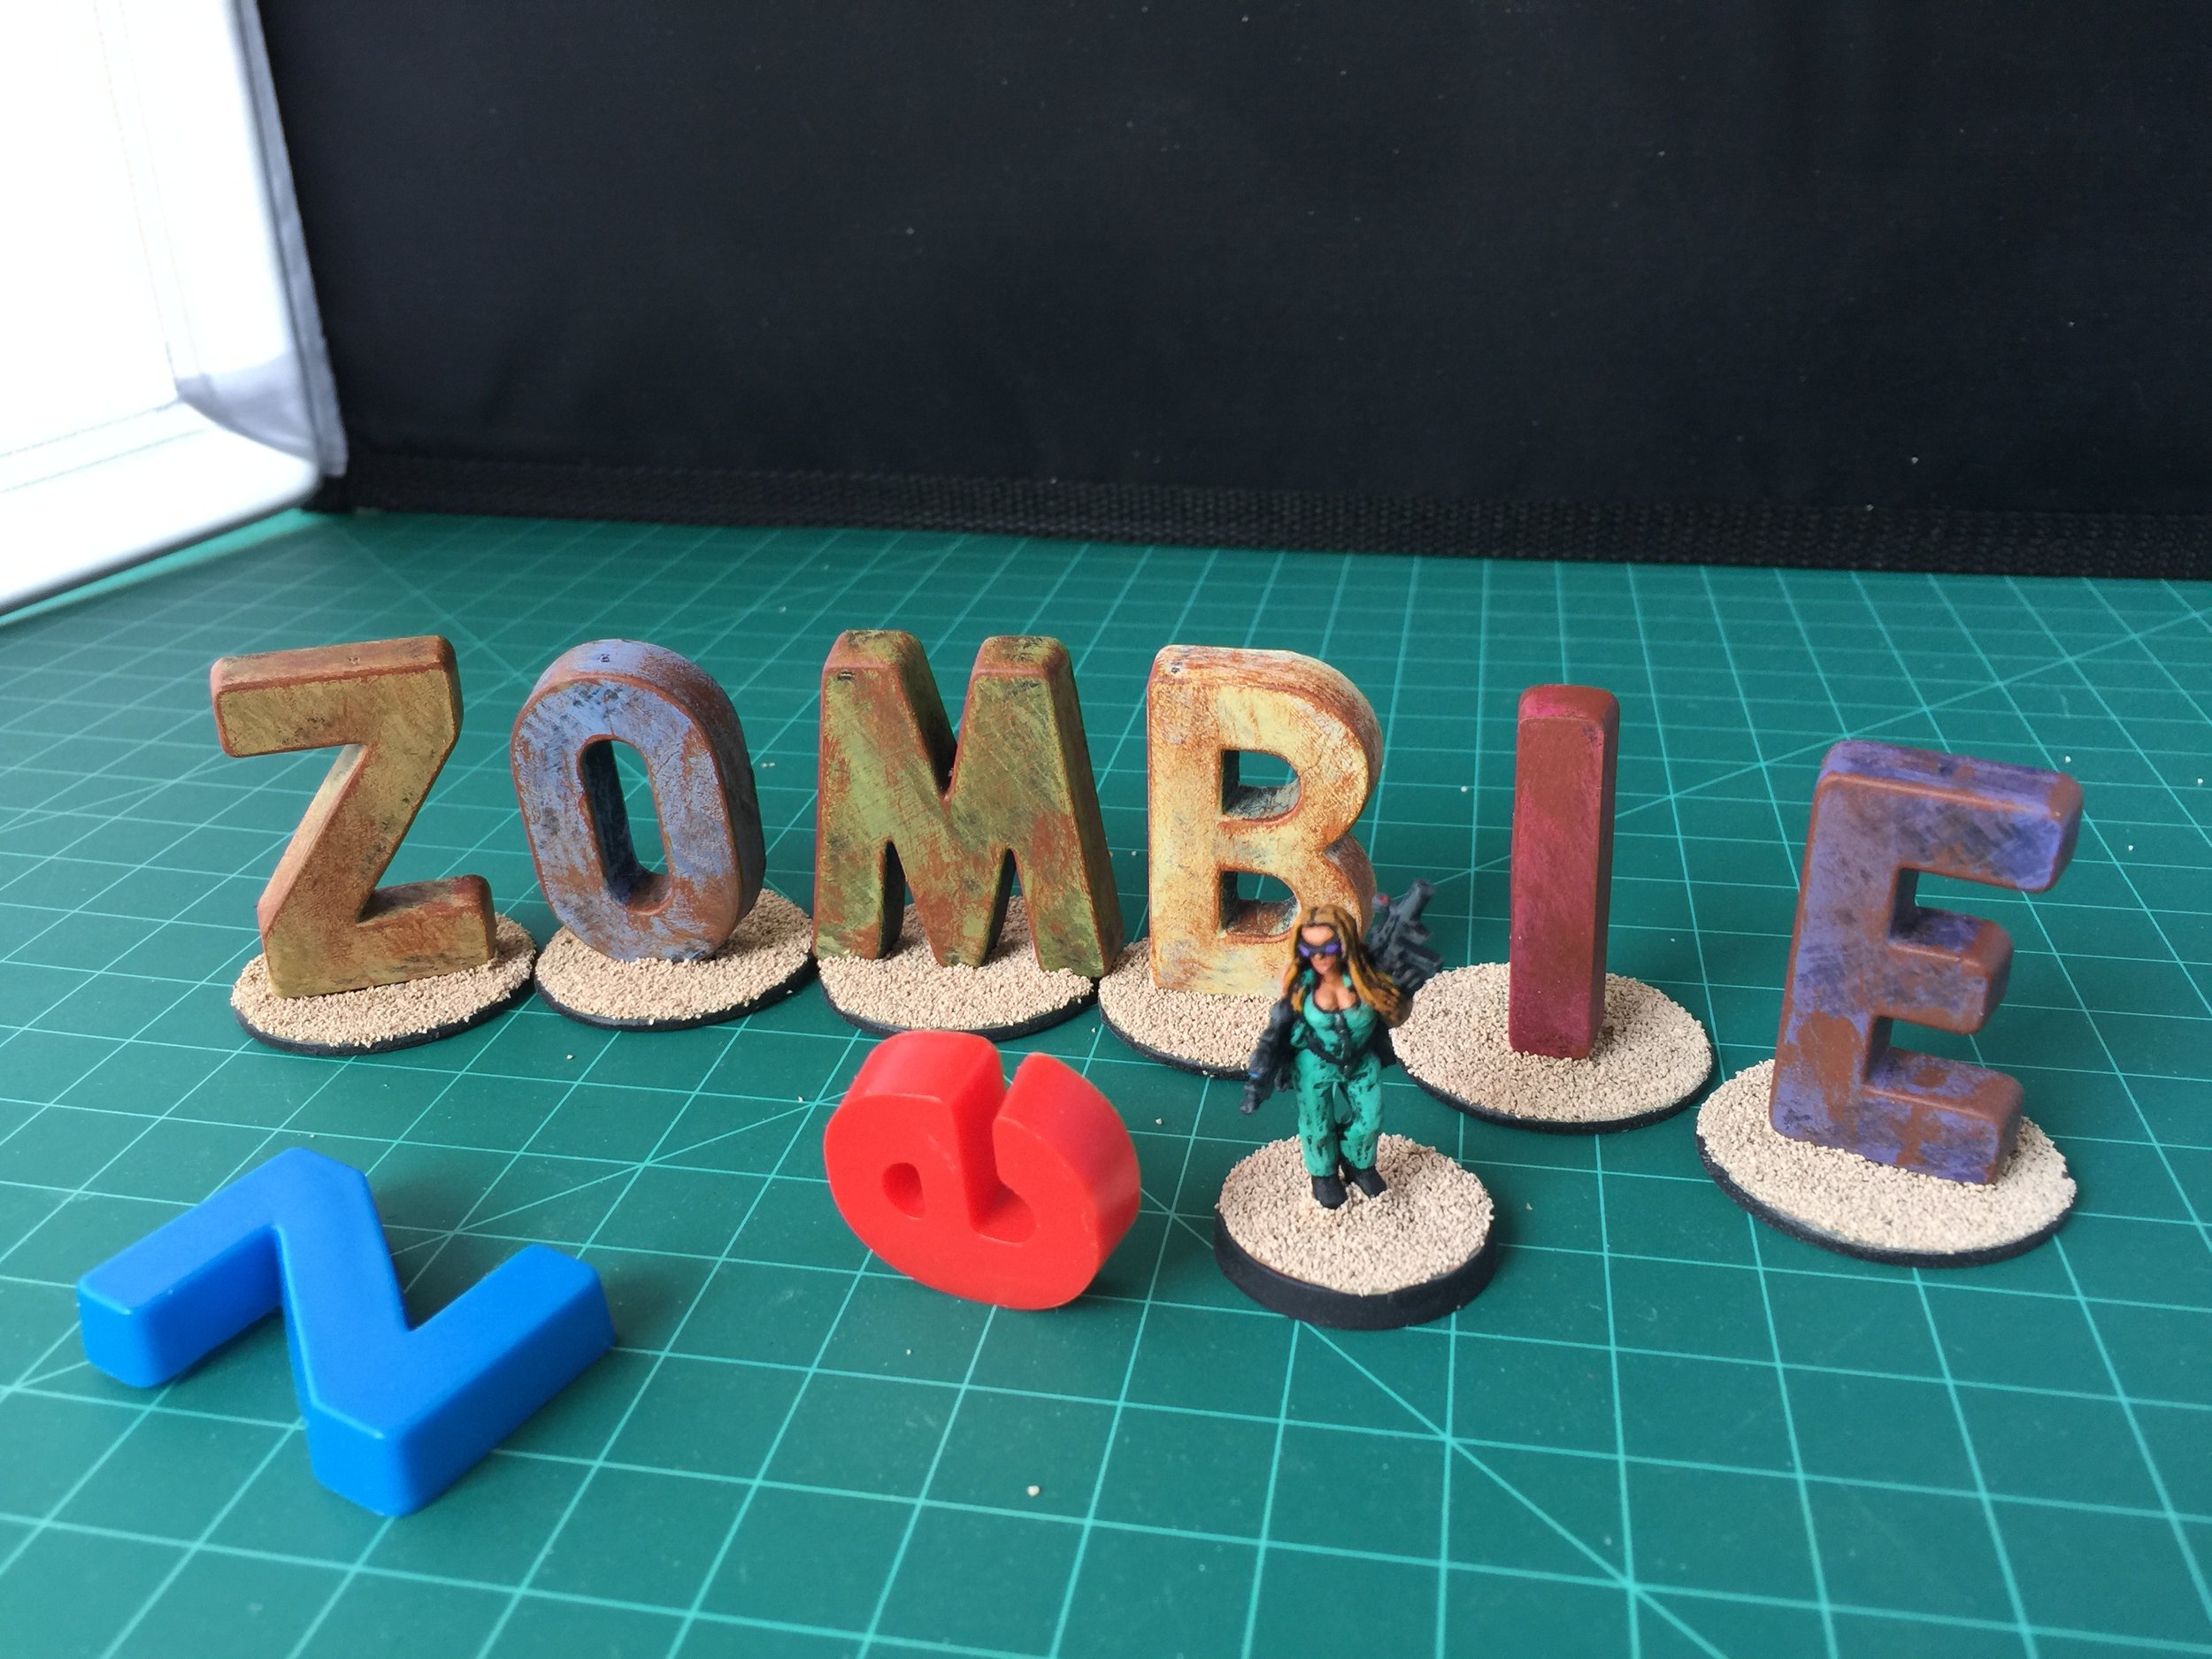
A recent swap meet visit gave up six baggies of plastic letters (upper and lower case letters). They were cheap at less than a dollar a baggy. I bought all six baggies in order to ensure the best possible selection of letters. When I bought them I considered using them to make store sign (which I may do with future projects), but for the post apoc collection I decided to do something a little more out of the ordinary. I based the letters on washers covered with Evergreen Plastic and then painted them to look like junkyard rusty throw away letters that spell ZOMBIE in upper and lower case letters. I’ll probably use one of the two versions and distribute the letters around the junkyard so that a careful viewer can read what they spell.
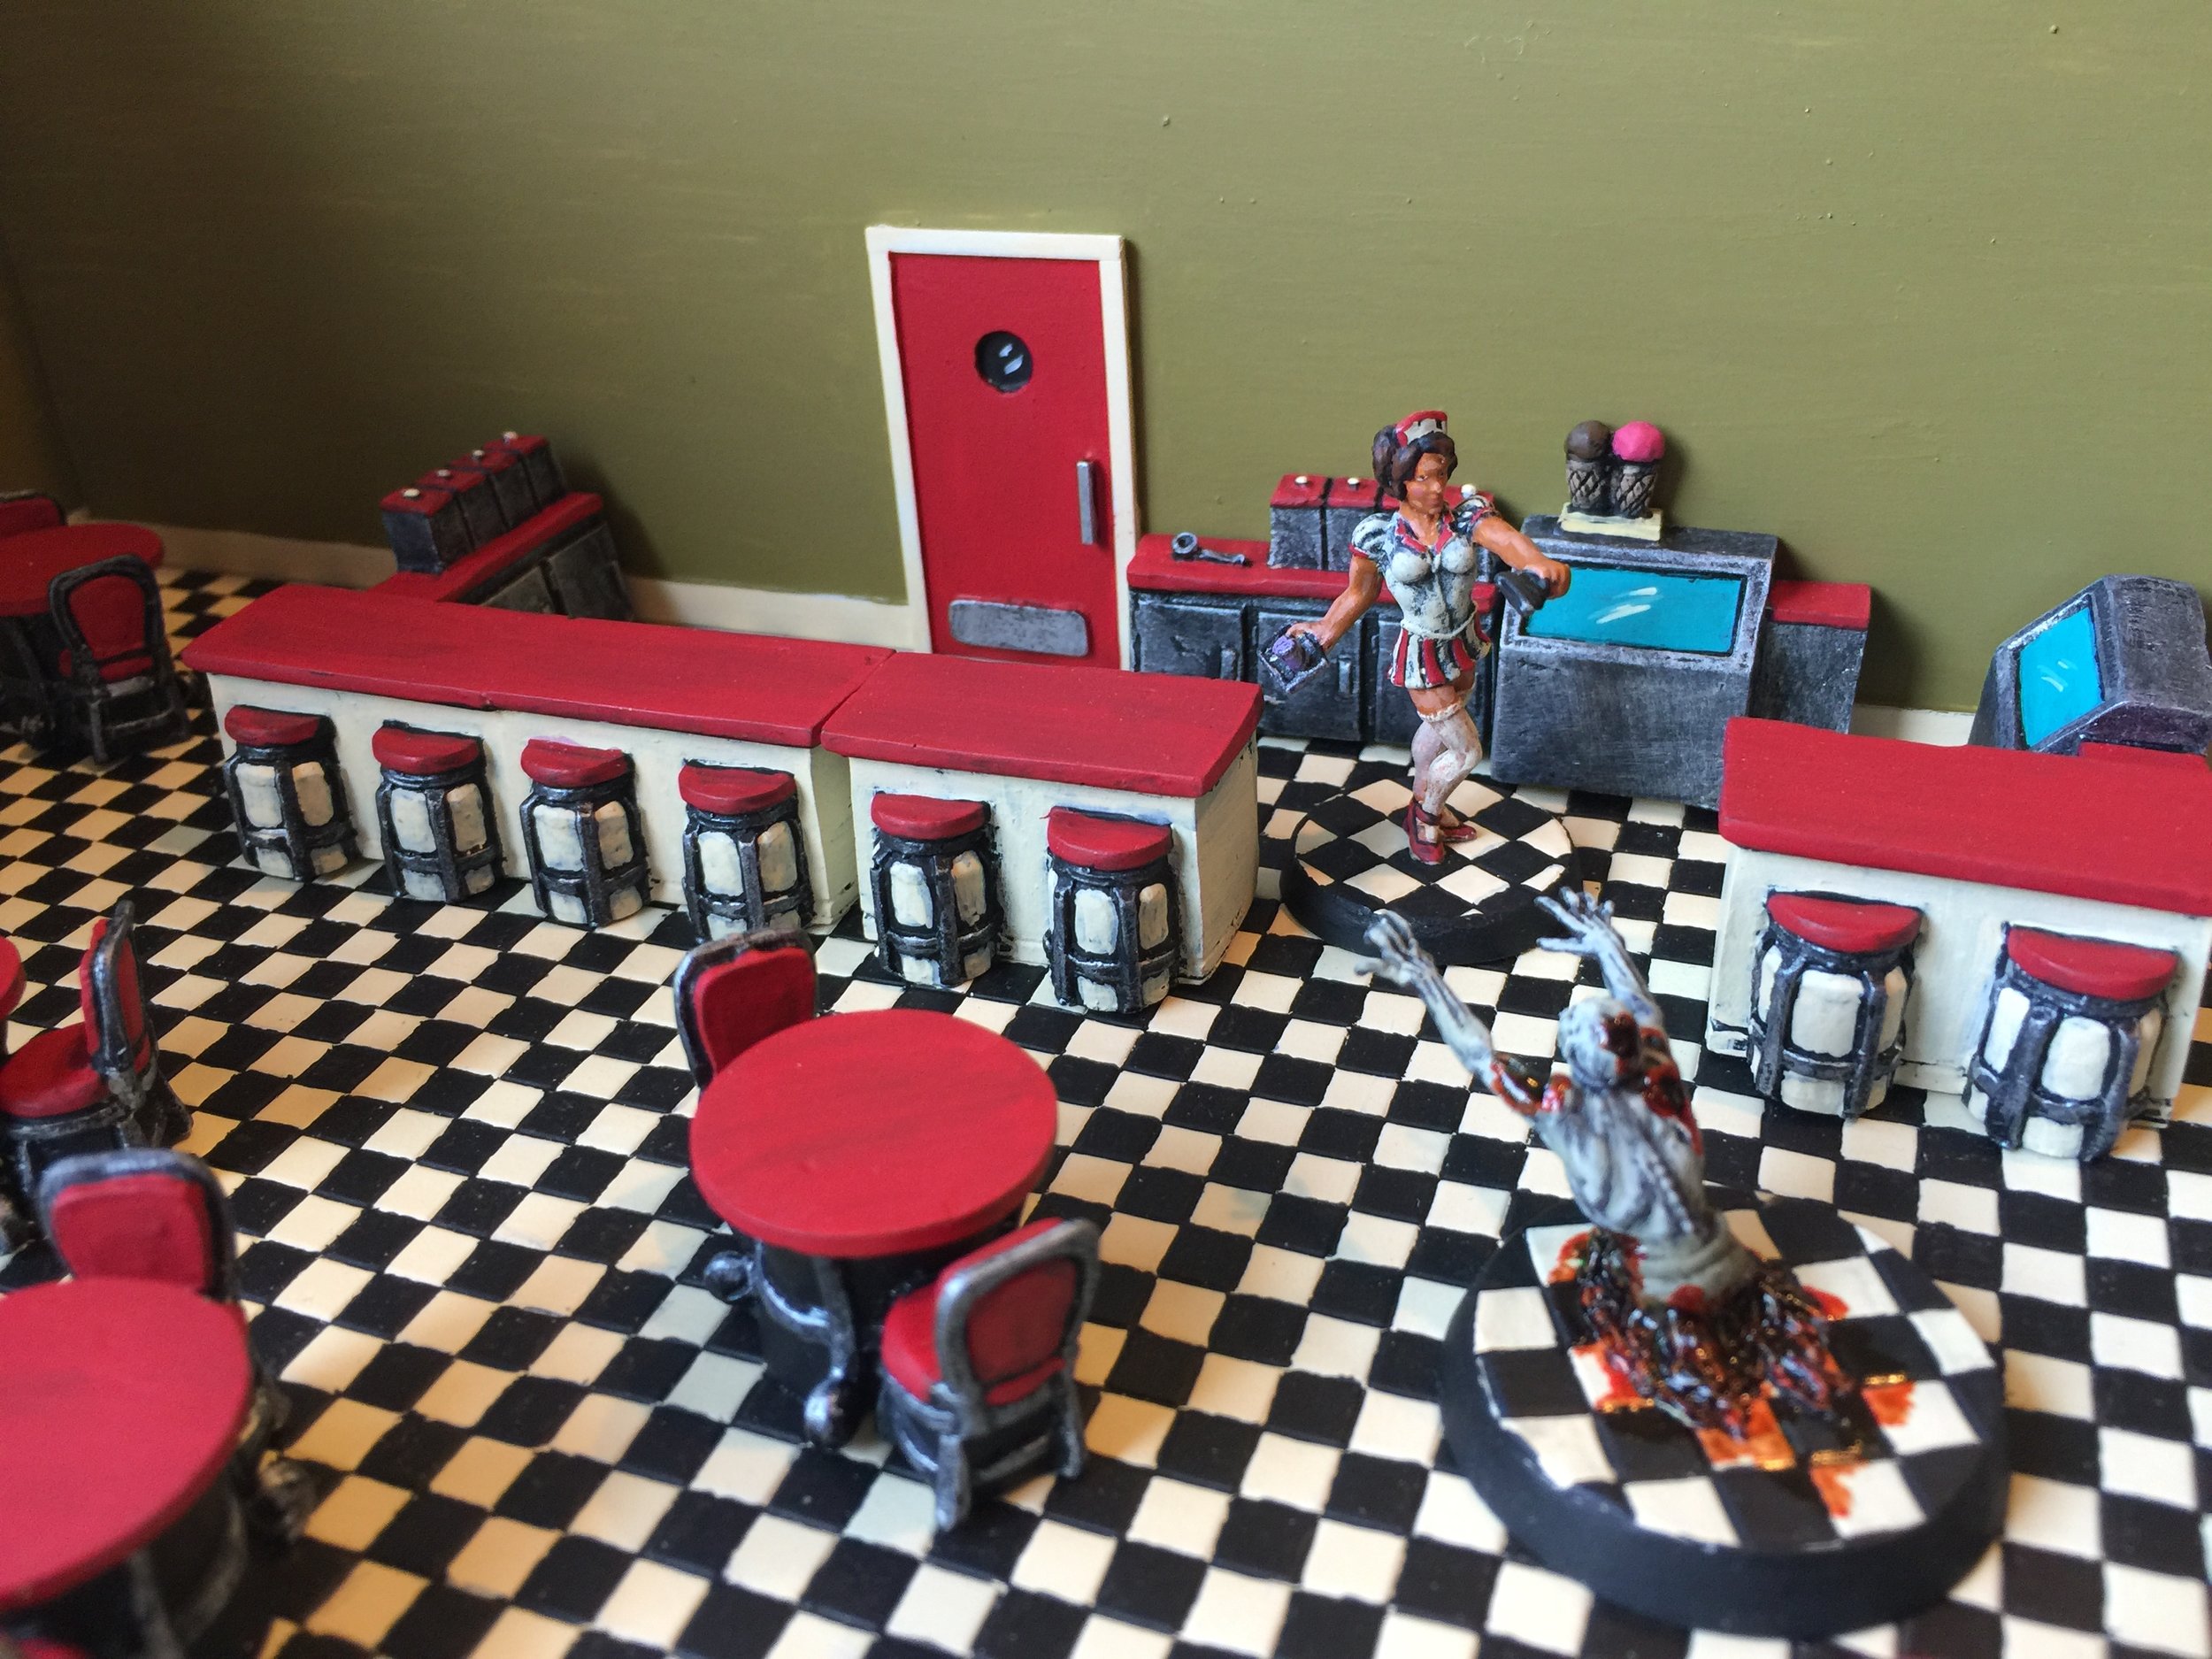
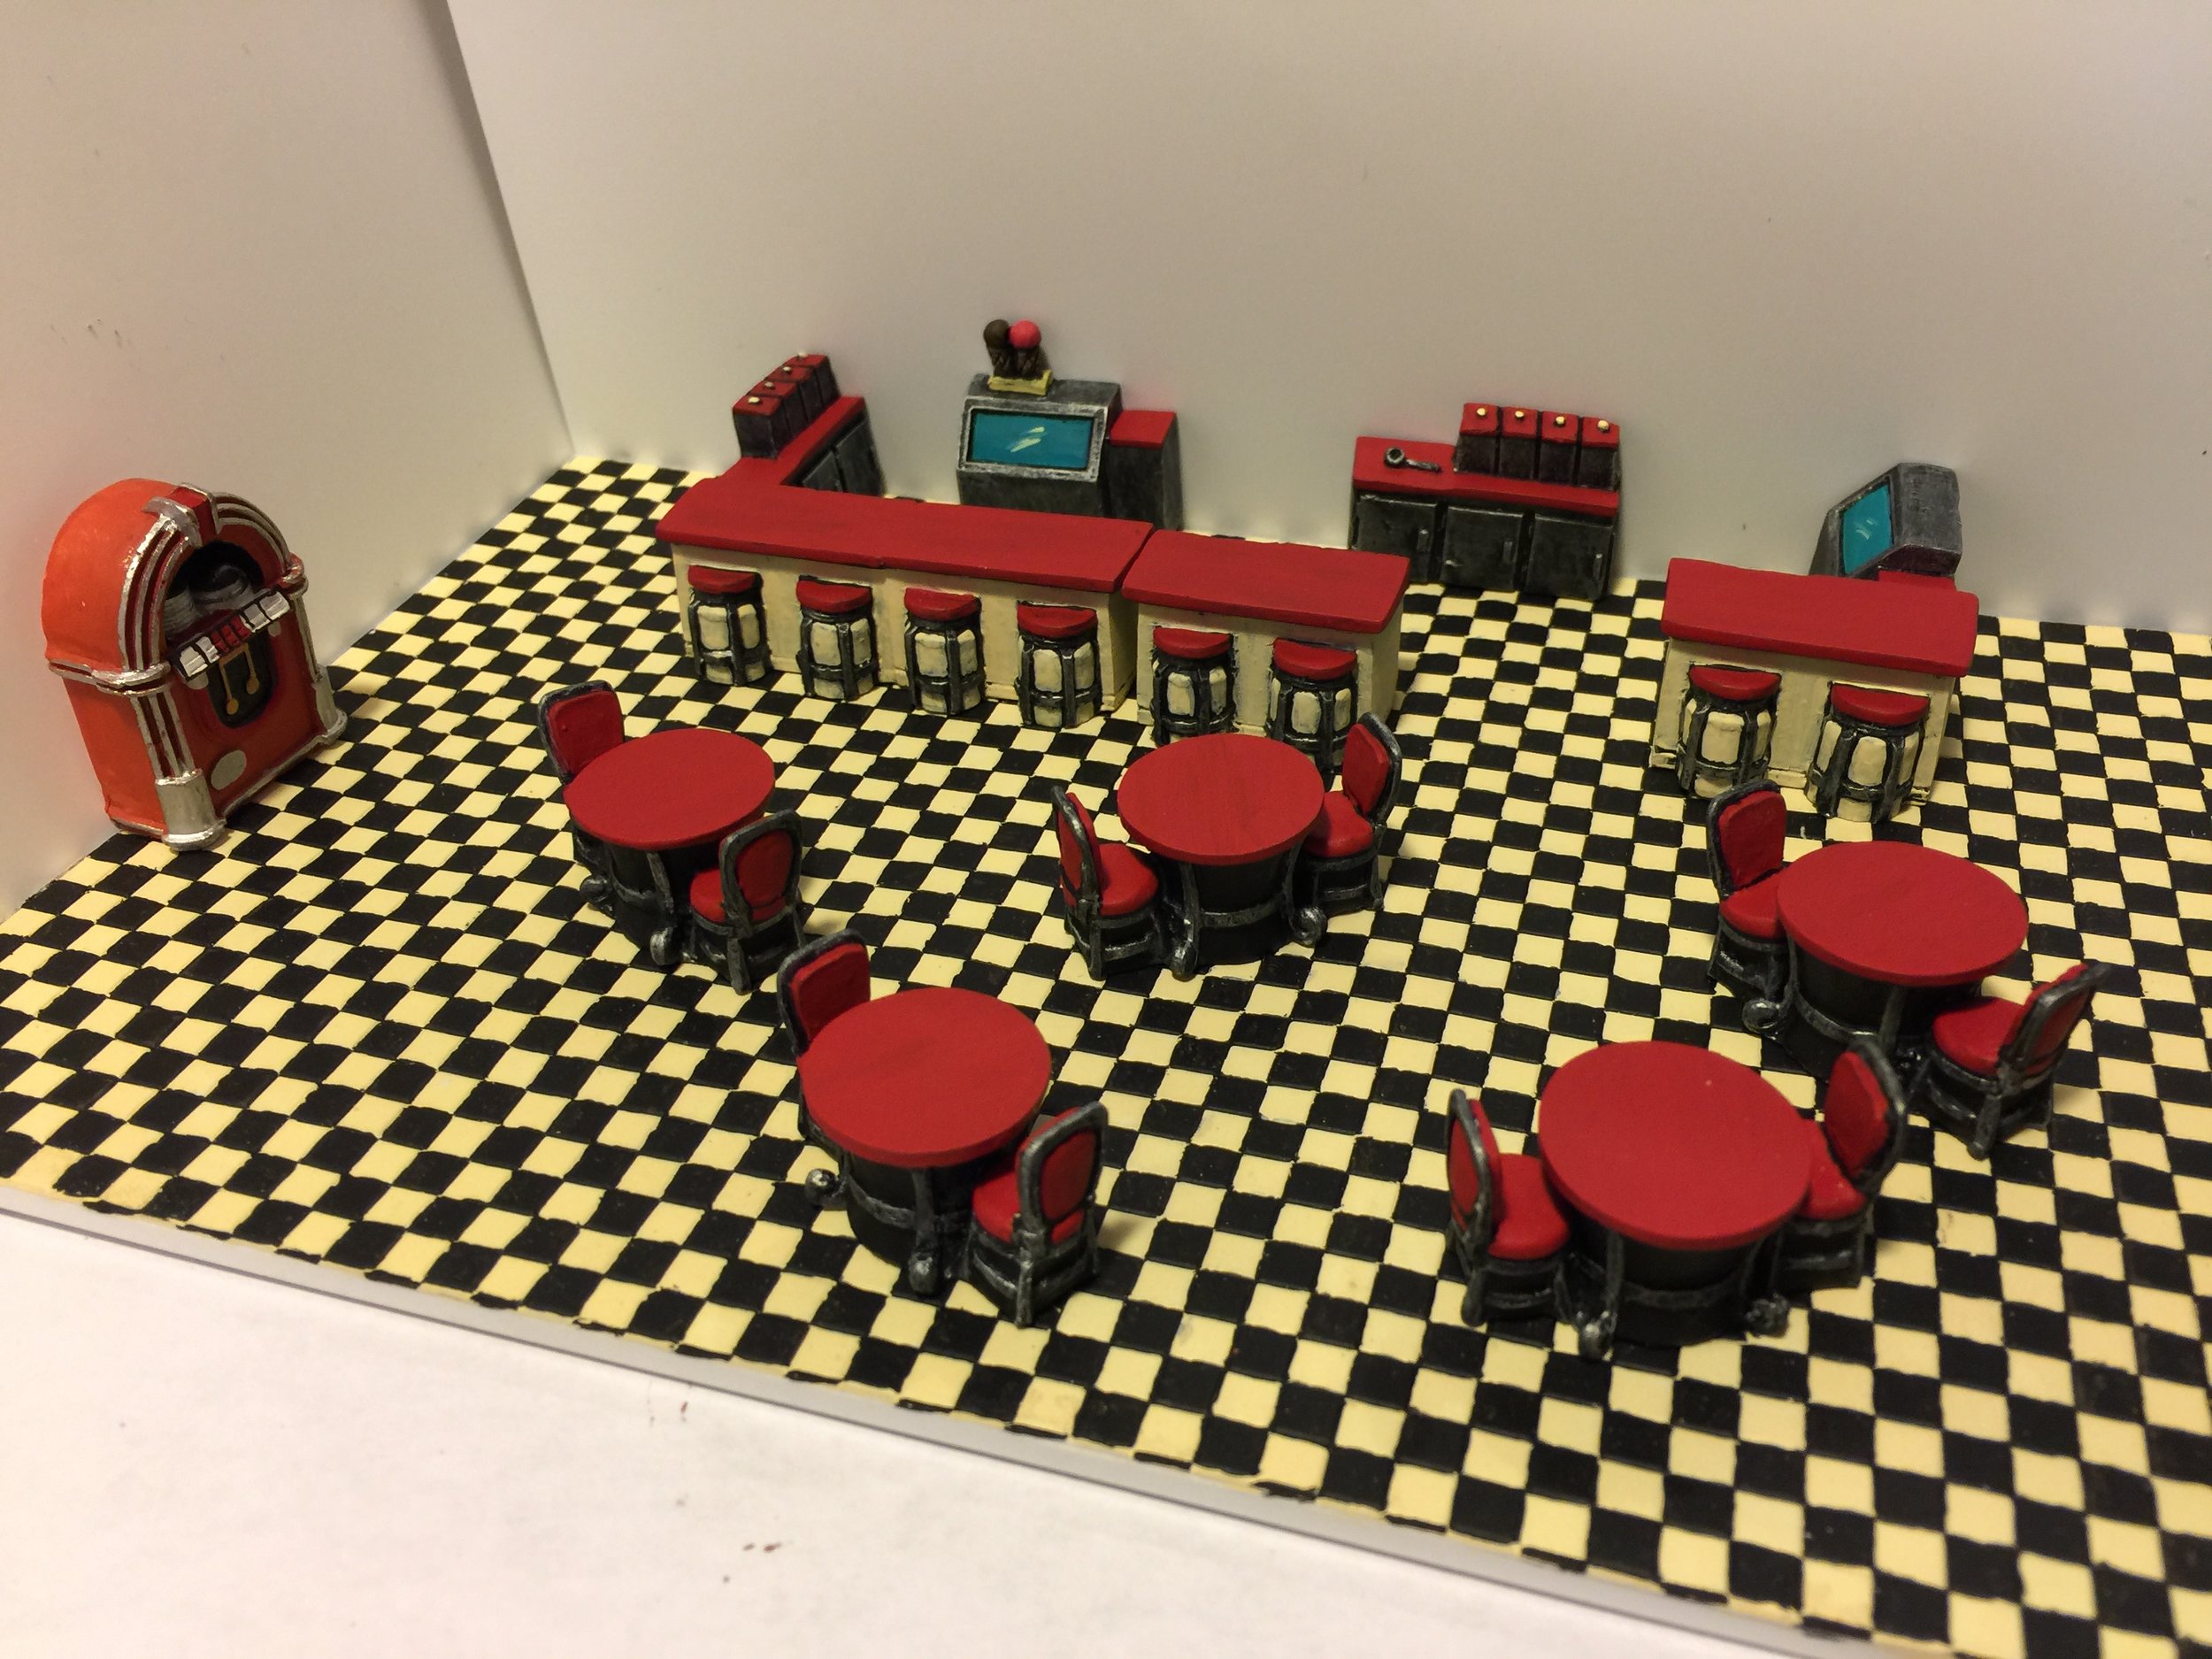
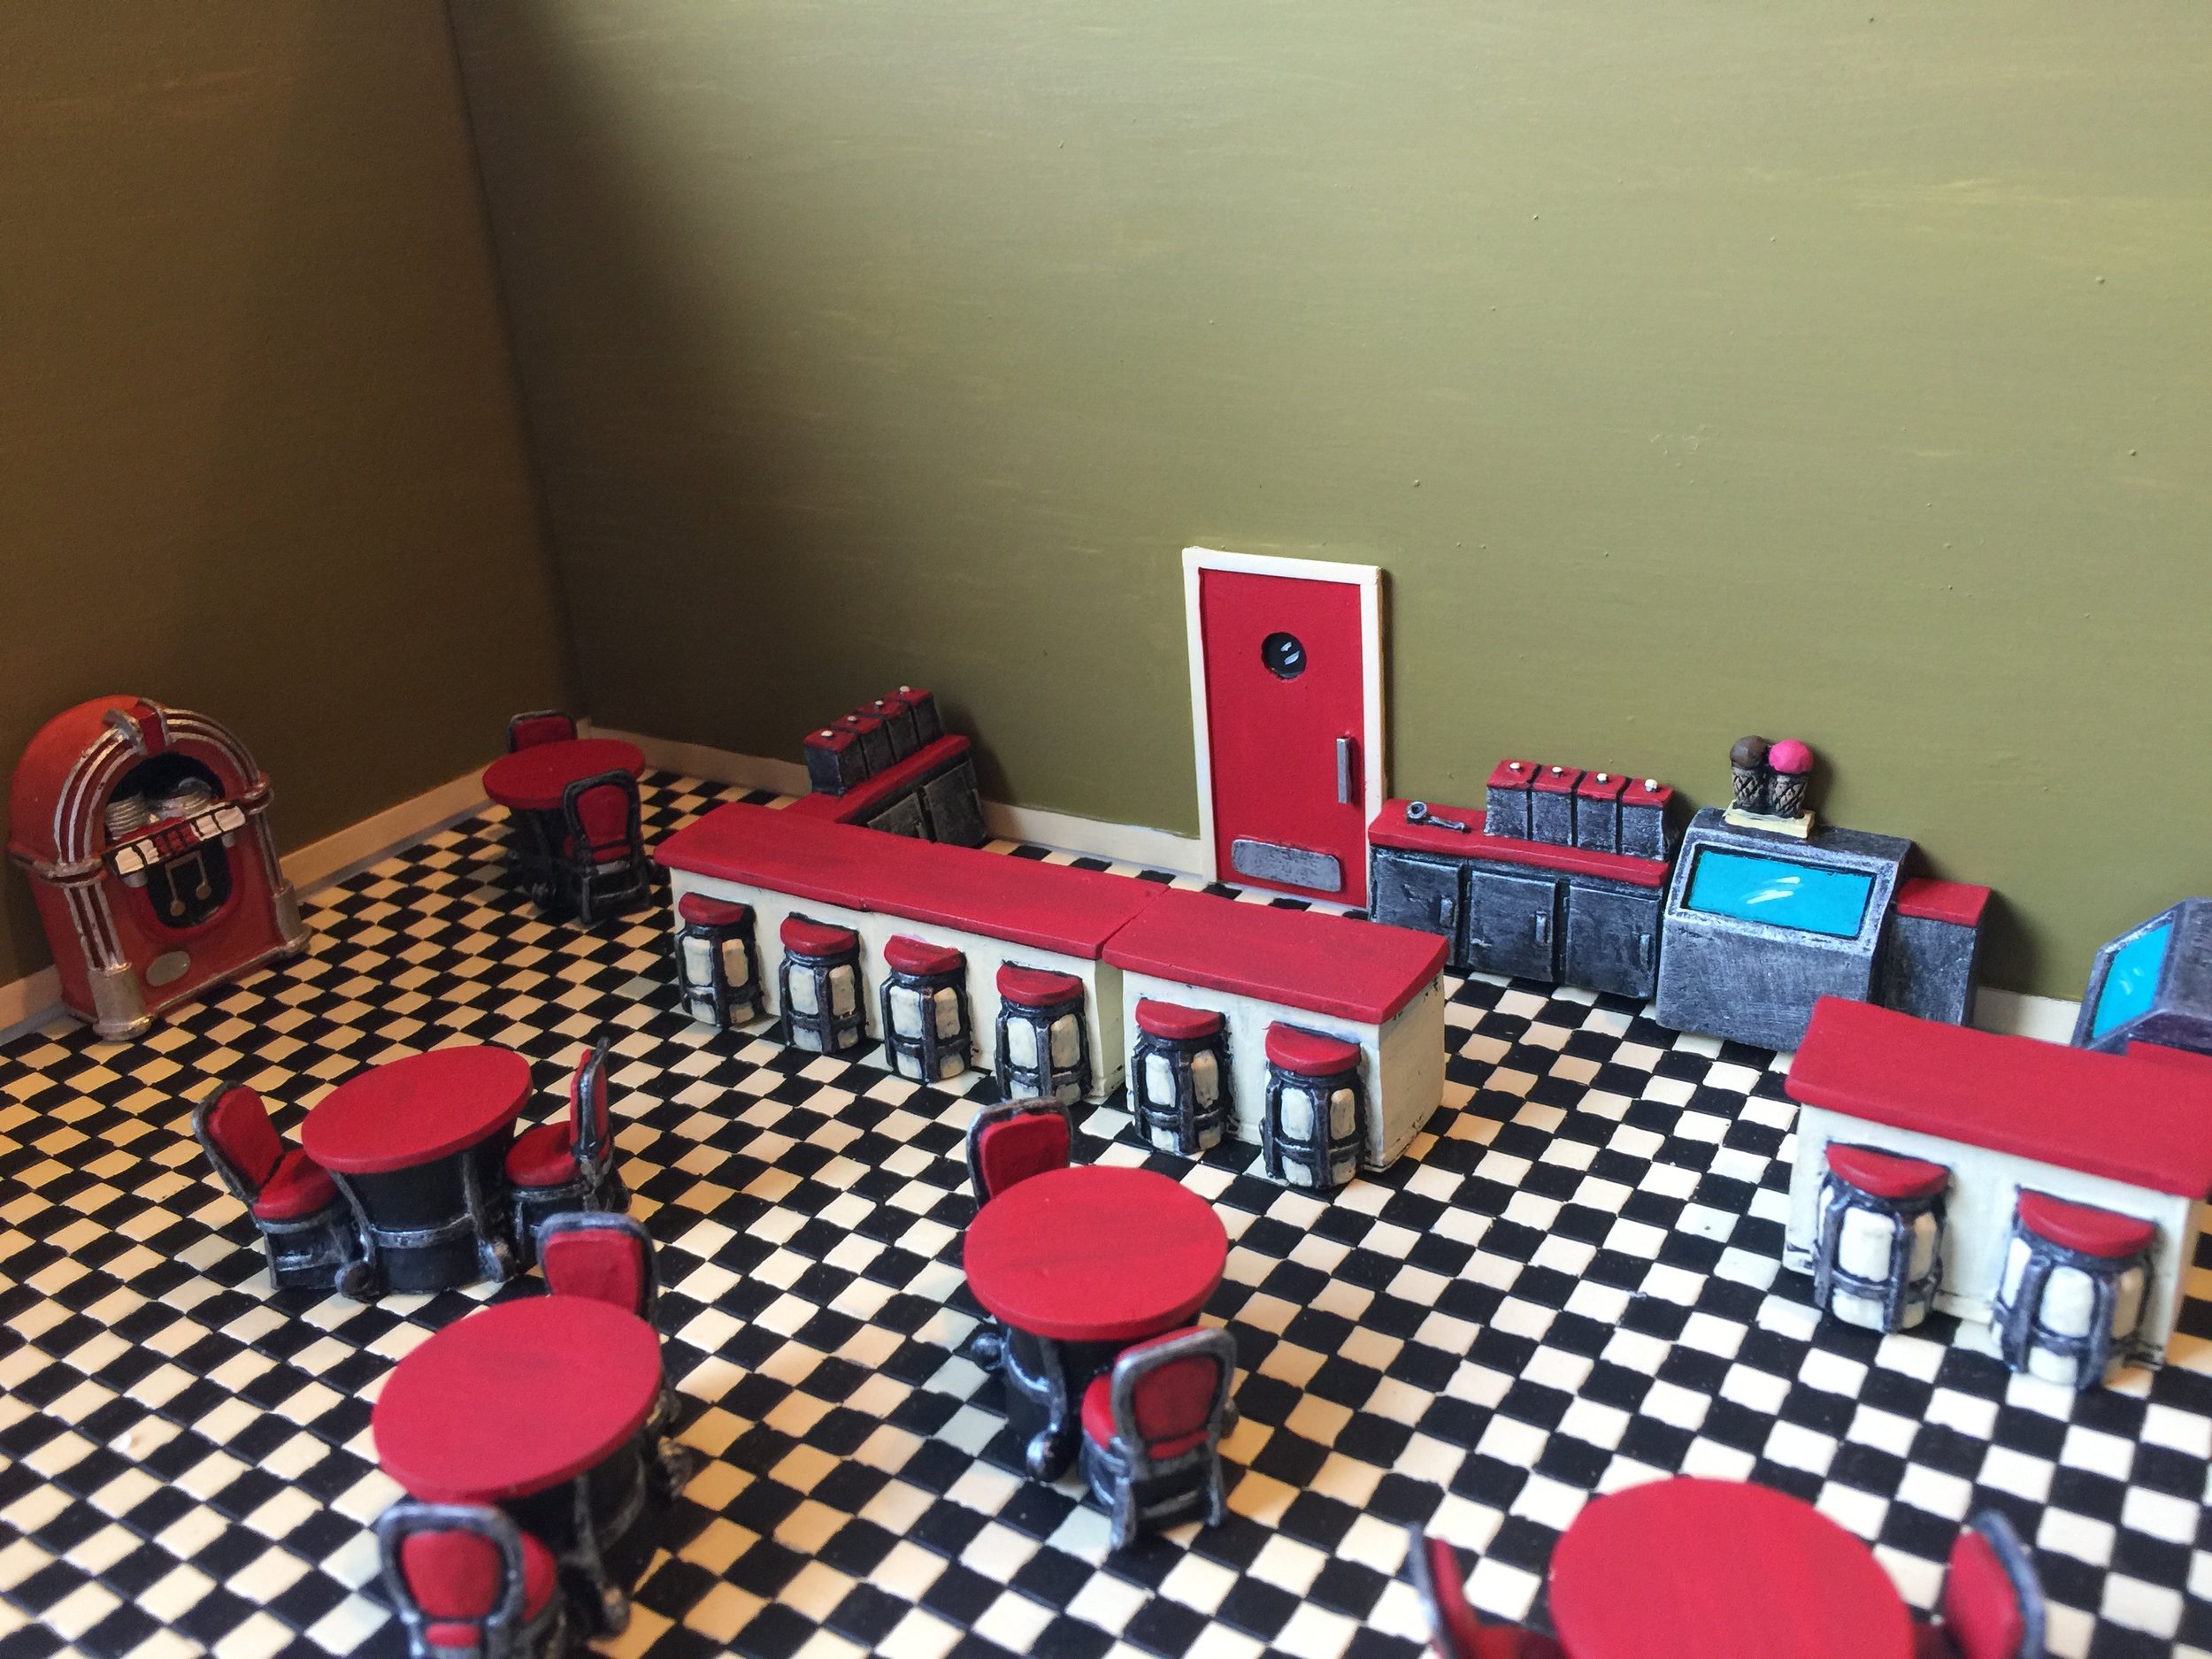
This collection will also include only one interior. Interiors for my 28mm collections have become an important feature of my collections in recent years… at least they are important to me. My first interior effort was simply lifting the roof off one of the Miniature Building Authority Spanish buildings in my Pirates collection and placing some figures in the room. Since that simple beginning I have developed an approach based on what I imagine a sound stage set would look like… a floor and a couple of walls. It offers space with easy access for arranging figures and furniture. It’s open so easy to photograph, and the way I construct the walls and floor (Evergreen and JTT Plastic) the pieces (floor and walls) come apart for easy, flat storage. For the post apoc collection I am doing only one interior. That is an ice cream parlor with tables, counters and stools, a jukebox and refrigerator units. The furniture came from a little decorative diorama piece I found at the swap meet several years ago. It was made of resin and included one of each of the items mentioned above. I used the original pieces to make additional pieces cast in resin. The jukebox is from a Lemax-style diner I found at the swap meet a year ago. The red door is made from pieces of Evergreen Plastic. I think it worked out well… with the addition of a little zombie violence of course.
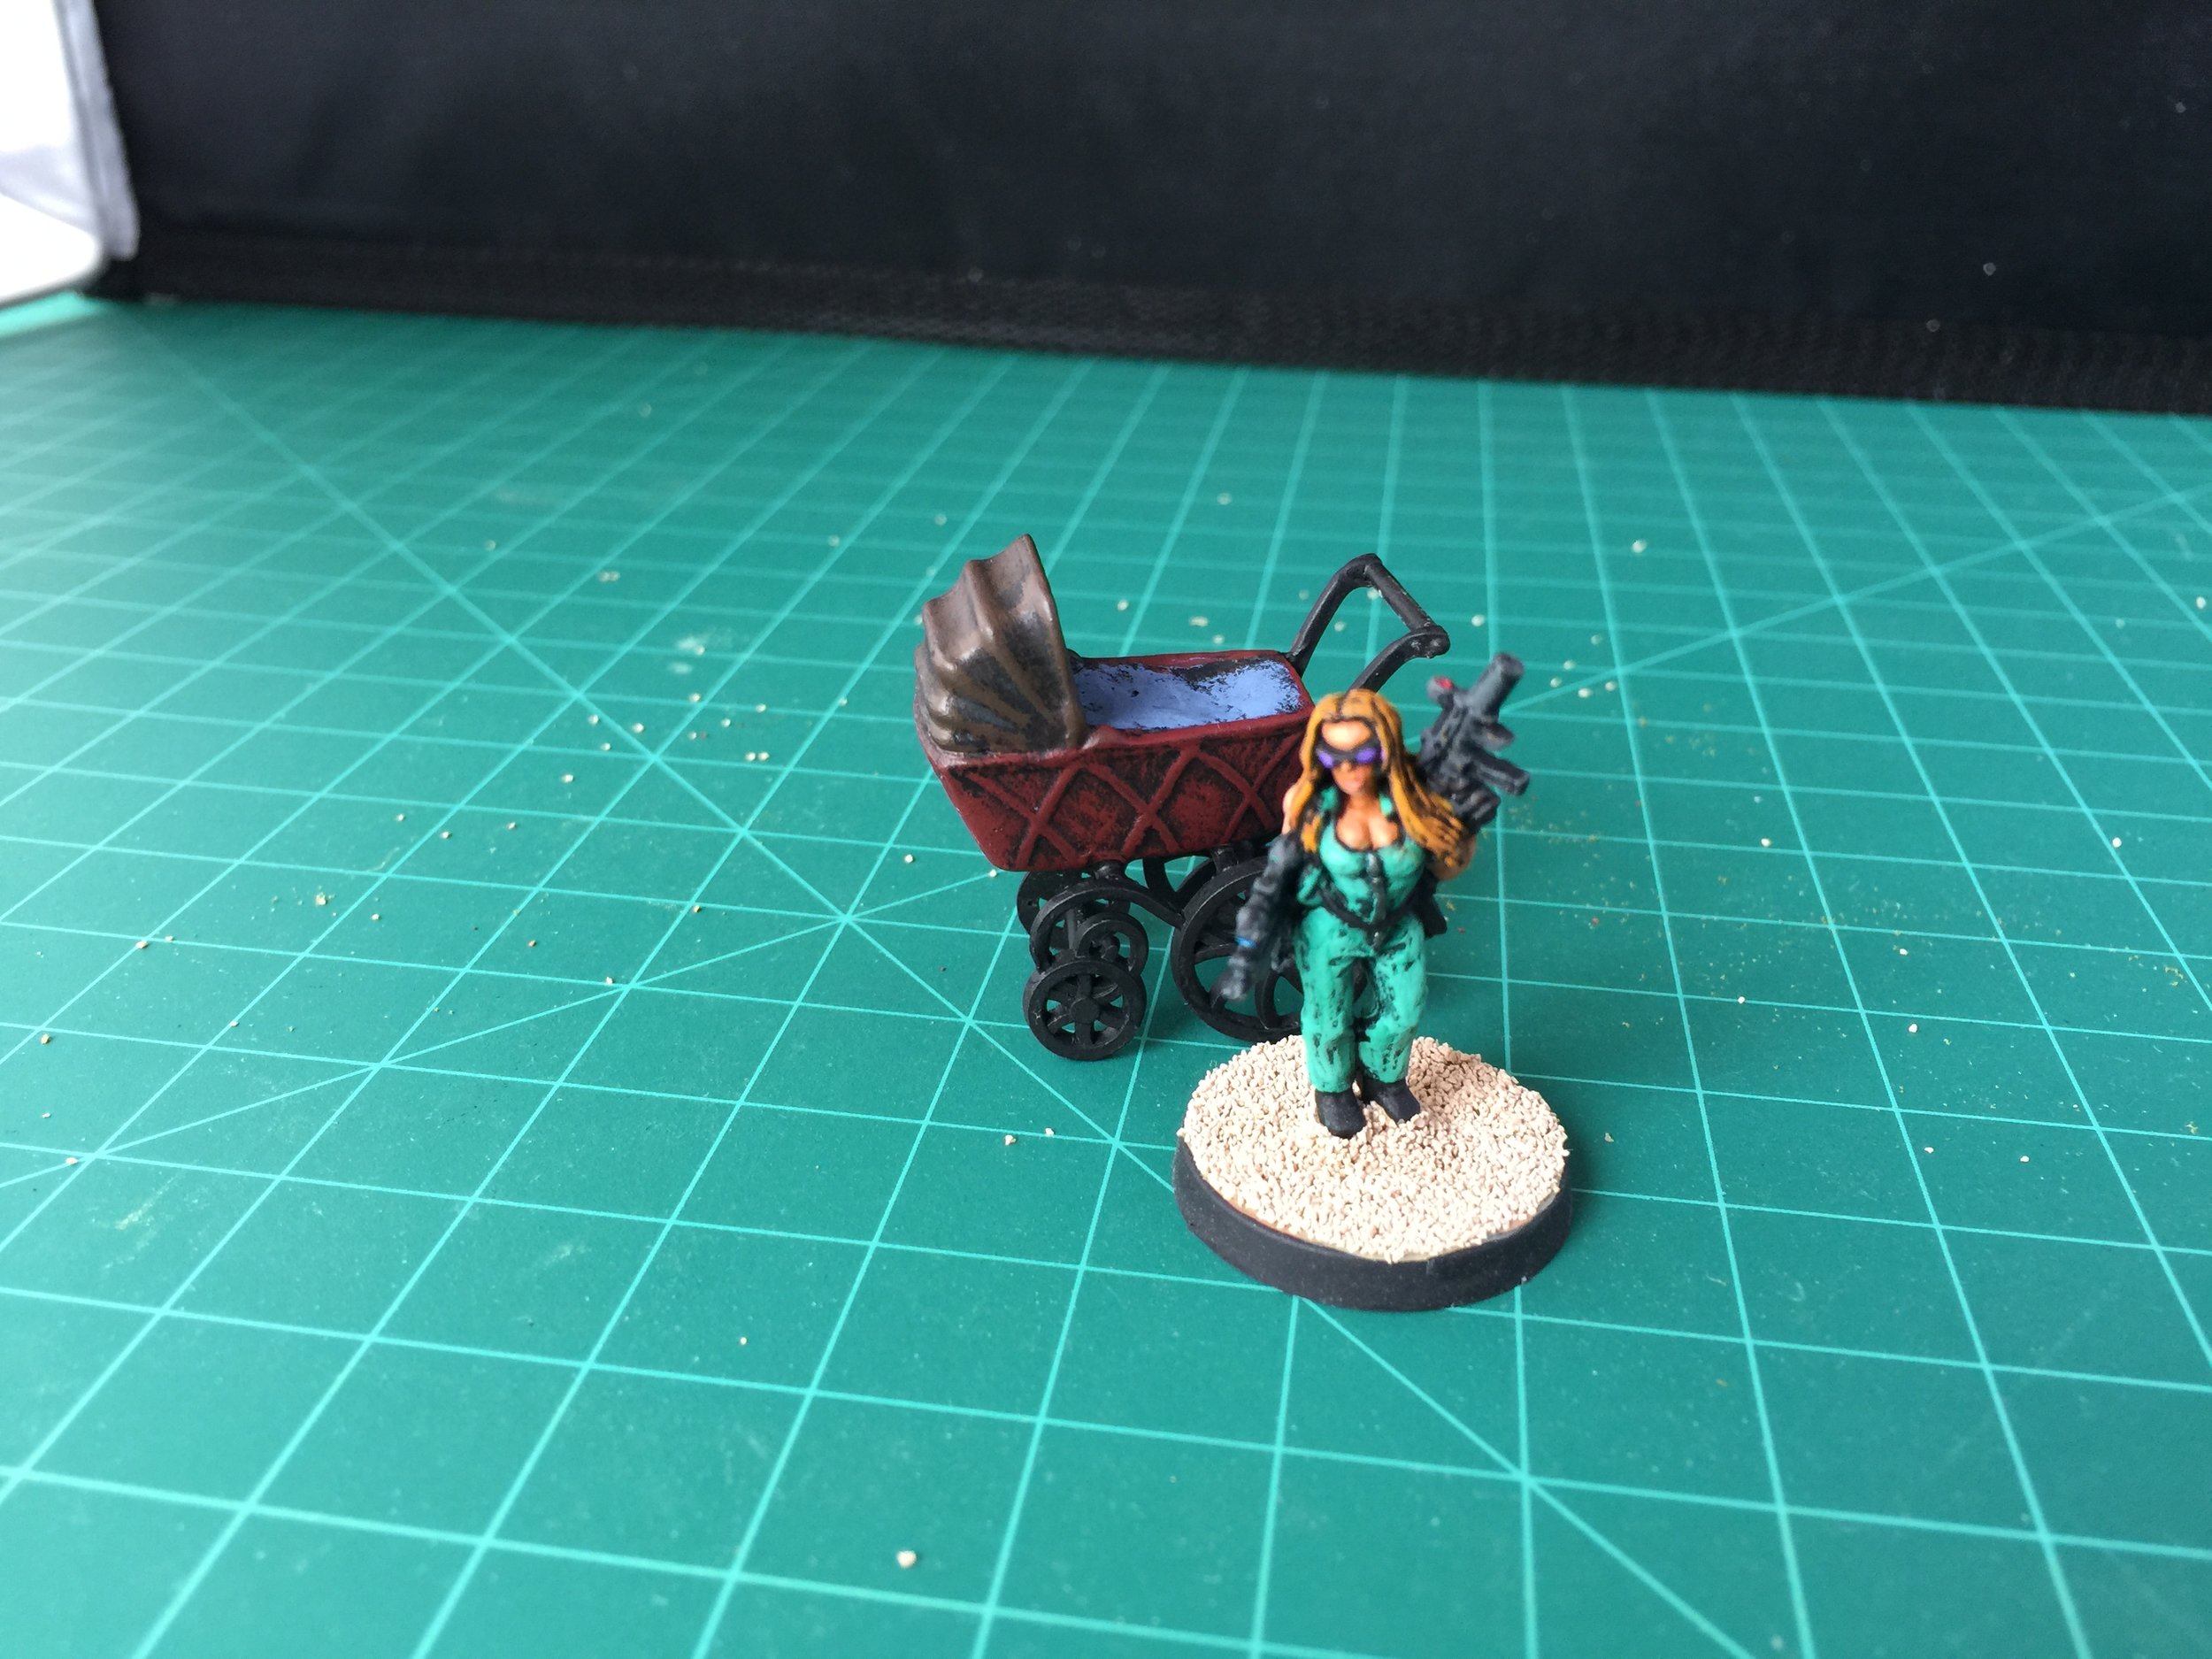
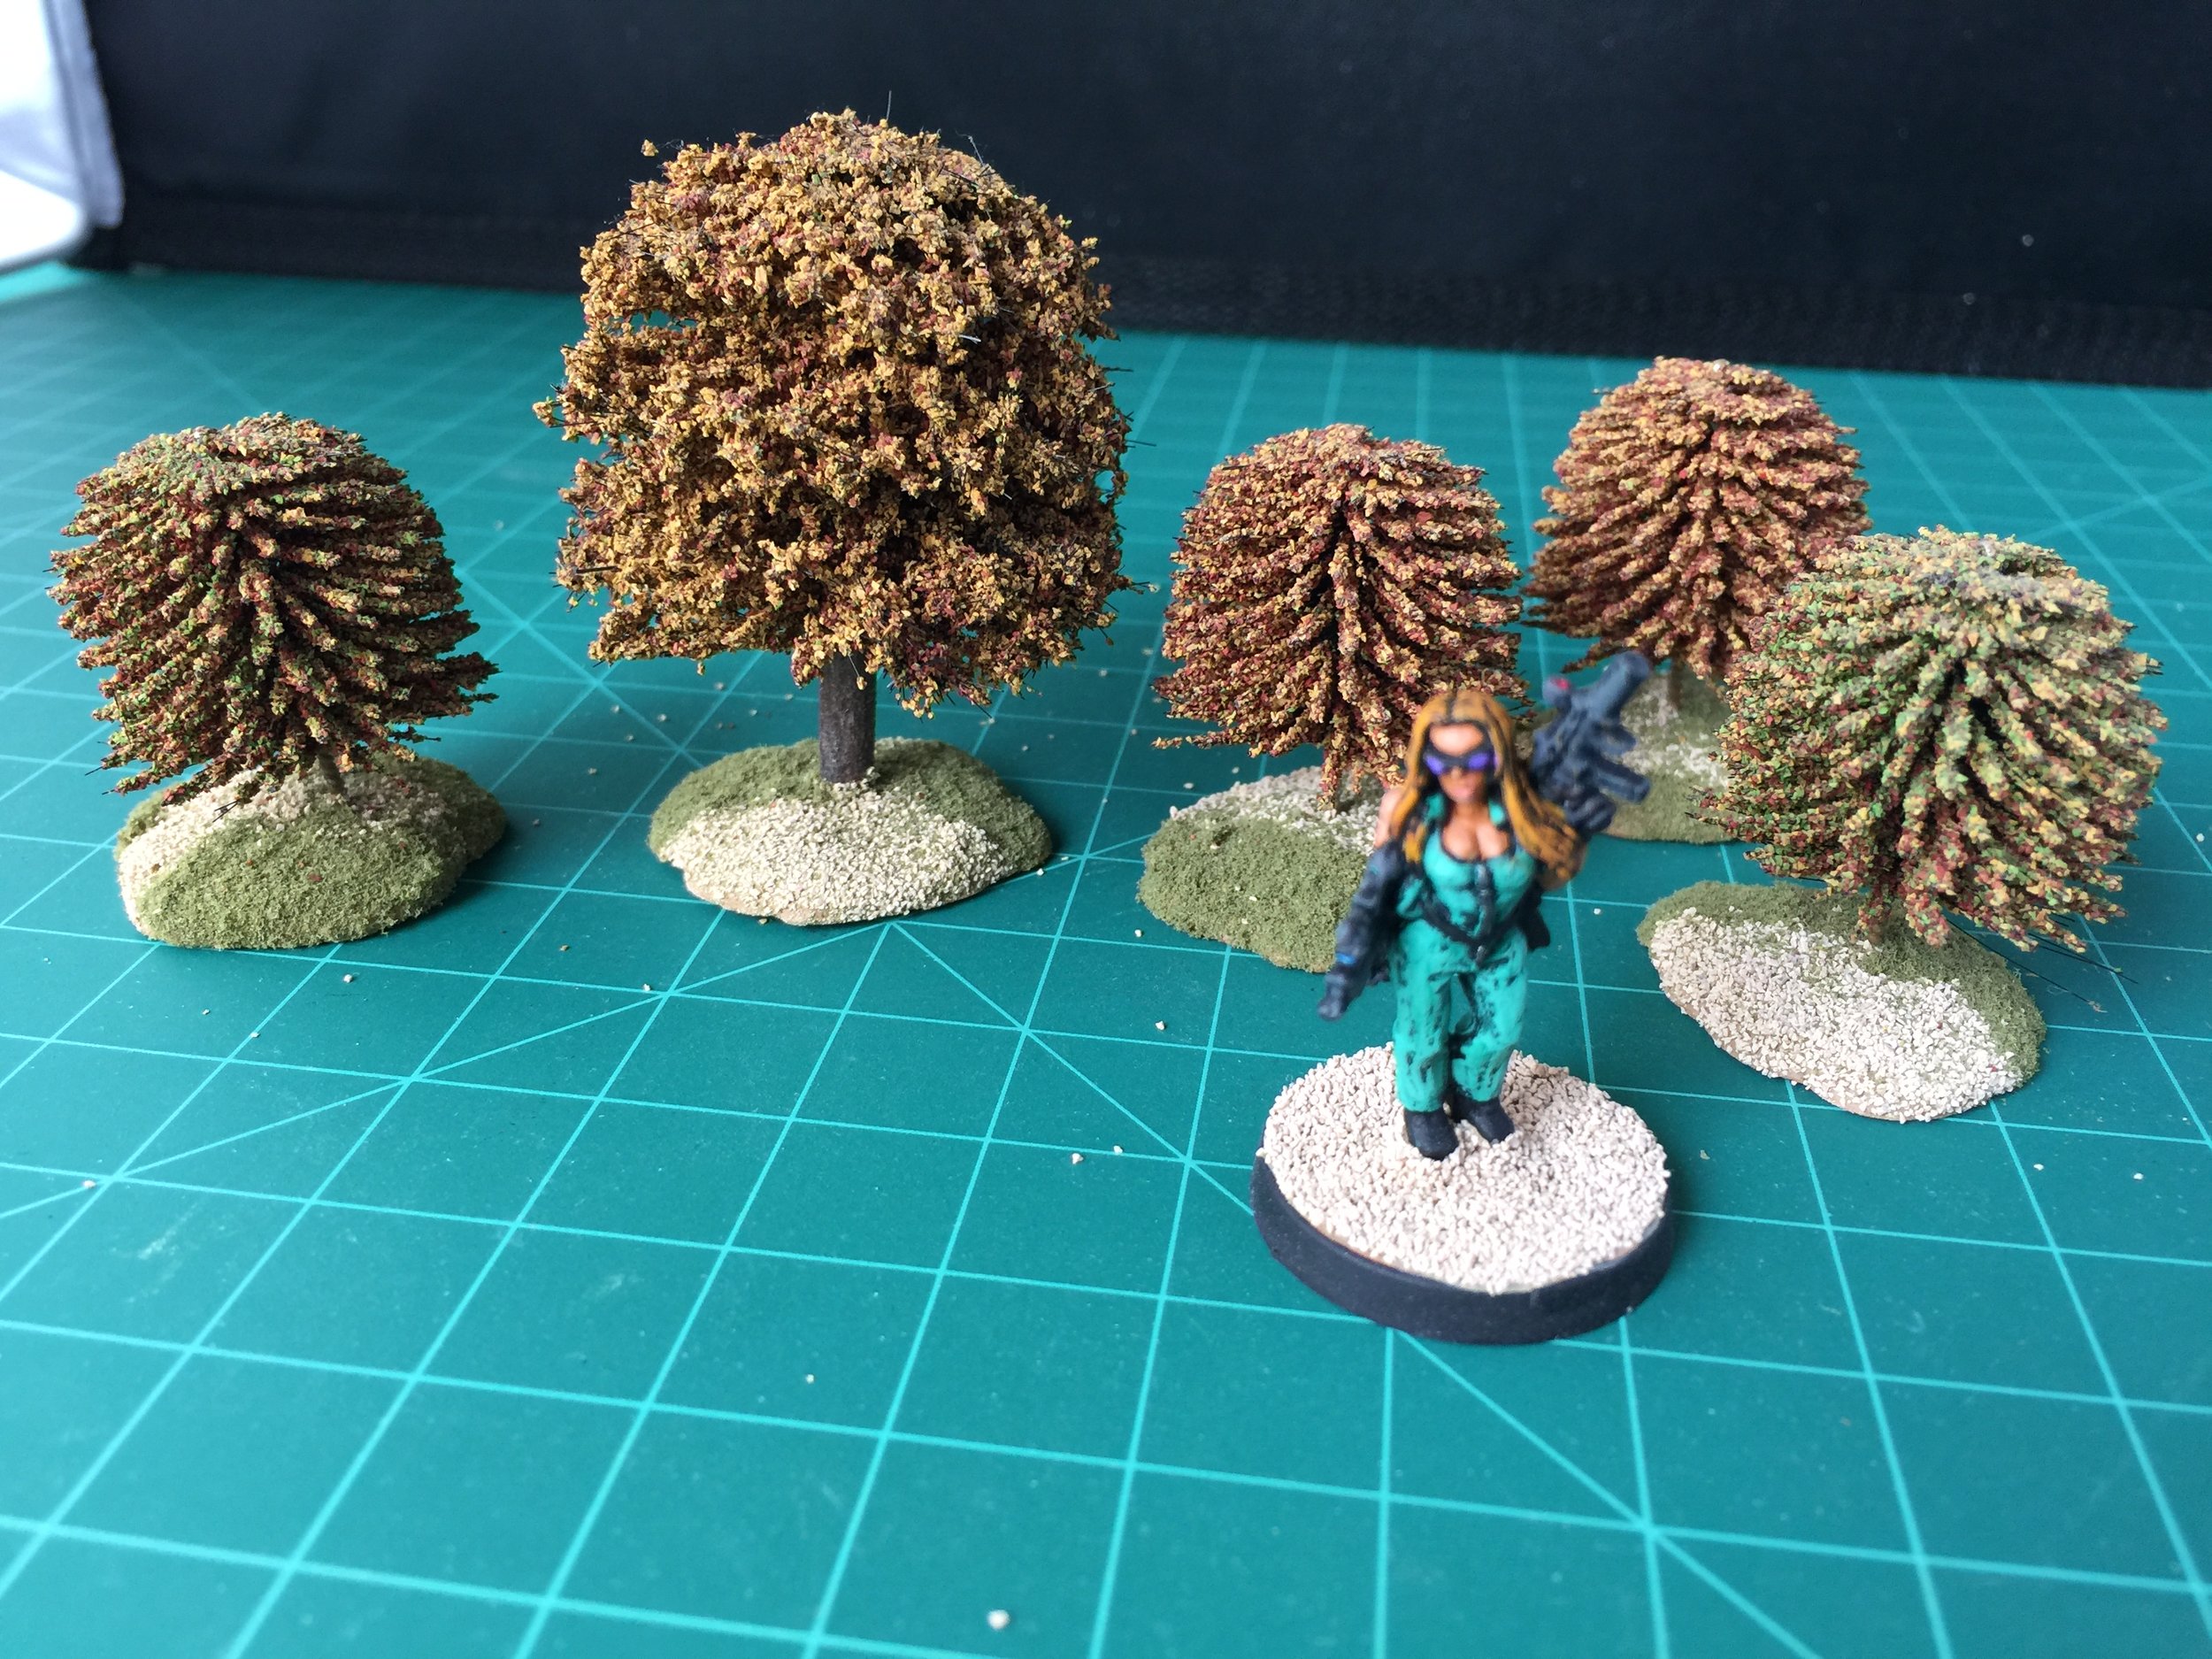
My final work of the week and for this project was to base a few small trees/bushes, and paint a Lemax-style pram. The pram, another swap meet find, is a little large (maybe 30mm rather than 28mm), but I think it will serve as an interesting detail piece abandoned on the streets of the town. It is always a strange moment when I realize that a collection I have been putting together for years and working on for months (in this case seven months) is finished. I still have the decals to put on some signs, but the heavy lifting (painting and building) is done. The new week ahead will see me working at the bench on some things that have nothing to do with my next project (15mm Boxer Rebellion), but at the end of a project I claim the right to do some non-project related things before making my next multi-month commitment… I expect the Boxers to demand all of what remains of 2018.


APRIL 8, 2018
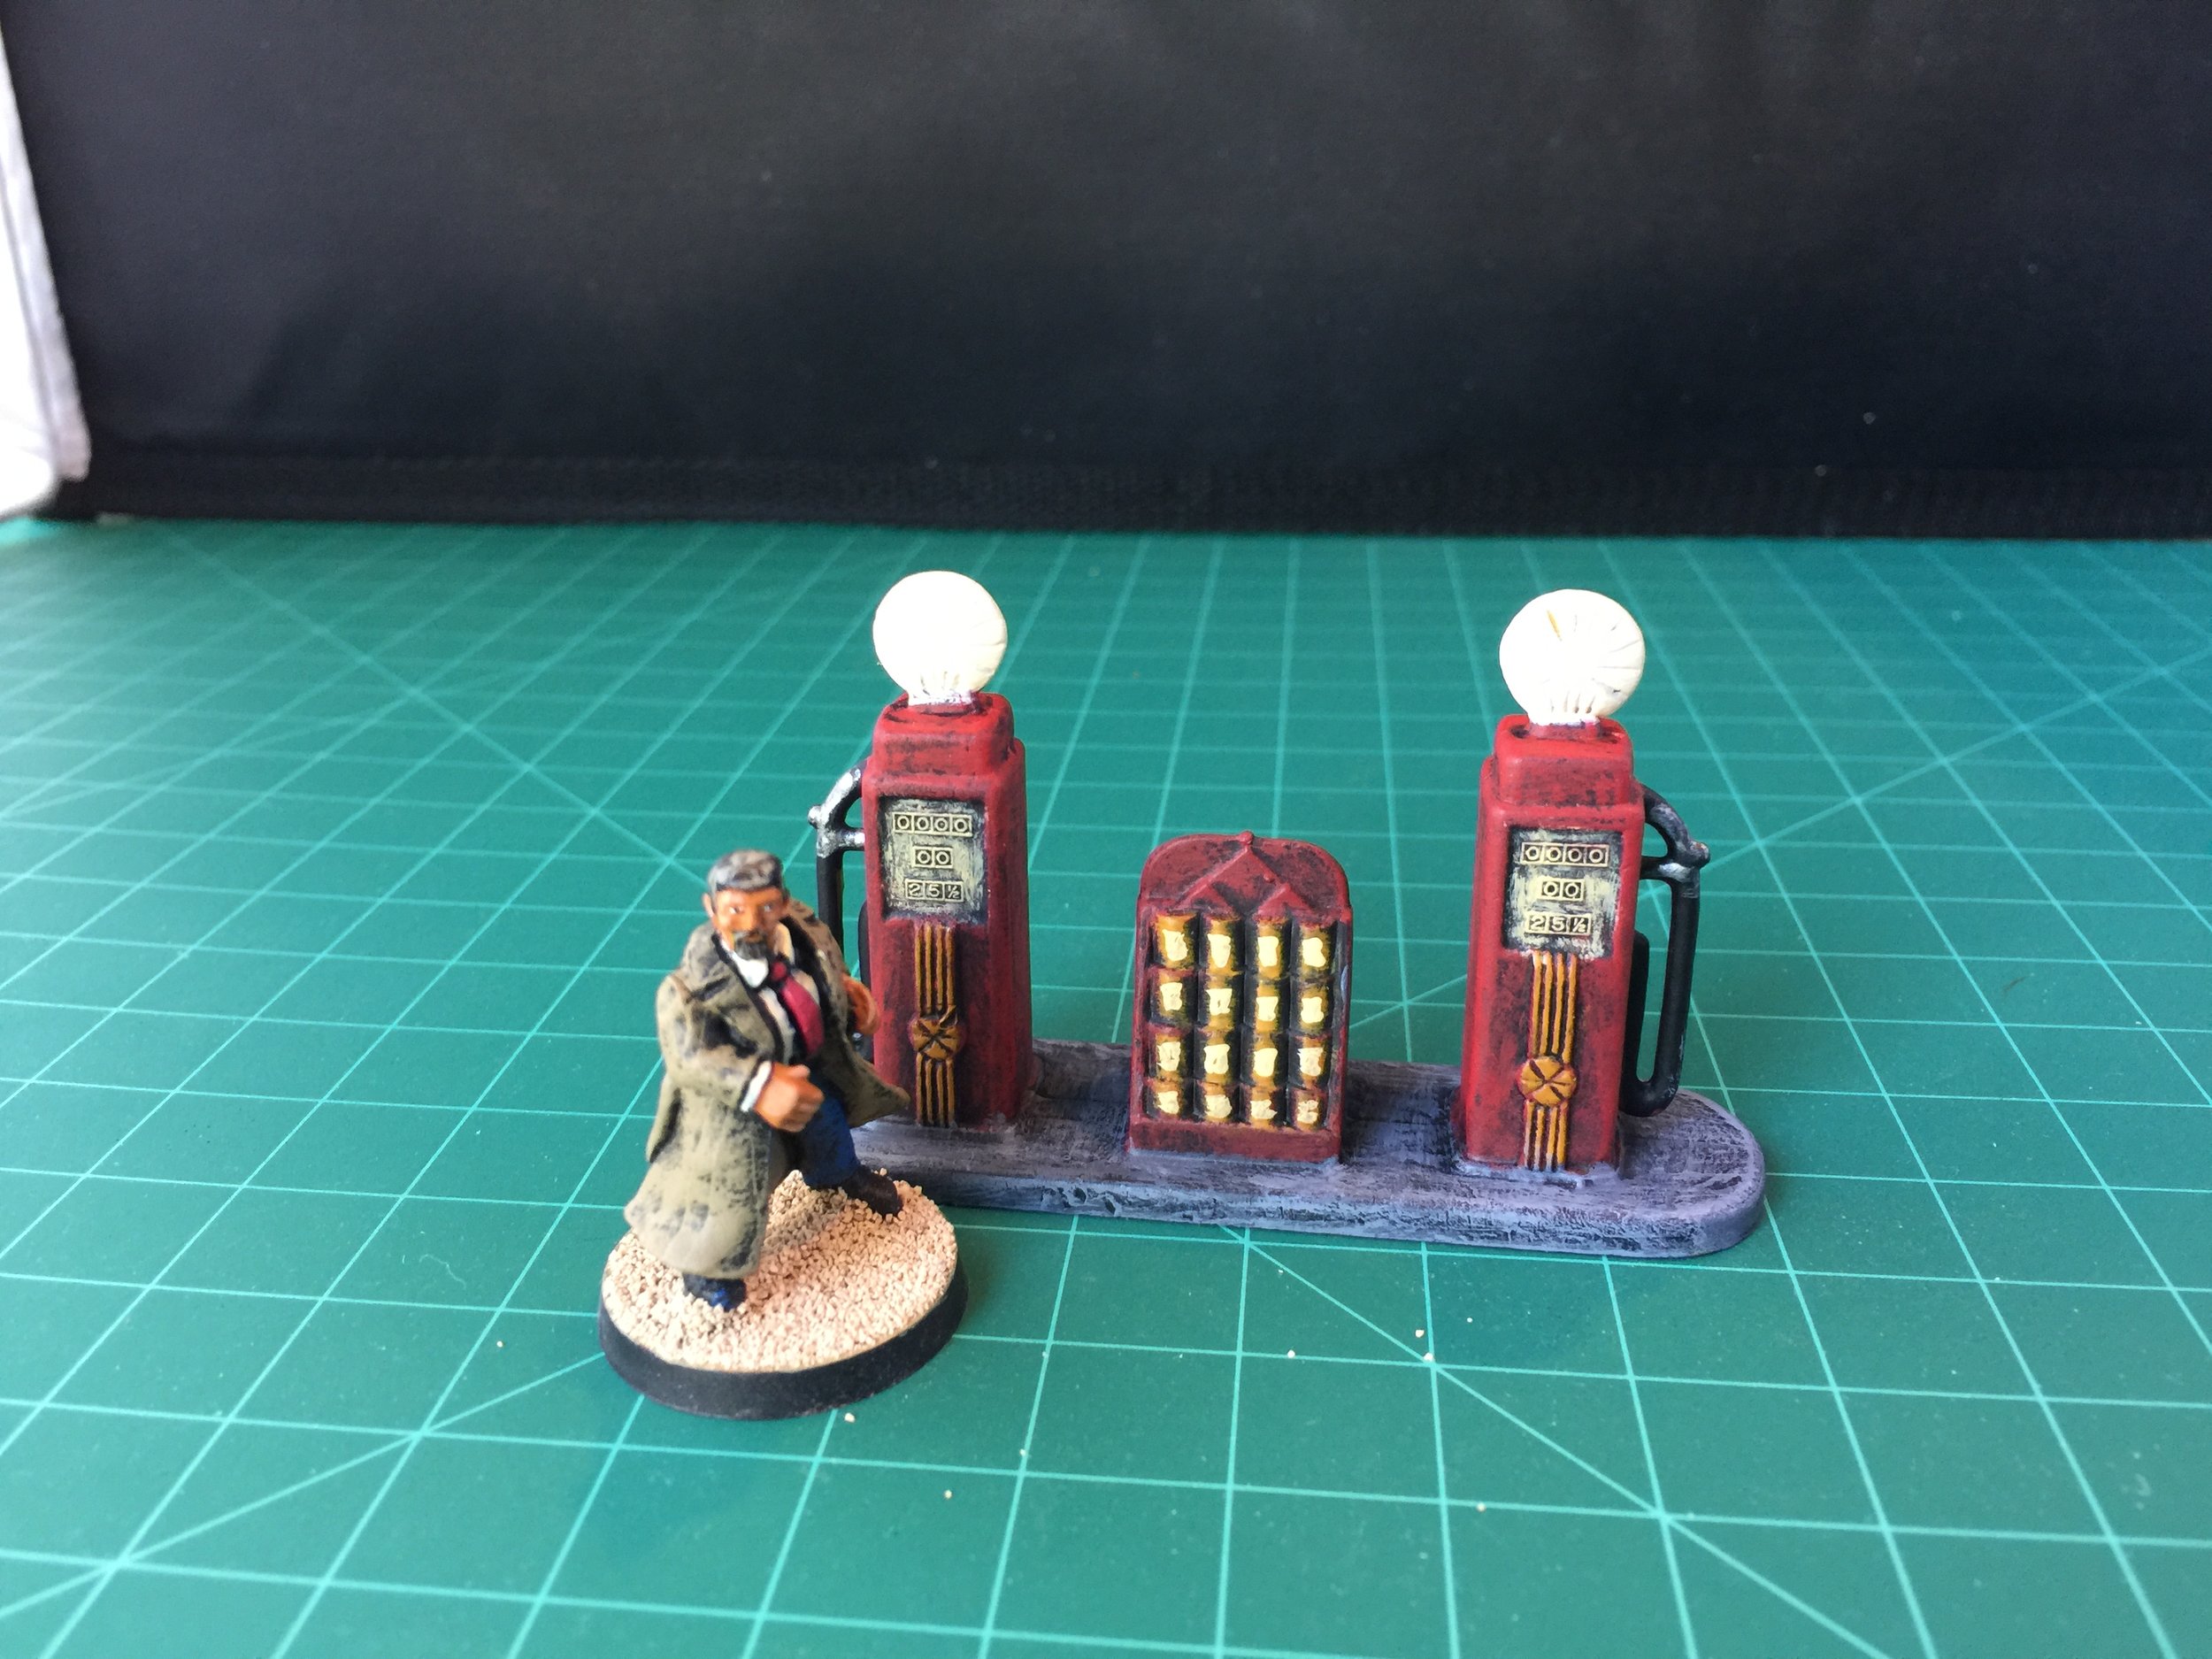
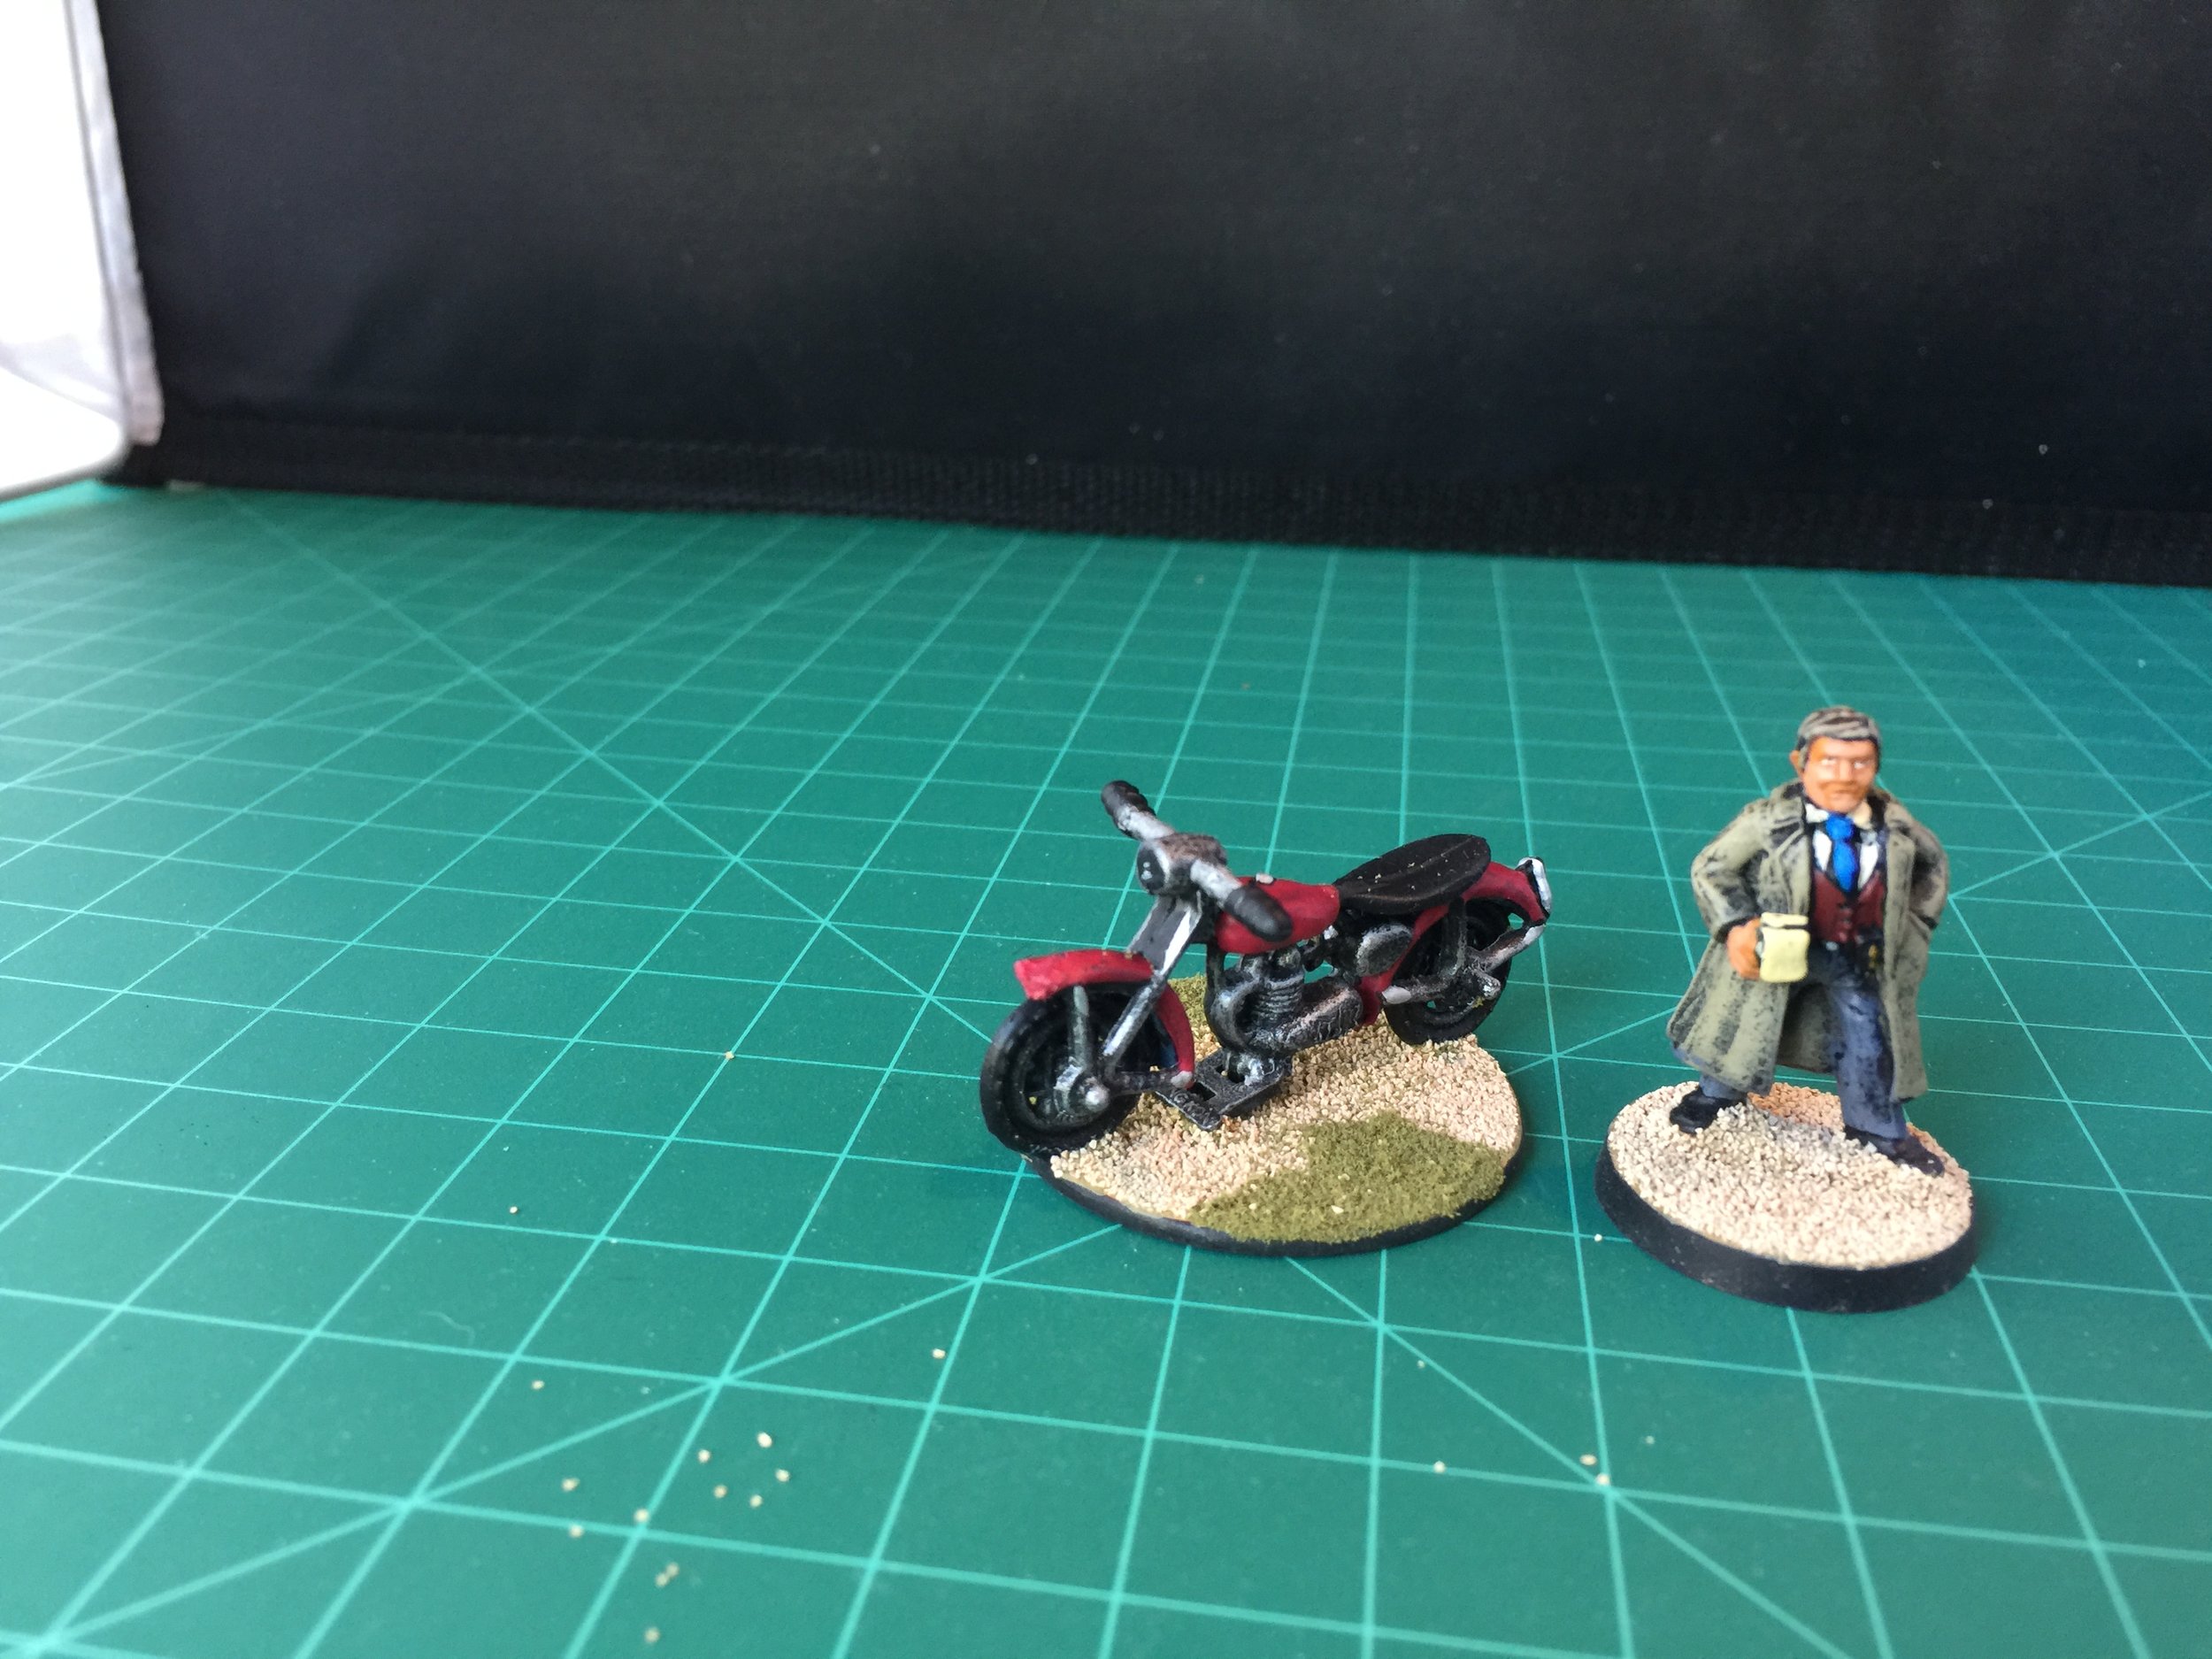
When I began this Weekly Workbench week, I immediately came to the realization that this one was unique. It was unique because my post apoc project is nearing completion. I had all of the figures for the project (between 400 and 450/lost count) painted before I began posting the Weekly Workbench element of my website; the buildings are done; the vehicles are done (almost… 3 bicycles and a motorcycle remain); the trailers are done; the rock formations are done, the cactus are done; the telephone poles are done; the Las Vegas sign is done; the trailer park and junk yard fences and signs are done; most of the small (though all important) detail pieces are done. What remains? I decided to do a quick inventory of what was not yet completed. The results of that inventory are as follows: 3 bicycles (by Eureka), 1 motorcycle (cast-off toys found at the swap meet), a soda machine (probably by Lemax), a gas pump island (by Plasticville), the ice cream parlor interior (scratch built but with furnishing found at the swap meet), a restroom interior (scratch built with furnishing/toilets, urinals, and sinks by Mega Minis), streets and sidewalks.
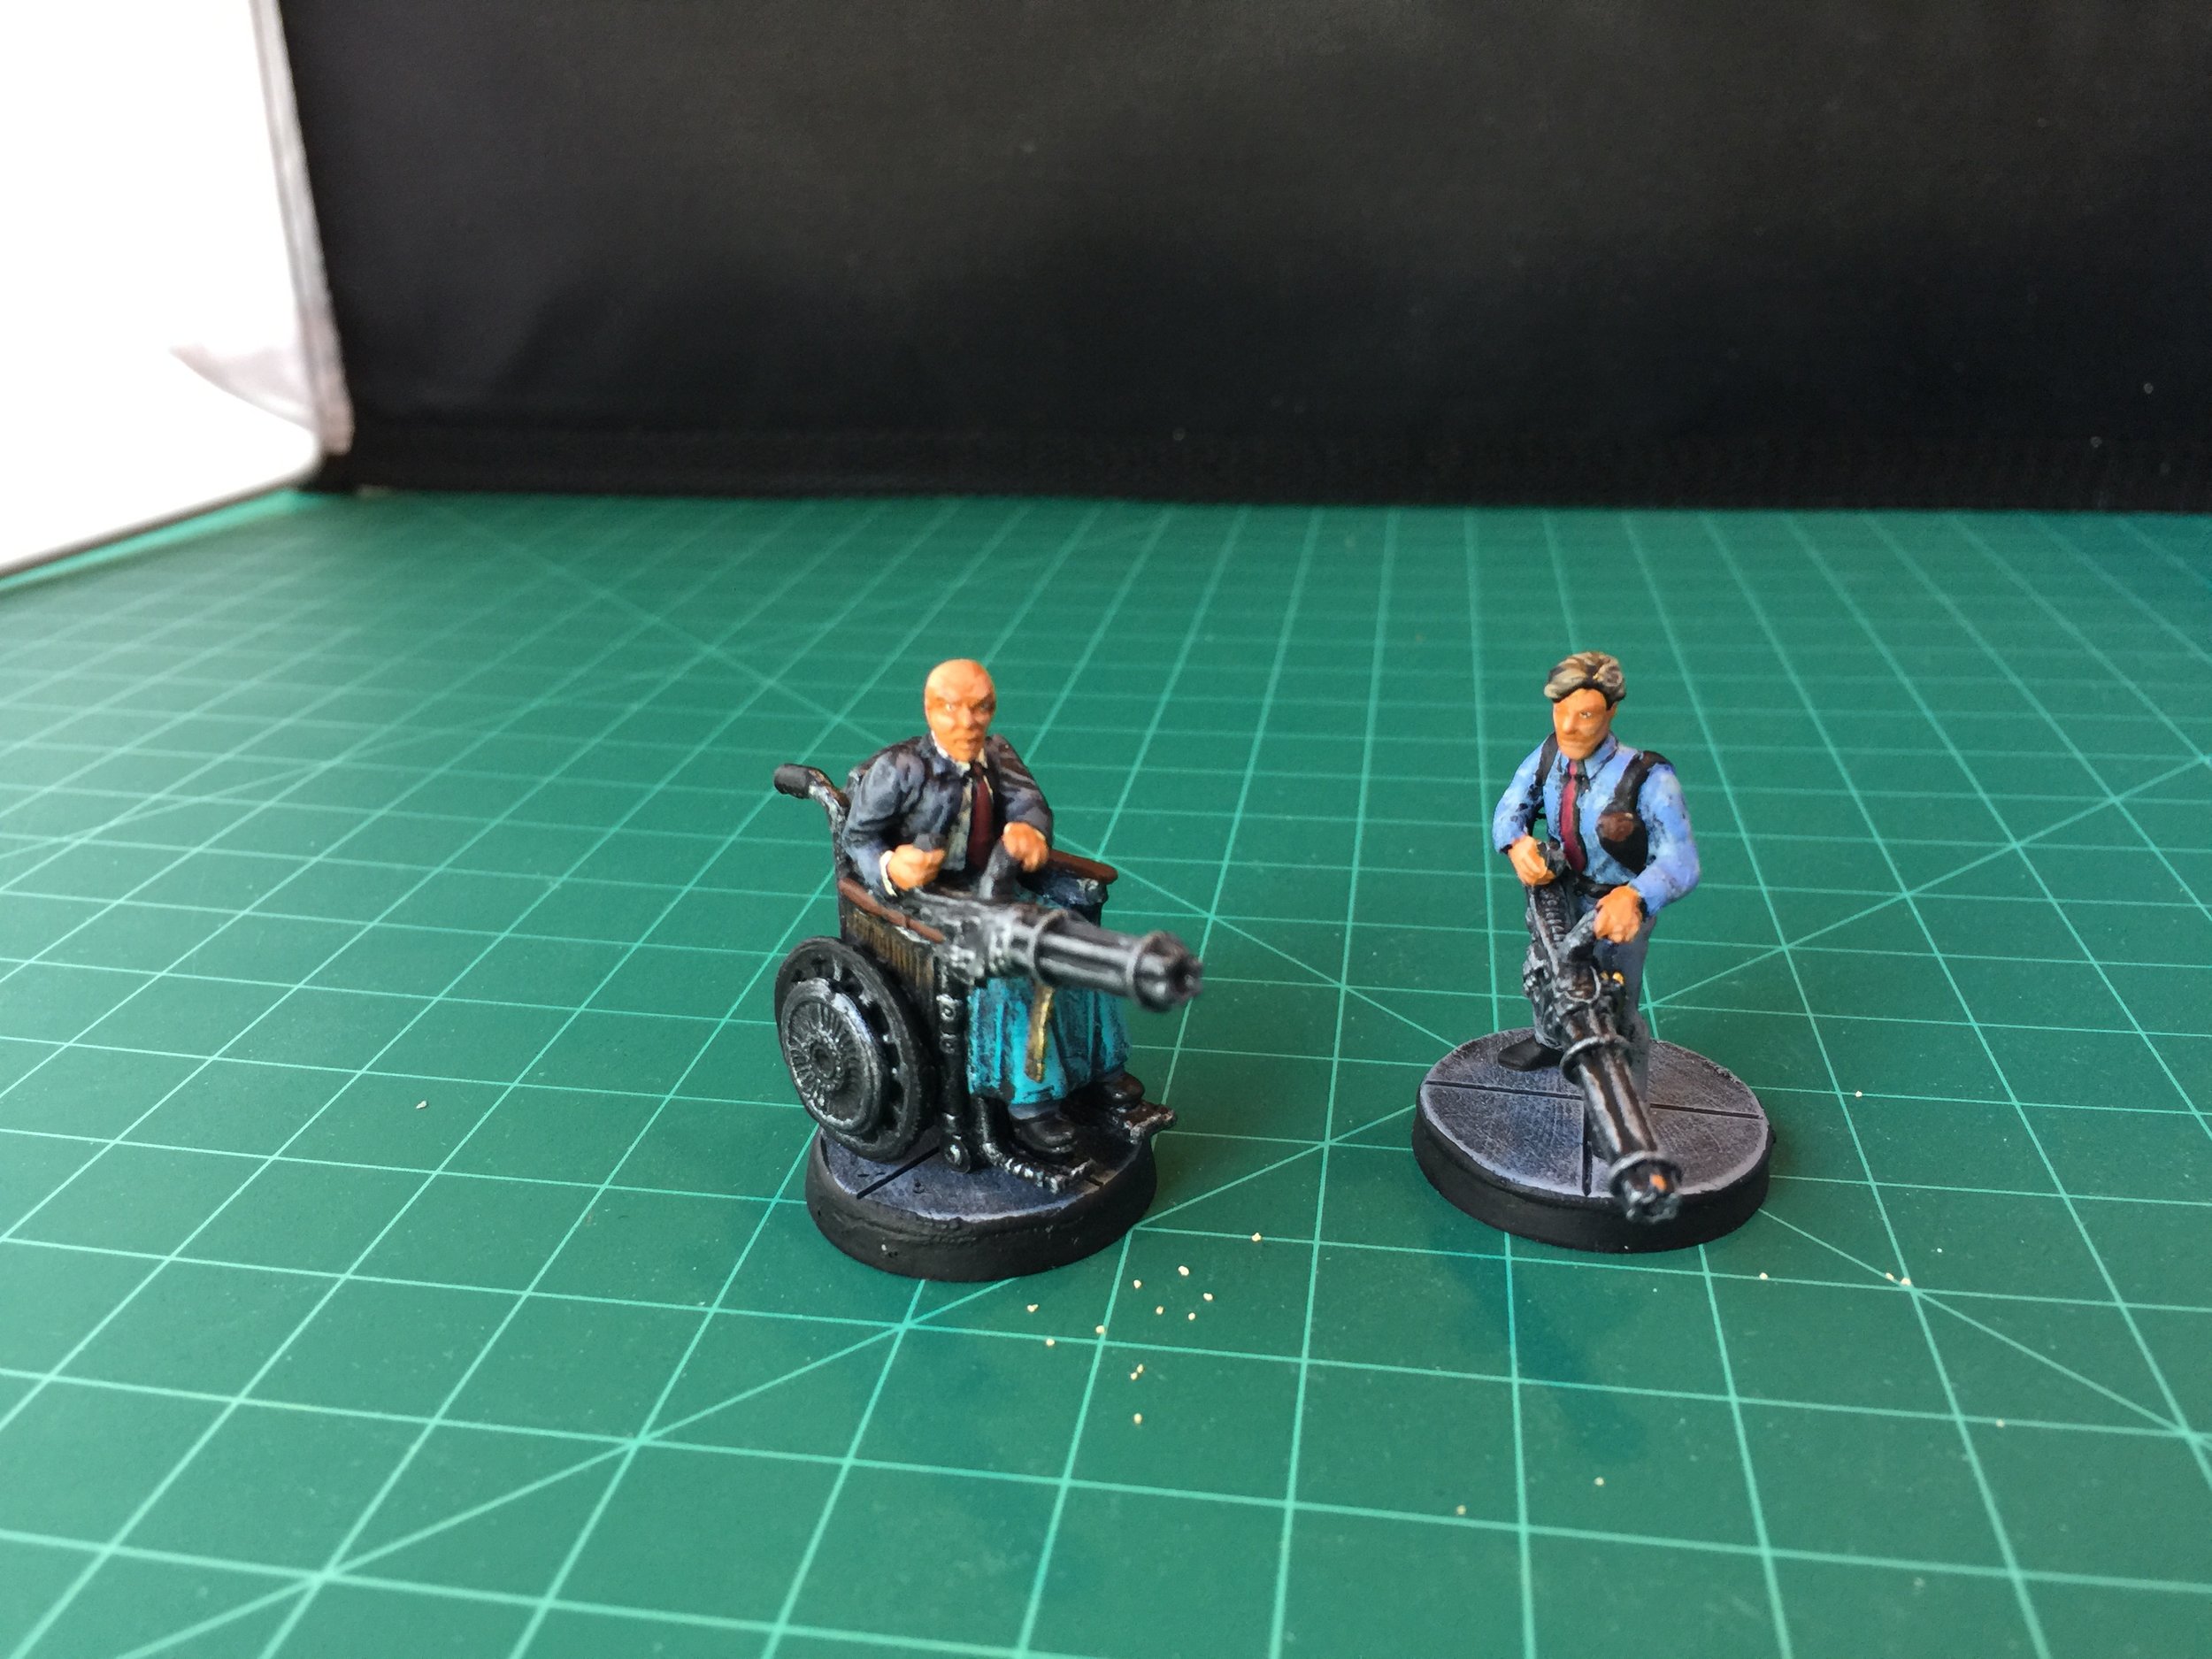
The first workbench task was the soda machine. I confronted two problems with it: first it was too short and second I needed to paint it without destroying the two soda signs on the machine. I raised the height of the machine using Evergreen Plastic and some Squadron green putty. Fortunately, the Vallejo Flat Red was a good match for the original color of the machine. I masked off the machine’s window and pay areas, painted them black and then dry brushed them chrome. It really turned out to be pretty easy. I next decided to paint the Plasticville gas pump island. I’ve had it for years (found it at the swap meet), and it really was just a simple paint job. My previous Weekly Workbench posting included two modified but not repainted Heroclix figures weaponized with Gatling guns. I decided to give them sidewalk bases. With that decision made I gave both new paint jobs… easy. The three bicycles by Eureka required some assembly… the pedals and handlebars. I painted one red, one green and one blue. I’ll put one of them in the trailer park leaning against a table, chair or trailer. I plan to have another on its side on the street or sidewalk, and the third will probably be leaning against the wall of one of the town’s buildings. I found a plastic motorcycle at the swap meet several years ago. It needed a little work (new hand grips) and paint. I think I’ll put it near the office in my junkyard or maybe the trailer park.
Once those pieces which are part of the post apoc collection were done, I decided to paint the Heroclix figures that I modified with Gatling guns; I decided to mount them on sidewalk bases rather than desert sand so they probably won’t be used with this collection since I made an initial decision to base these post apoc figures on bases covered with desert sand. I also put in some work on three signs: two announce that drivers are entering the town of Sleepy Eye and one roadside sign announcing that drivers are 125 miles from Las Vegas. The signs are made from Evergreen Plastic set in bases of Milliput. To provide a little additional interest value, I attached leftover pieces of cactus from Pegasus, and a broken wagon wheel from Wyrd. I’m writing this on Tuesday. Tomorrow my wife and I will be spending the day with our granddaughter. On Thursday or Friday I will be doing a practice layout of my town in preparation for work on roads/streets and sidewalks. Given that and the limited amount of workbench work that needs to be done on my post apoc project my time at the workbench will probably contain less than usual this week.
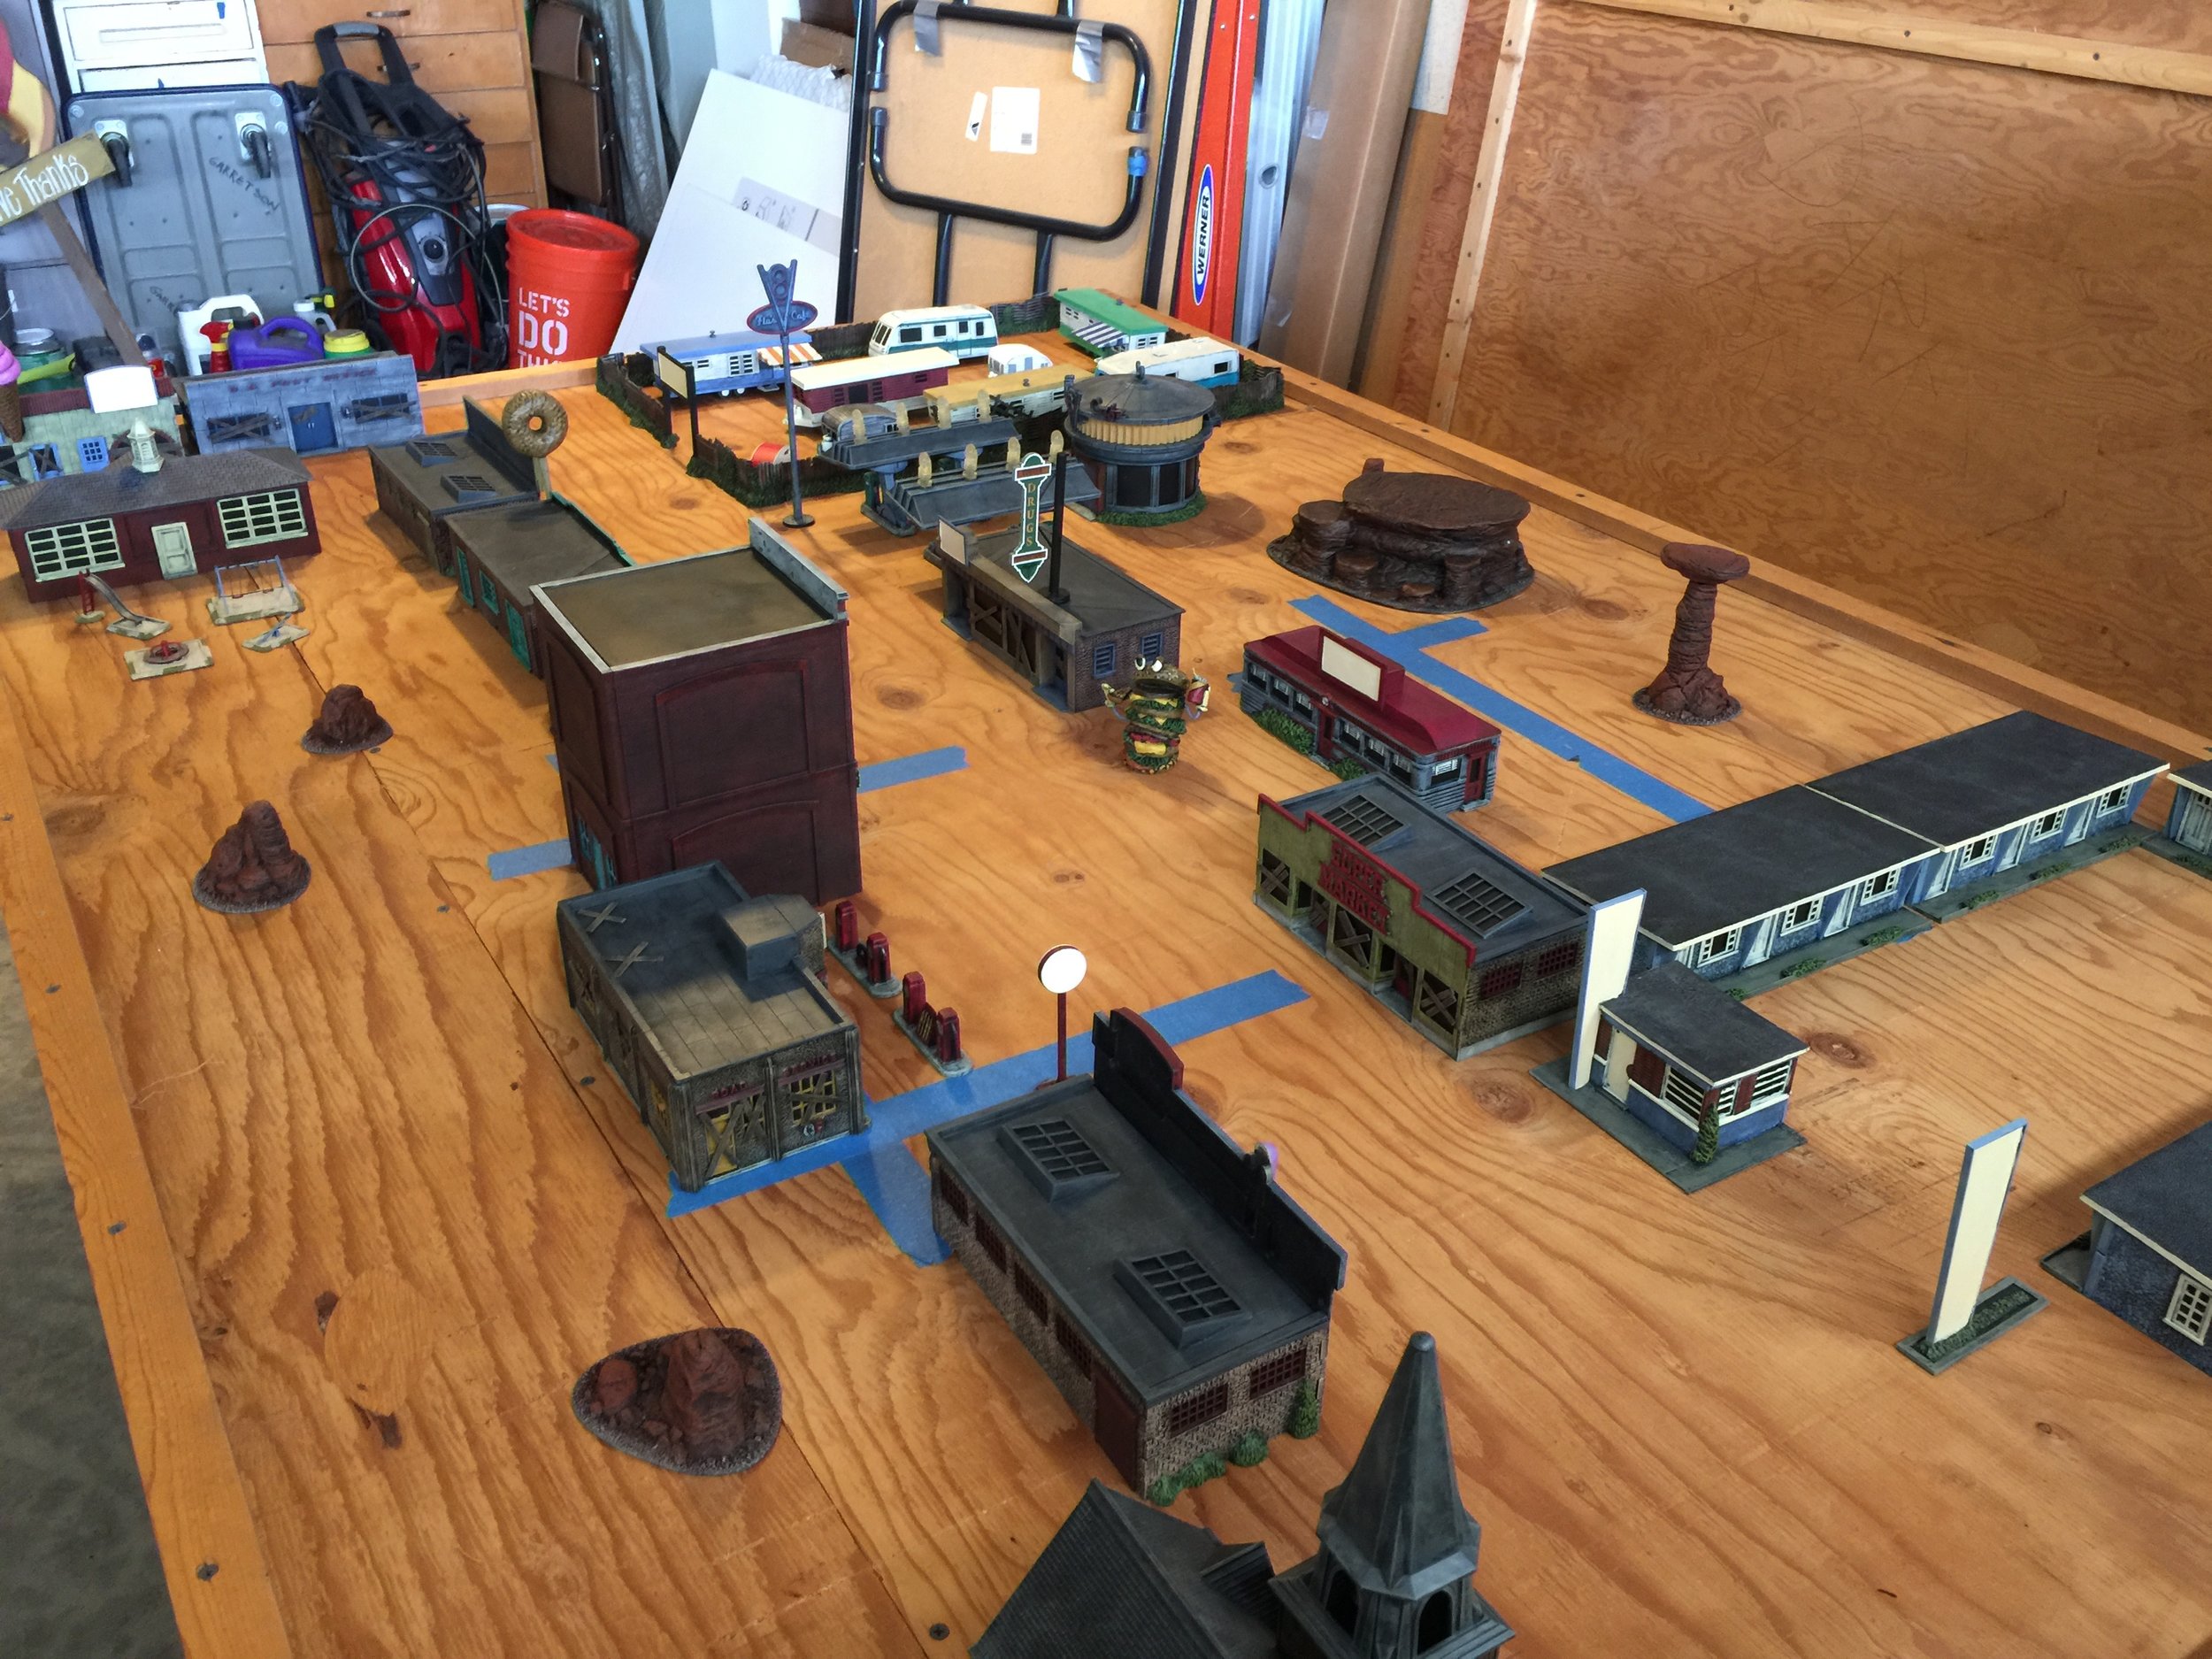
As this workbench week came to an end (we had a great day with our granddaughter) I came upon another pack of Foundry Street Violence figures (The Lovemore Detective Agency), and decided to paint them up. I also put the finishing touches on the three signs I spoke of earlier. I closed the workbench out this week off the bench and on the layout table. I learned some lessons about the layout process years ago. The very first collection we ever photographed was my 15mm Samurai castle siege. I set that up for the first time the morning we took the pictures and as a result there were a number of problems with the layout that could have been resolved if I had done at least one practice set-up a week or so before taking the pictures. Therefore, I now always do a basic set-up (mostly structural rather than figures) a couple weeks in advance. The first thing I learned doing this initial practice set-up for the post apoc collection was how well the buildings will actually fit on the table. The second thing learned was the precise placement of the different structures, and the third was the space (width) I have available for the street and sidewalk that pass through the town. Keep in mind when looking at the pictures of the table layout that at this stage there is no ground cover, no streets or sidewalks, no background mural, no accessory details, no figures, no vehicles. All you are seeing is the mapping out of the town on a plywood surface. It’s always an important learning experience, and an important part of my process.


APRIL 1, 2018
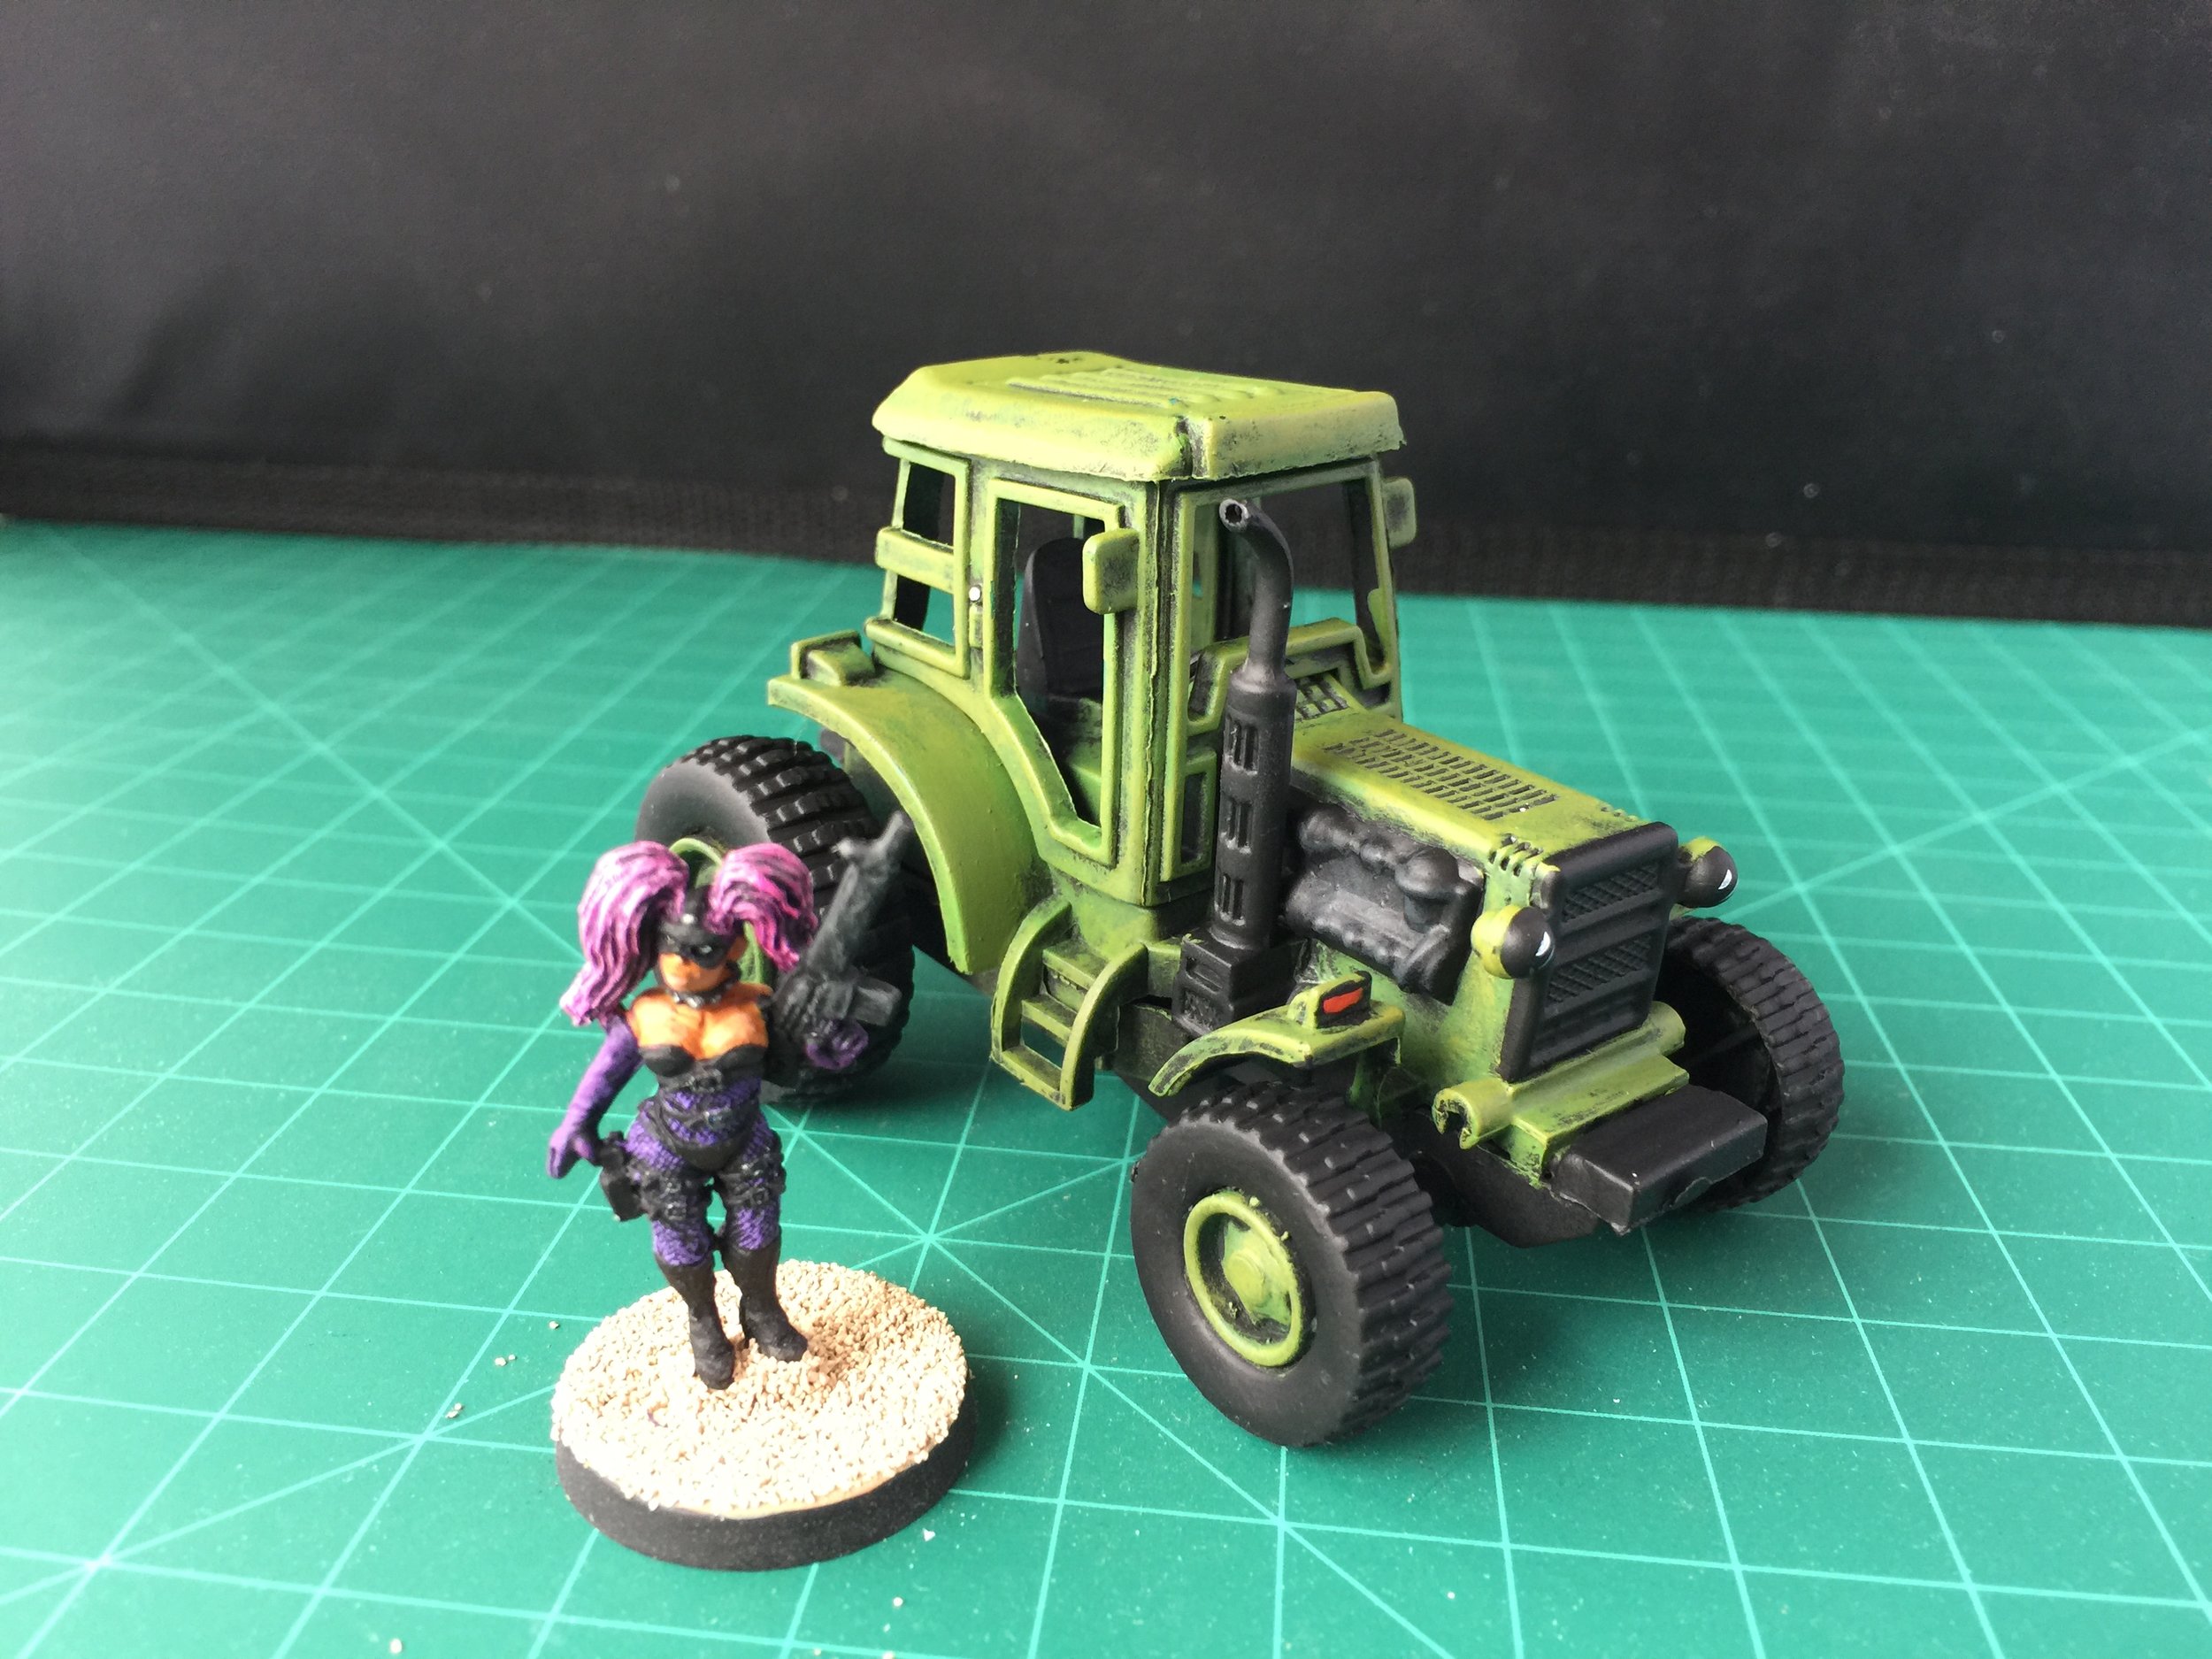
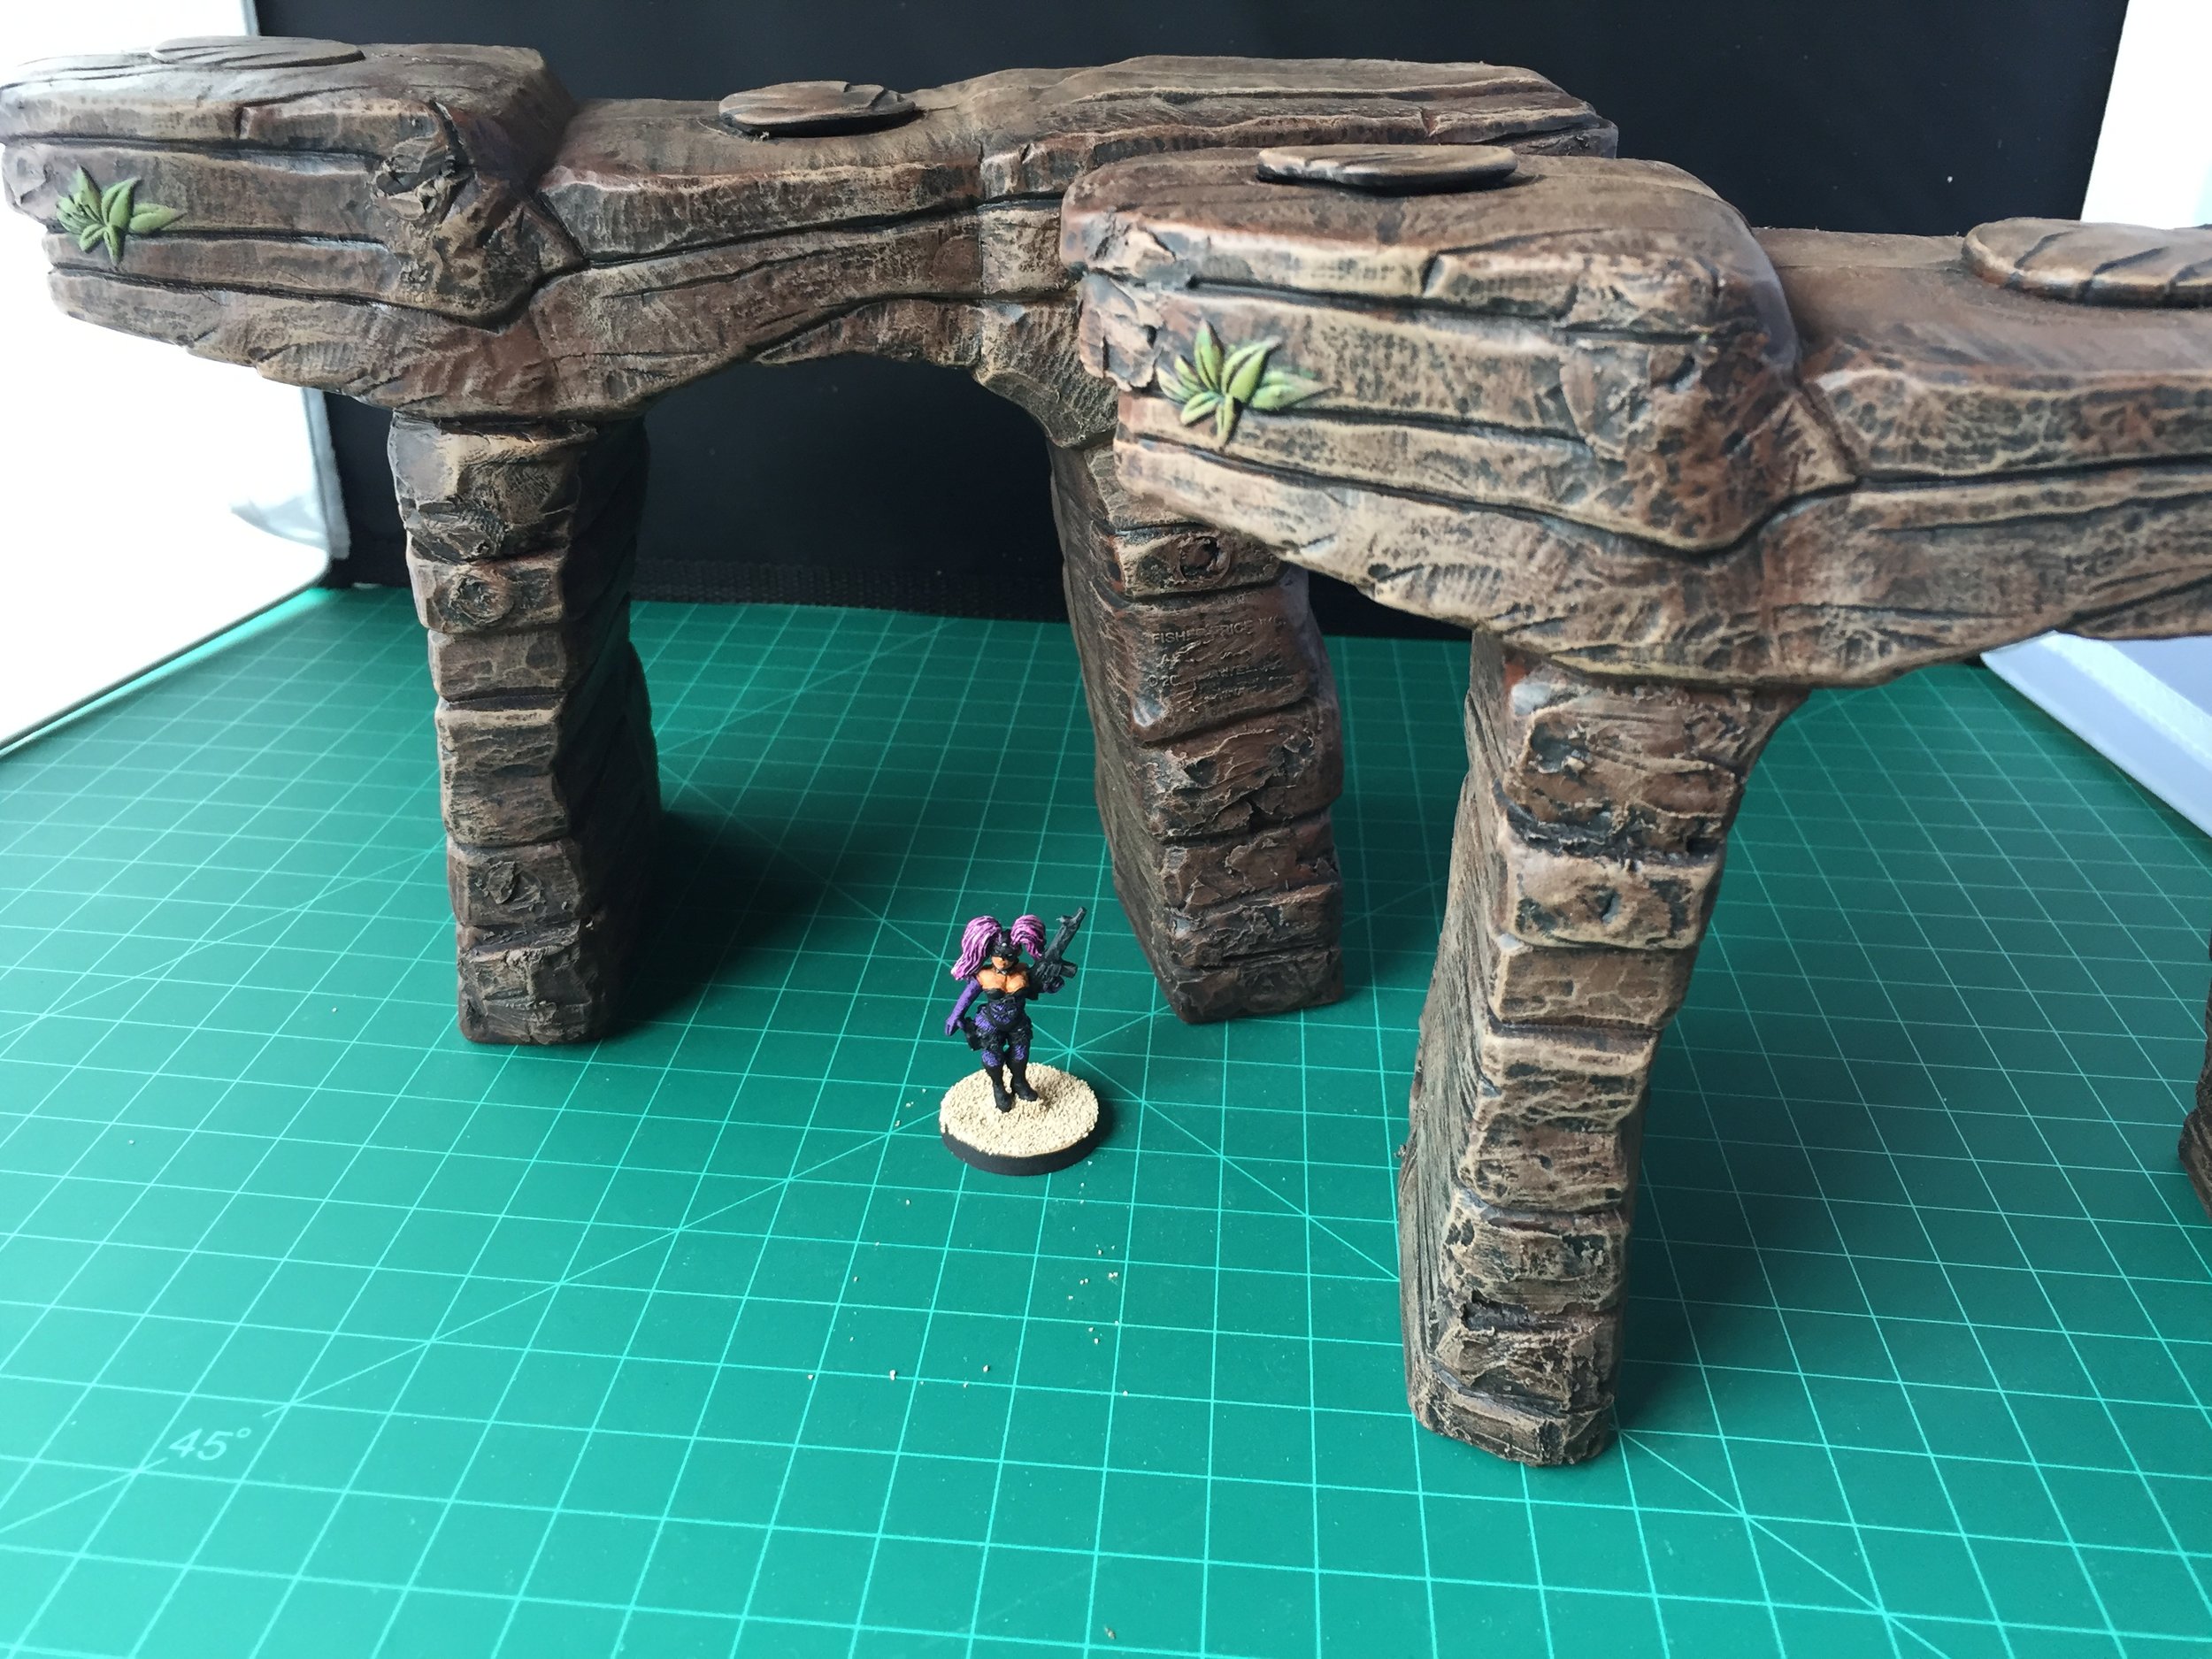
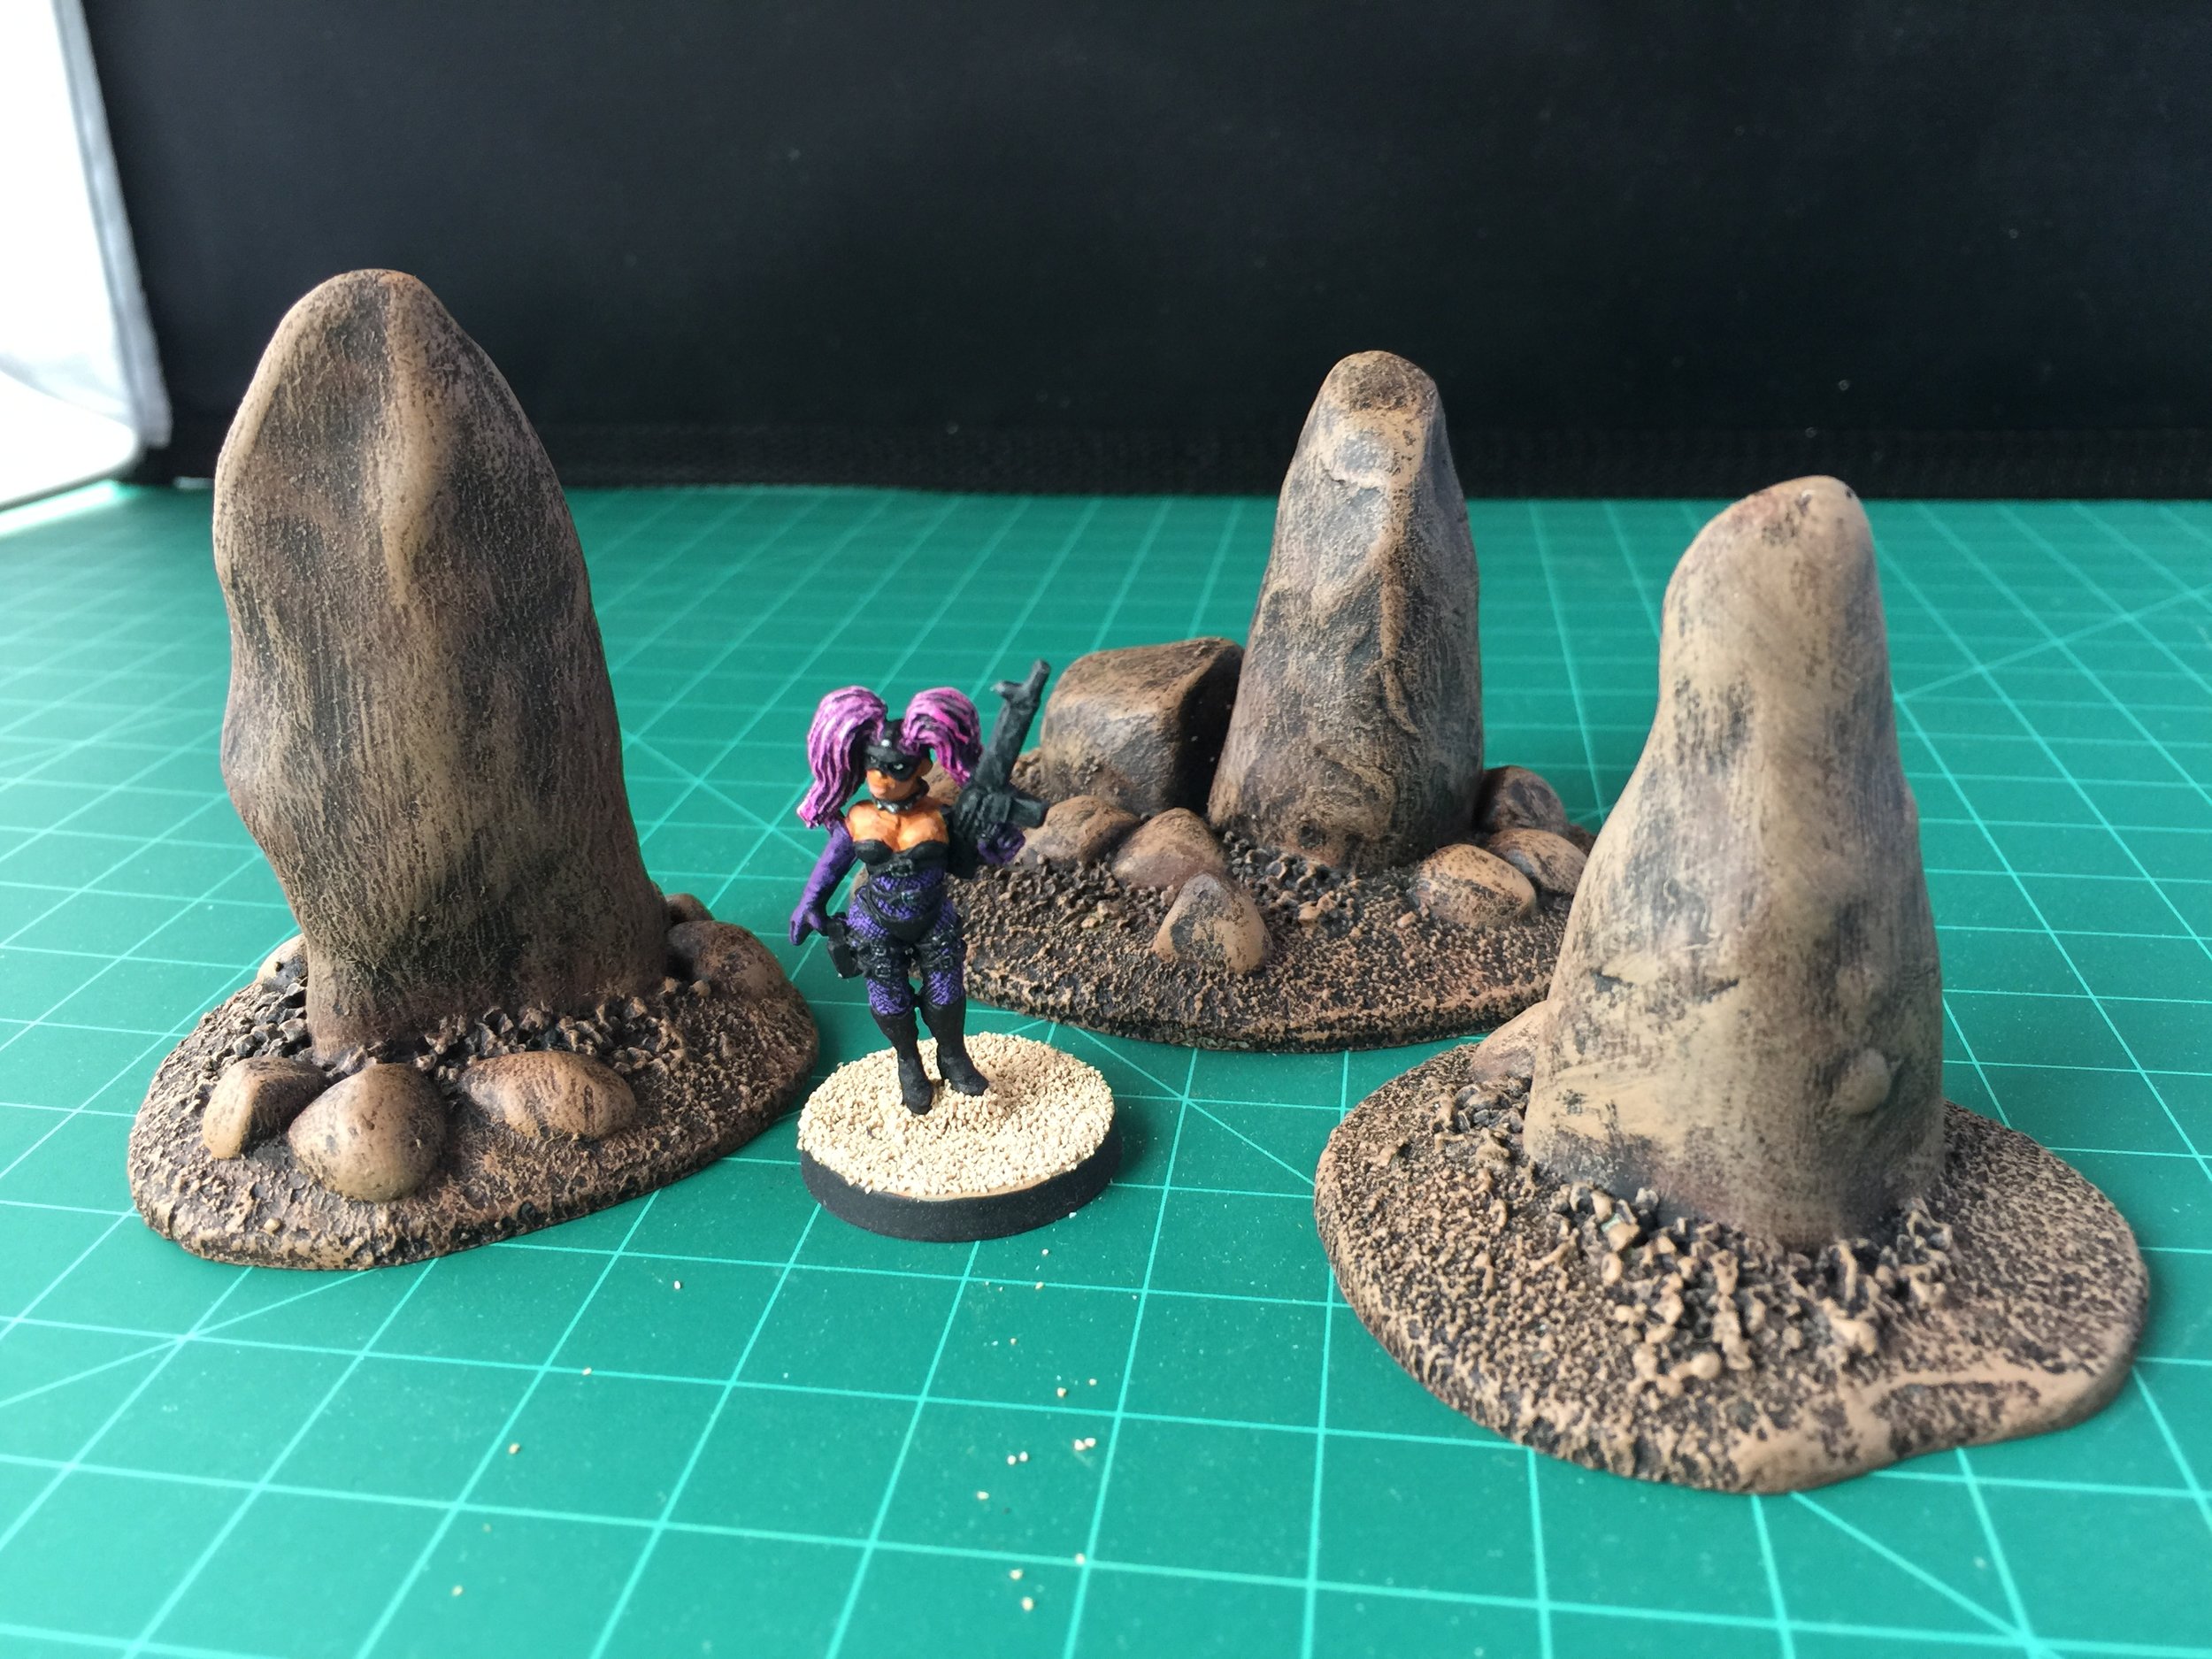
Much of this past week my workbench efforts continued with Pegasus cactus. Like last week, I did a box of Pegasus cactus #1 and #2. Since the cactus I painted this past week are the same as those painted the previous week, I’m making an executive decision to not bother taking another set of pictures… just look at the previous weekly workbench pictures twice. I know have nearly 160 completed cactus. Keep in mind that my post apoc layout will be done on two 5 ft. x 7 ft. tables. On Sunday I bought a cast-off toy tractor at the swap meet… for a dollar. It doesn’t really match the period look of most of the other vehicles in my post apoc collection, but I really like it, and it painted up great. Monday morning I was organizing some things in my storage shed, and I came across two plastic rock outcroppings purchased several years ago. They were originally part of a toy marketed with the release of the first Cars Movie. Over the years I’ve bought two of them for a dollar/maybe fifty cents each because I could see that they would paint up great as part of the desert terrain I was planning for my post apoc collection. I’m really glad that I rediscovered them because they are beautiful pieces and painted up really well. More rocks followed the two from the Cars Movie. Two of them are large arches that are also cast-off toys purchased at the swap meet for about a dollar each and repainted. The last three rock pieces I will probably do for this project are by Snapdragon and were picked up for $2.50 each at Brookhurst Hobbies a couple months ago when they were clearing out the last of their Snapdragon stock.
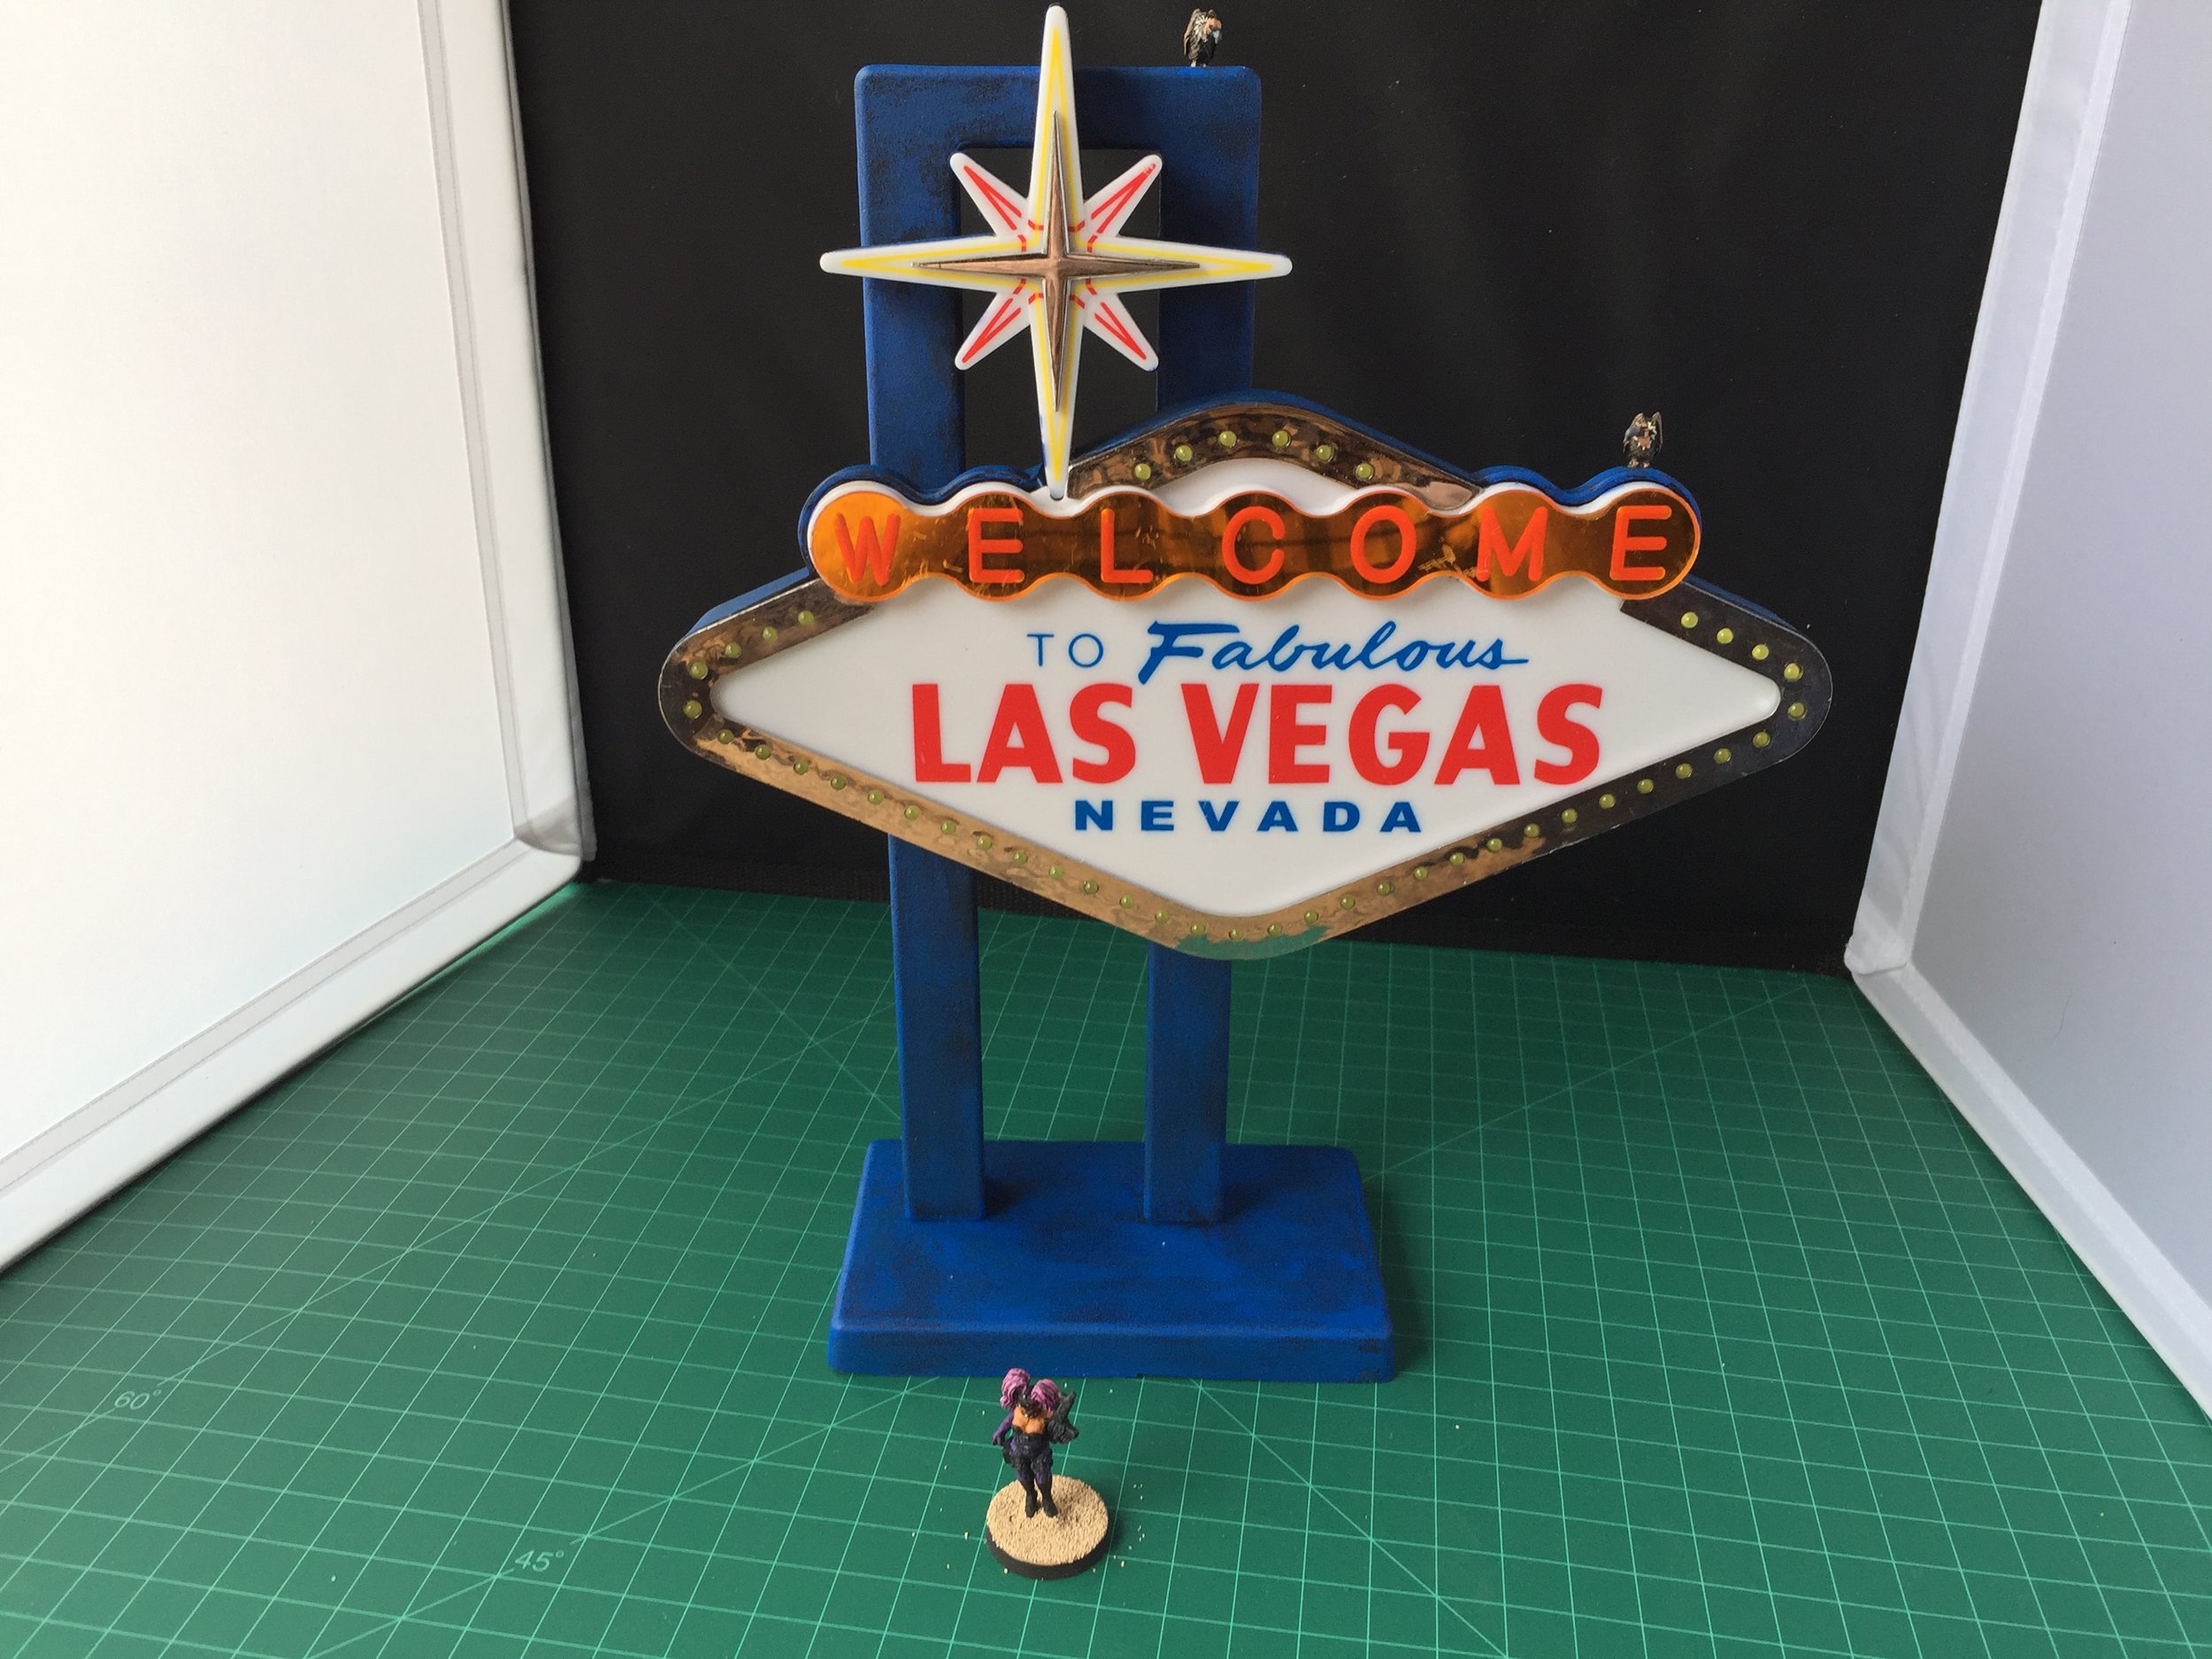
I next revisited my Dimestore Dreams fire chief car. It got a full paint job rather than the partial one that I initially did. It now has a much better look… in my opinion. With those done I returned to the Pegasus cactus and began the repurposing and painting of my Welcome to Las Vegas sign (another swap meet dollar purchase). Without a doubt the sign makes no realistic sense out in the desert a hundred or more miles from Las Vegas and yet we’re talking about a collection that is full of zombies and big bugs so why not have a big Welcome to Las Vegas sign… it’s fun, and I added a couple of vultures.
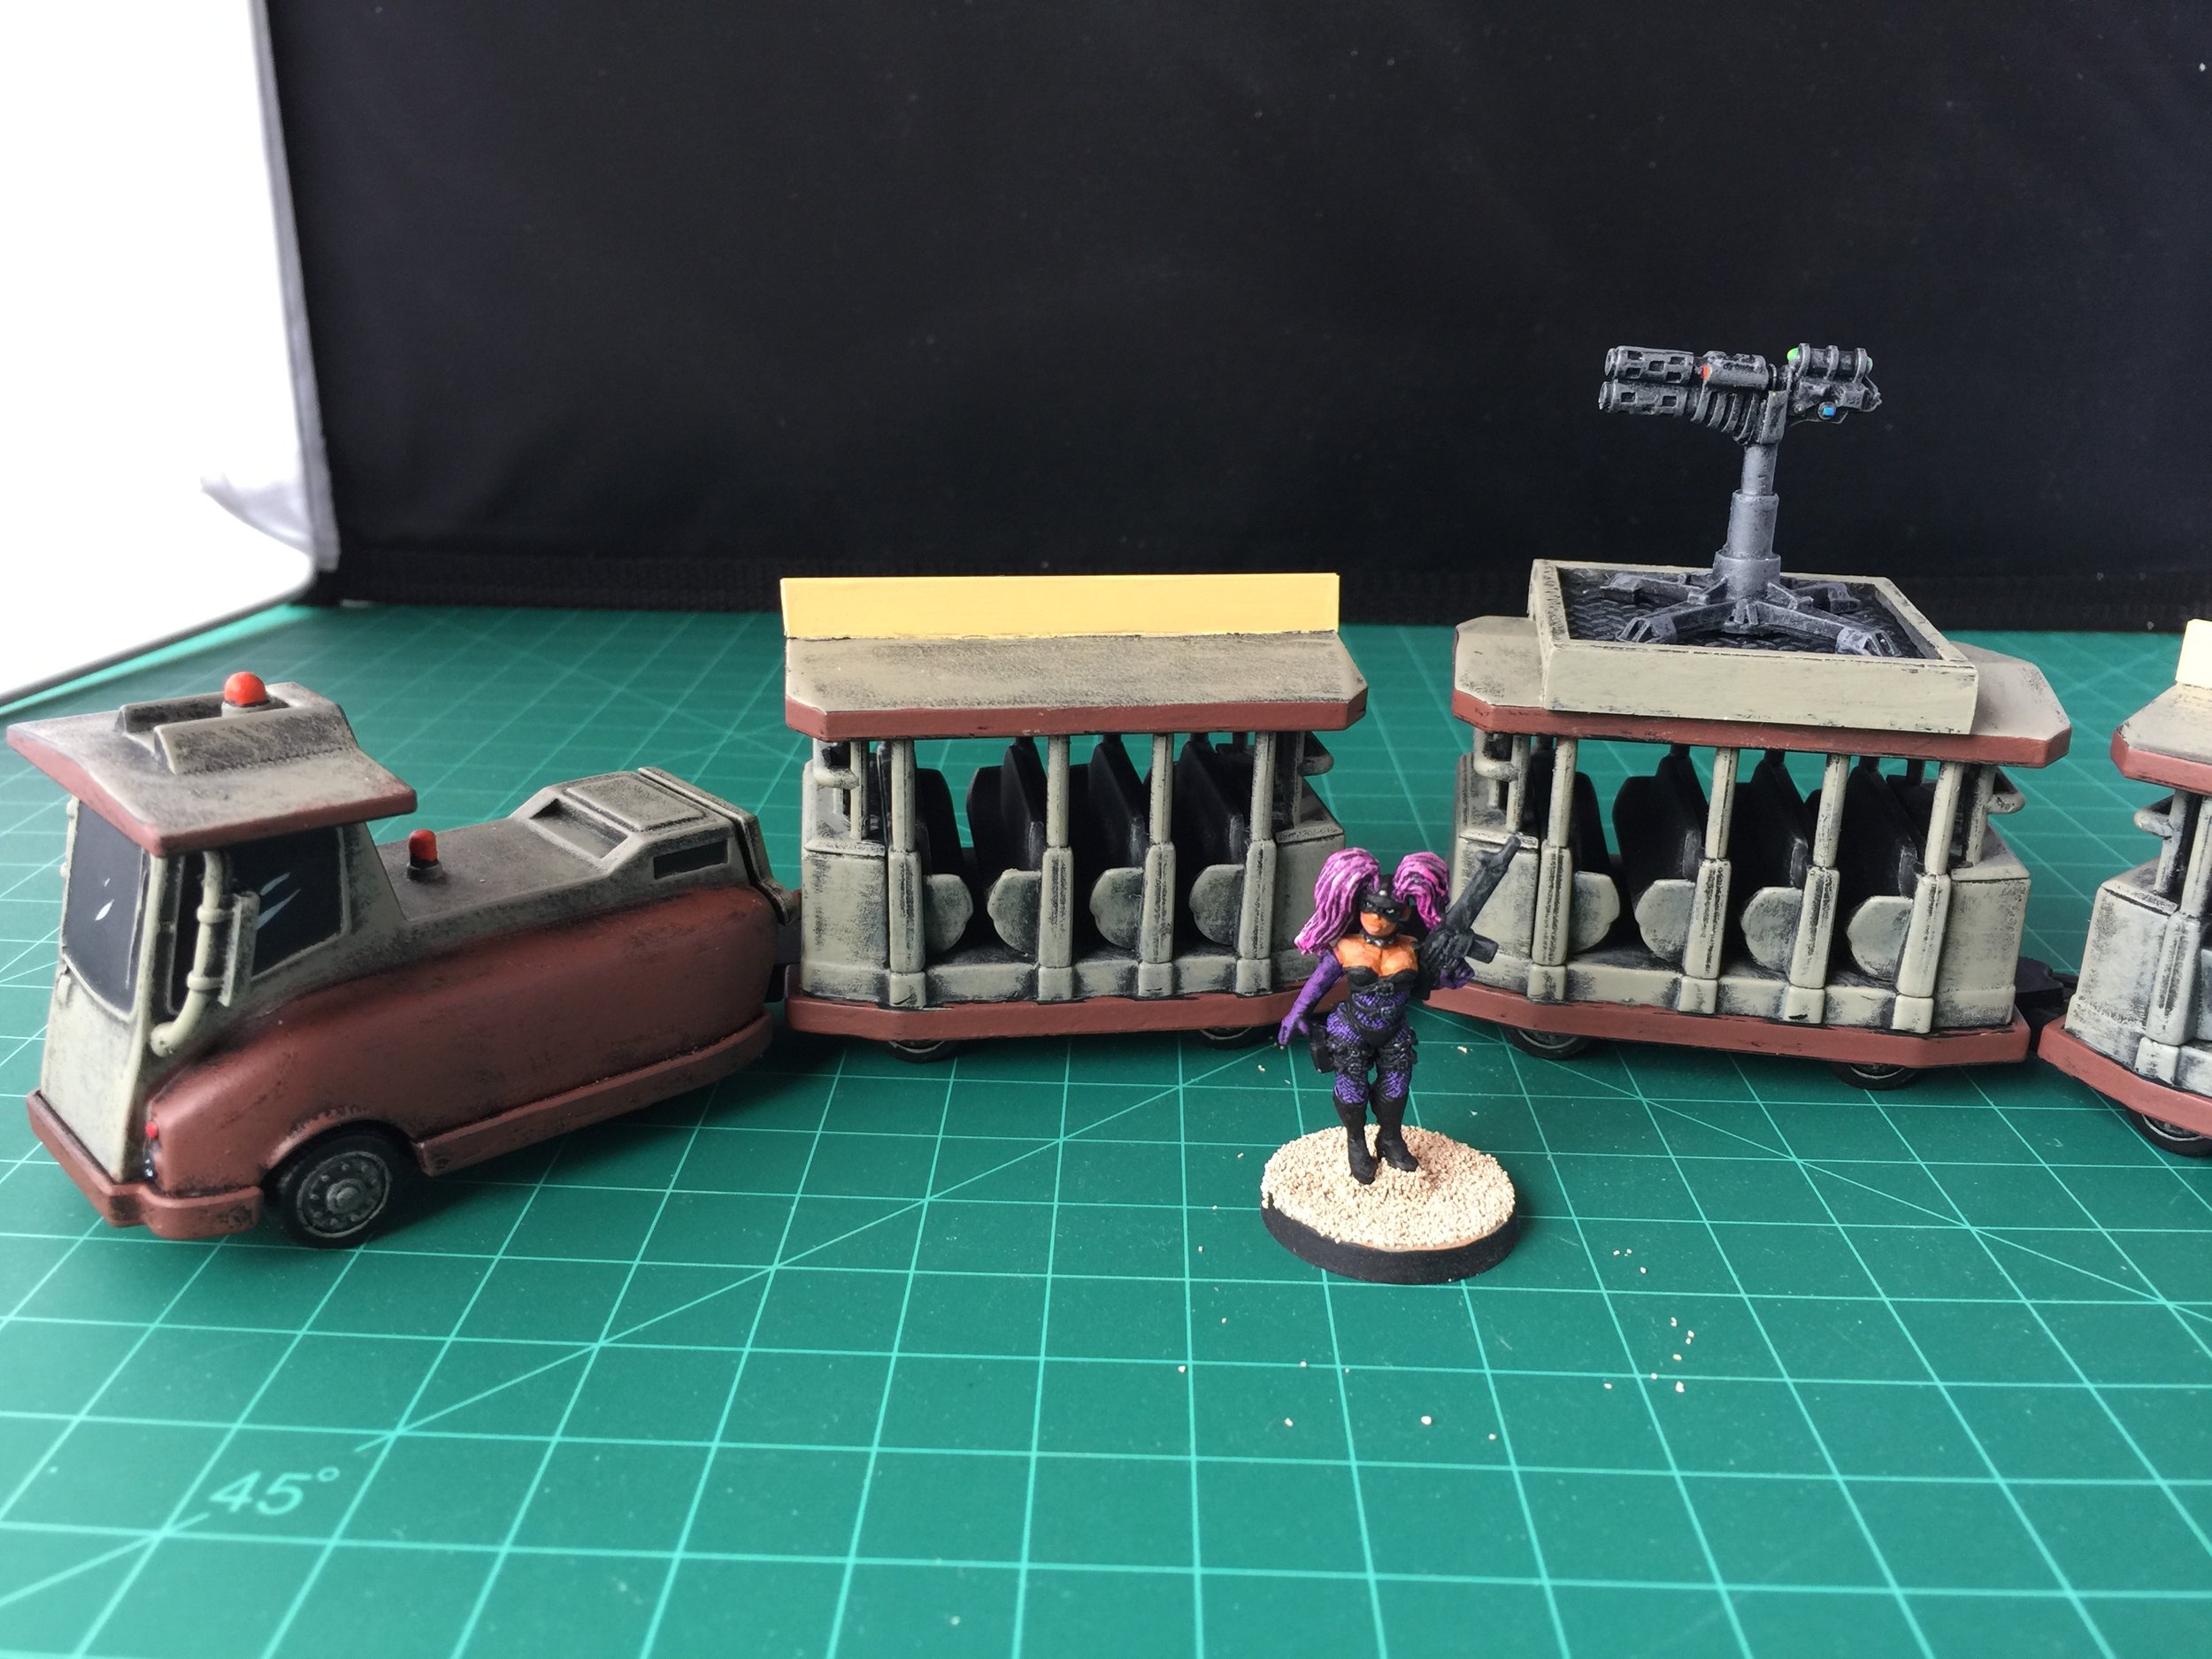
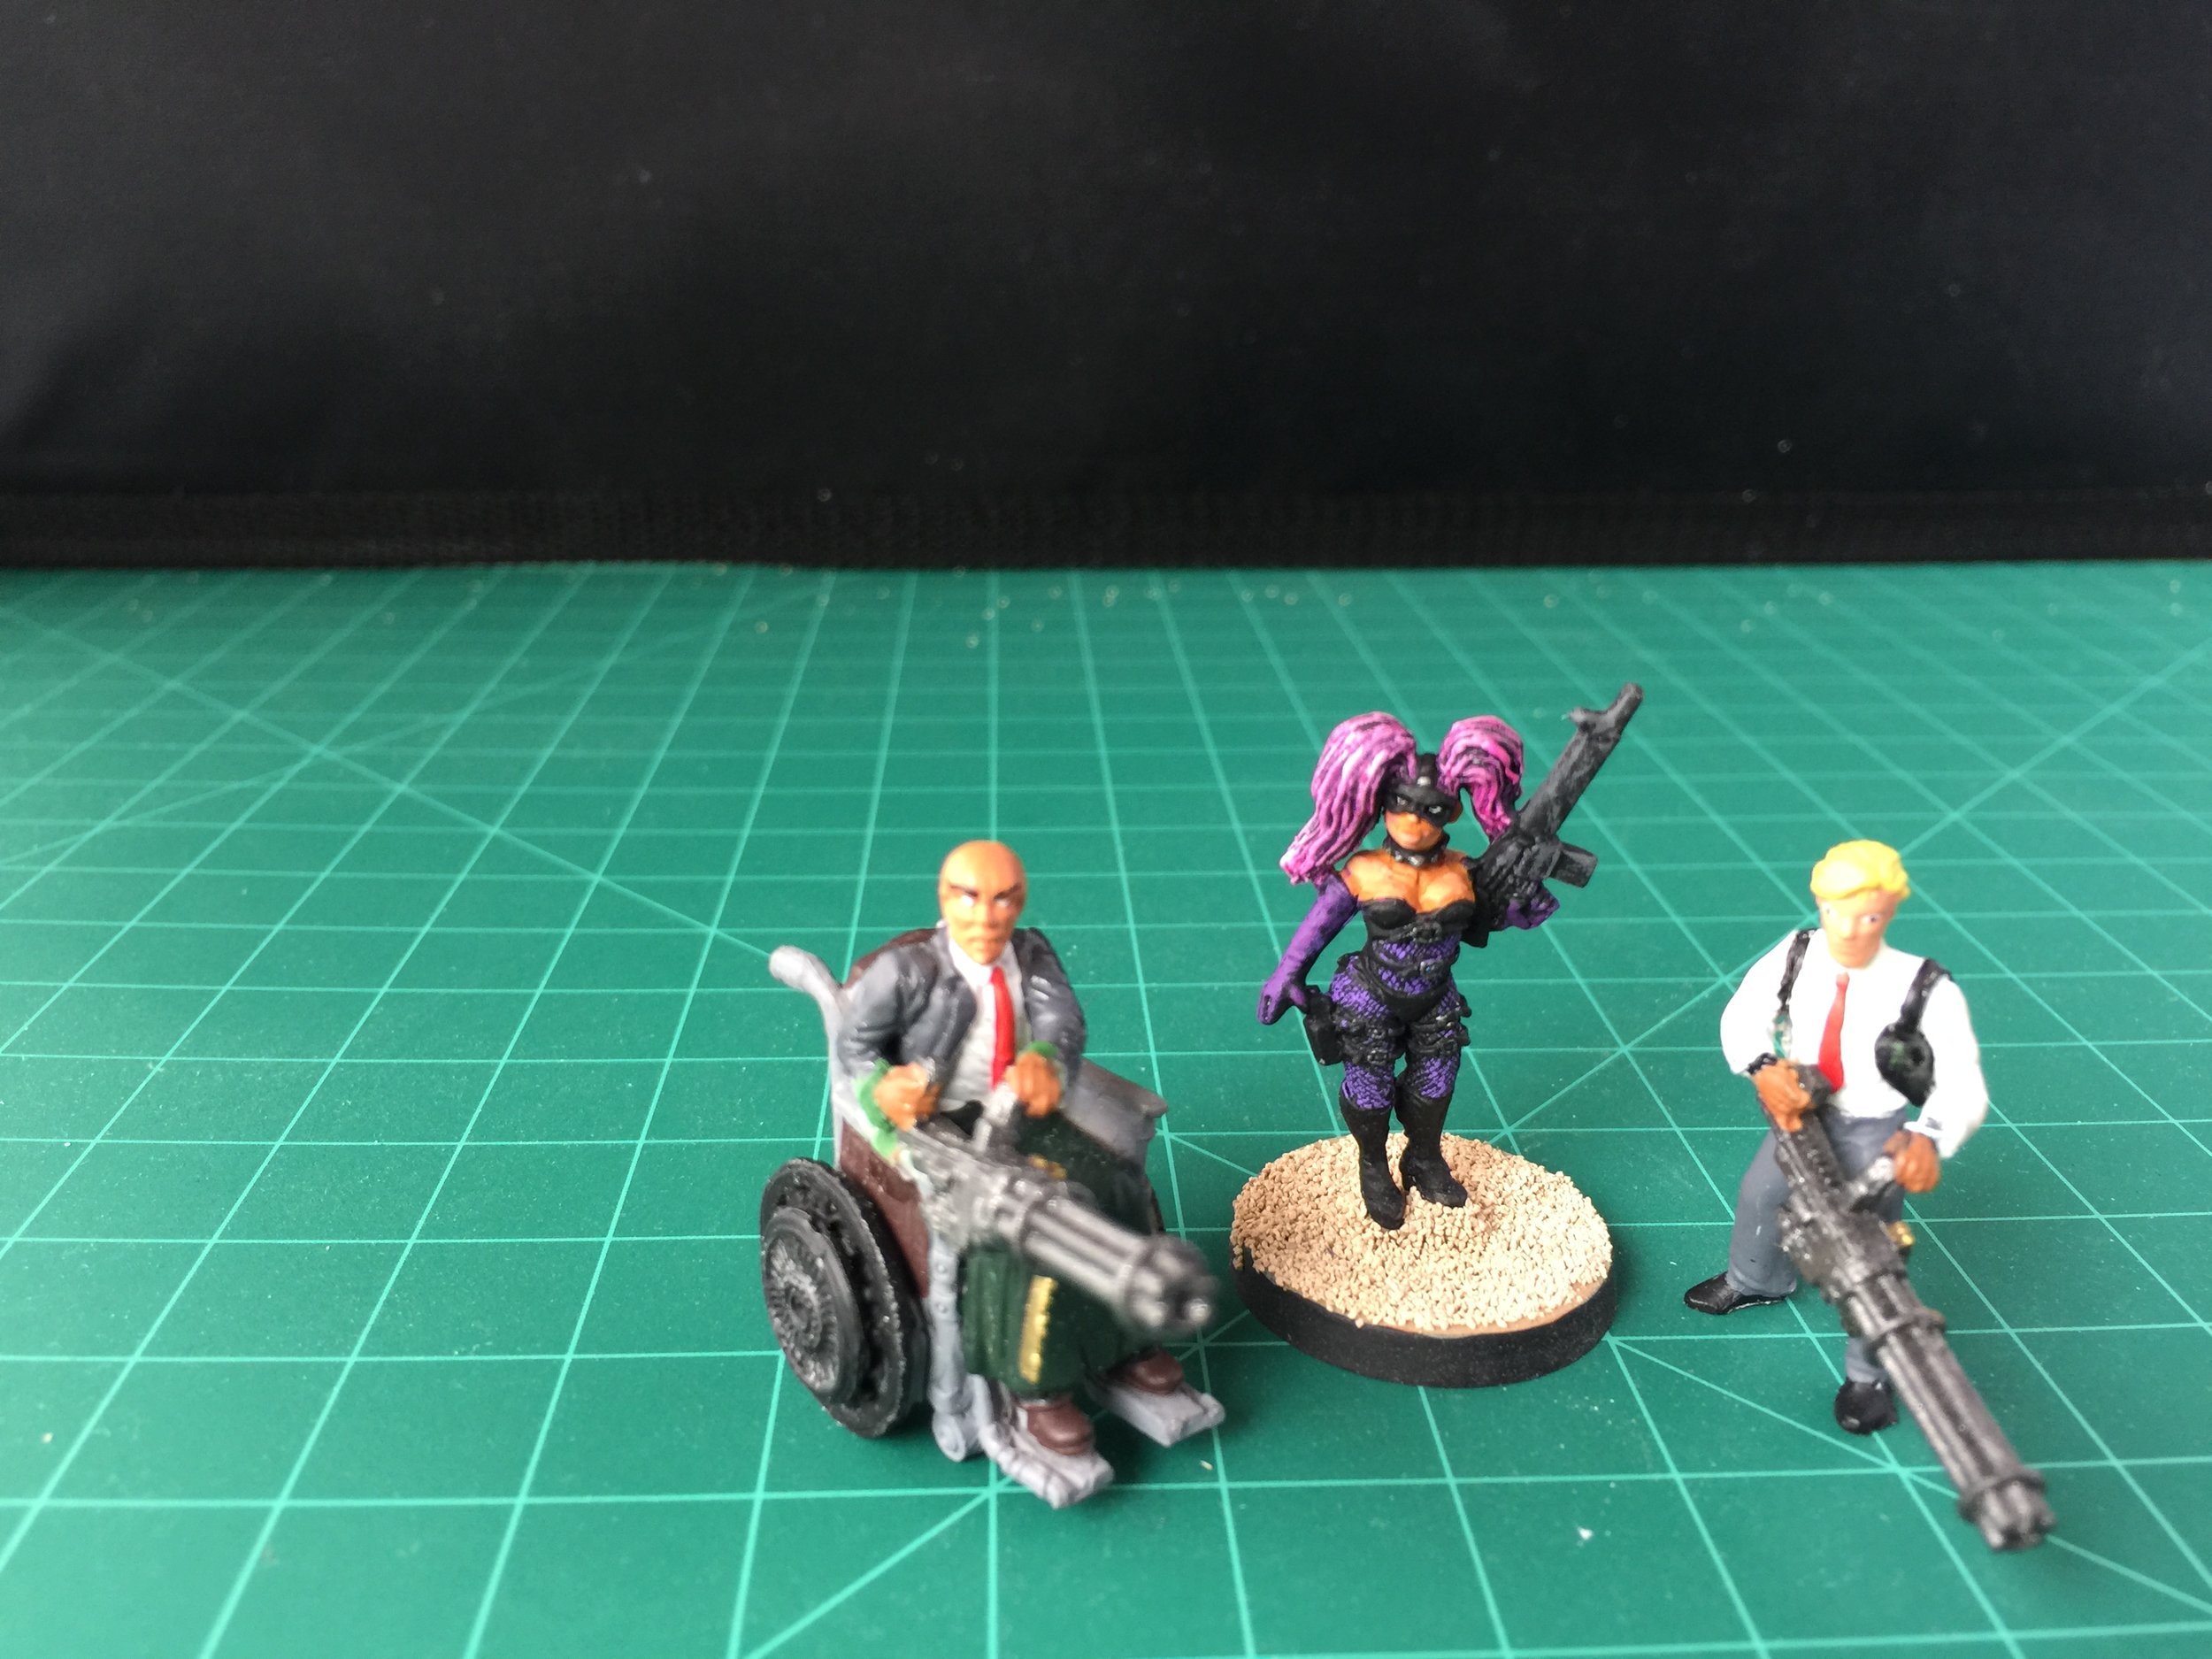
Once in awhile during the course of a project a plan is altered… sometimes big, sometimes small. That happened while I was repurposing/modifying and painting the Disney parking lot tram to become the ZOMBIE TOUR tram. Originally my plan was to attach a couple of Gatling guns (taken from the Heroclix Skullbuster figure; I had two of them) to the front and rear wagons of the tram, but when I found the pieces for a larger gun, the plan changed and a rooftop gun platform was attached to the second wagon instead. Cactus painting, while important to this project, gets boring and my mind wanders, and it wandered to modifying a couple of Heroclix figures with those unused Gatling guns. With a little carving I removed the Gatling guns from the Heroclix Skullbusters and attached them to the Heroclix figures Gotham Undercover and Professor Xavier. I’m not sure these will become part of my current project, but I like the way the modifications came out. I won’t be basing or painting these two figures until I have a better idea how they will be used.
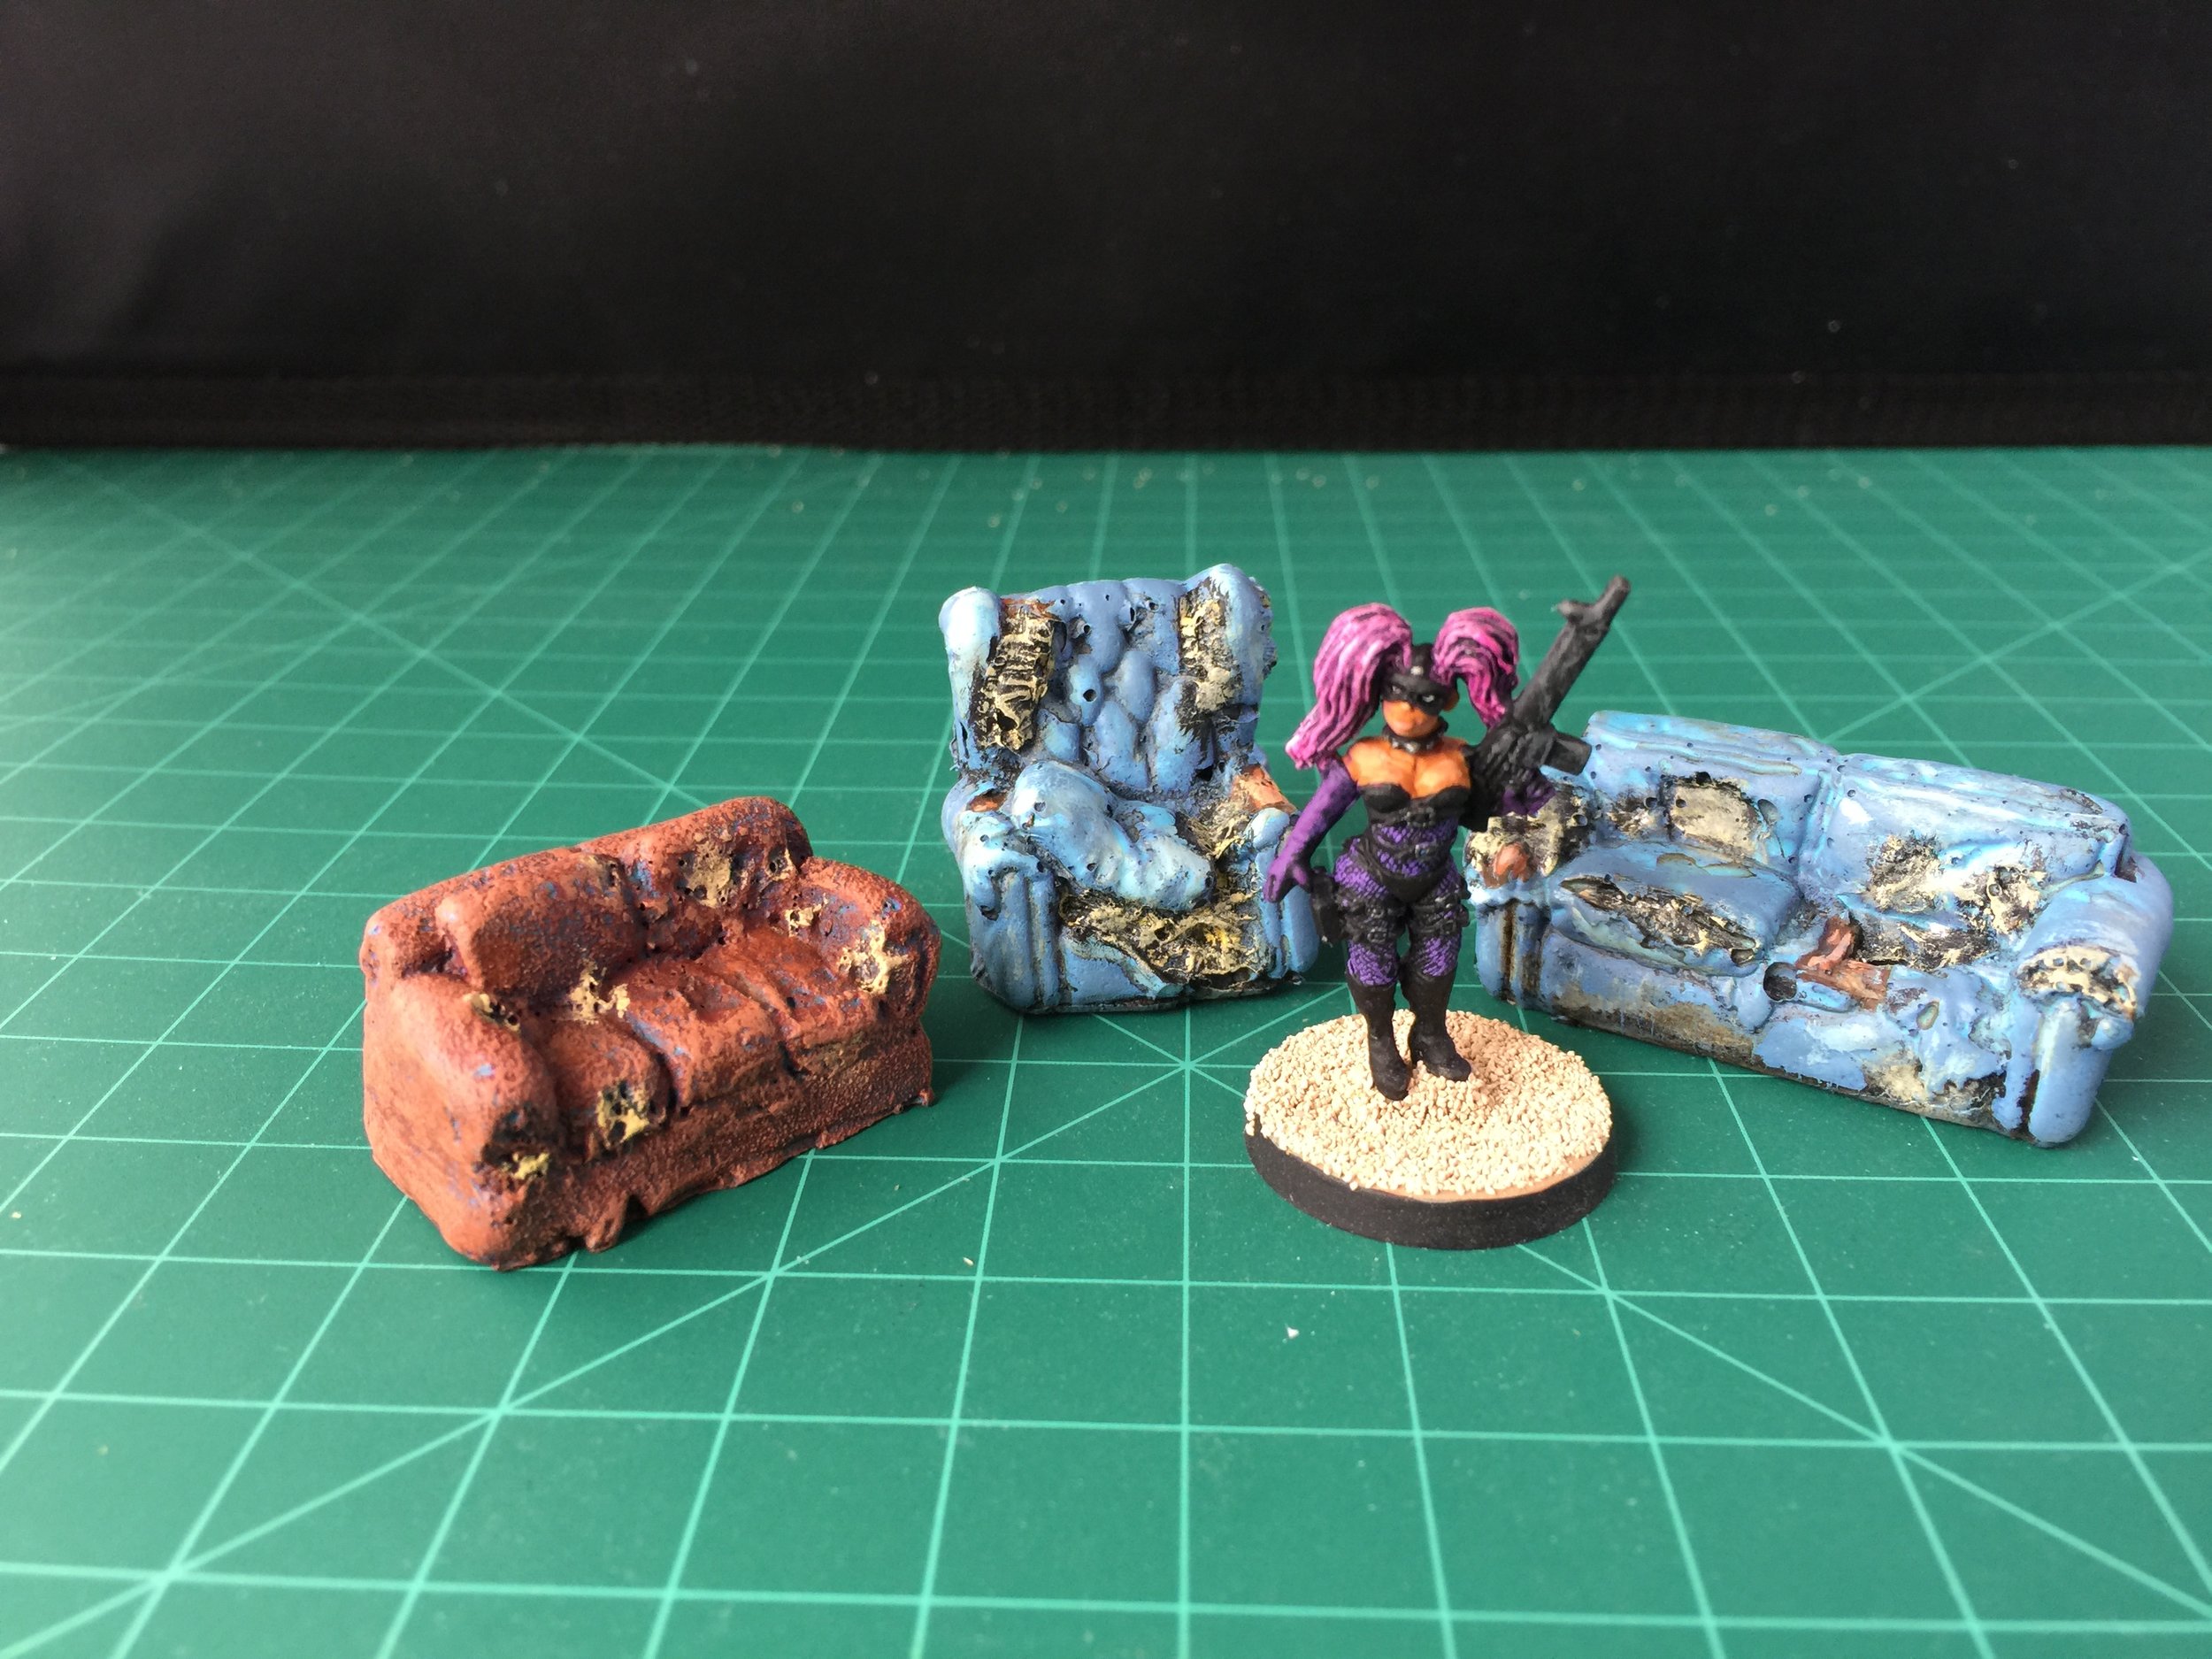
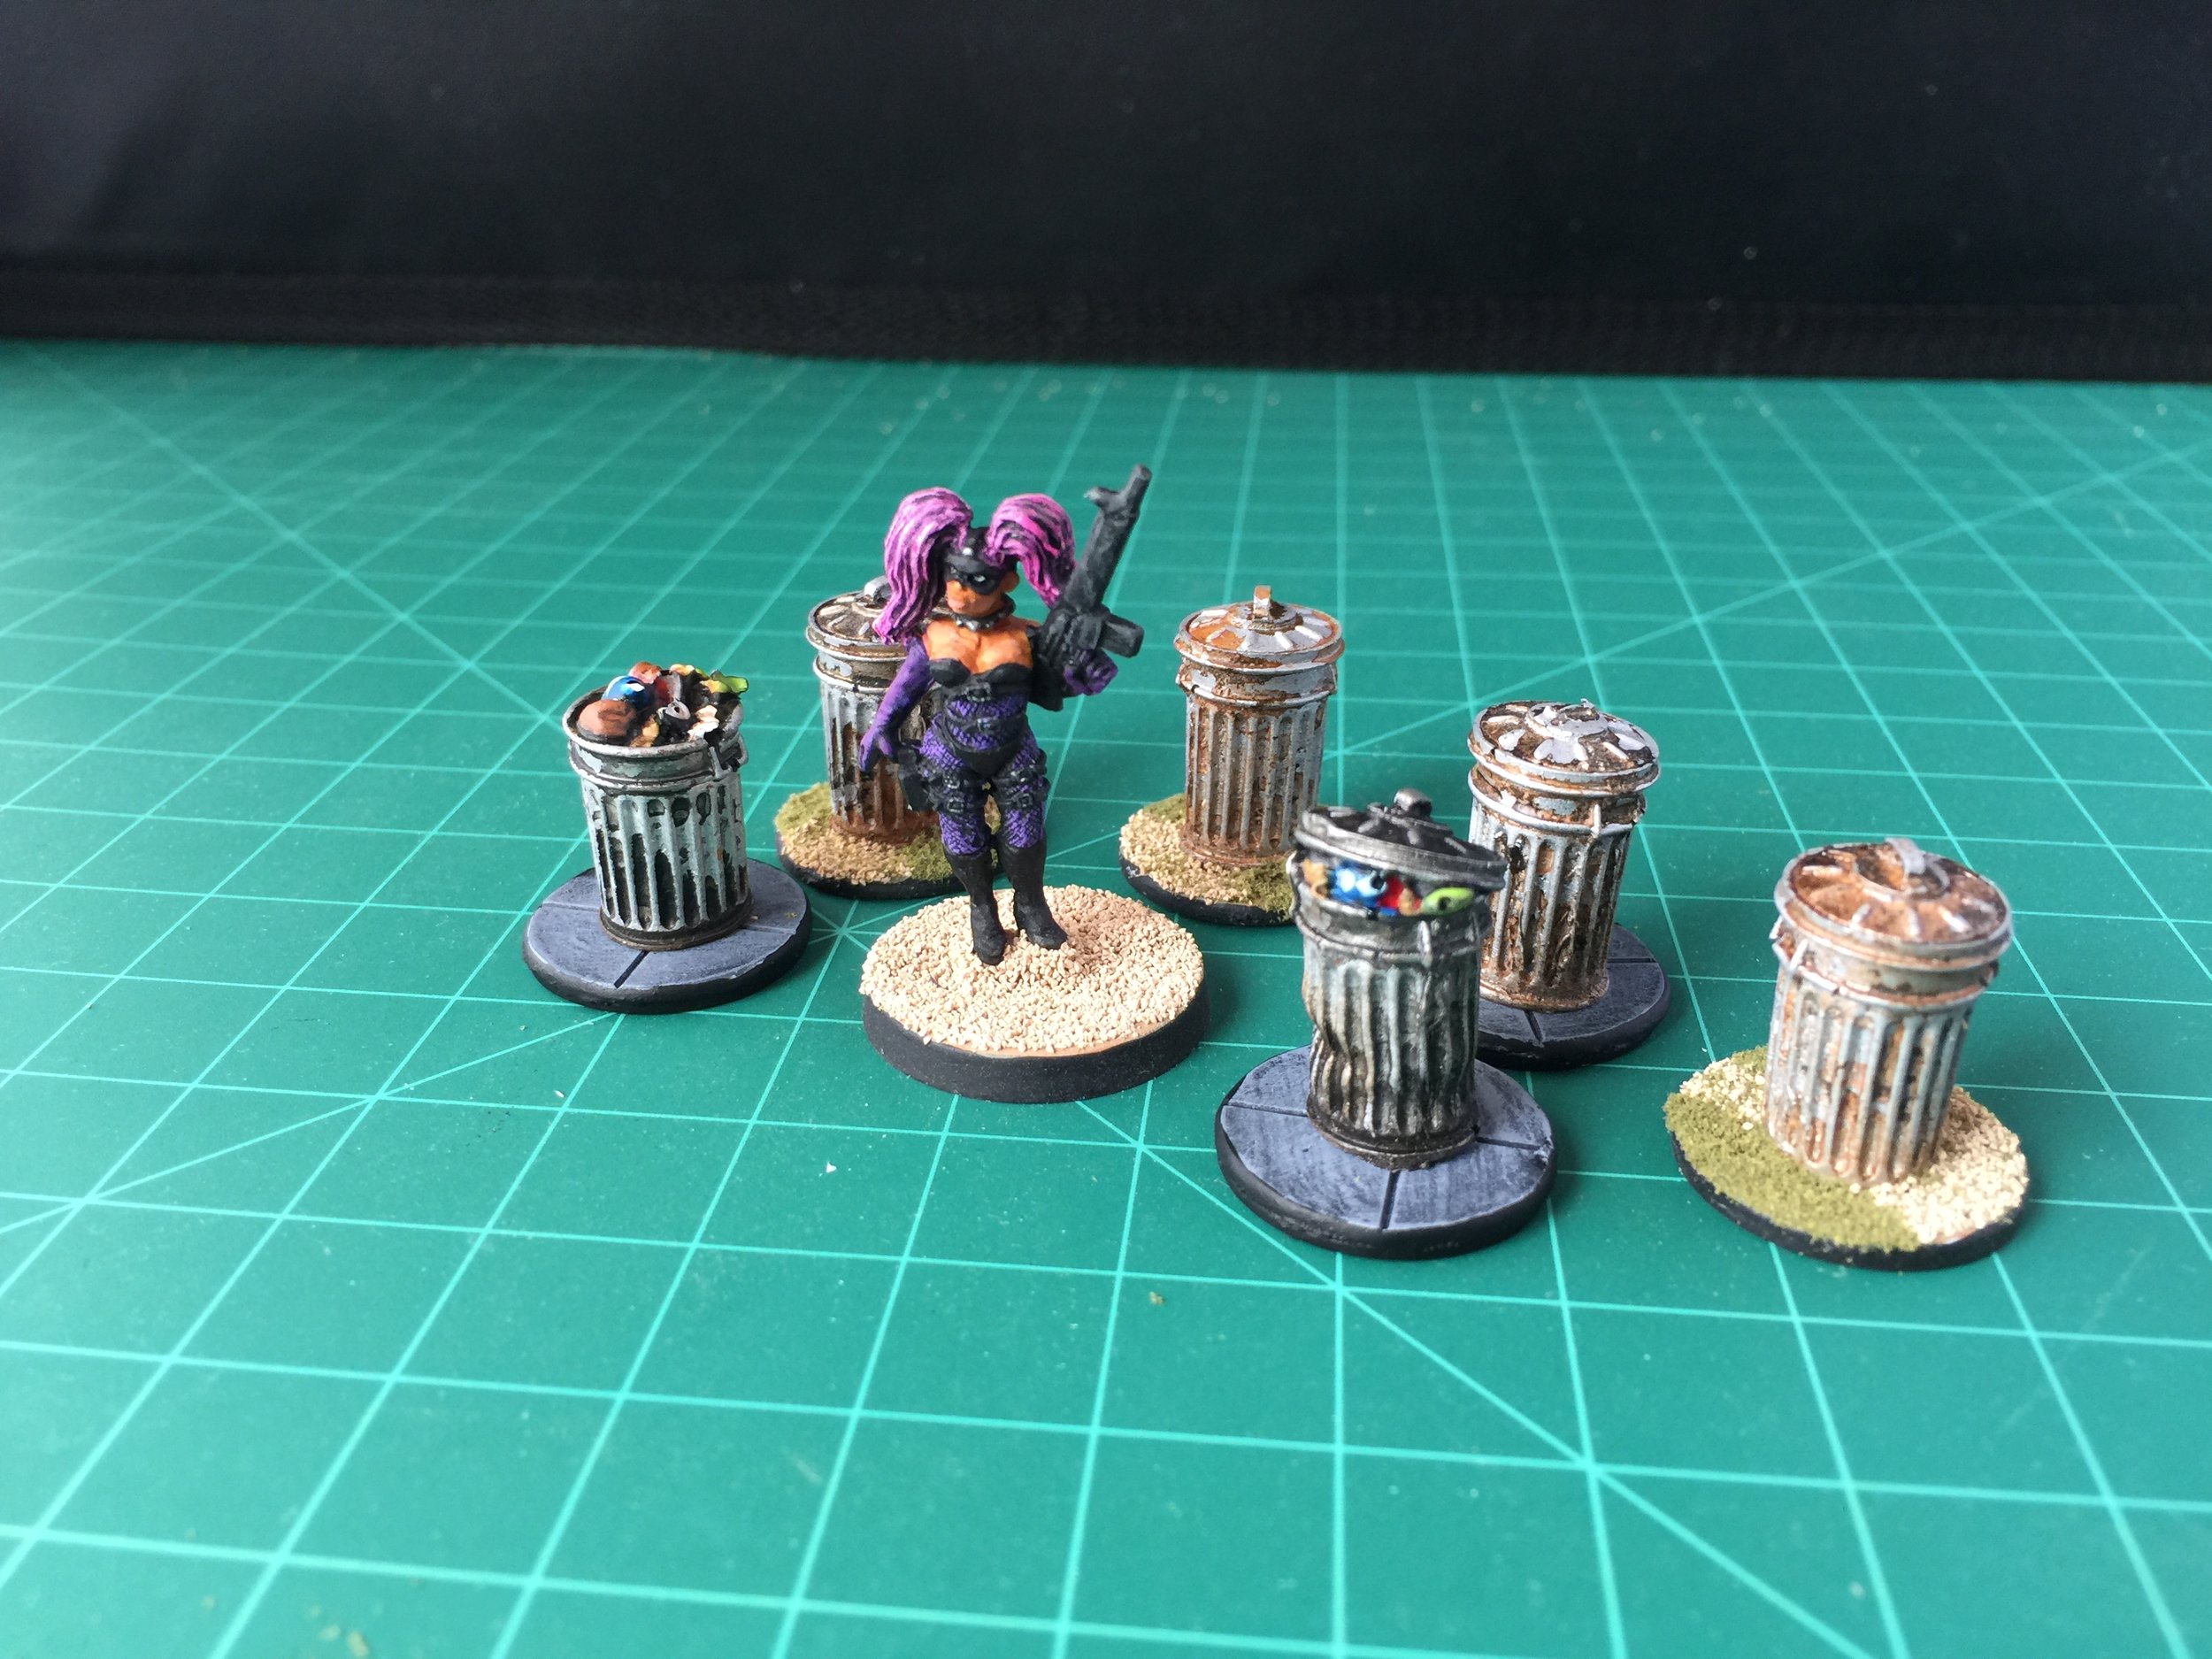
Another break from the cactus was the repainting of a couple of beat-up overstuffed chairs and a sofa. I got them on eBay under the name Pro Paint. Their original paint jobs weren’t bad but not mine so I put the brush to them… better now. I should note that in addition to the Pro Paint furniture, I also have six of their trashcans, and I didn’t bother to repaint those… I just gave them bases.
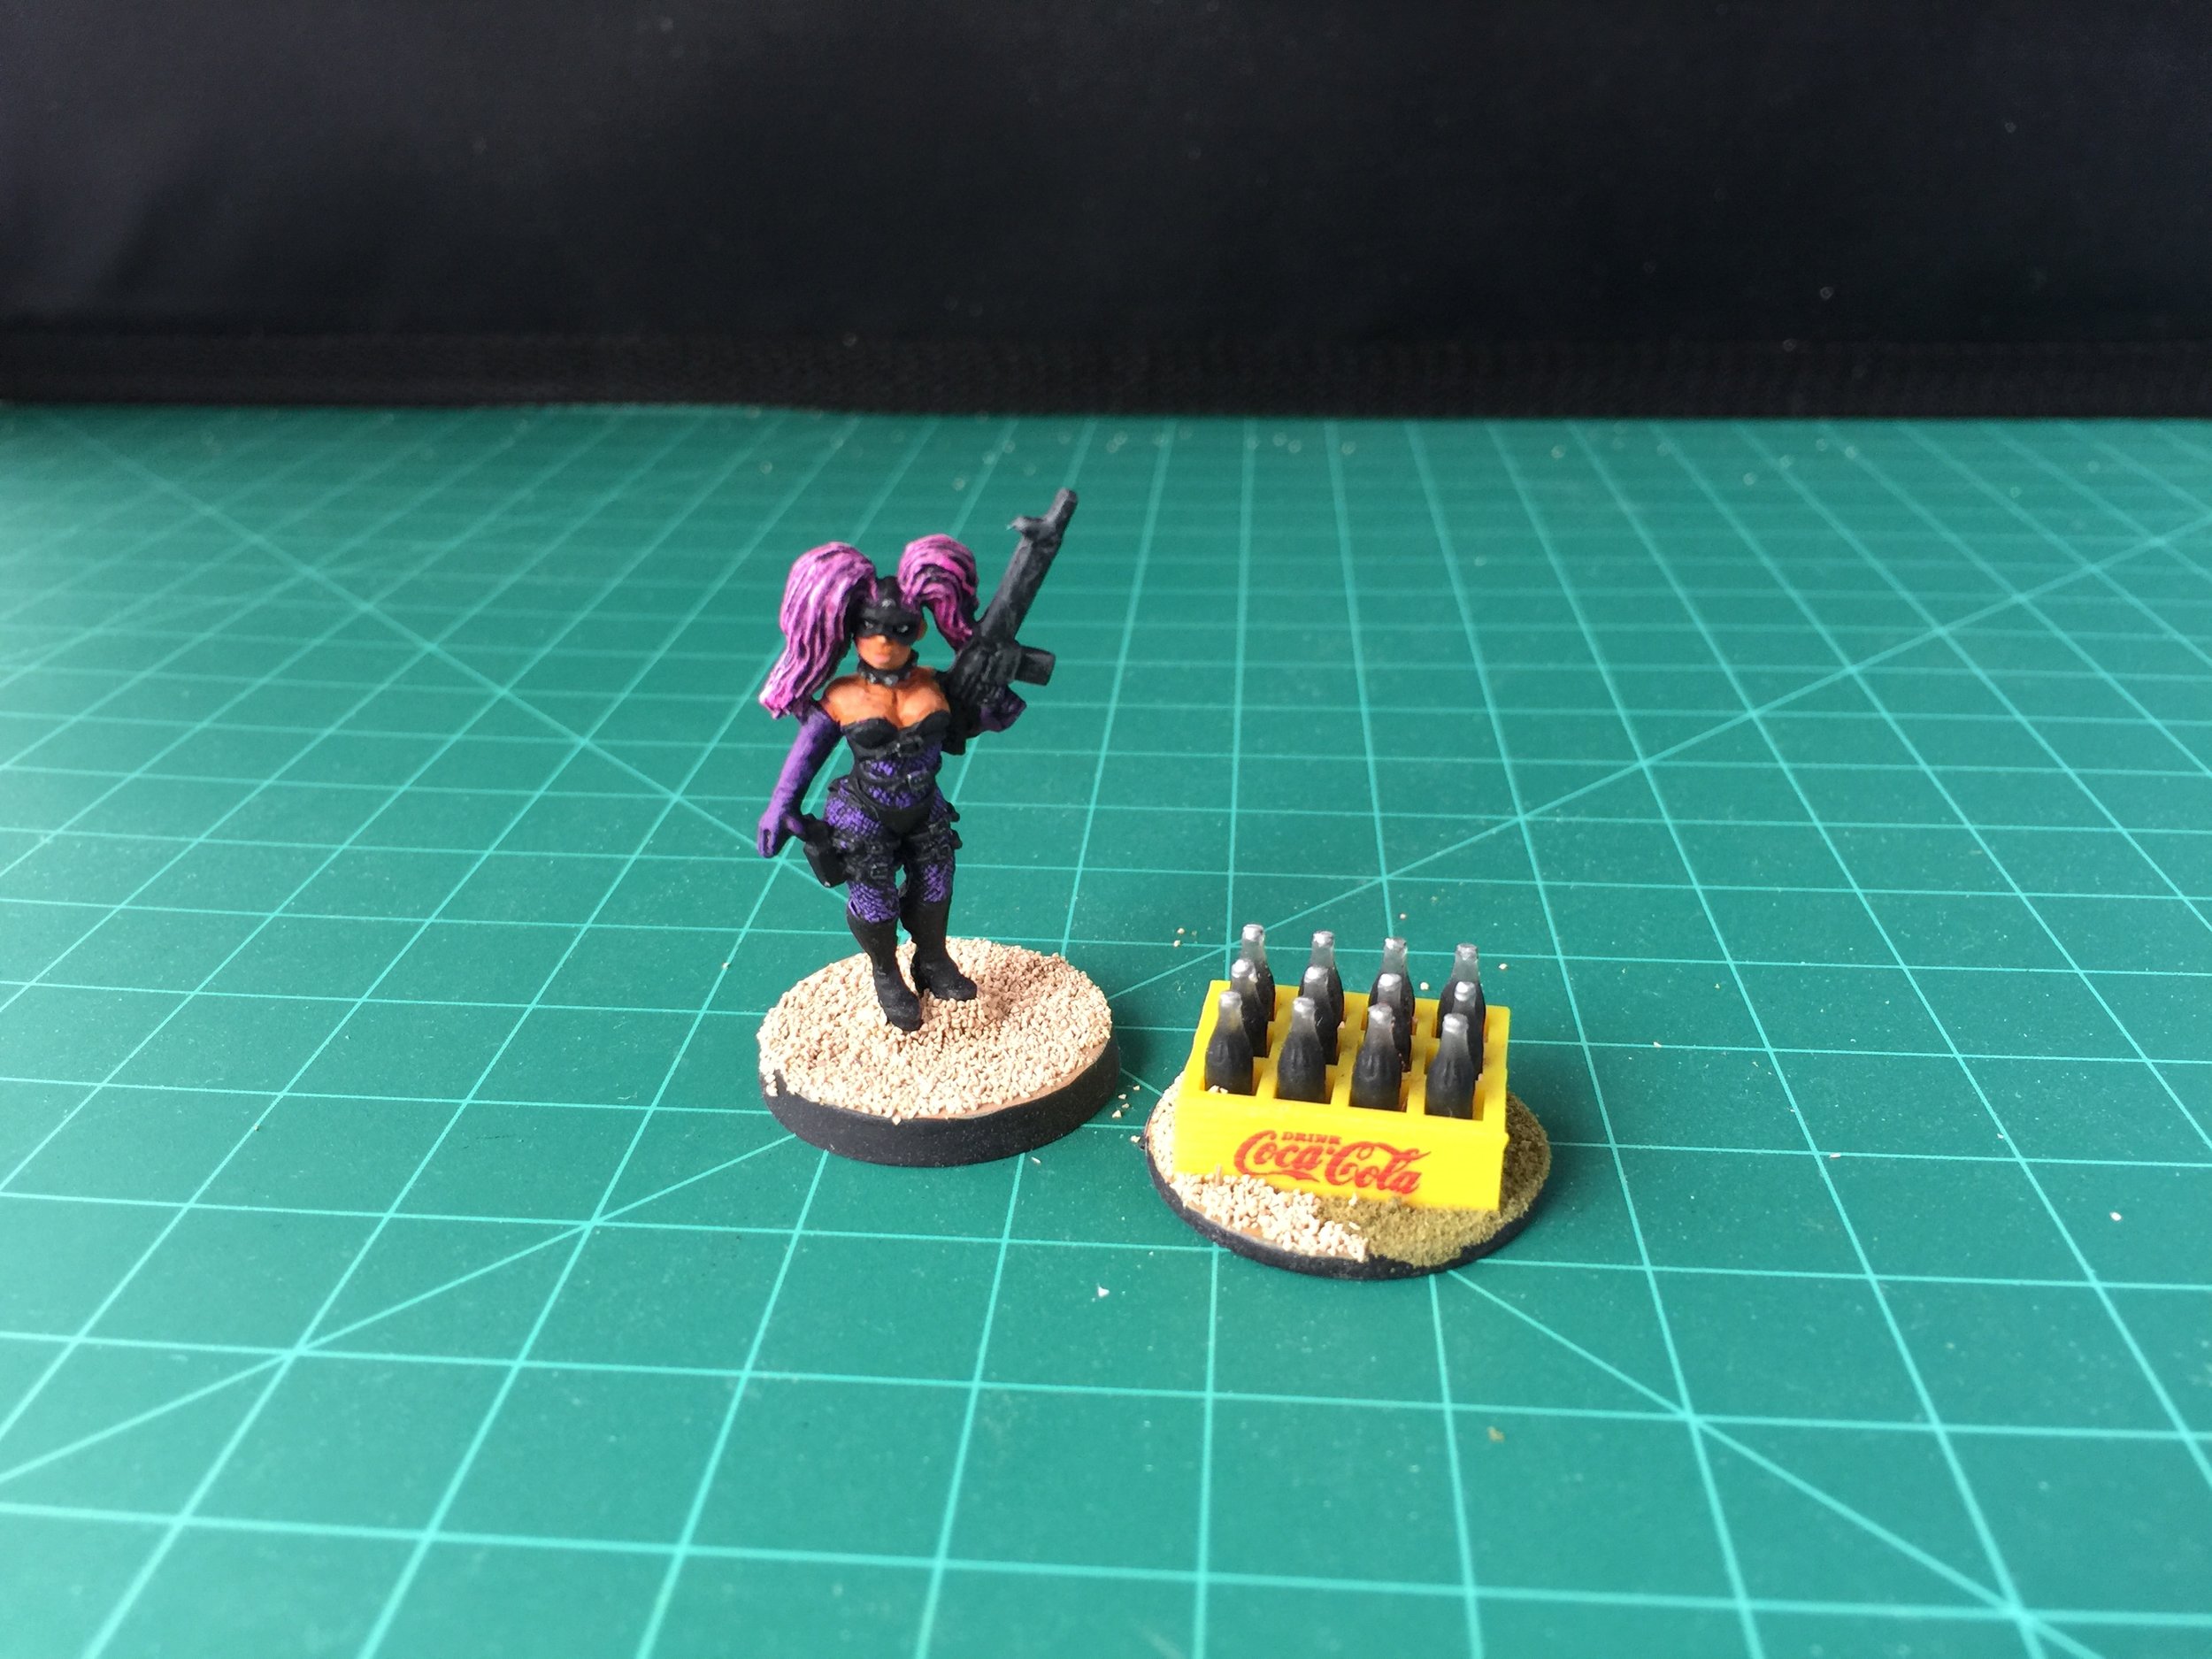
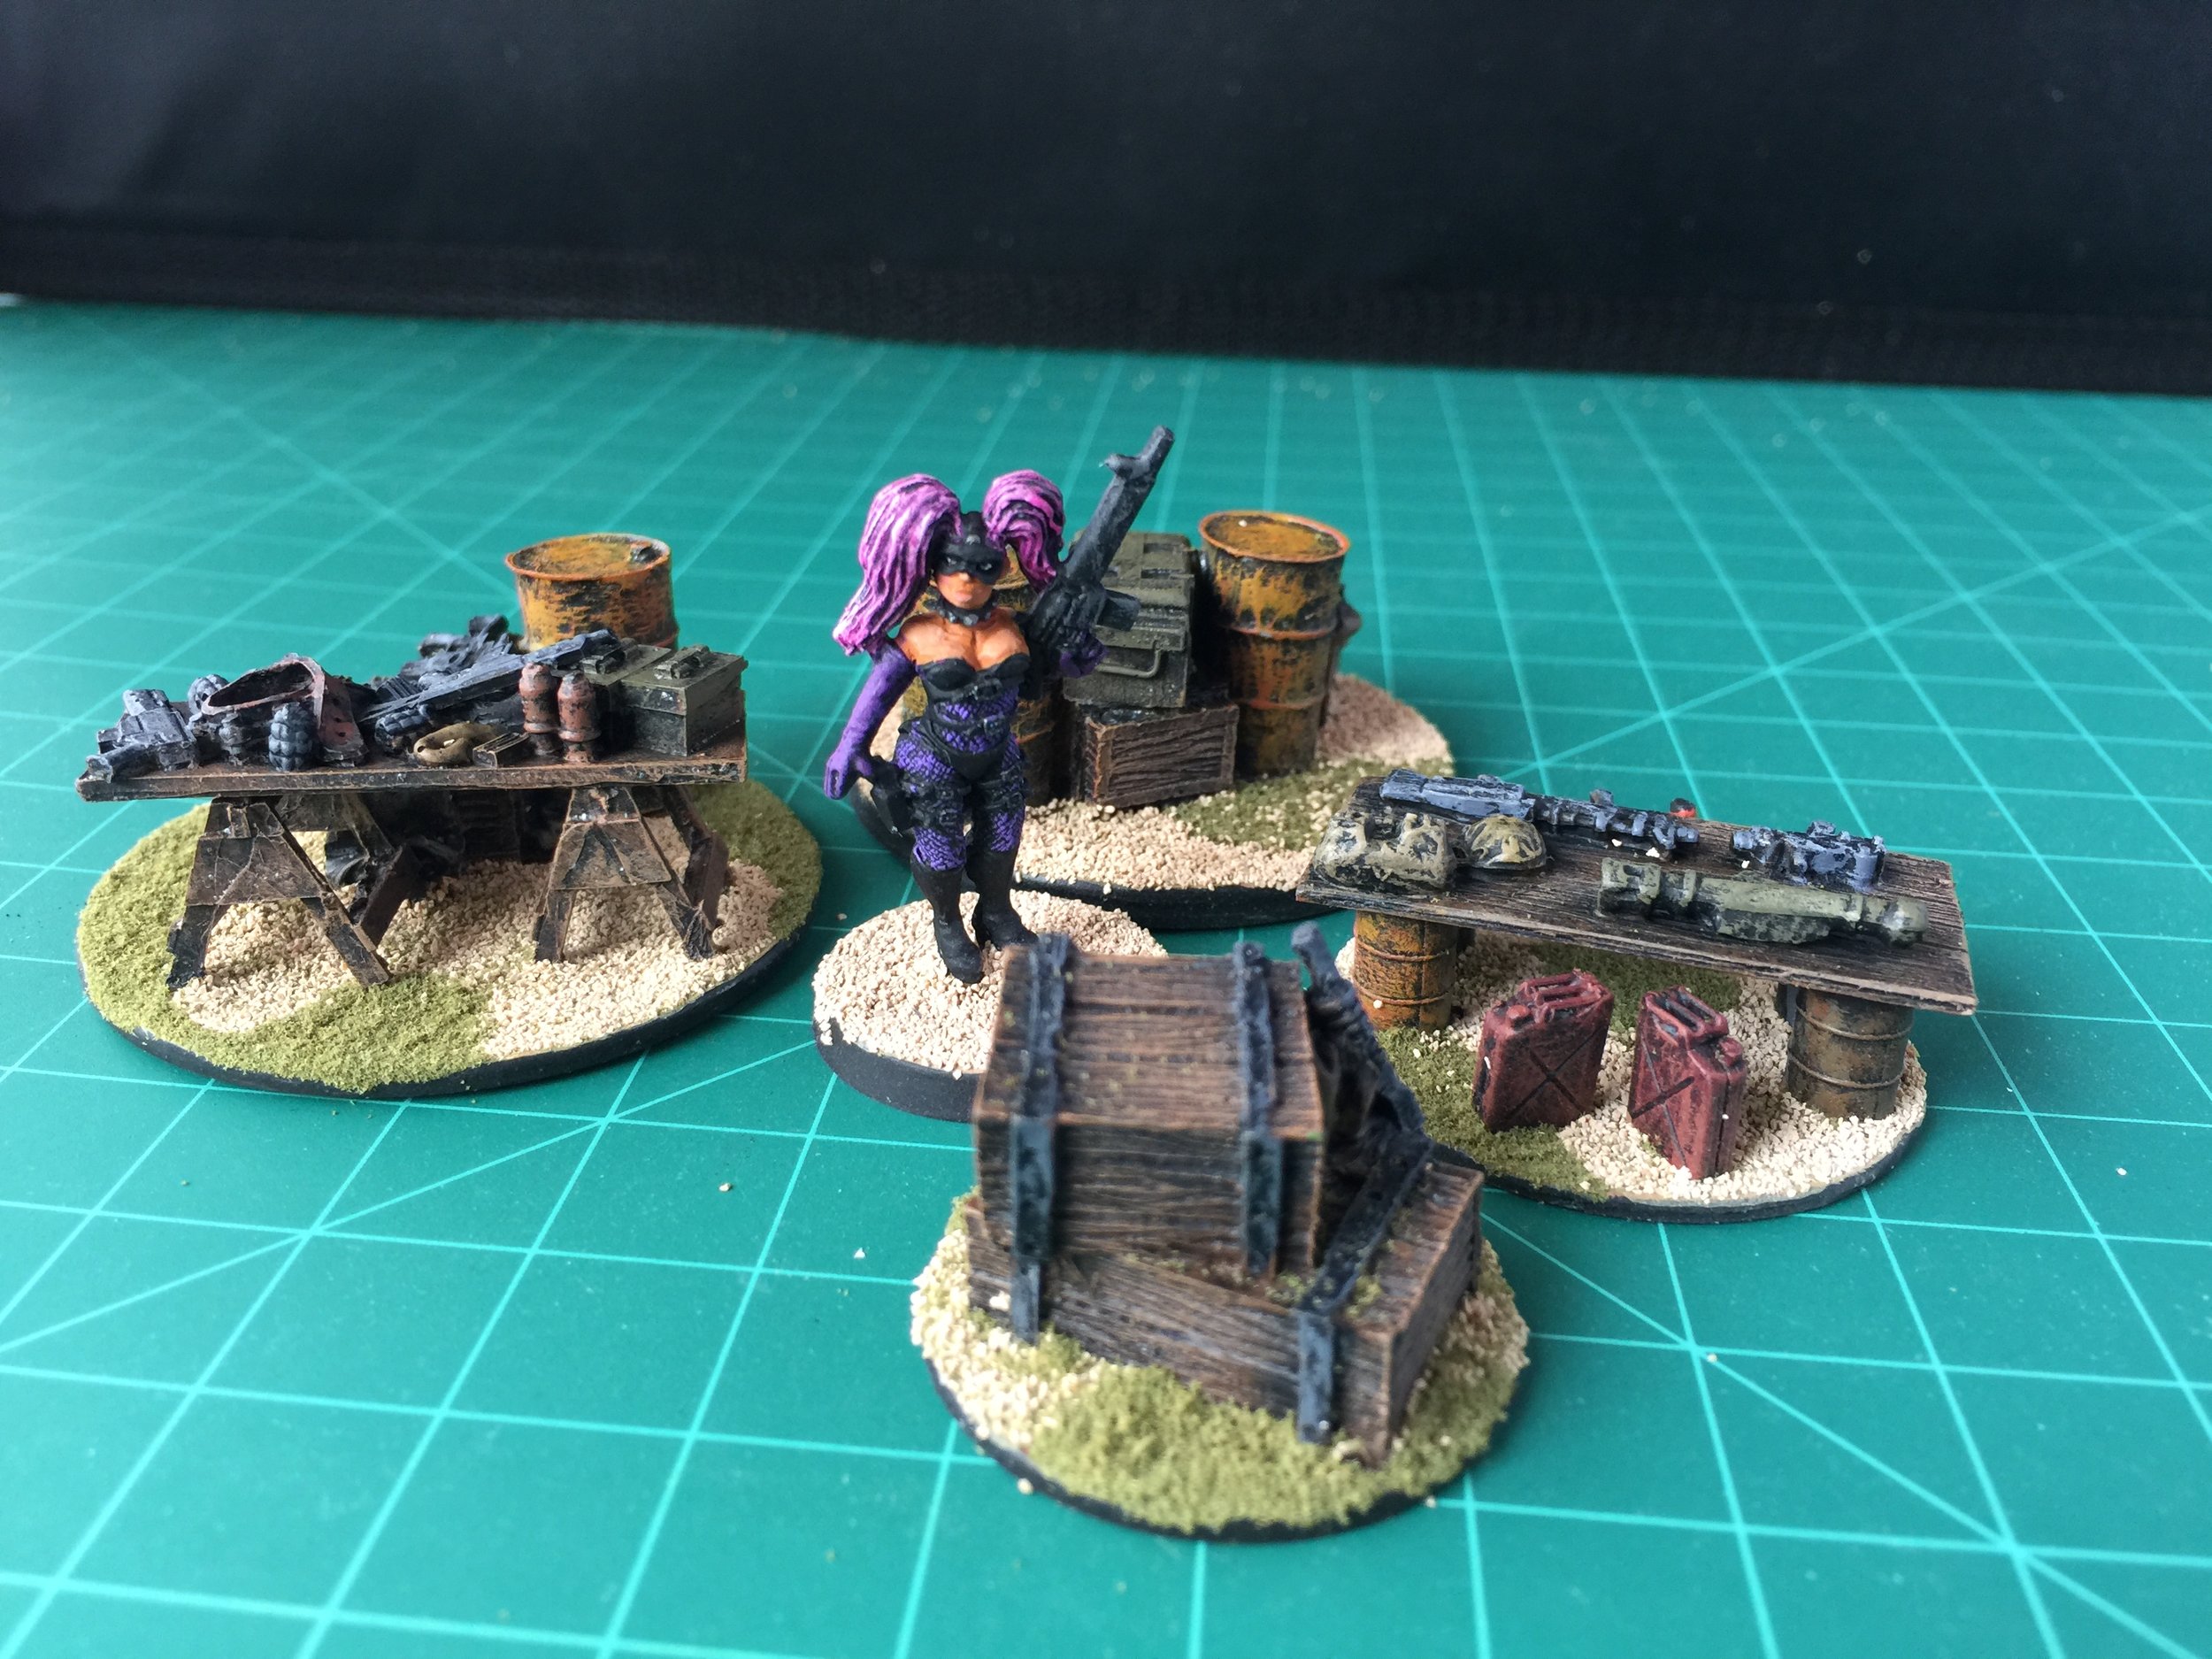
I closed out the week painting the last of the cactus, basing a crate of 12 Cokes (a little large but I think they will be okay and offer an interesting detail), and I based and painted the Crooked Dice arms dealer terrain set. I liked that set so much that I decided to expand it by adding an additional arms table made from Evergreen plastic, some Grandt Line HO scale barrels (used as table support/legs), weapons from the Foundry Street Violence line of figures and a couple of military equipment packs and jerry cans from a Tamiya 1:48 scale accessory box. Pretty good week.