August 25, 2019
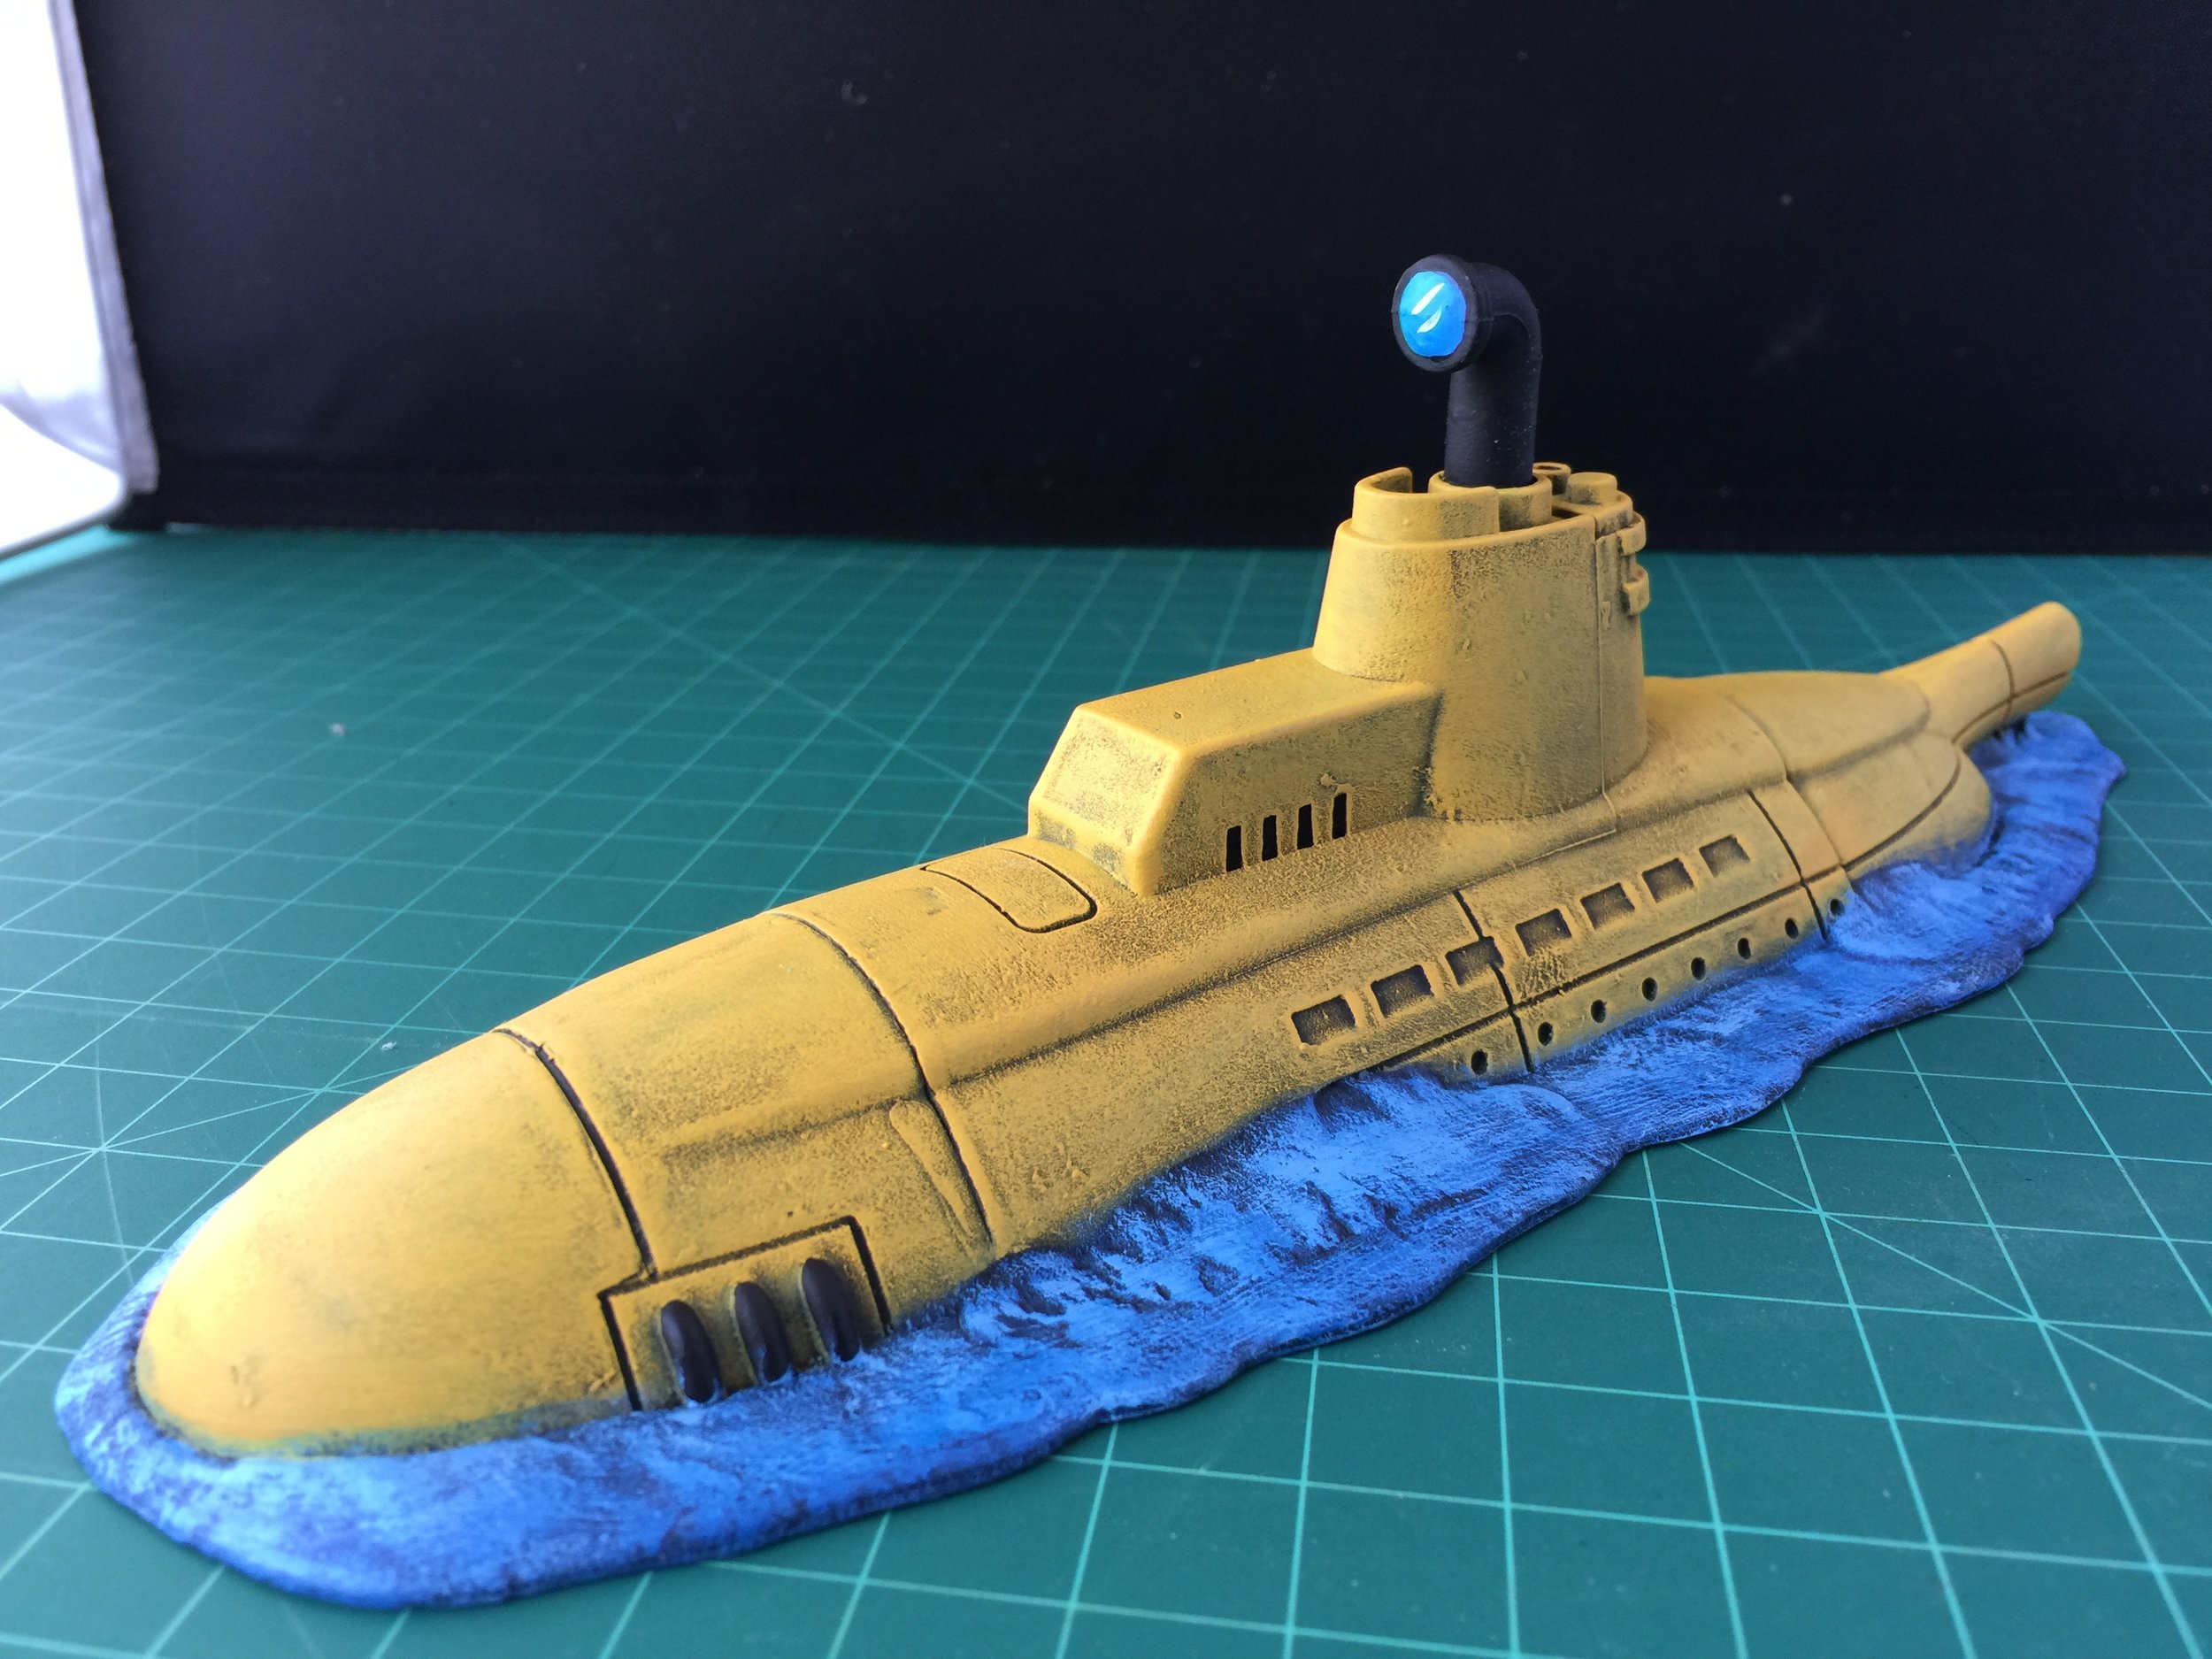
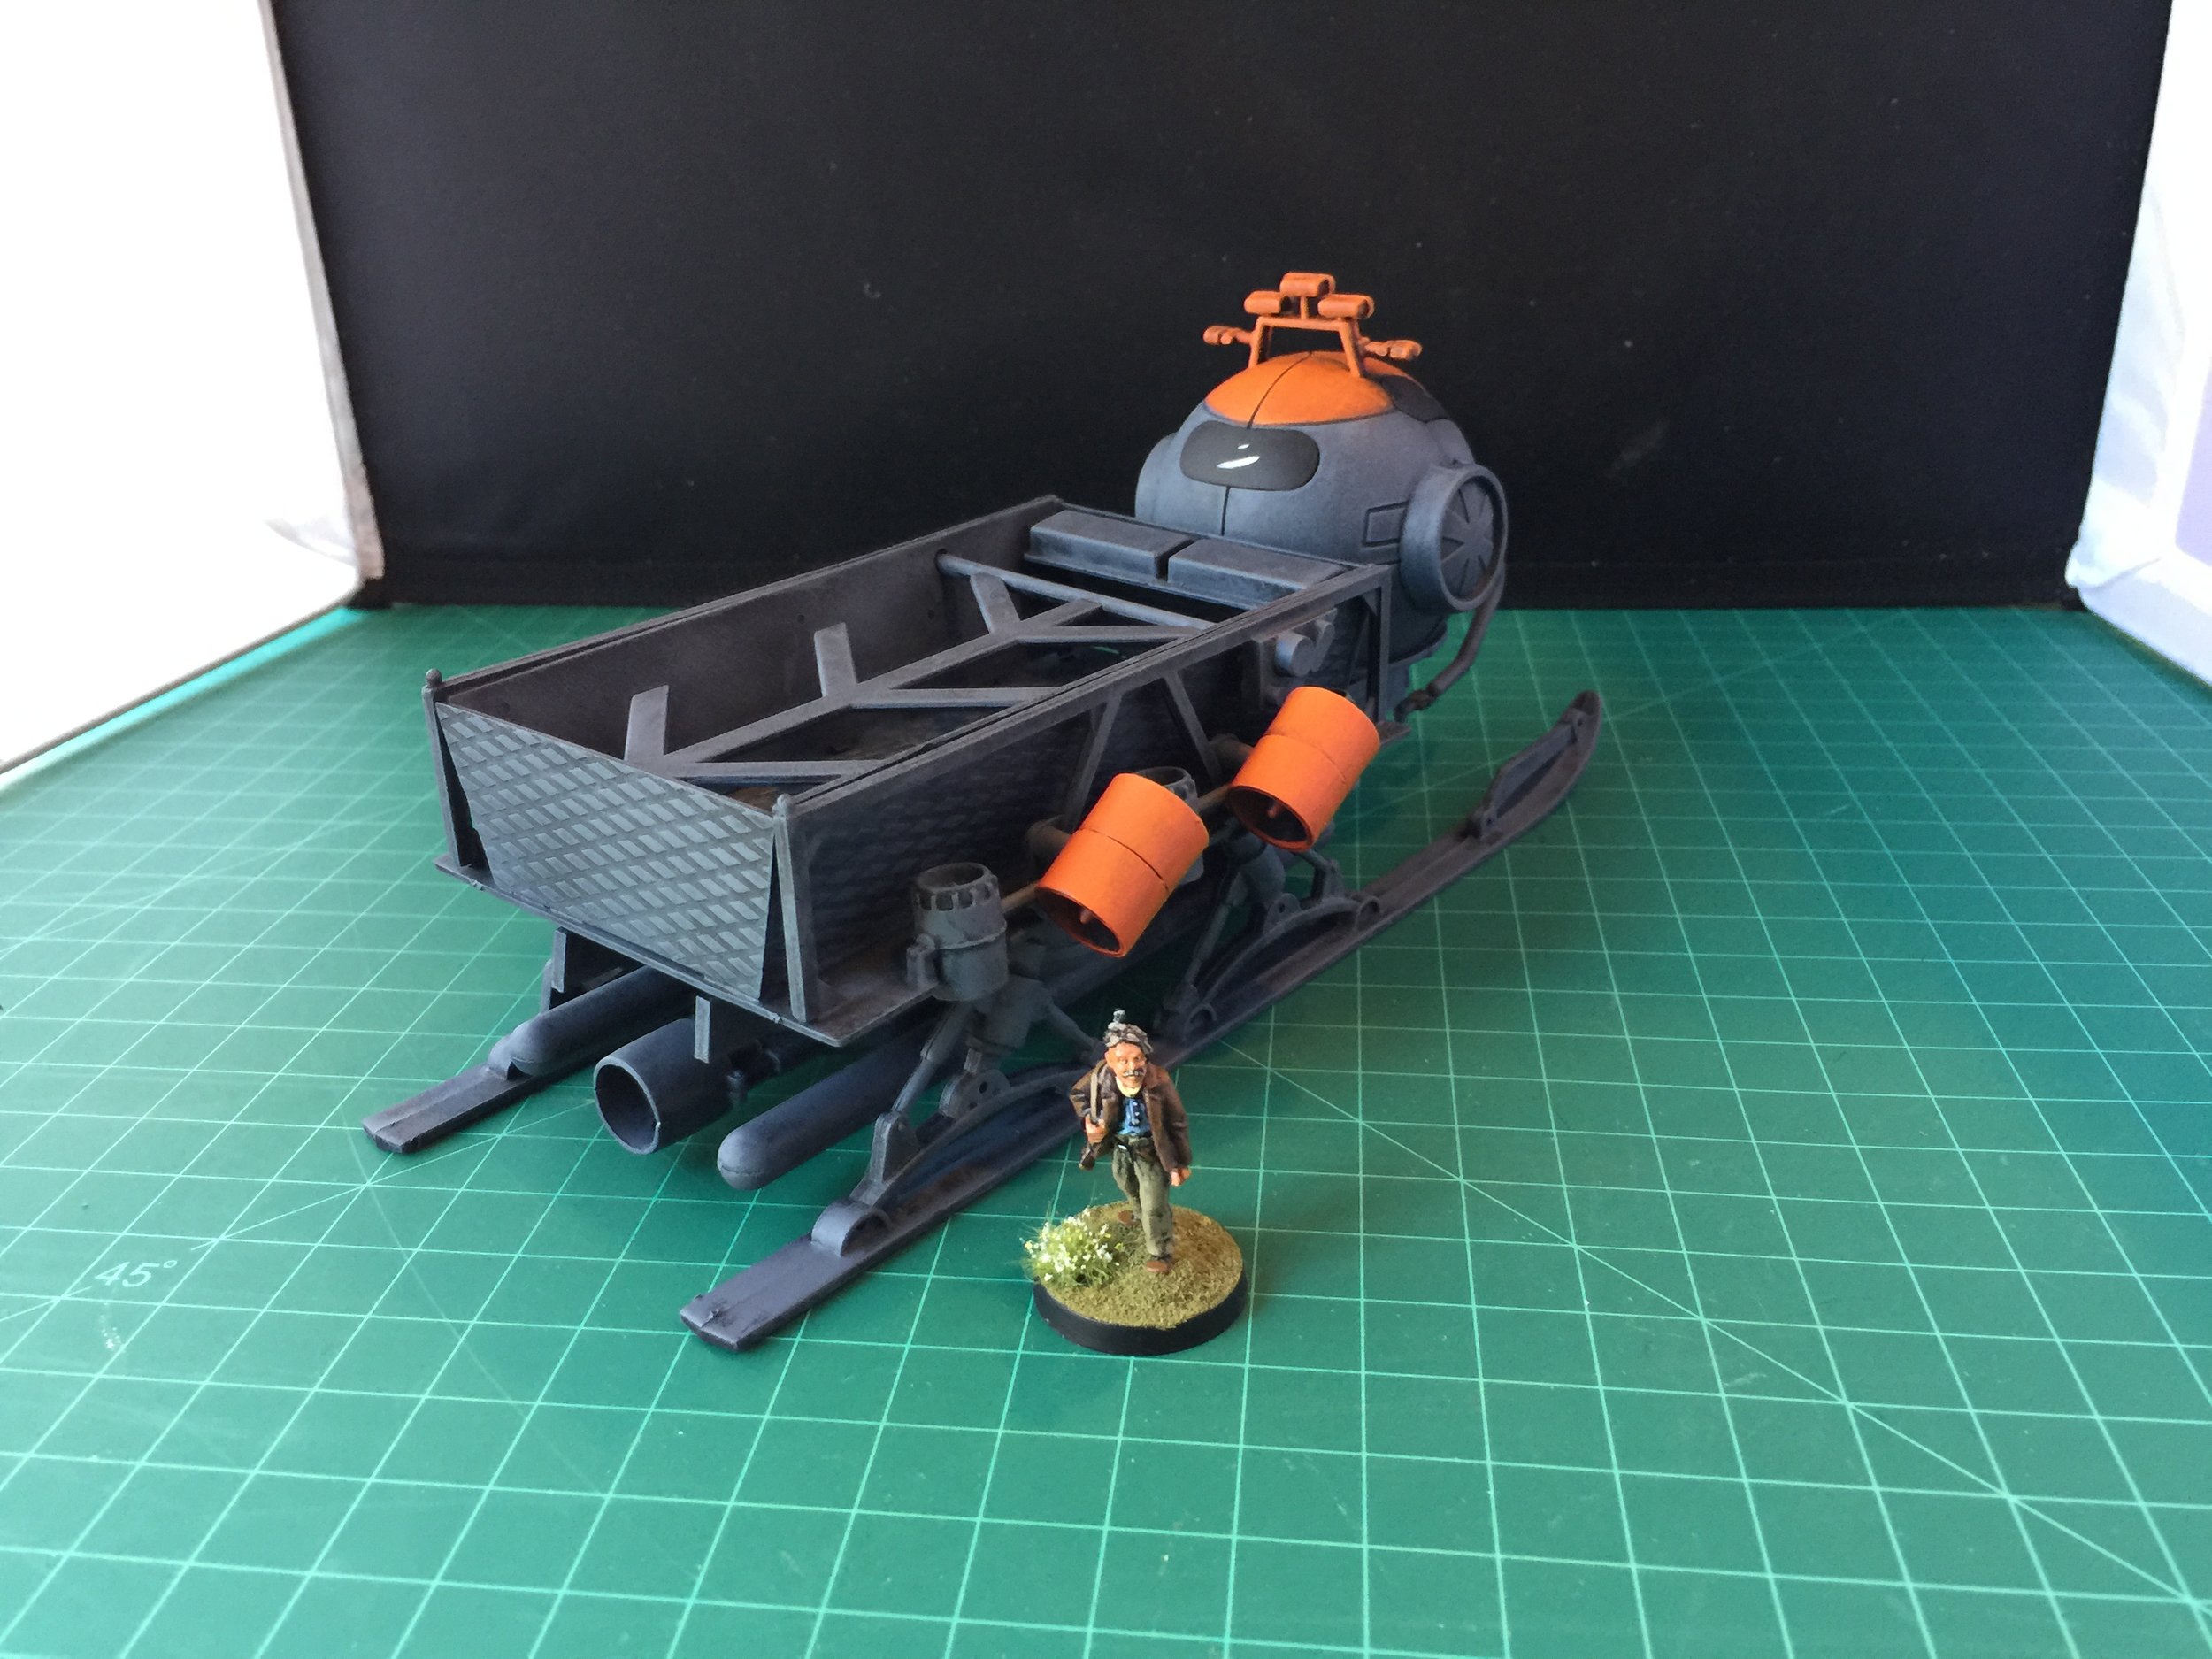
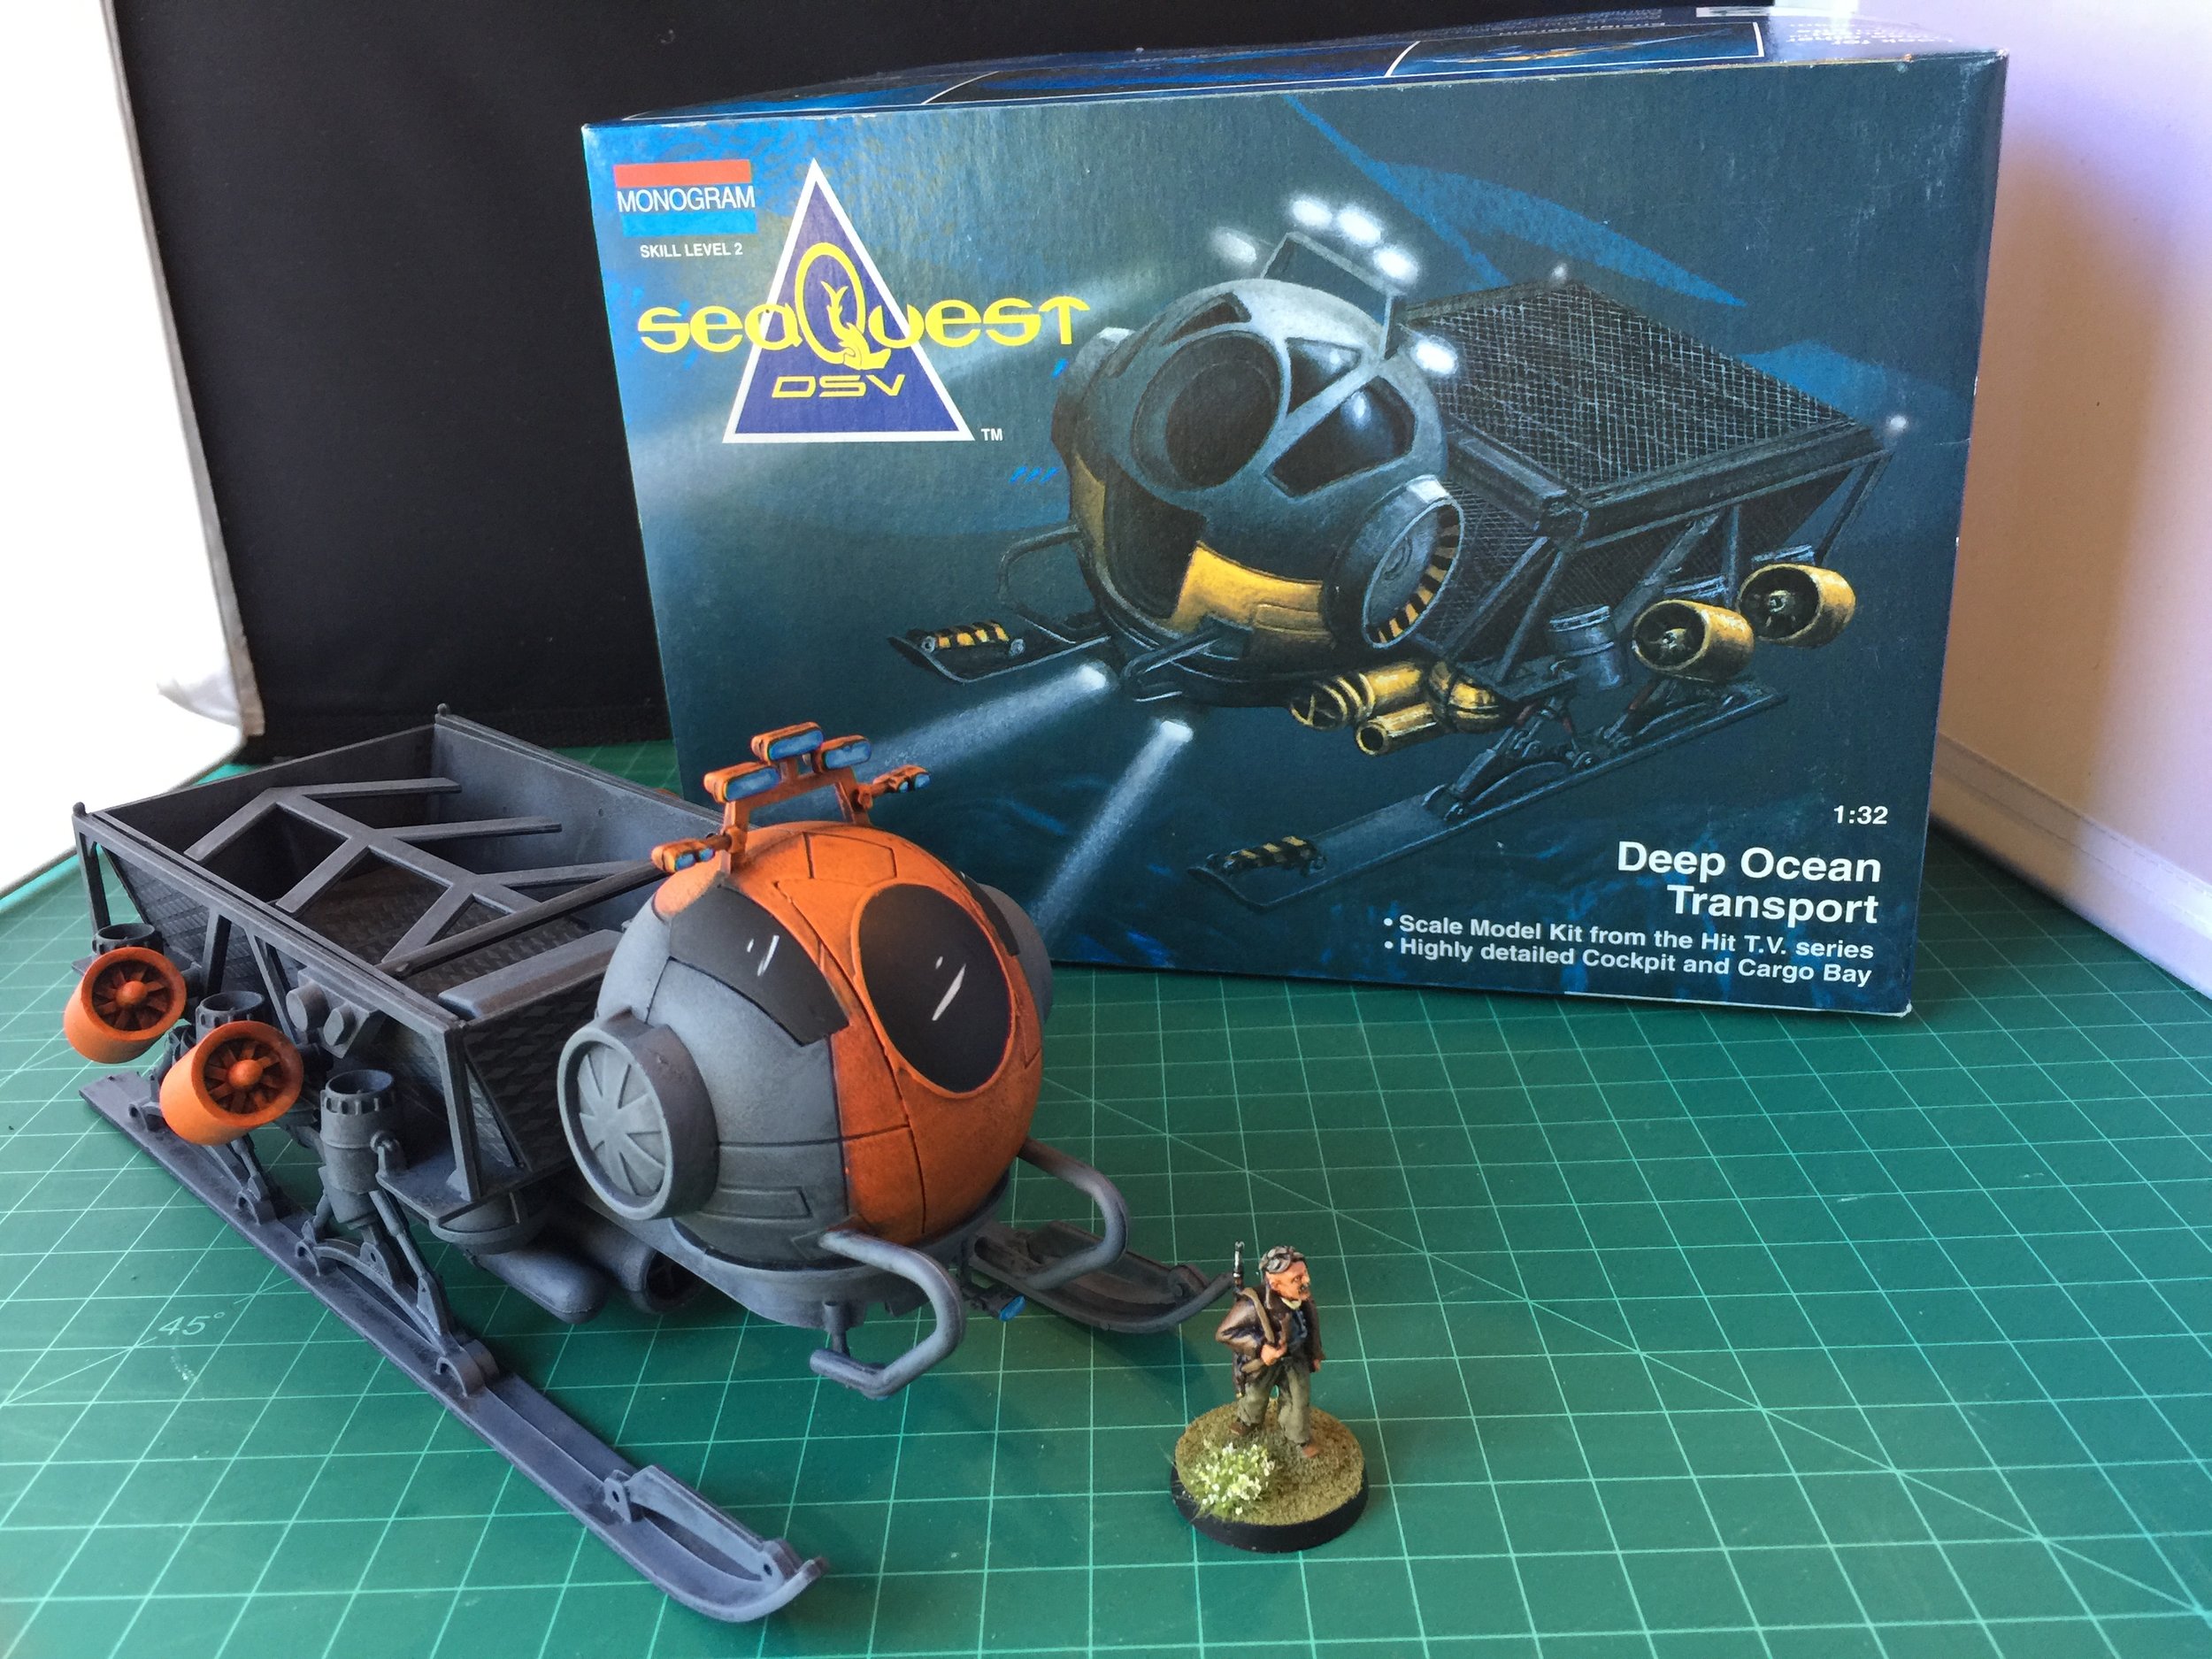
The first half of this week we were in Morro Bay and visiting Hearst Castle… great trip. When I finally returned to the workbench, I turned my attention to finishing the third of the Ian Weekley star forts… mostly just painting. With that done I decided to take a detour back to my Gordon Loch Ness project and build and paint the second Monogram SeaQuest model I picked up at the swap meet… the Deep Ocean Transport. While I gave the overall vehicle a color scheme of Intermediate Grey, I kept the Amaranth Red in play with some detail work on the vehicle’s bridge and some side propulsion units. I think it’s a nice addition to the collection, and at $3 a great swap meet find.
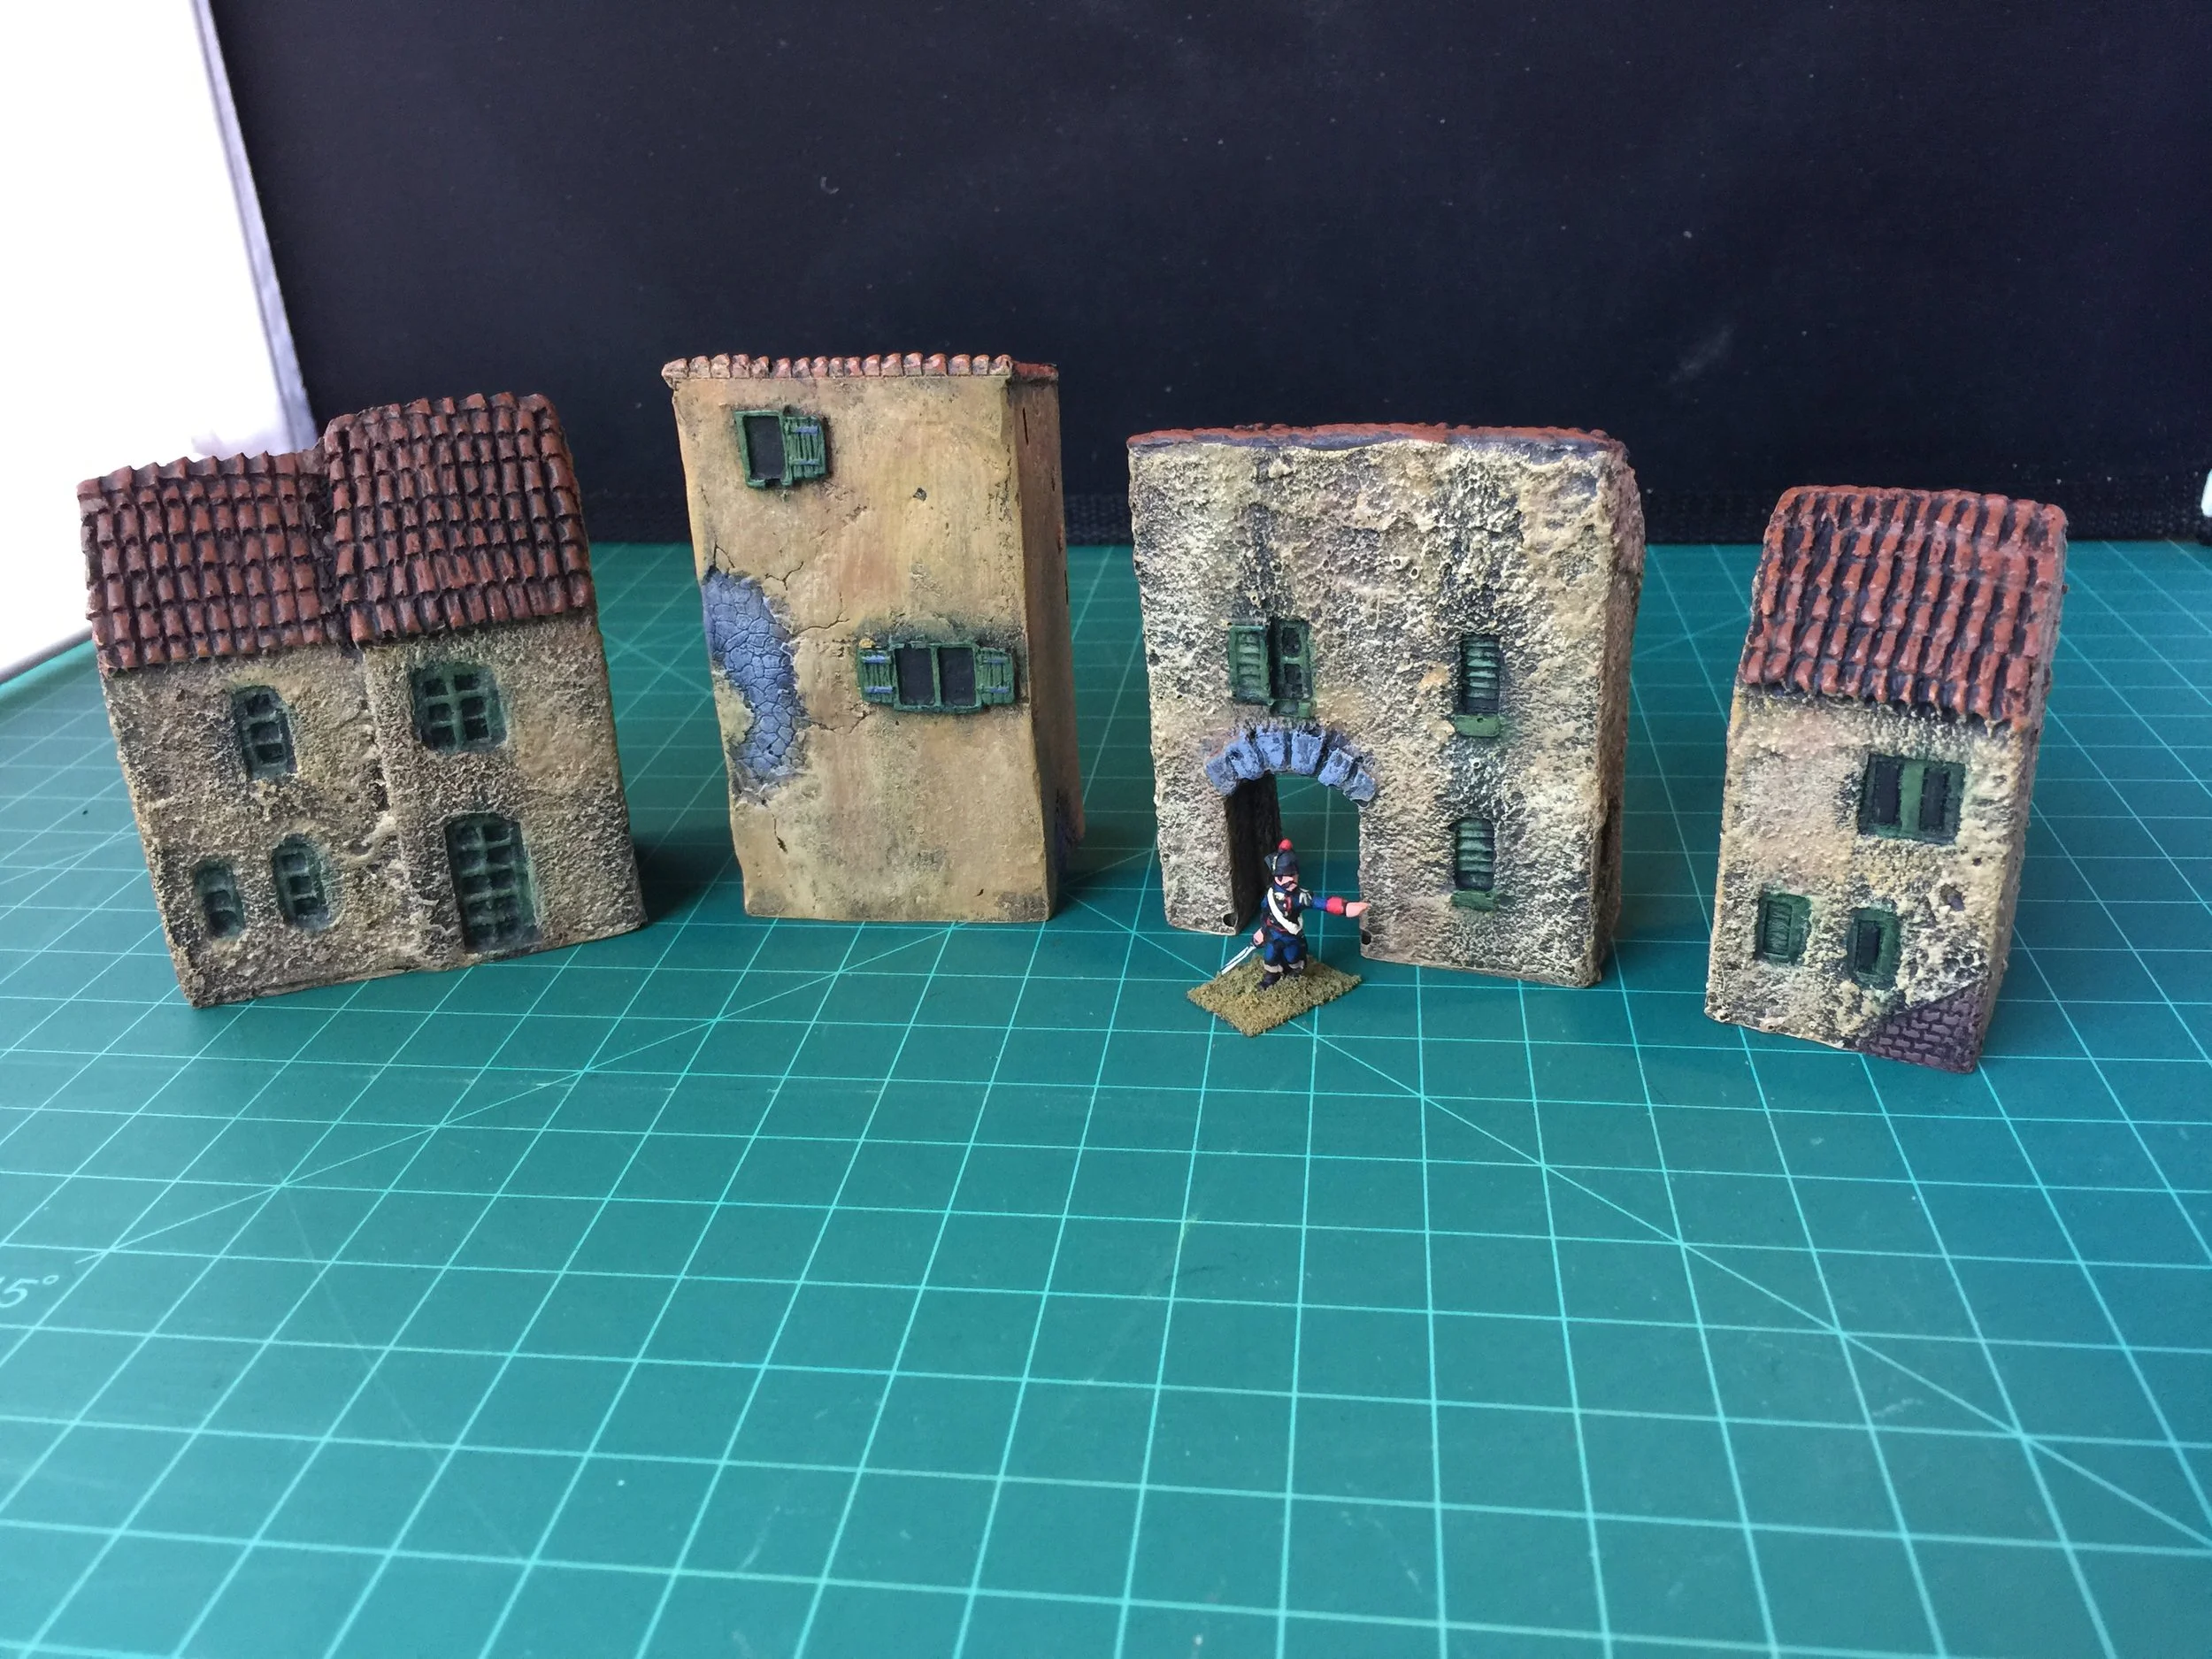
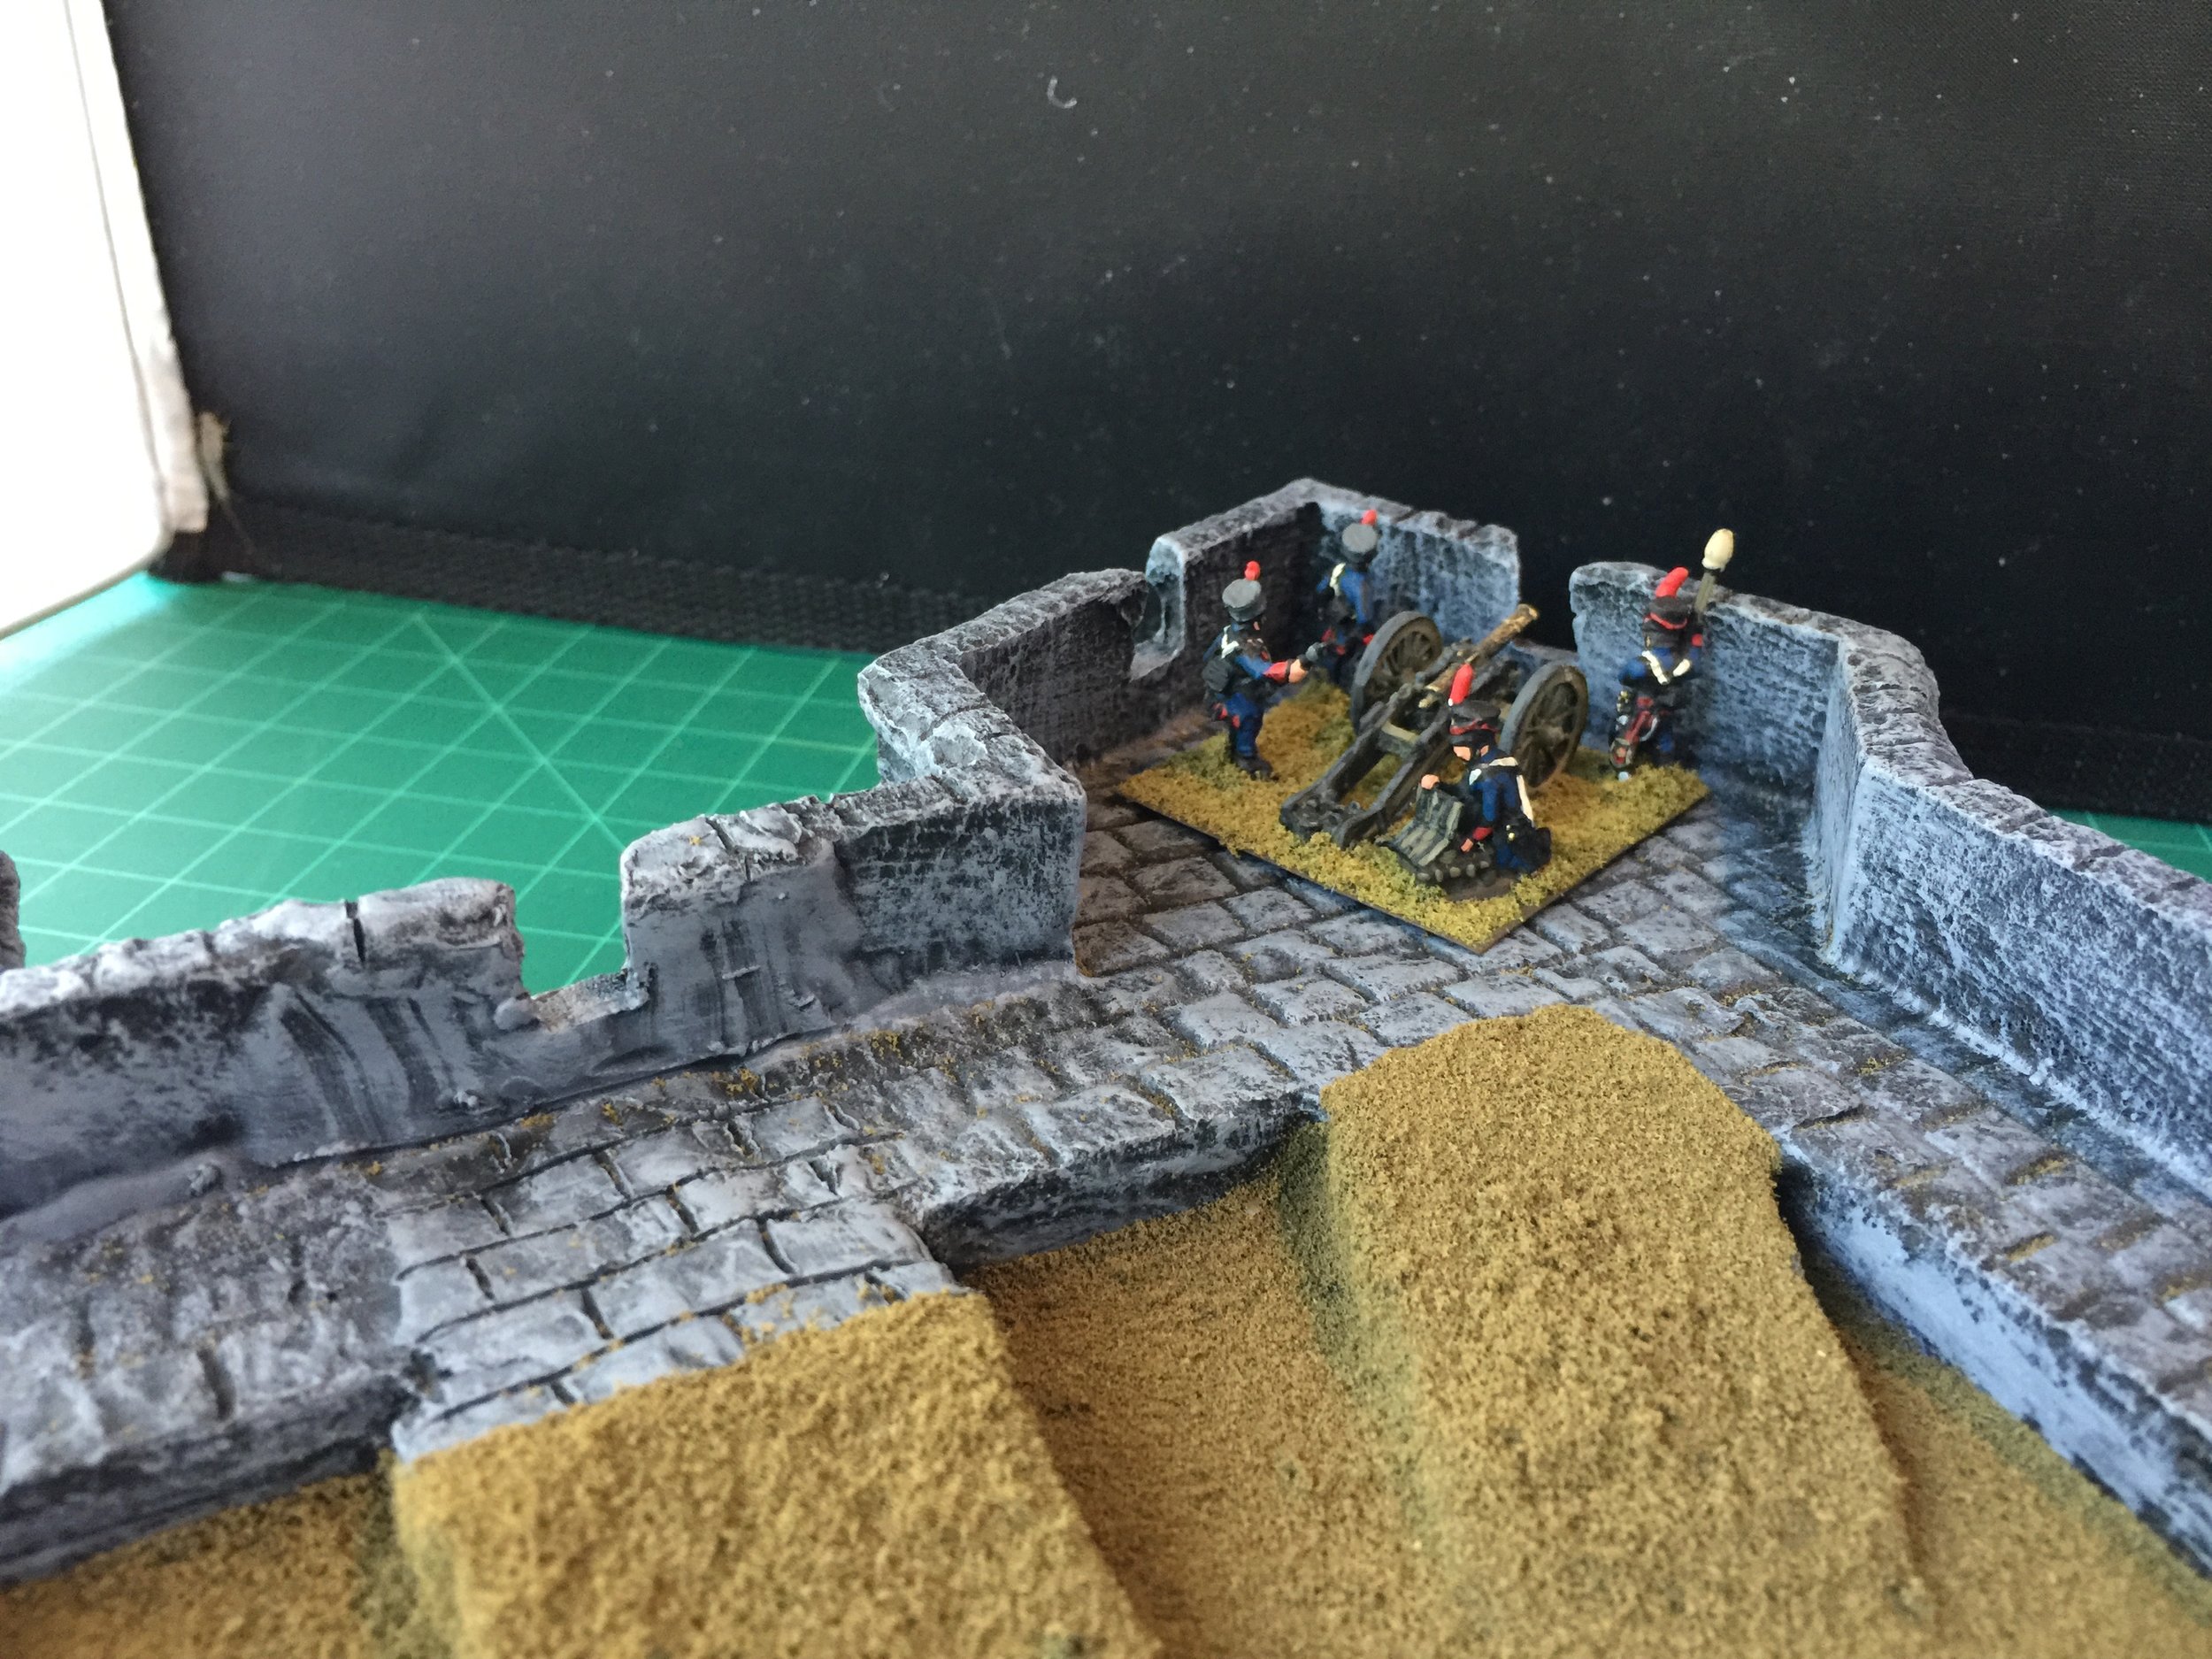
I closed out the workbench week by returning to terrain for my Napoleonic Spain/1809. The Spanish village I will be using is very old school composed of more than 30 buildings most of which are Hovels, a few Ian Weekley, and a few unknown. I have had most of these buildings more than 20 years, and they are of the same period of manufacture as the Ian Weekley star forts. Compared with the Northern European buildings by Landmark that I used with my other 1809 Austrian Napoleonic collection, they are a bit crude by the best standards of current terrain/buildings, but I’ve always liked these Hovels’ Spanish buildings, and it pleases me to incorporate this earlier terrain look throughout this second Napoleonic collection. On Saturday I painted the first four of the town buildings and have posted them here with front and rear views. The figure used for scale is from Old Glory 15s from back when that company was stilled owned by Russ Dunaway… well over a decade before he began Blue Moon 15s.

August 18, 2019
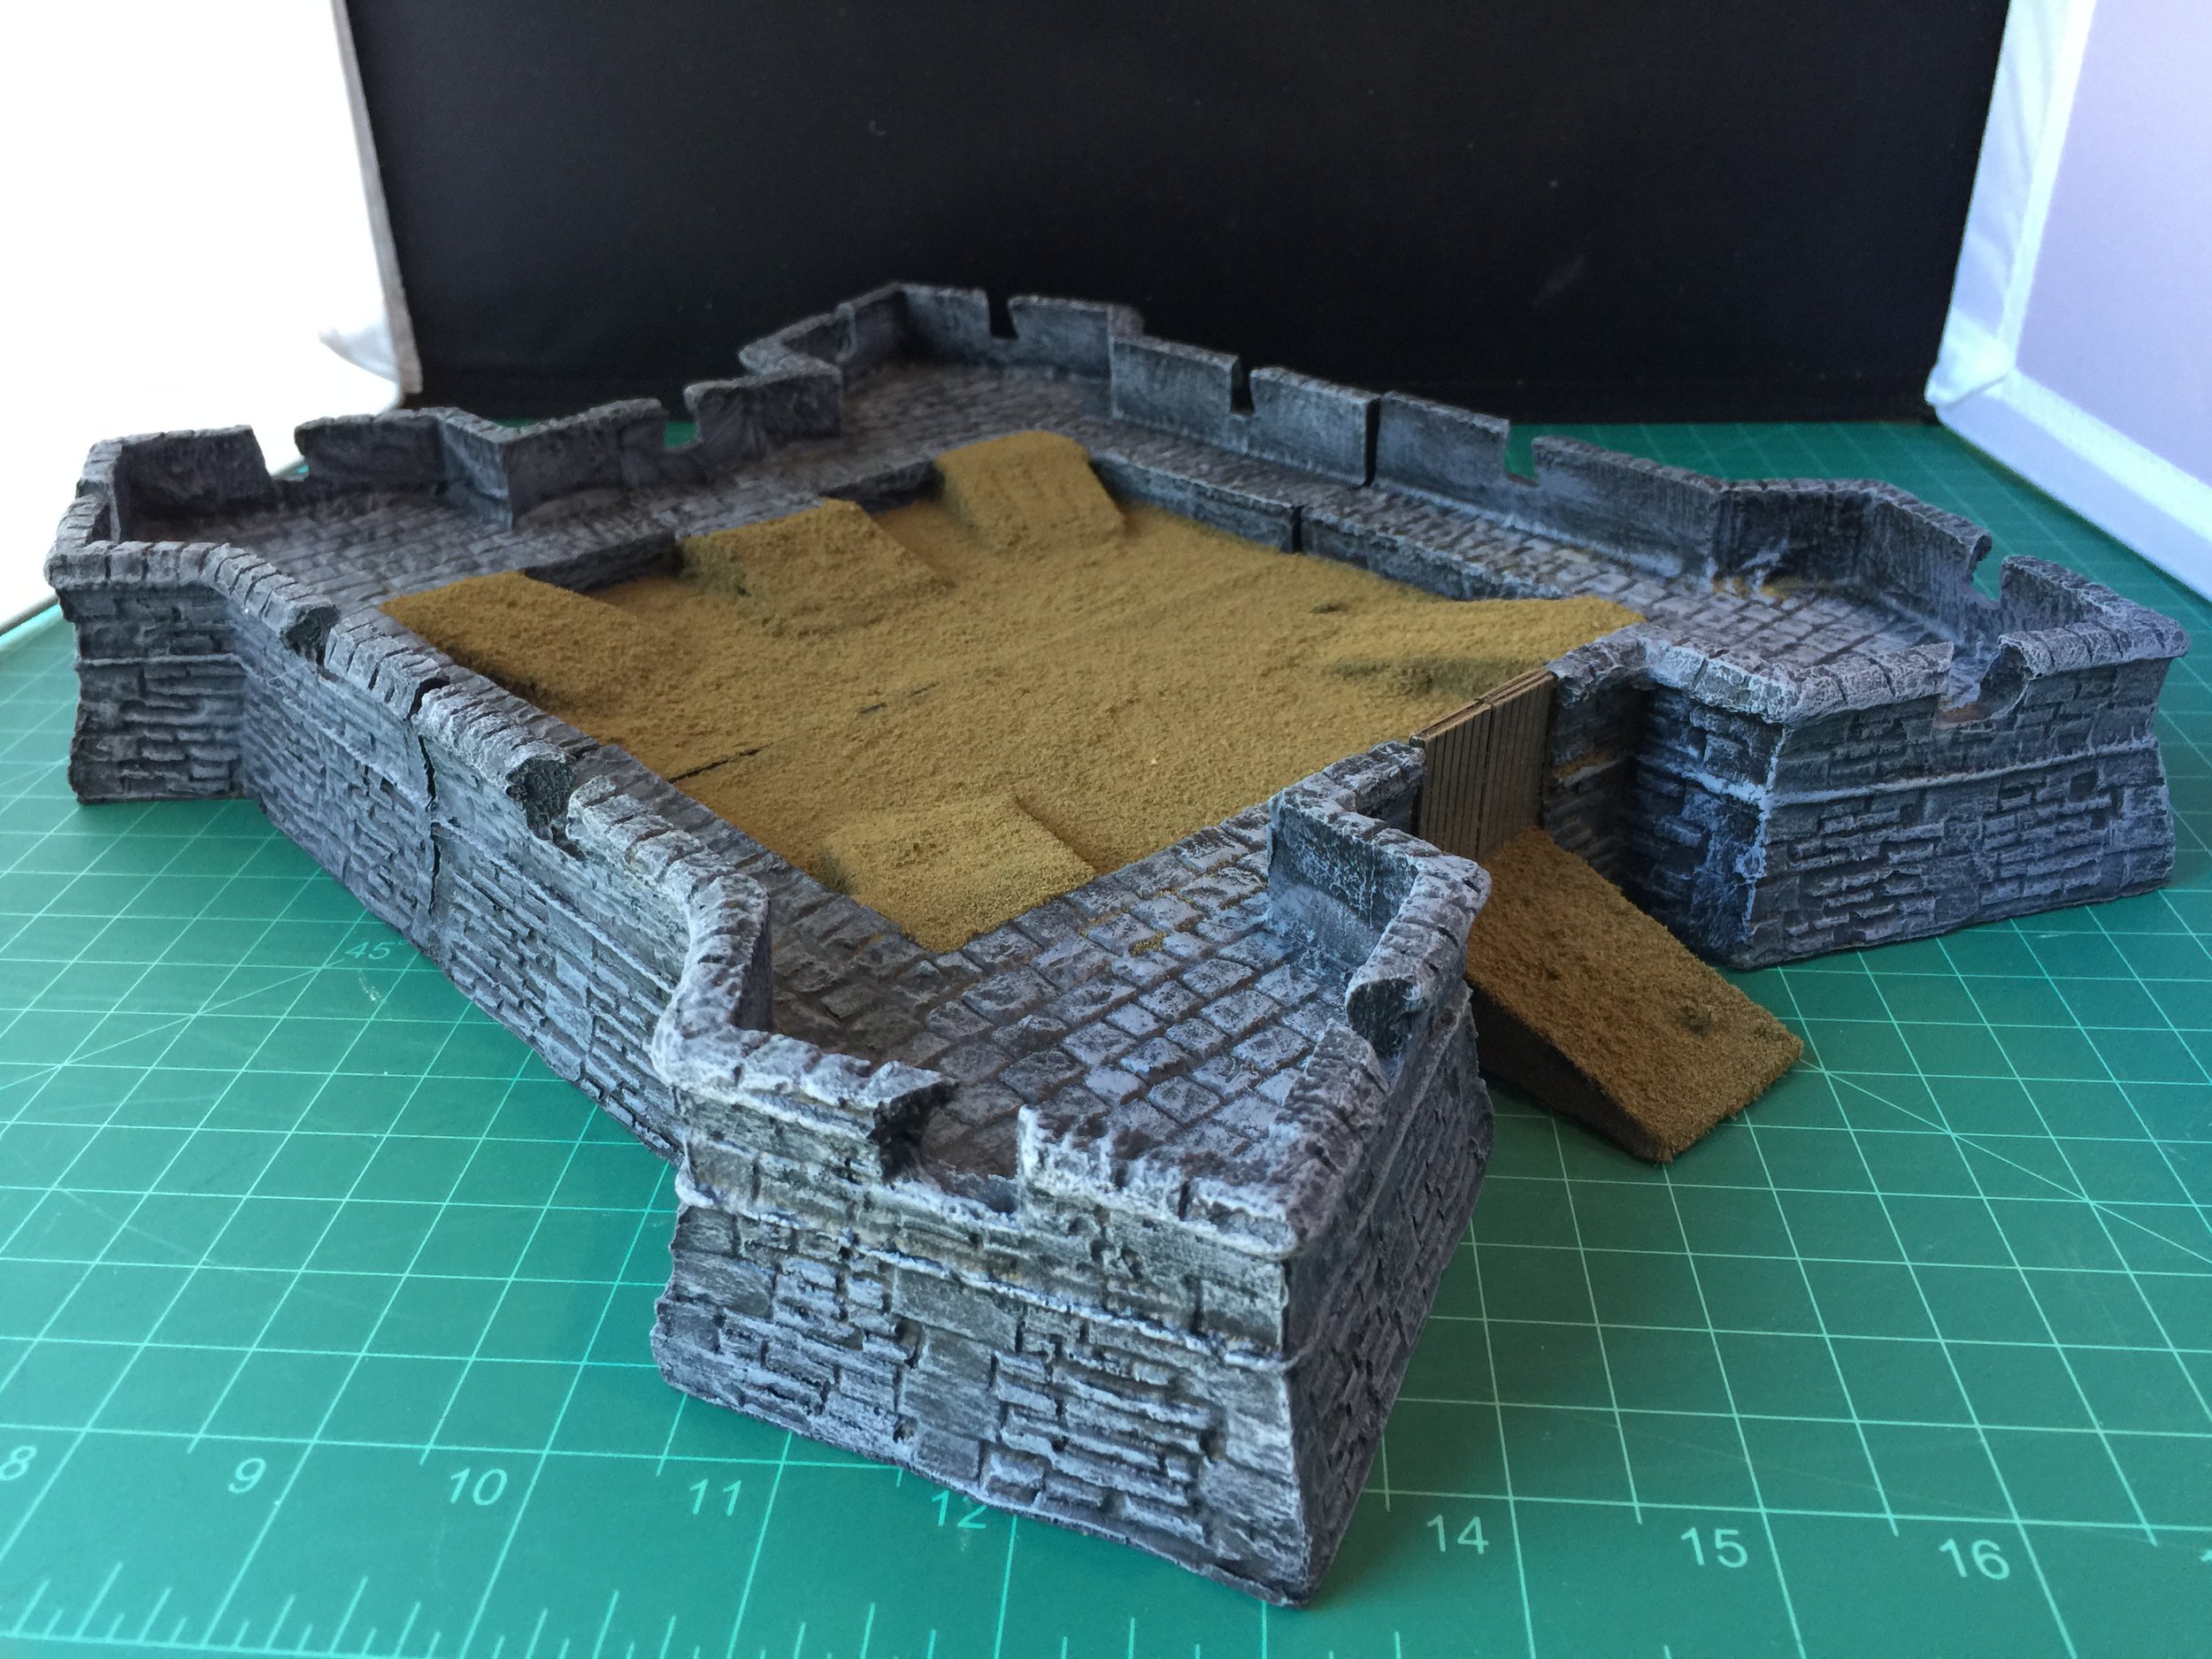
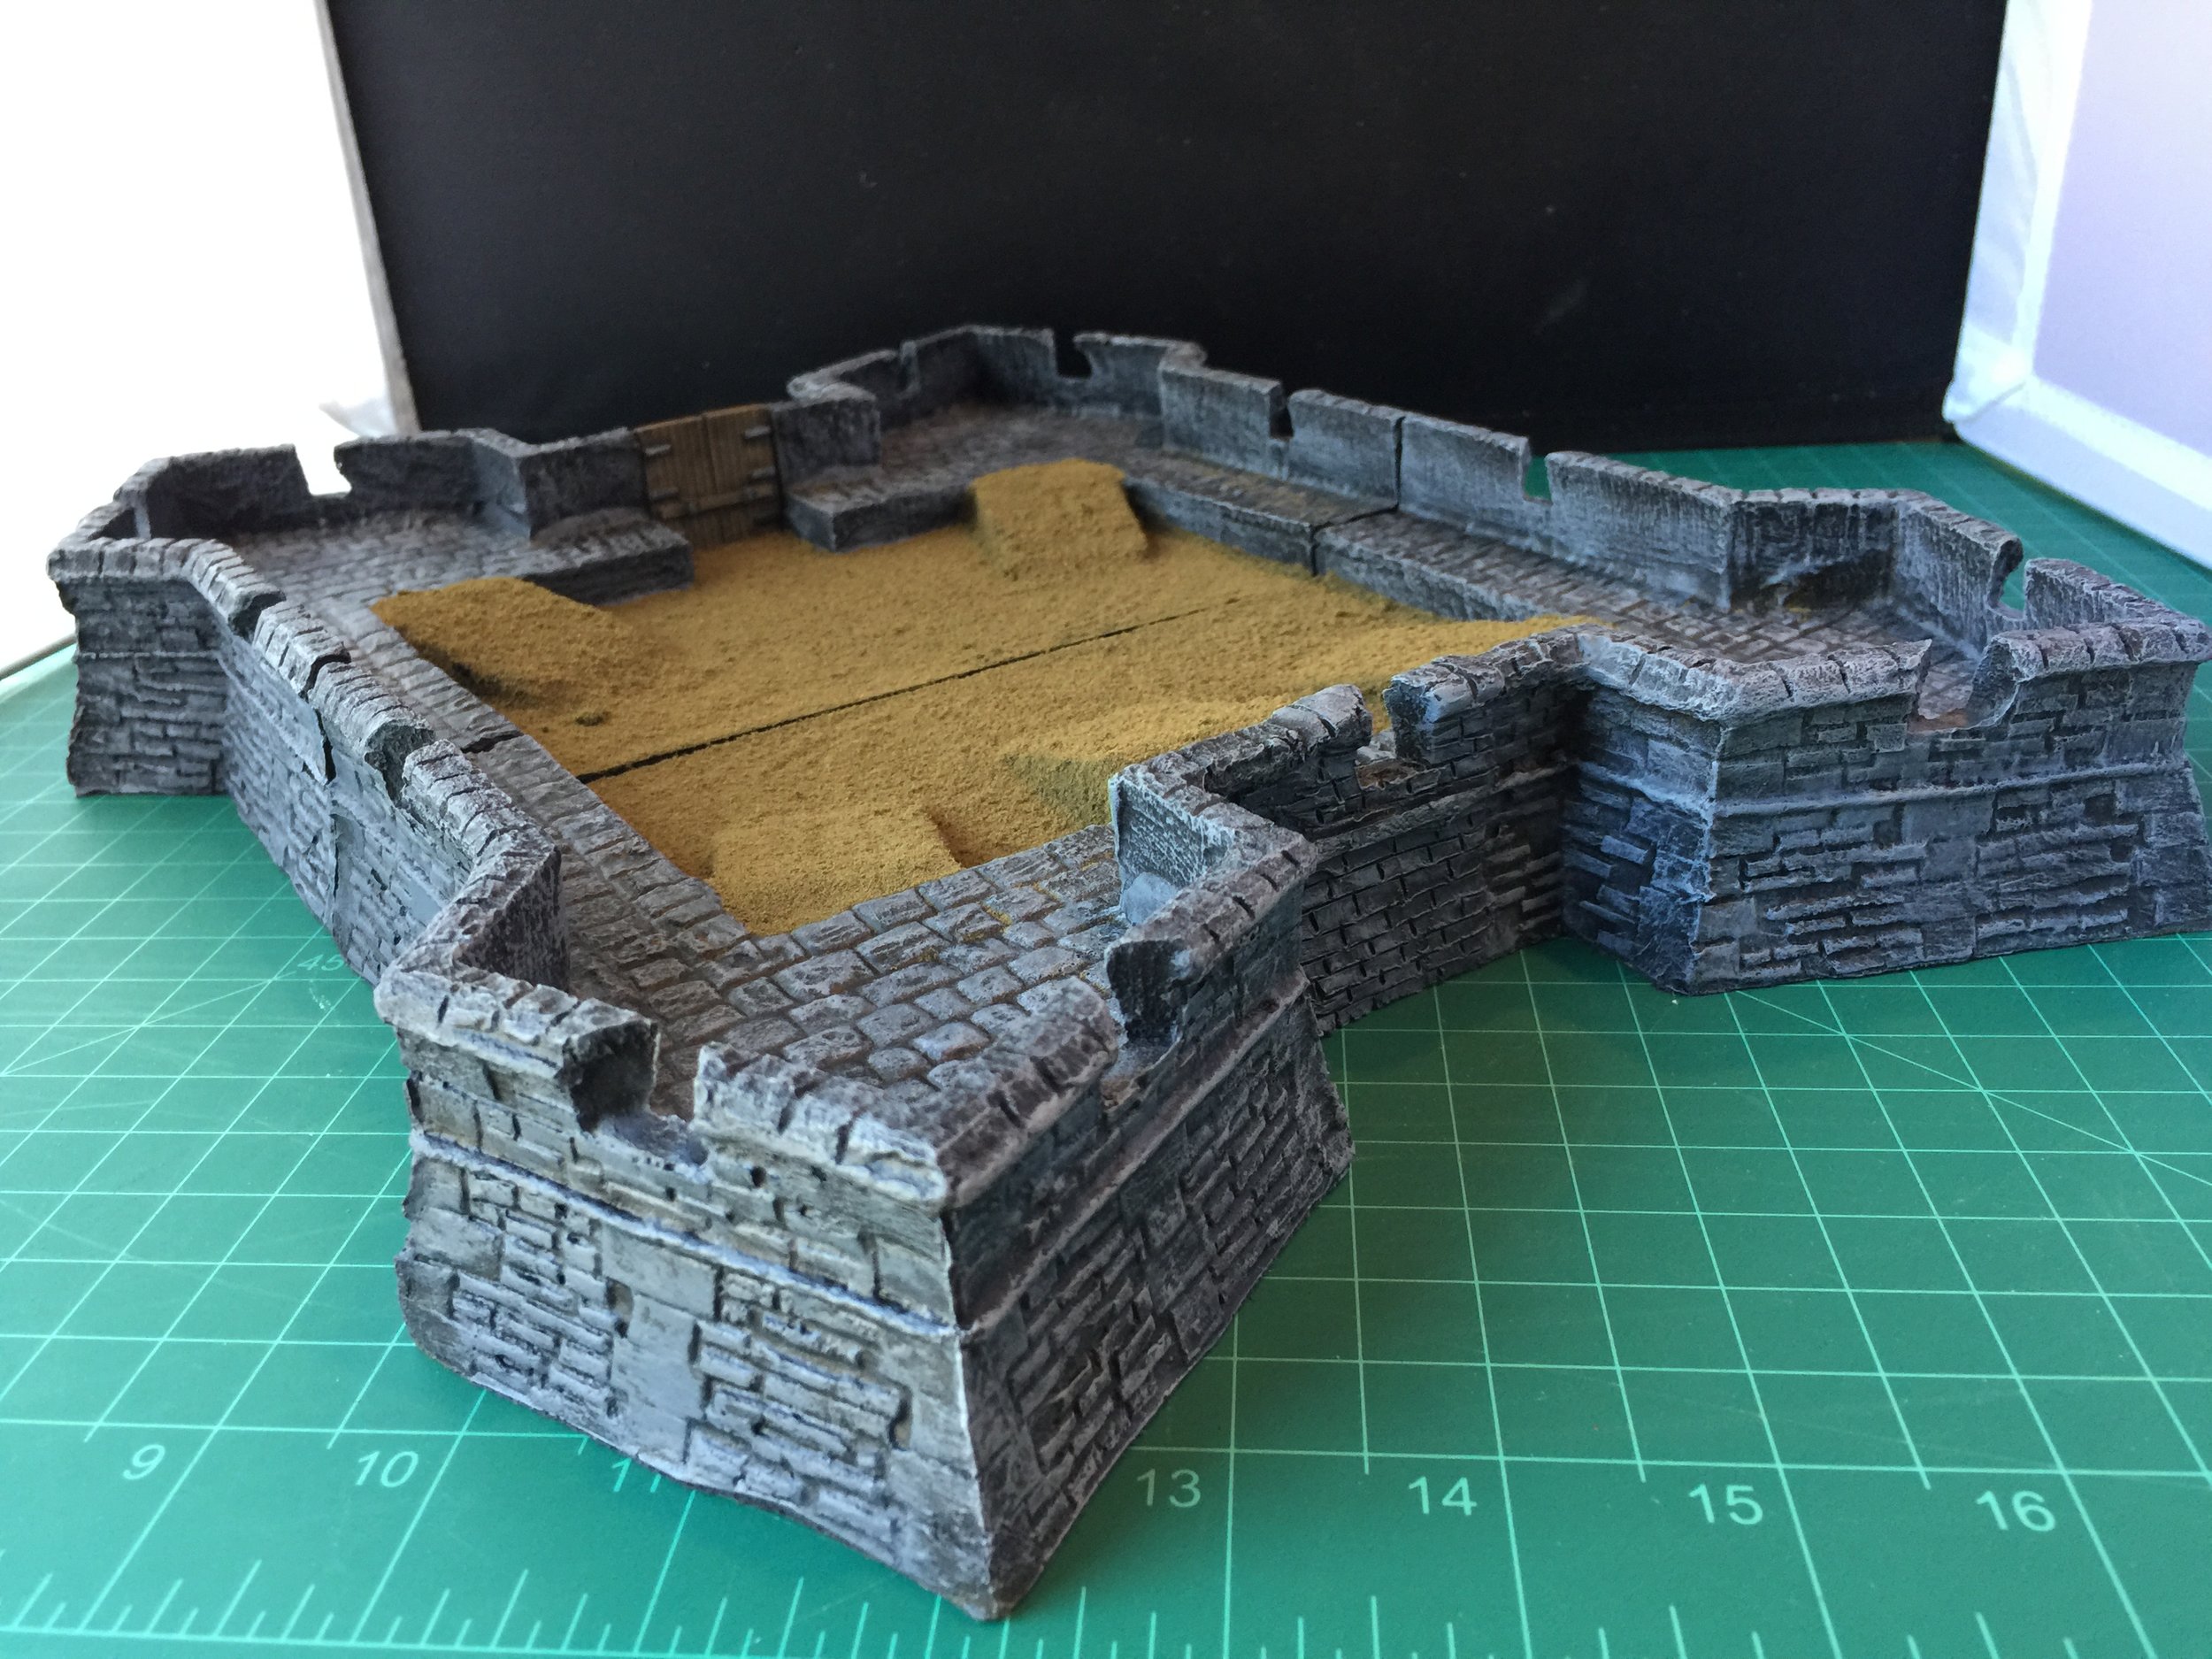
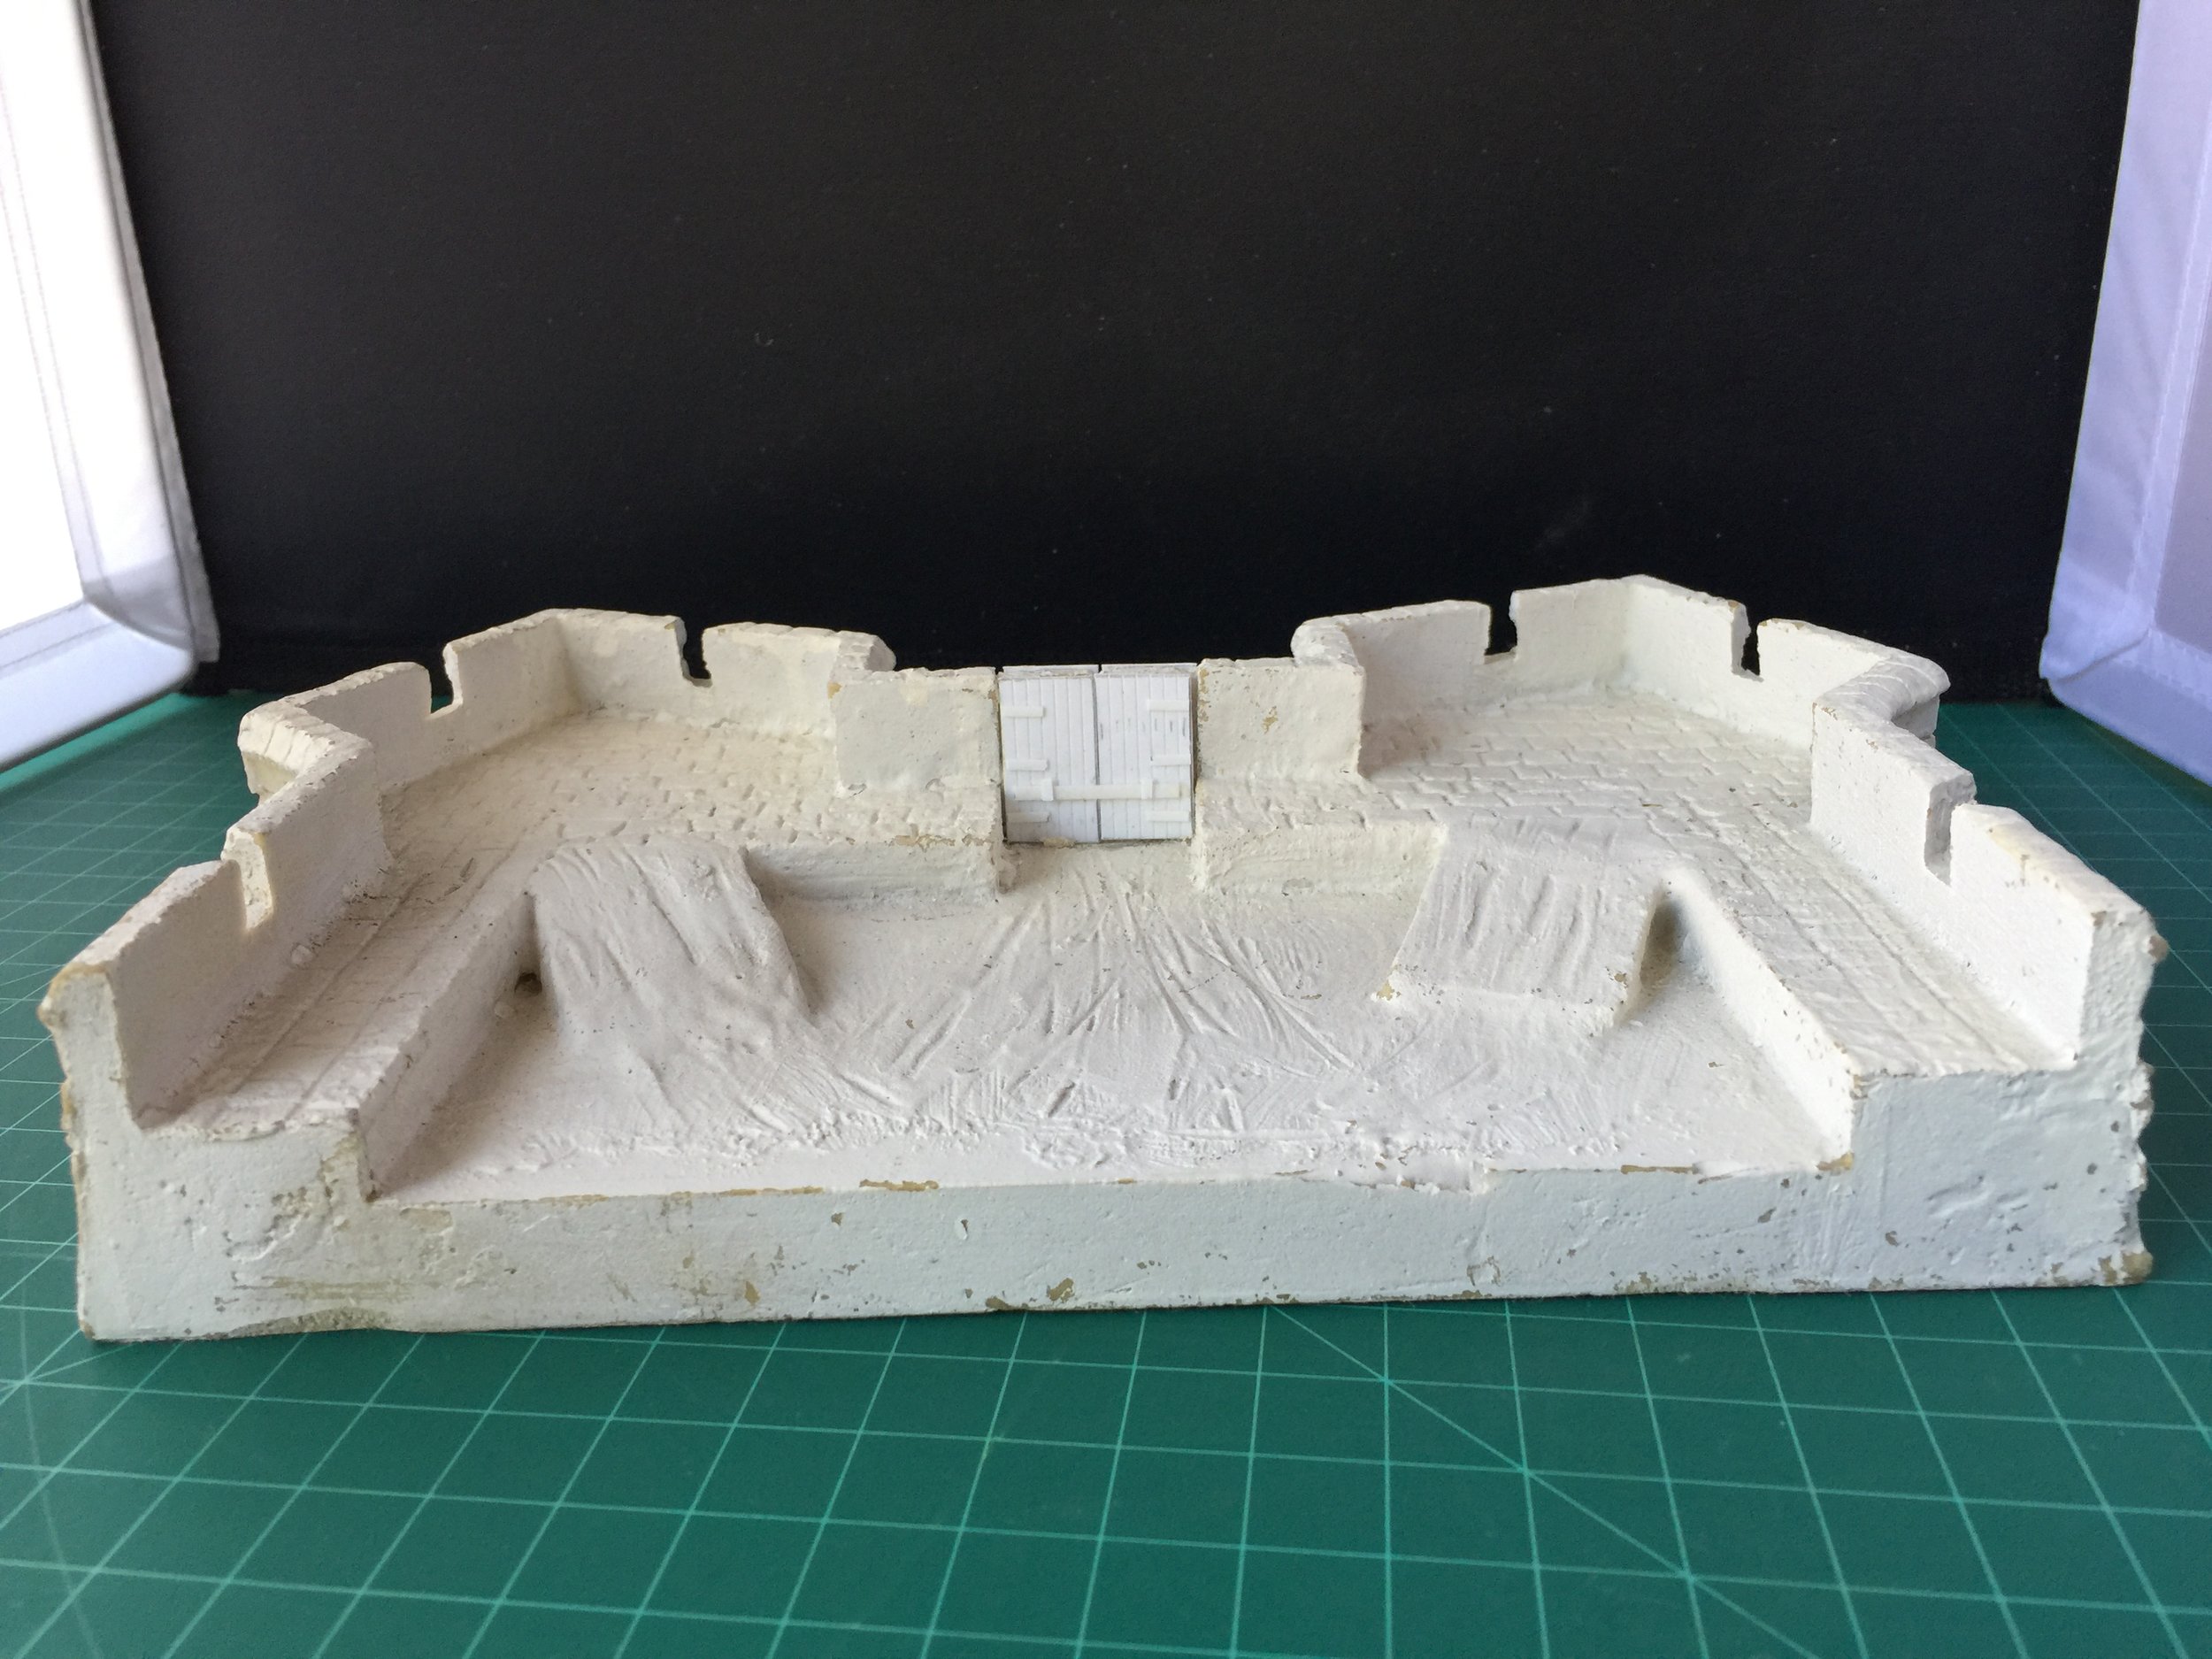
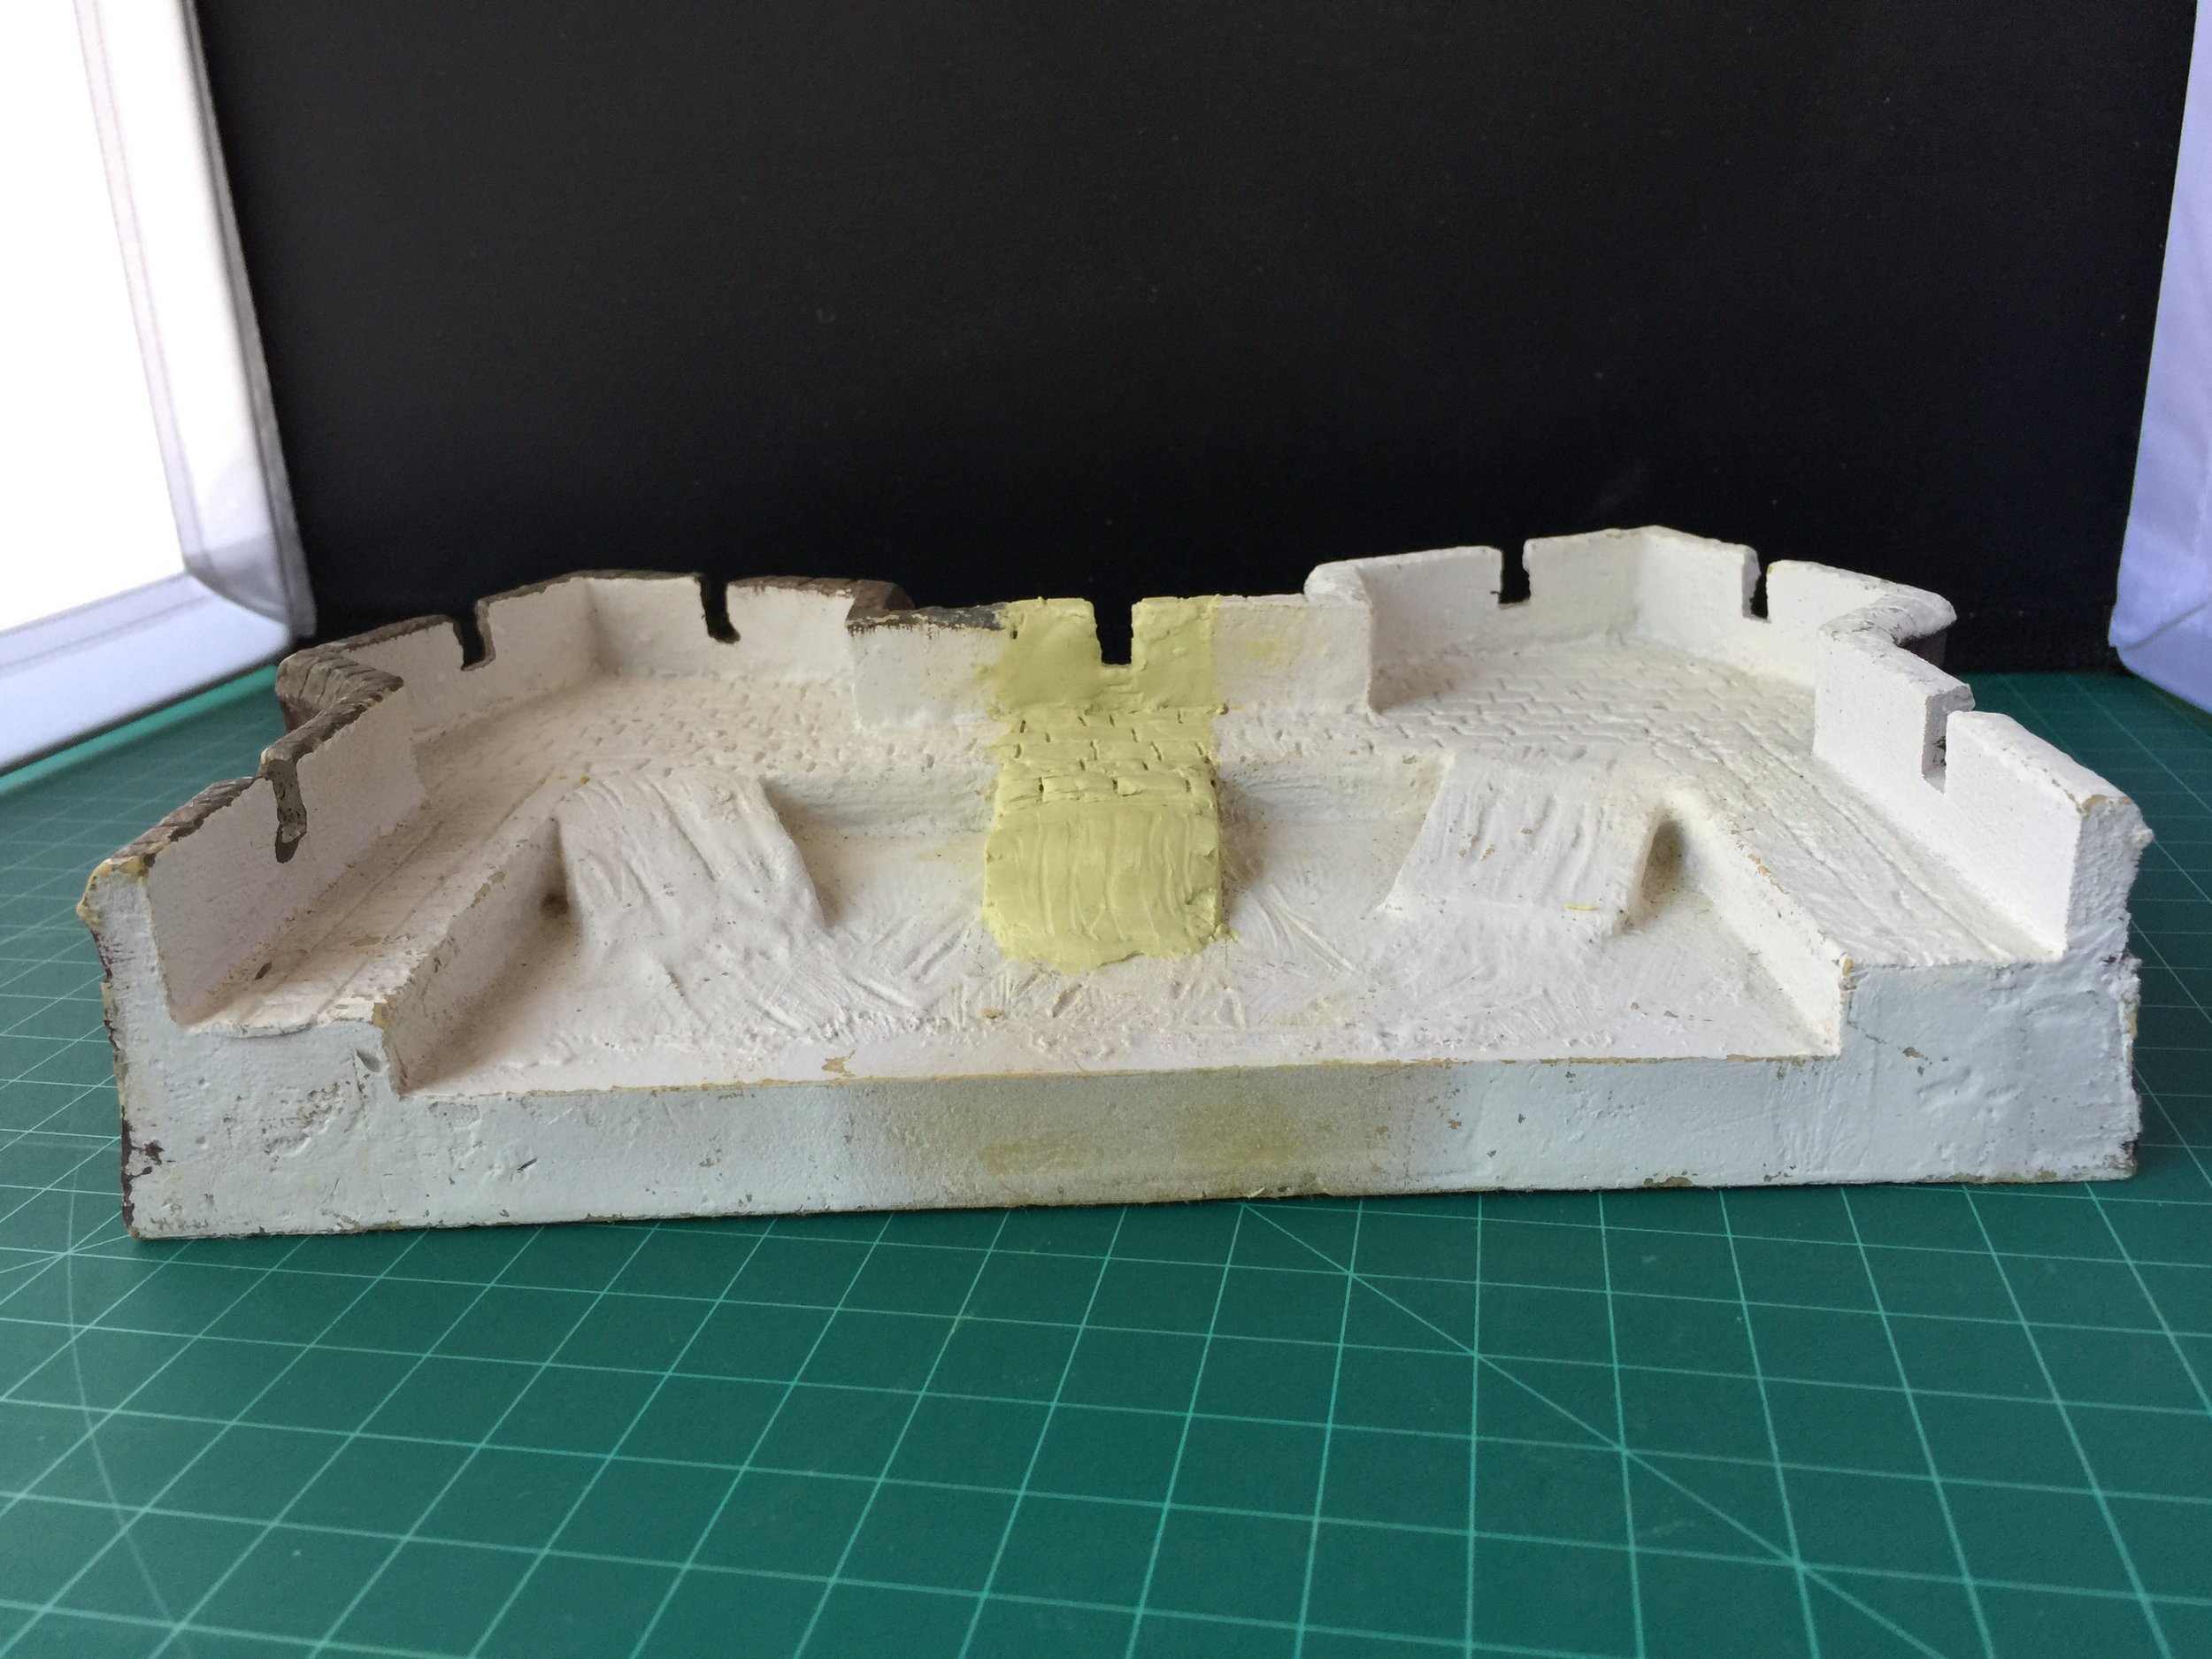
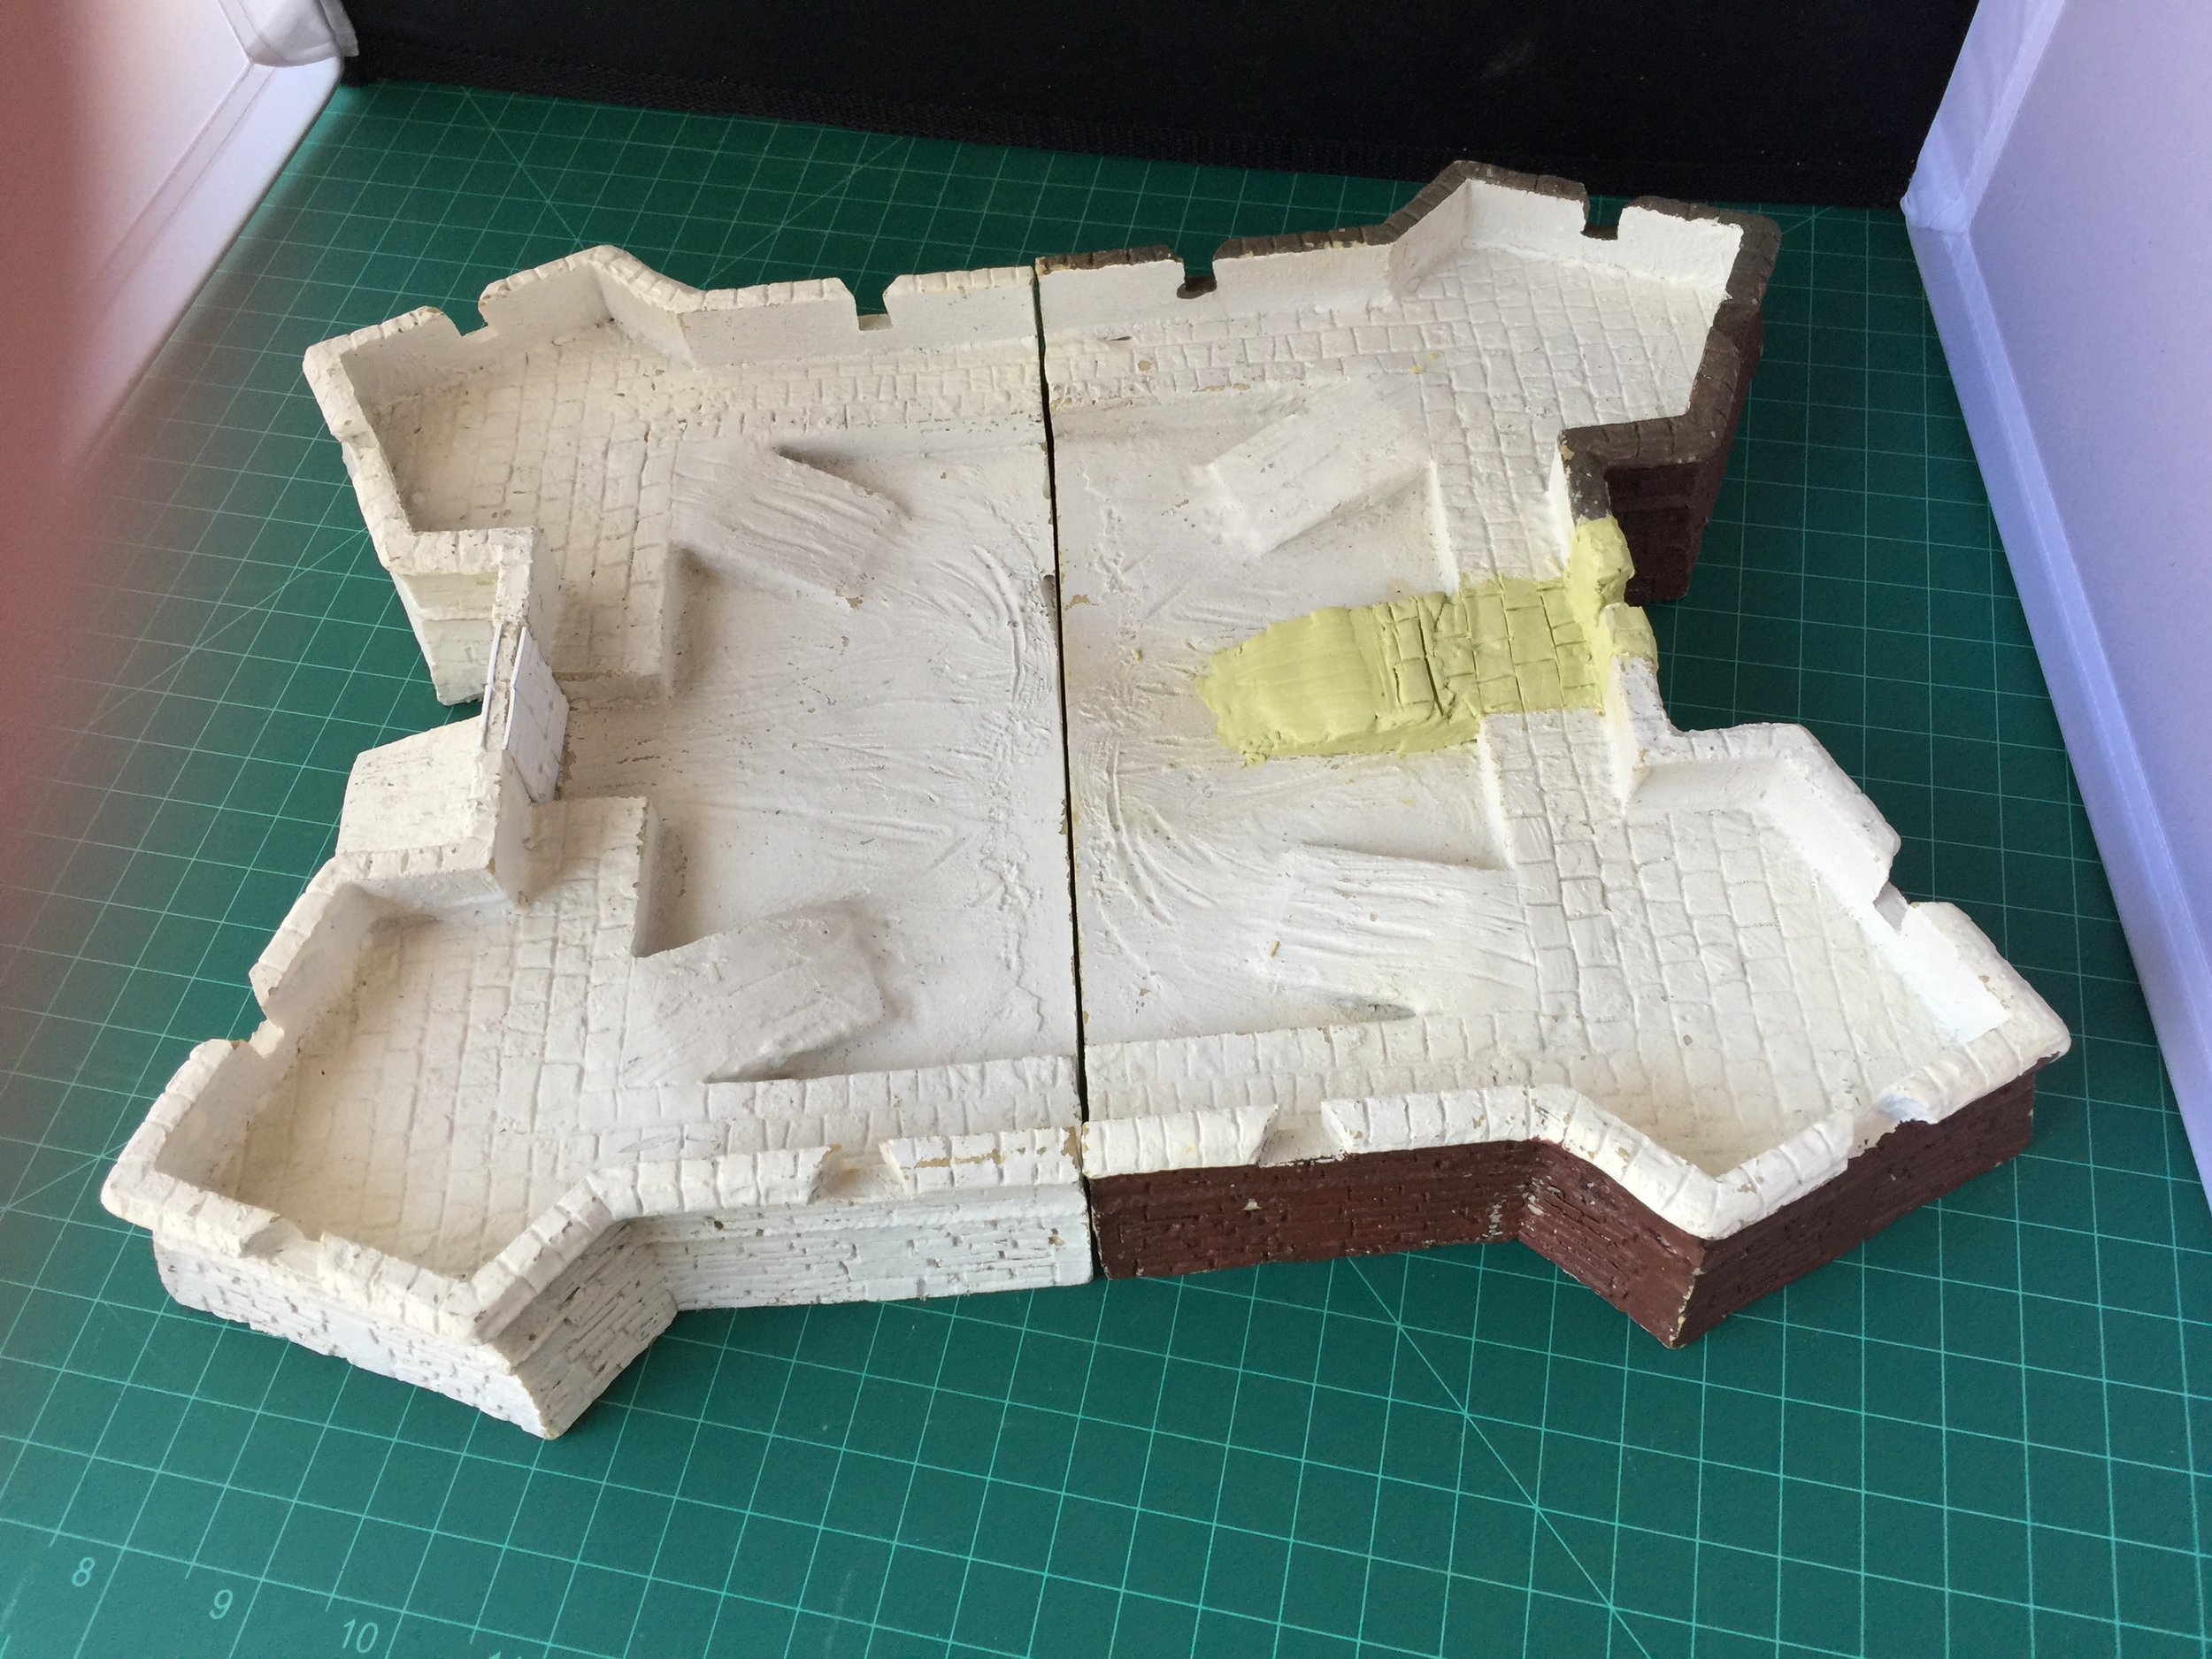
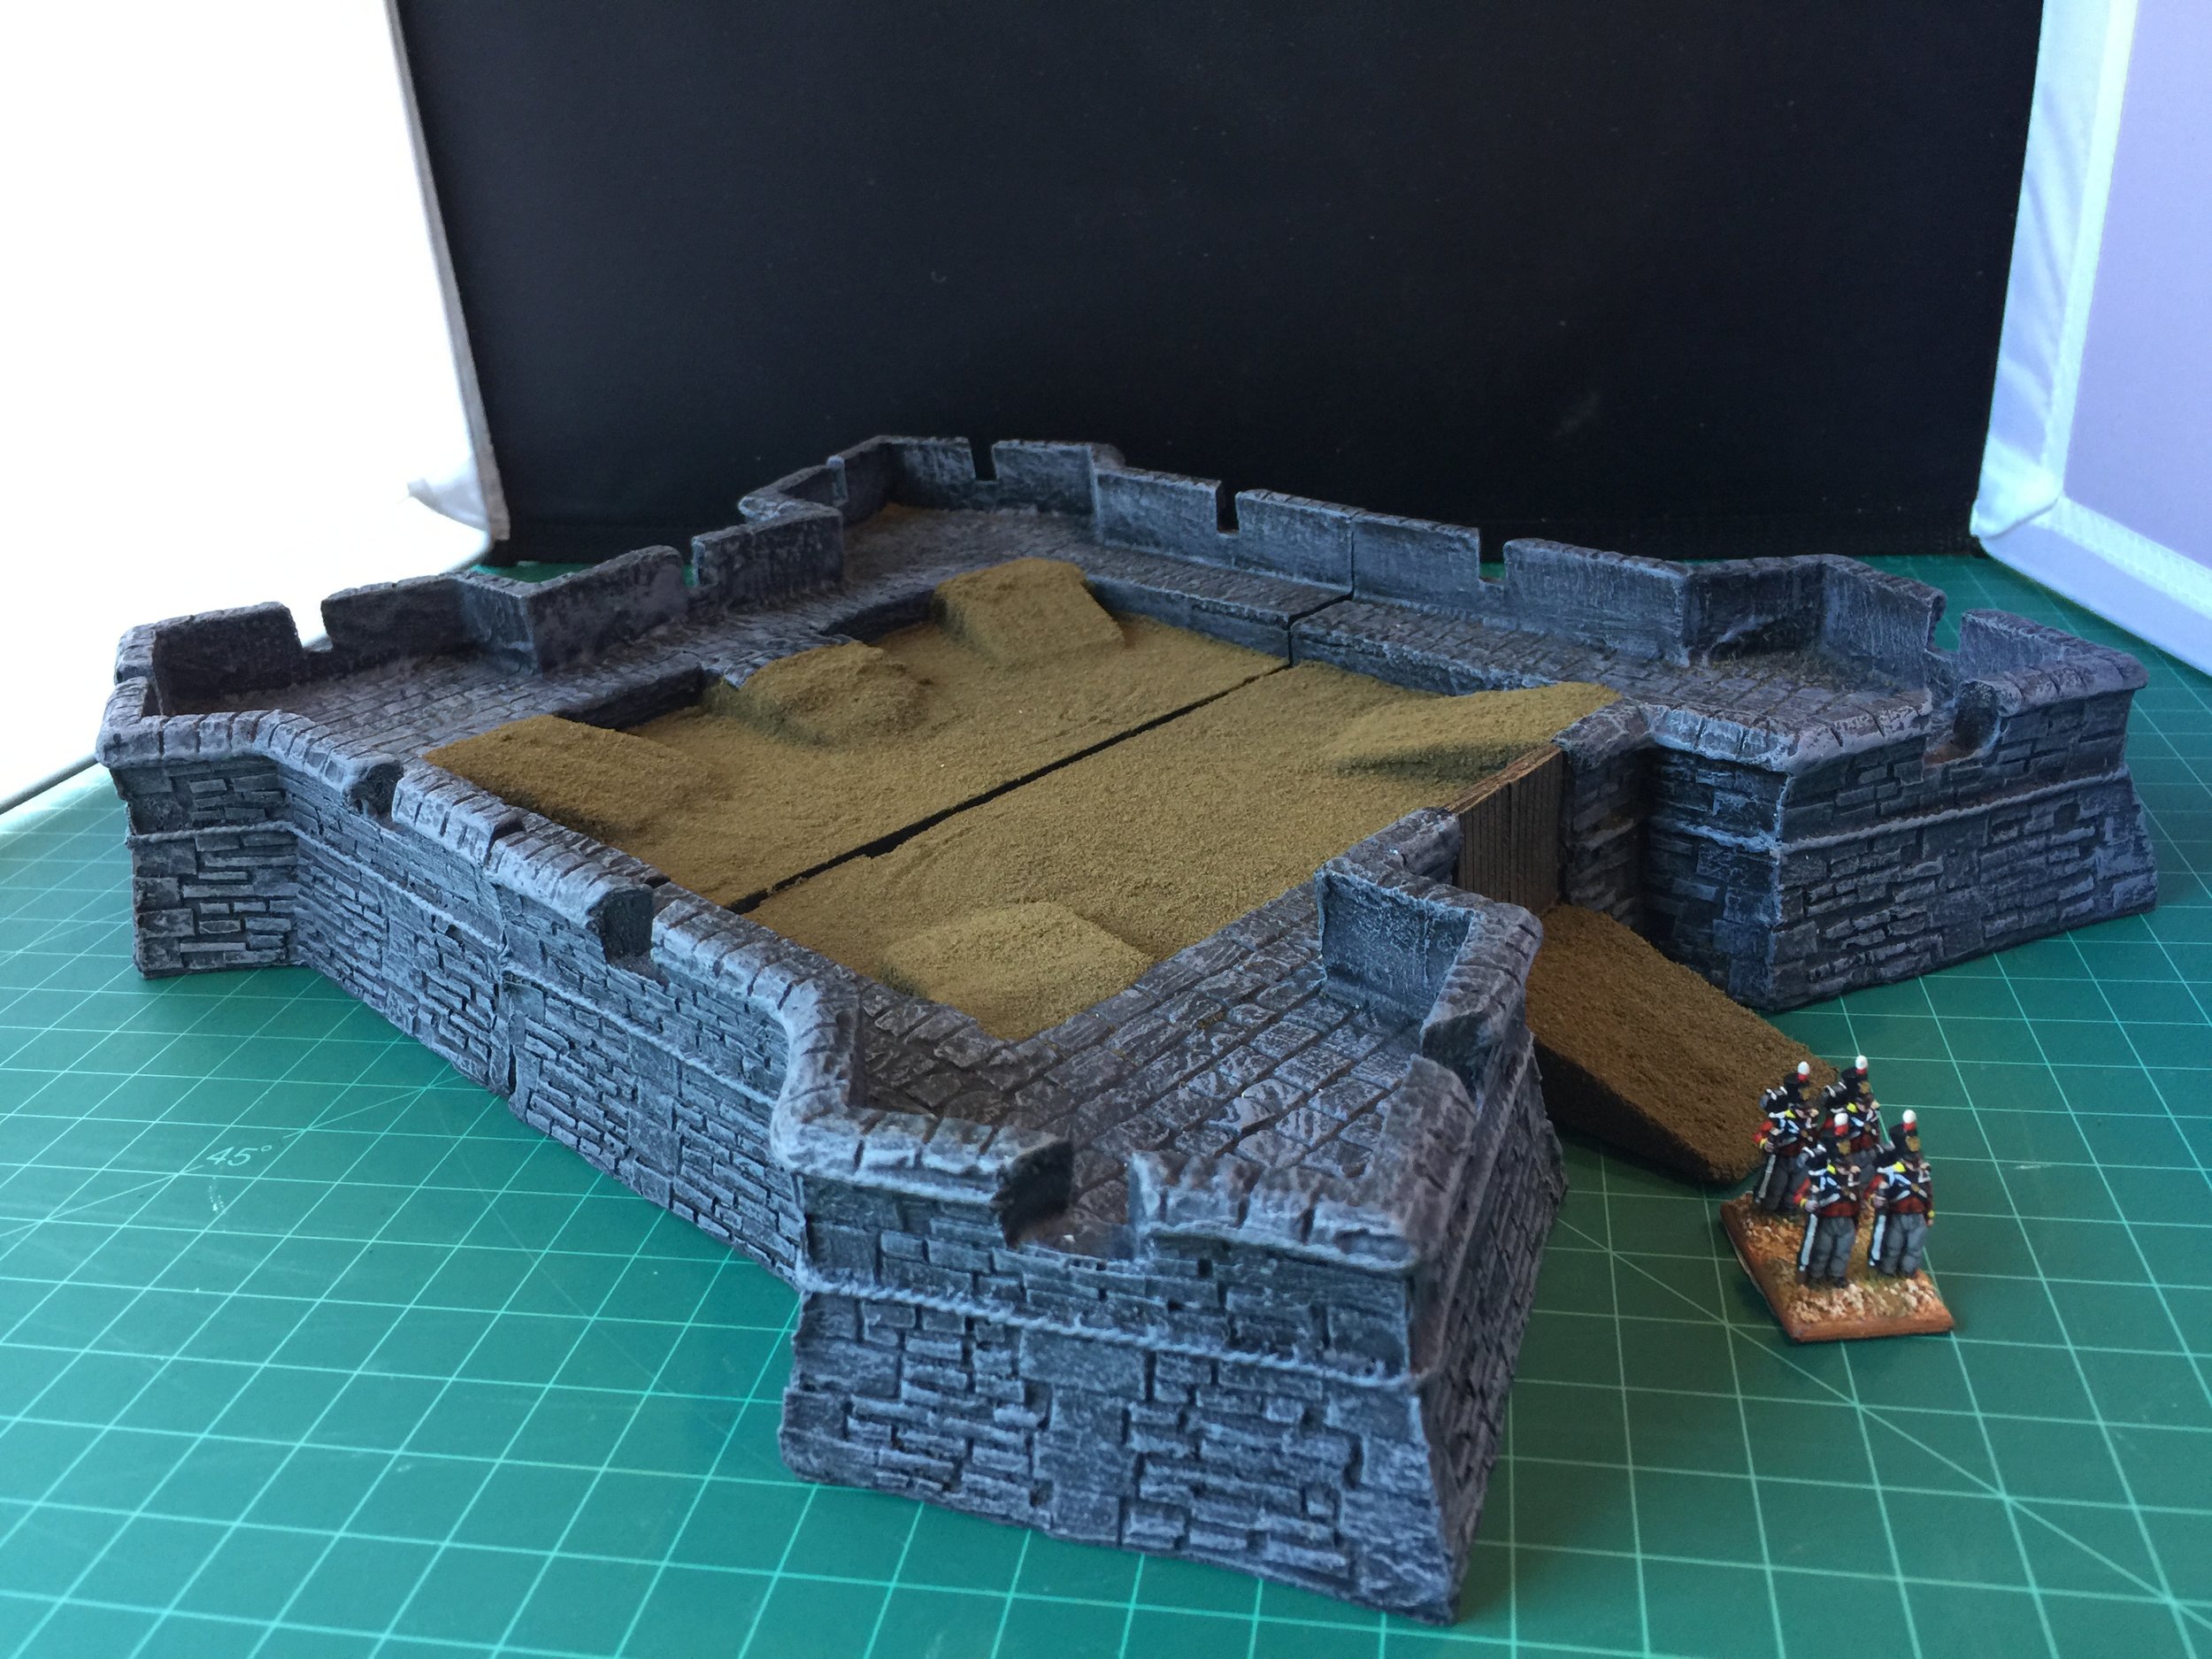
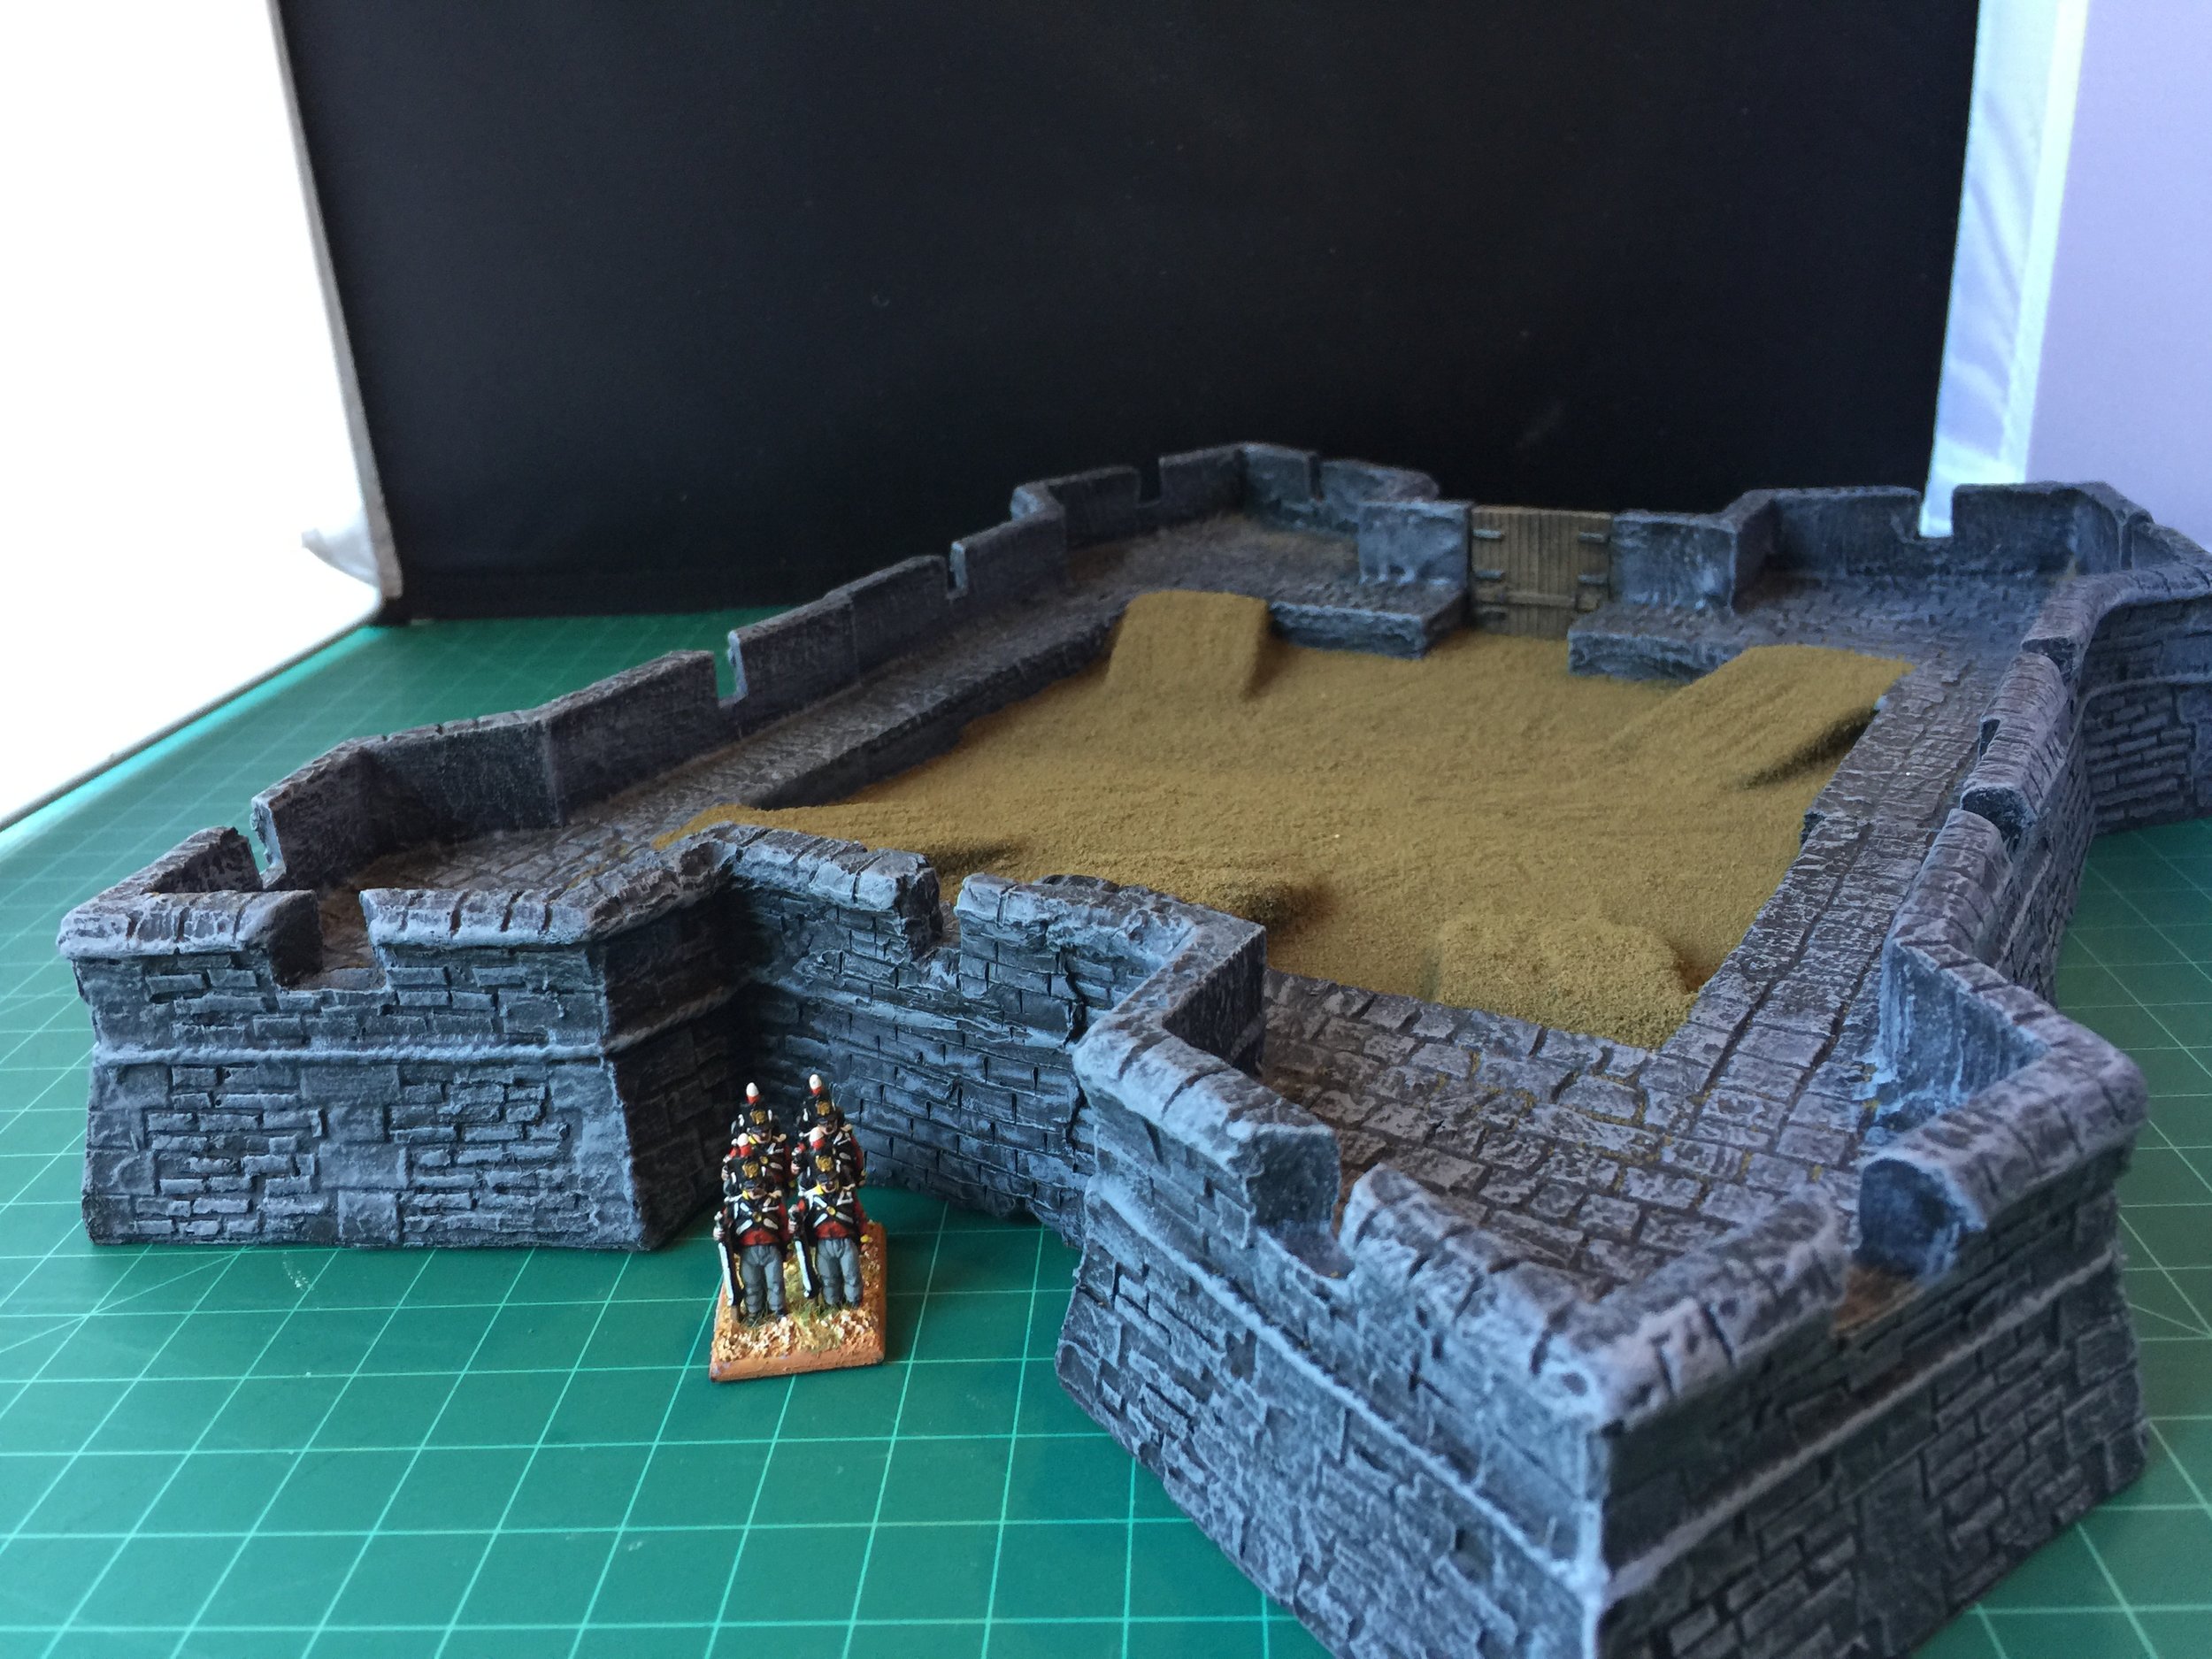
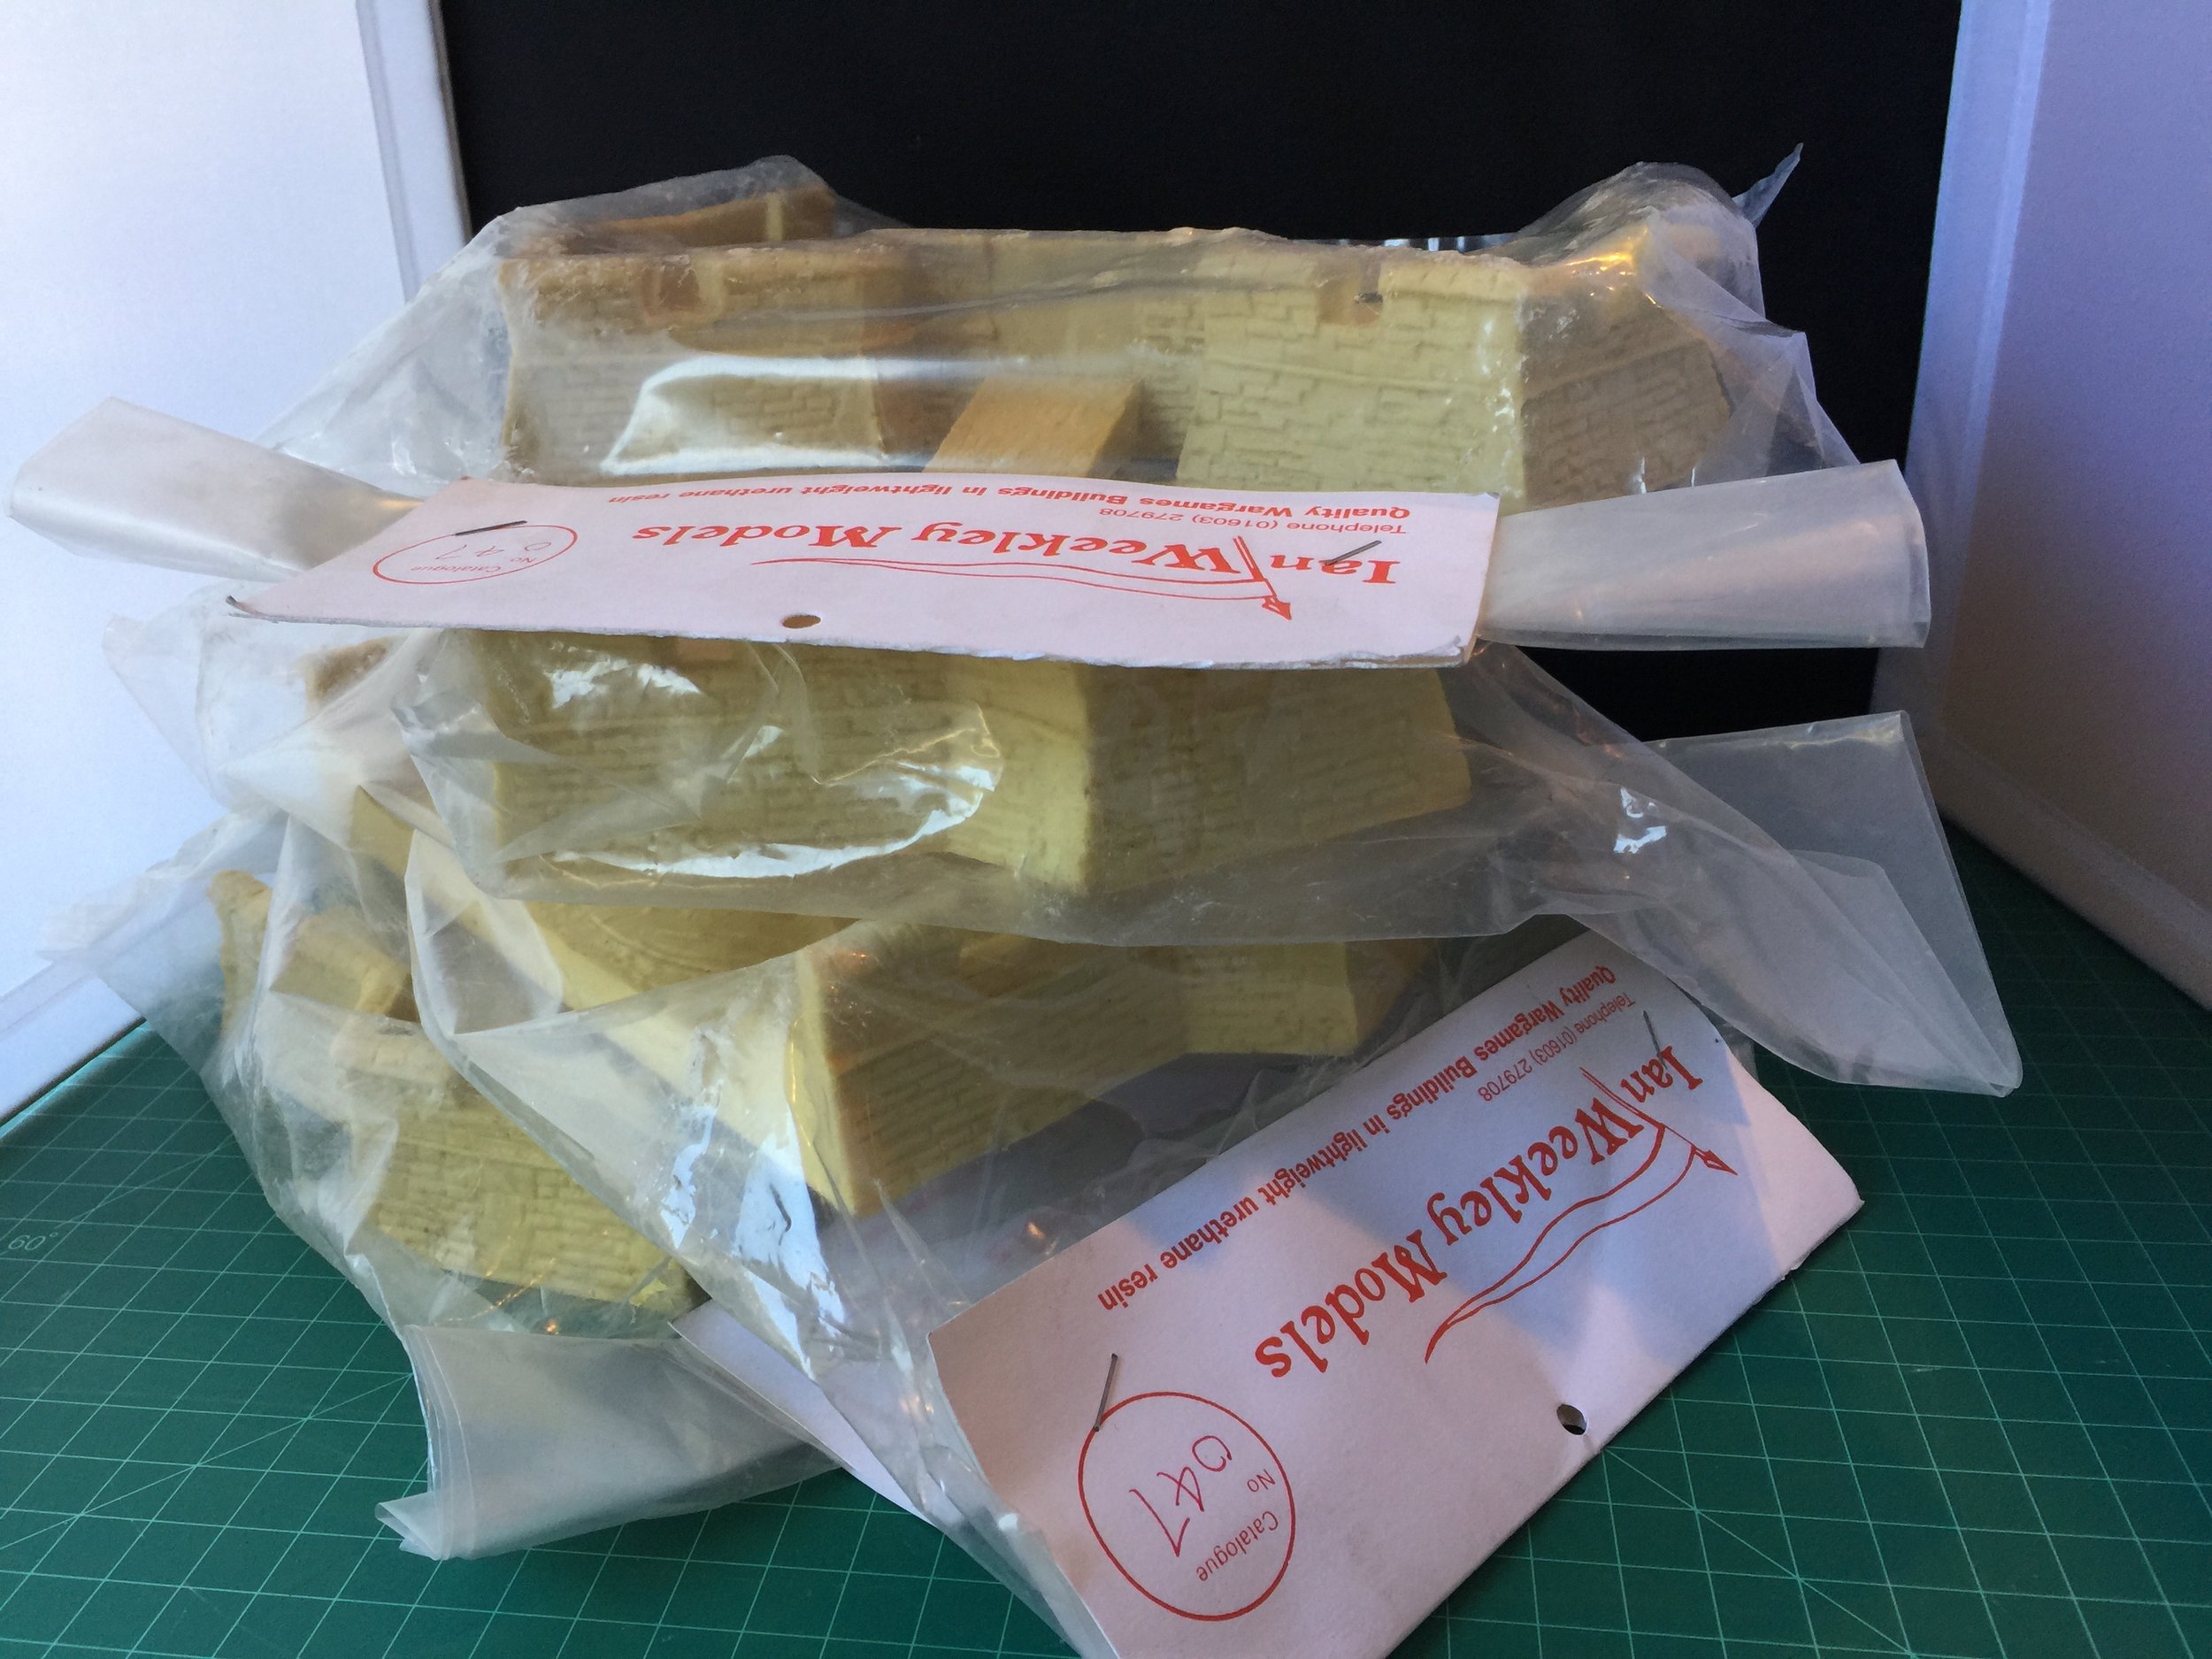
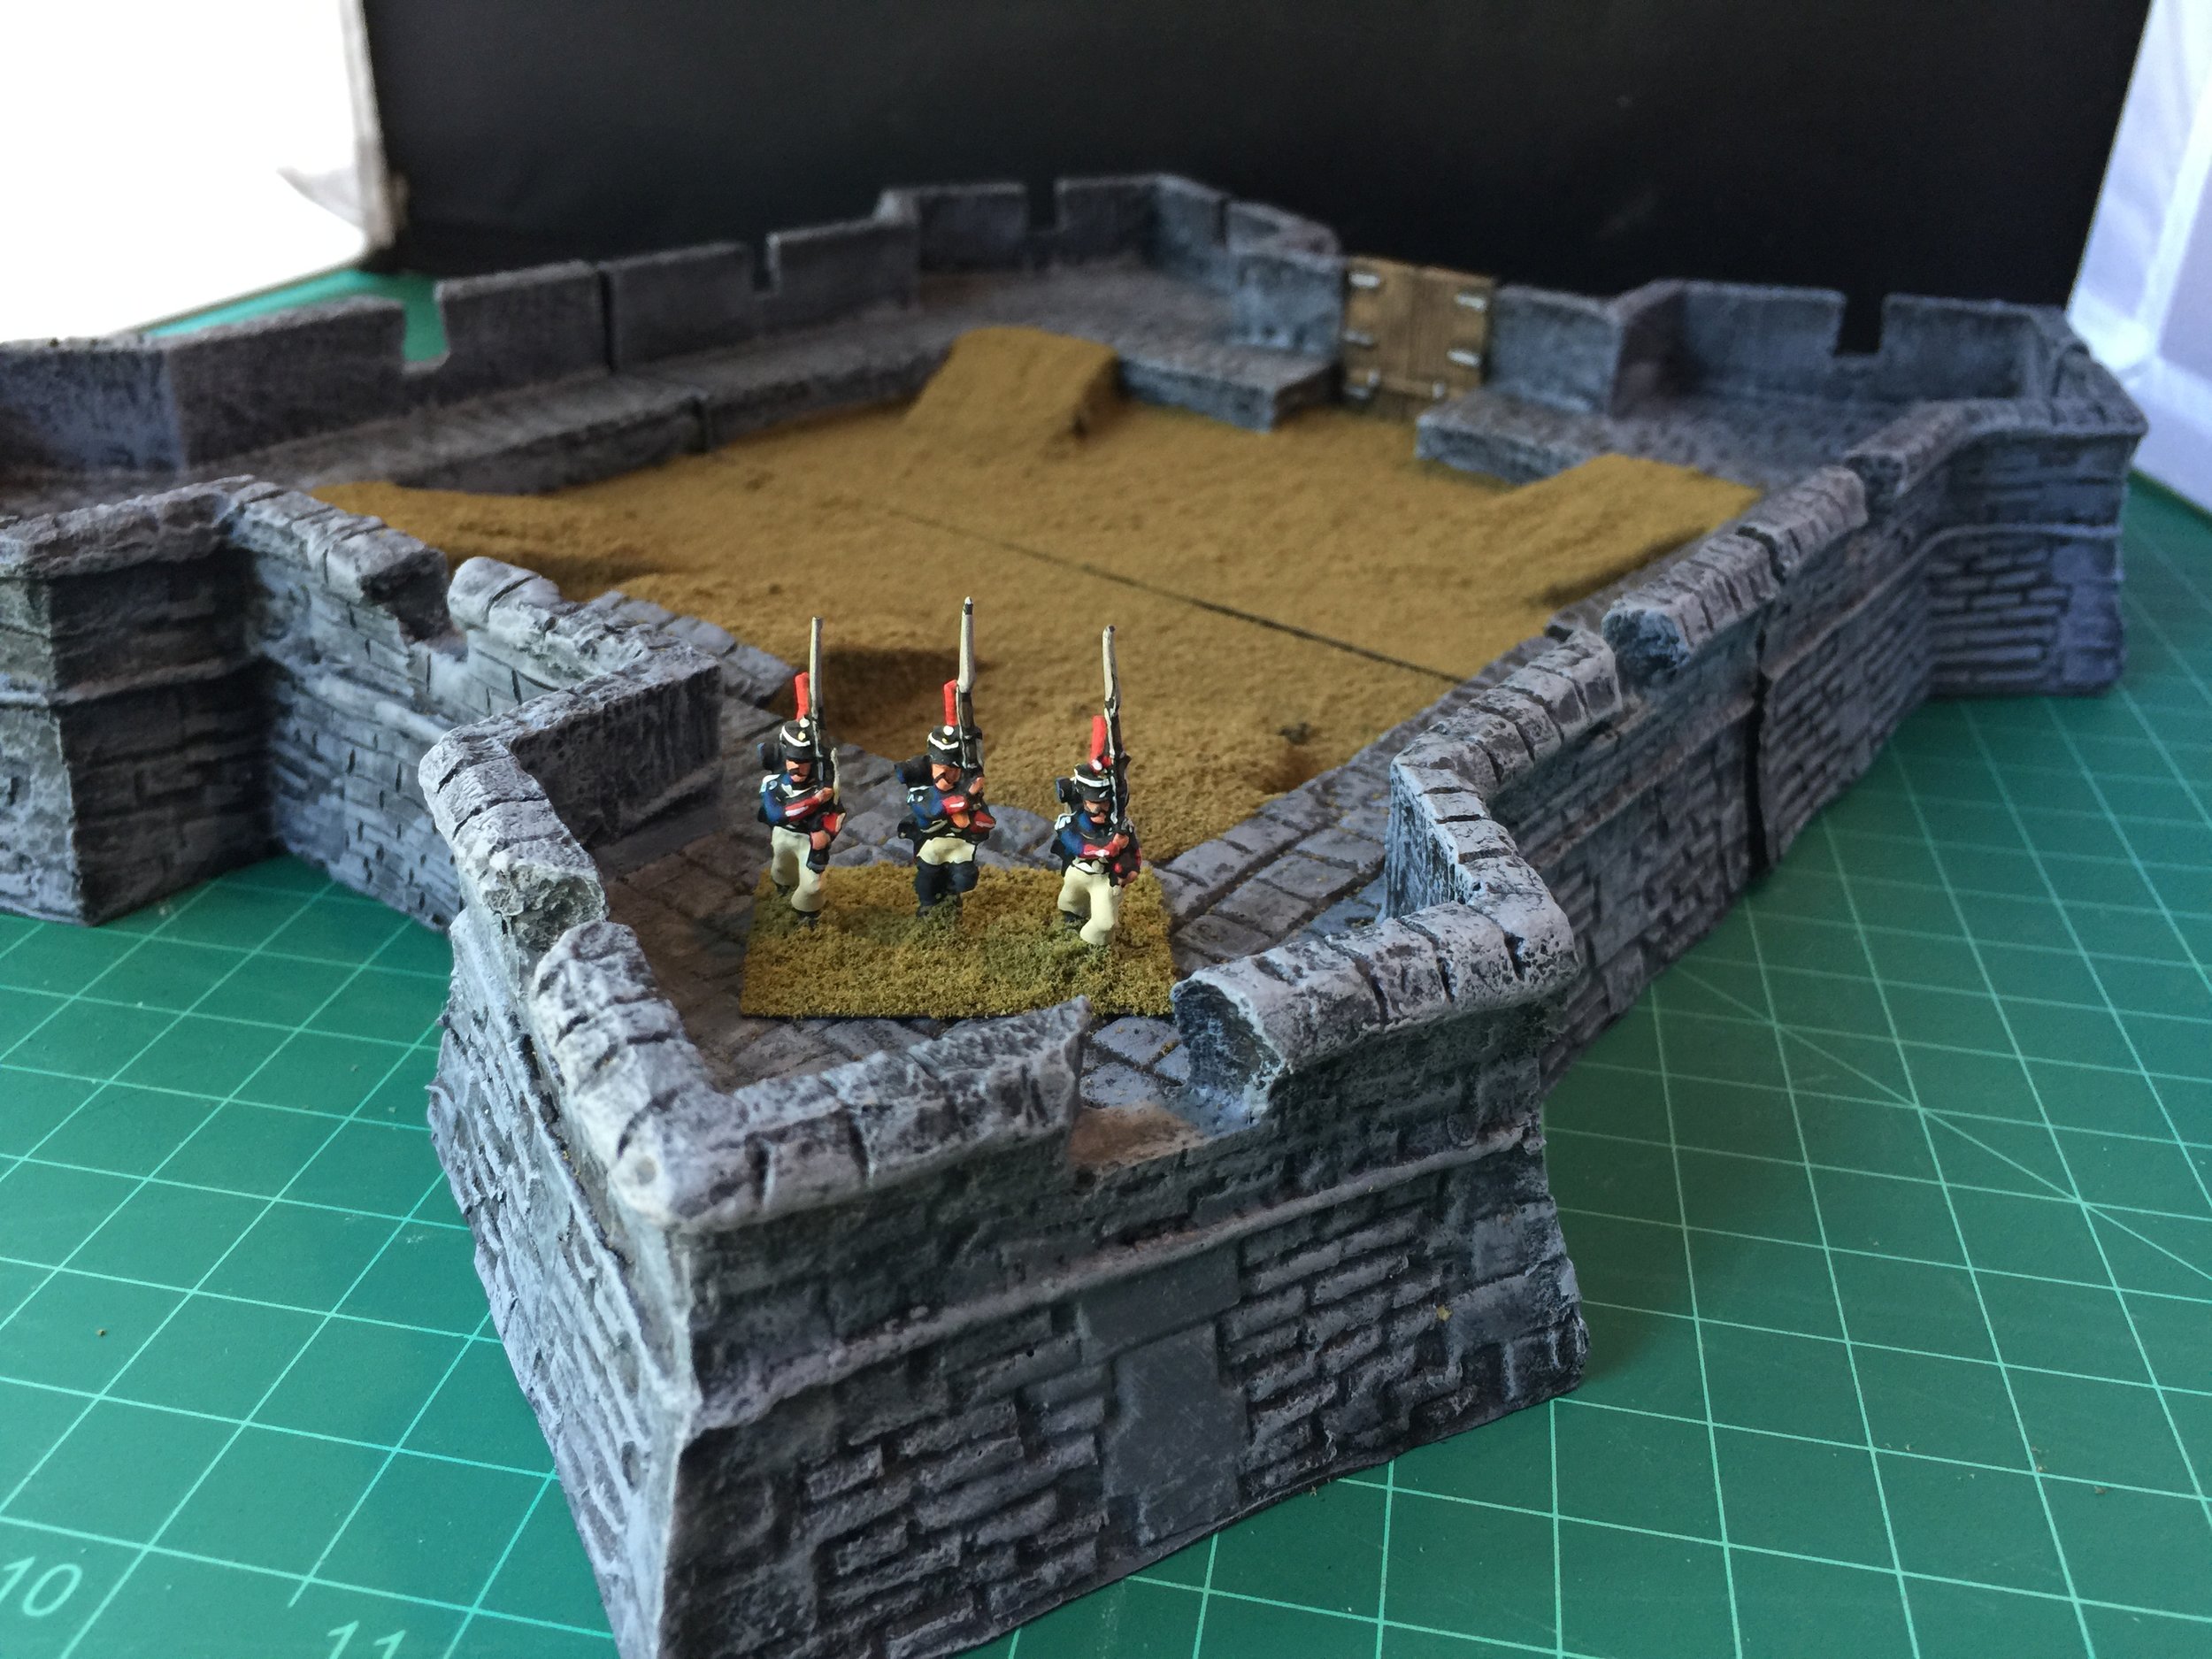
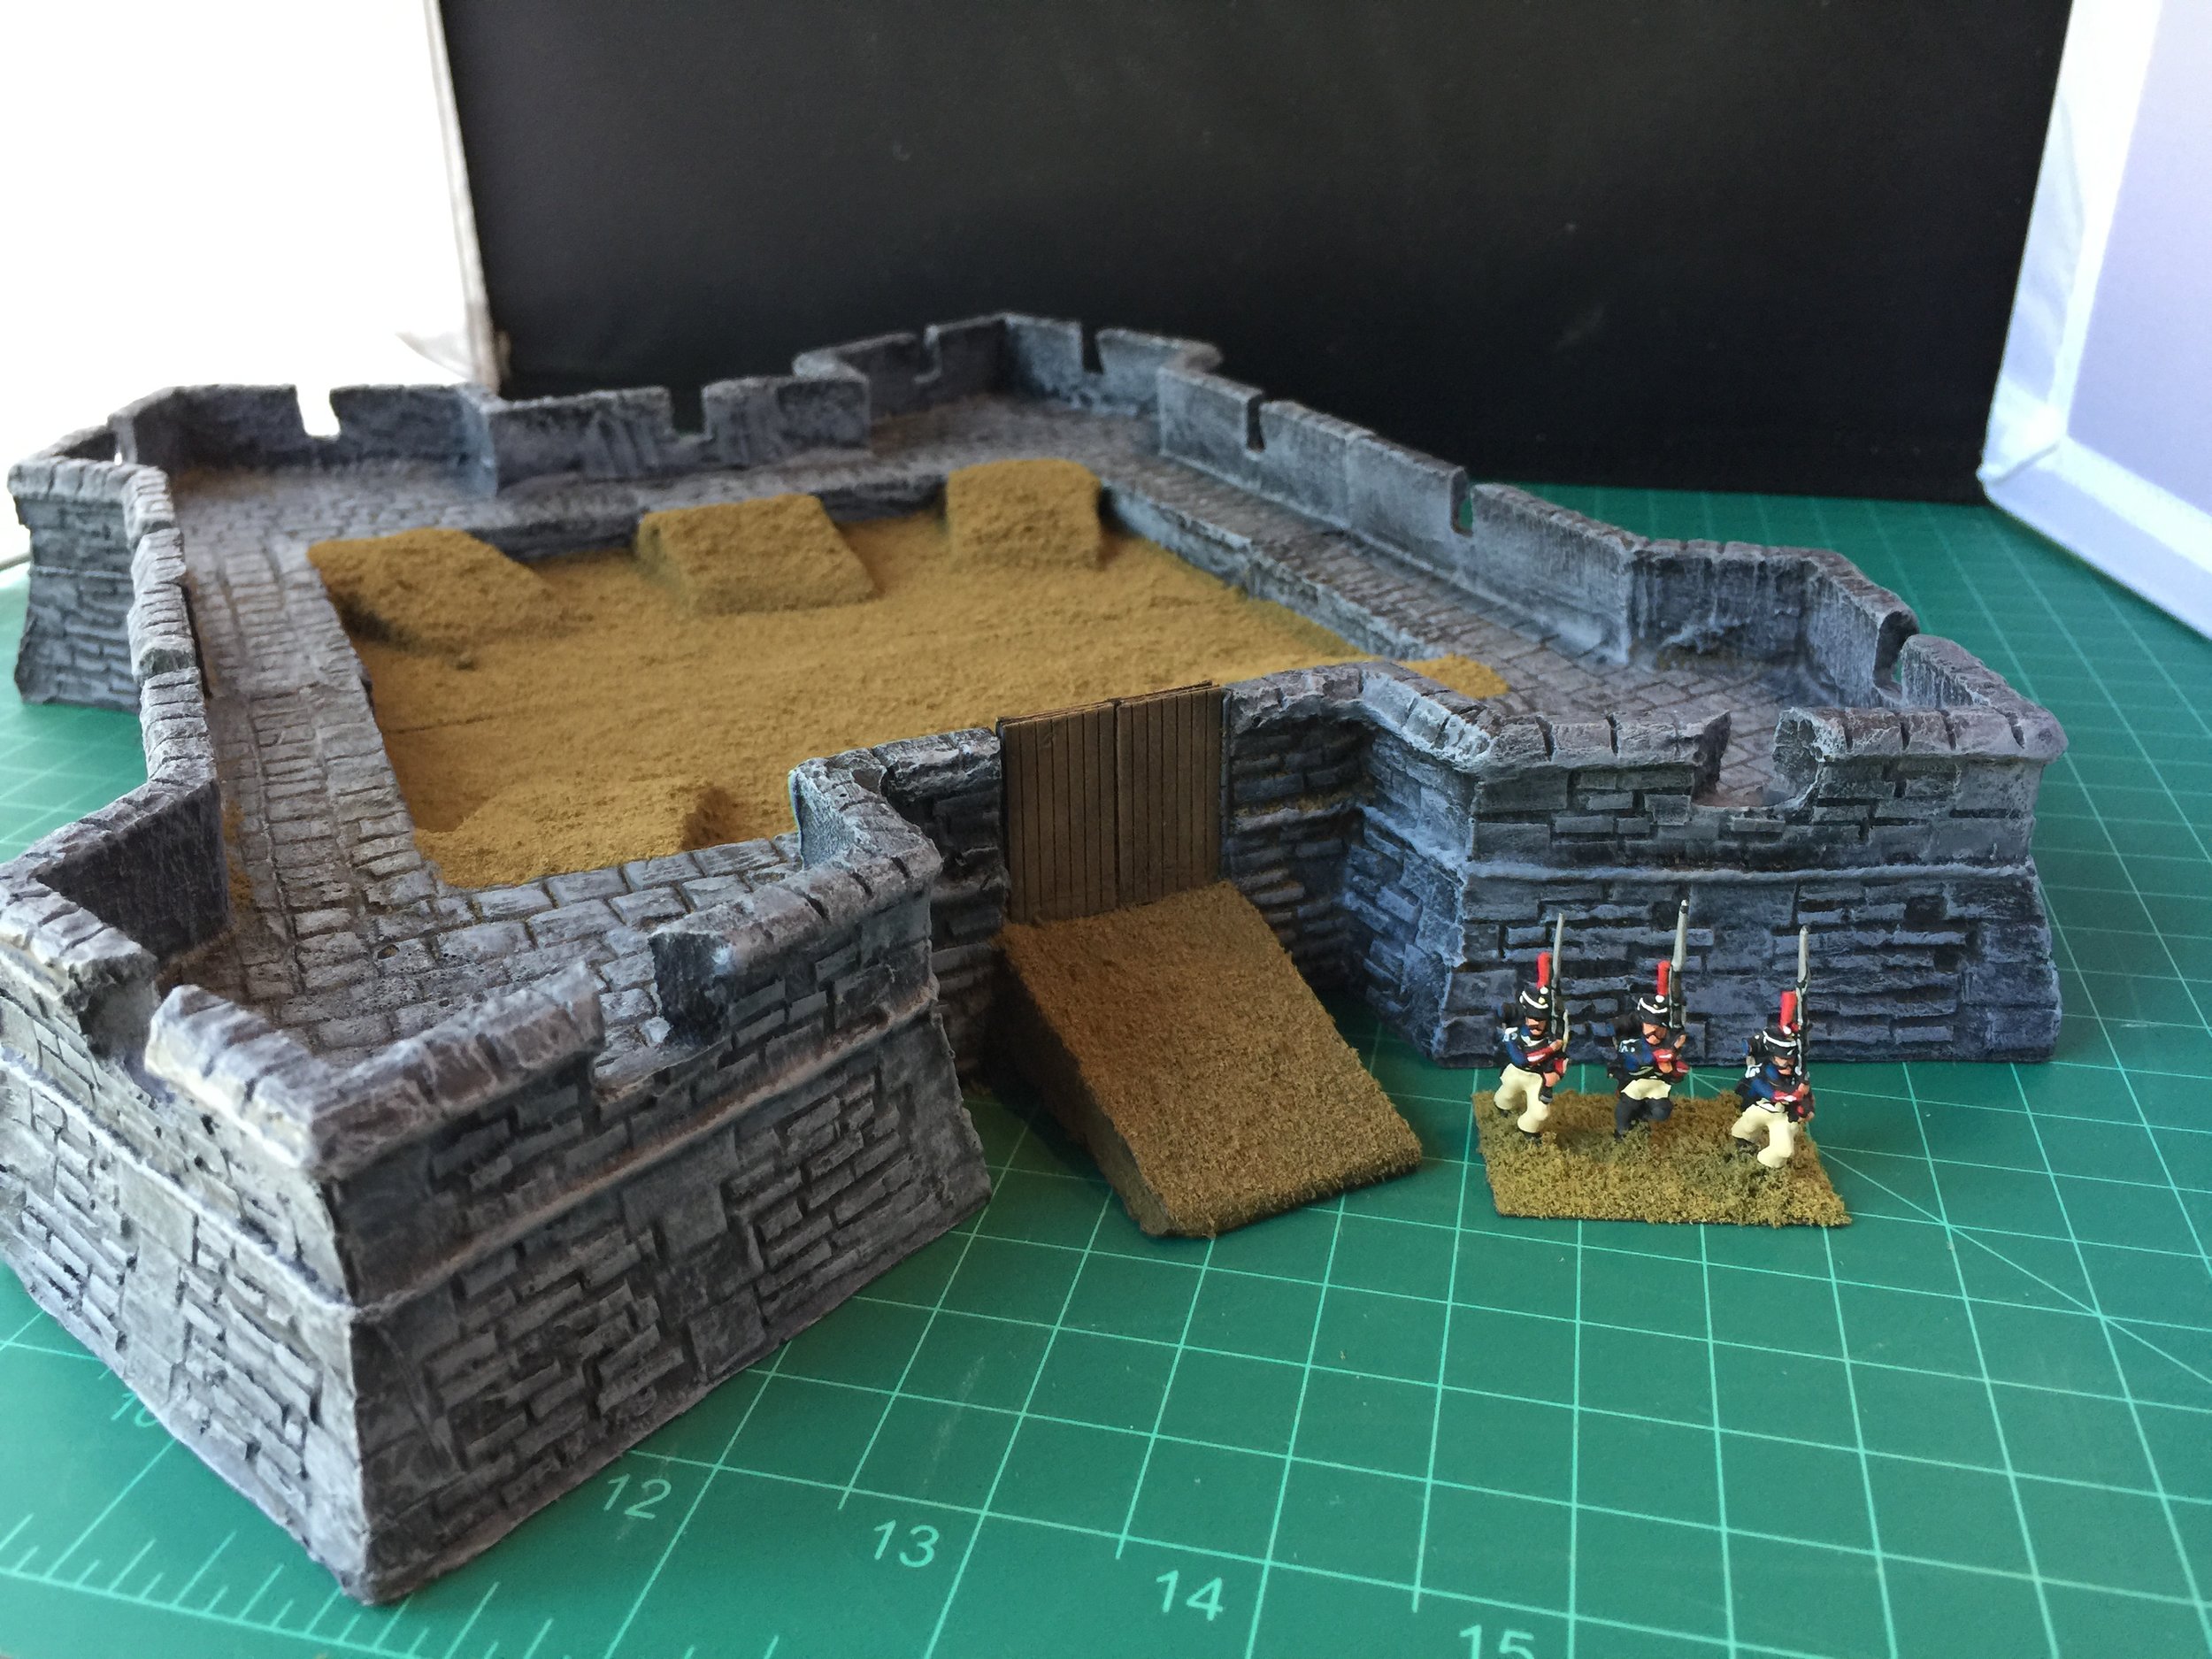
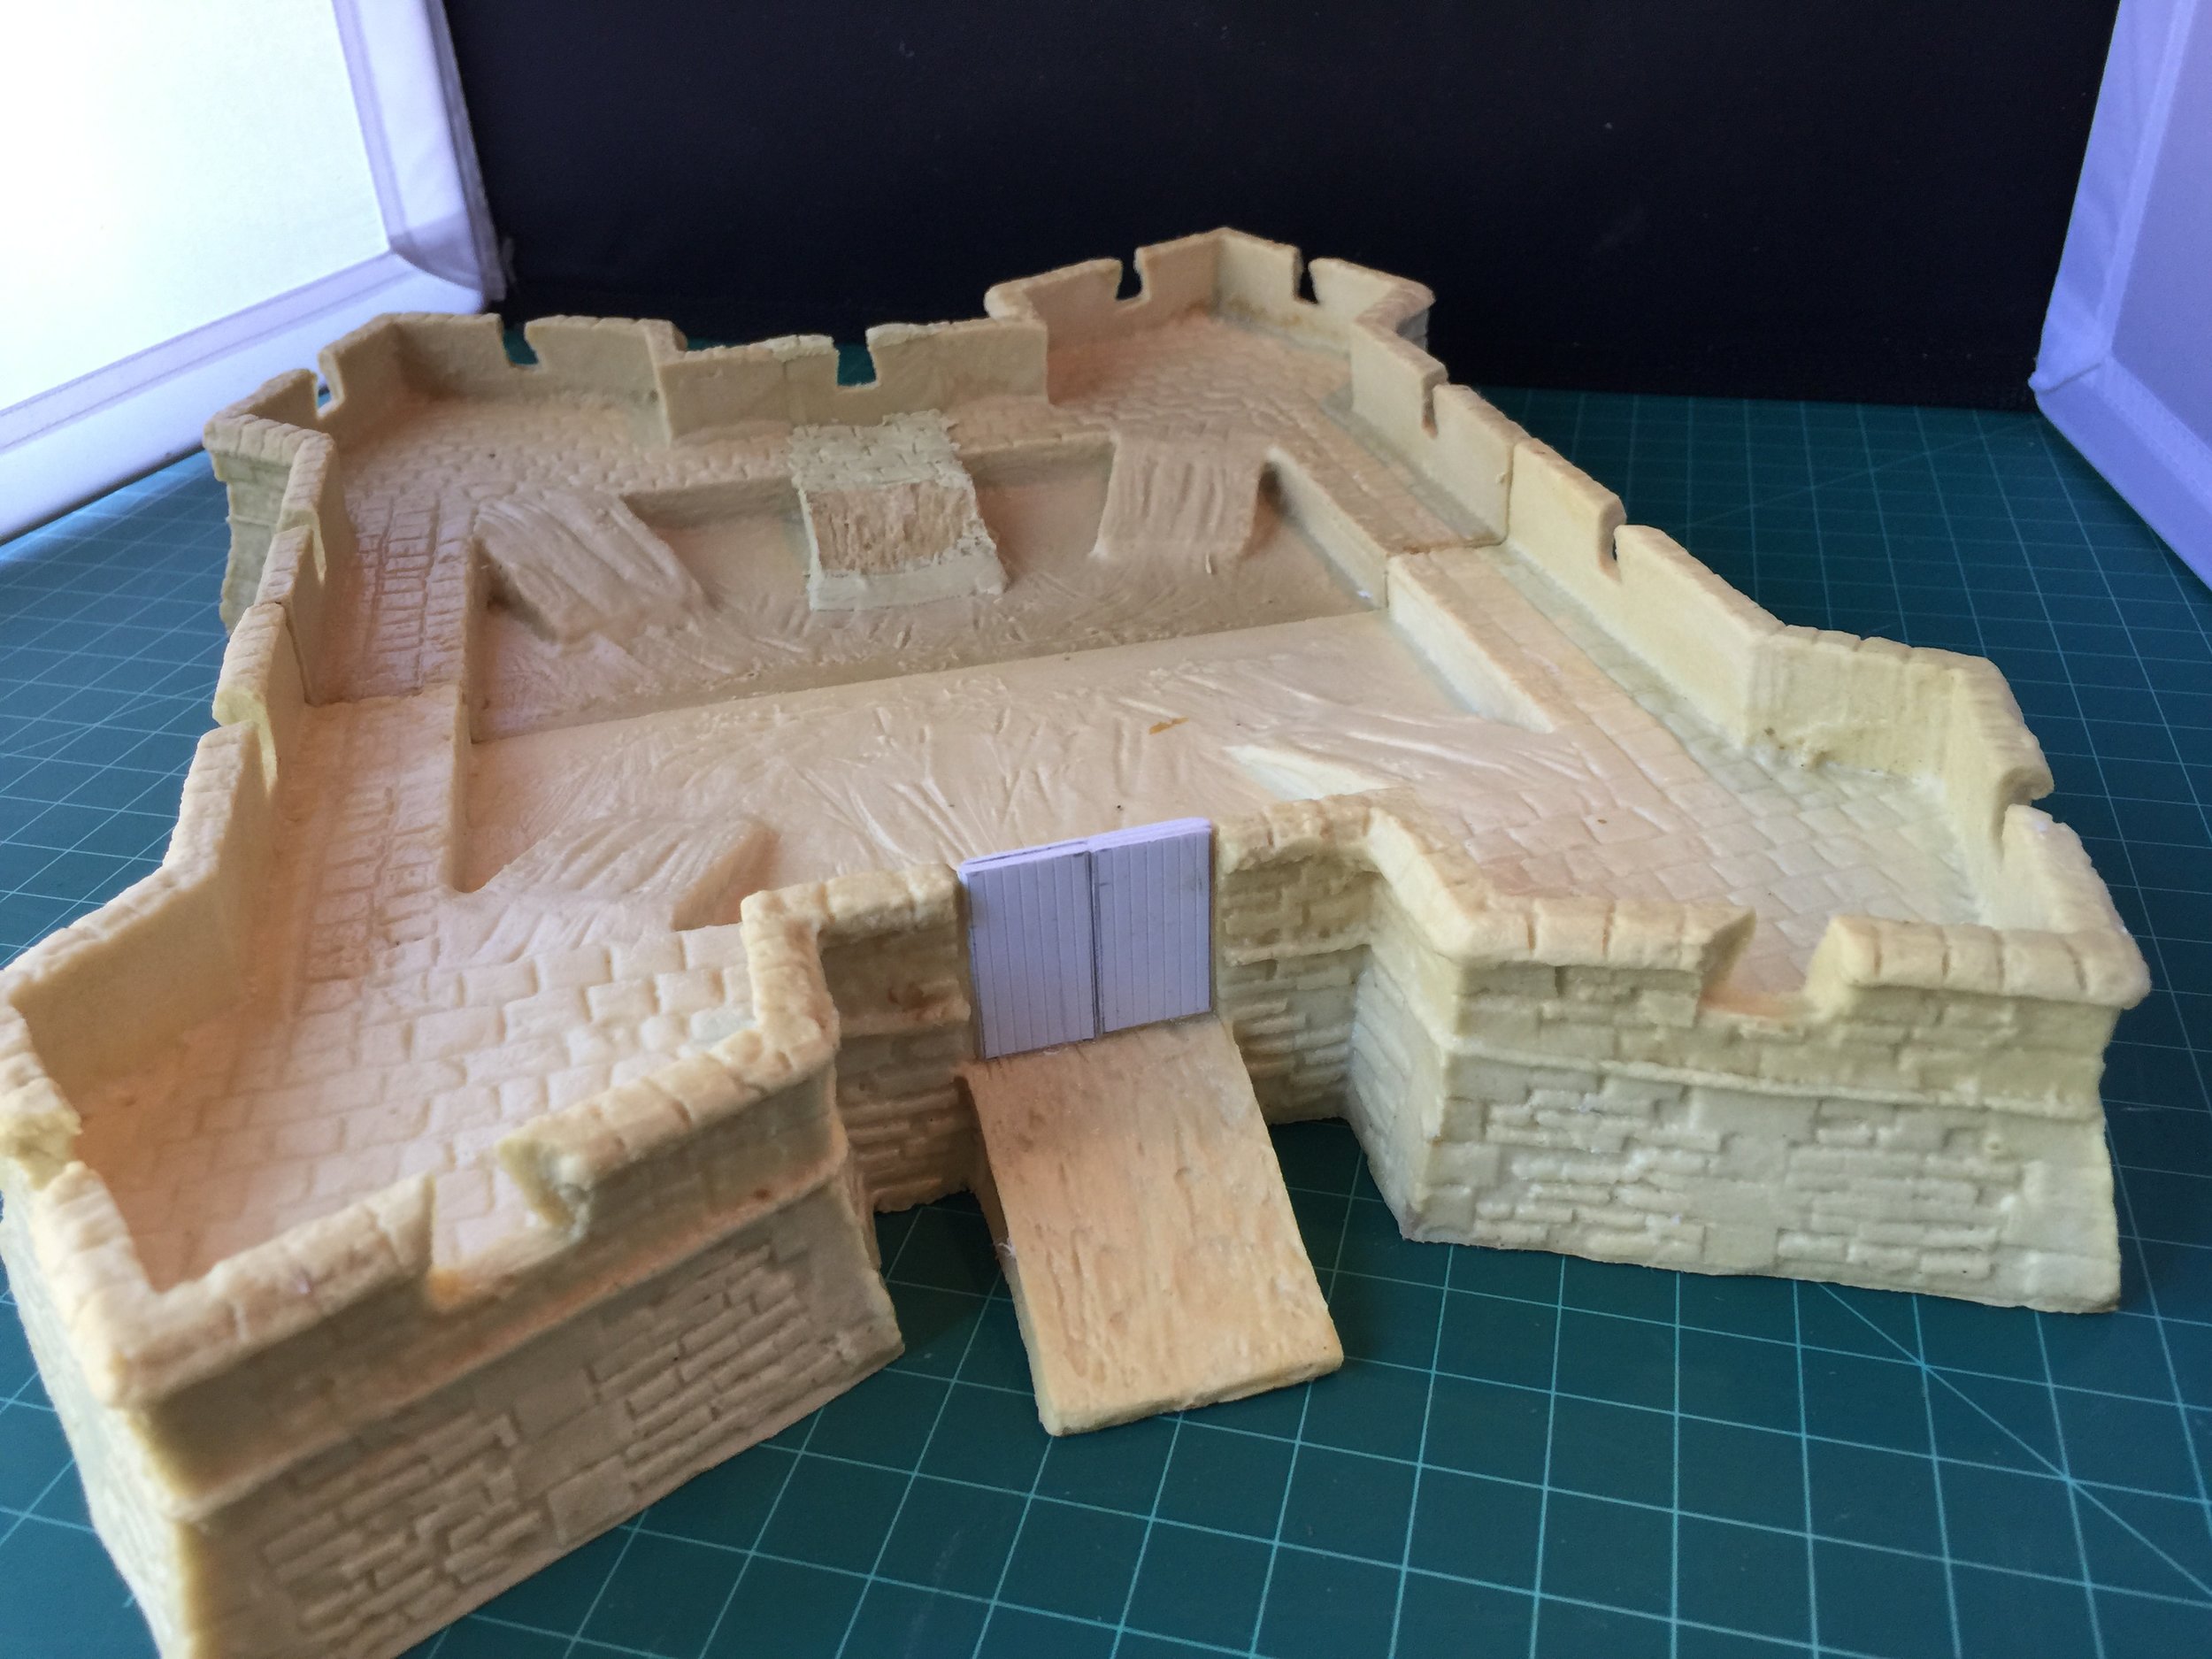
We were away from home this past week so not much work was done at the workbench. Having decided that my next big project would be Napoleonic Spain in 1809, my opening efforts on this project were to begin work on the three star forts I will be using to defend the Spain town that will be central to this collection. Over the year I have purchased three of the Ian Weekley star forts. My guess is that most people engaged in this hobby in 2019 probably are not particularly aware of Ian Weekley. In fact, I thought I would provide a short backgrounder on him in this write-up and was sad to discover that the internet has very little to say about him. I believe he has been dead for 20 years or more, but when I became interested in this hobby he was one of the original manufacturers of terrain. By today’s standard most of his terrain is rather crude, and some of the items don’t make complete sense. For example, the three star forts I will be using in this project are complete of two halves each. What is particularly odd about this is that both halves are identical so when you put them together to form a single fort, you find yourself with two entrances. Consequently, in order to have forts that looked appropriate I had to cut away one of the entrances and replace it with a new gun port made from Milliput. I also found the entrance provided to be without necessary detail so I cut that gate away and replaced it with a new entrance/gate made from Evergreen plastic. Despite all that I am very happy to include these Ian Weekley forts as part of this project because once completed they will look fine, and it is also an homage to one of the early leaders in this hobby. My only real accomplishment at the workbench this week was to modify all three of the forts and paint two of them. The British and French soldiers in the pictures are 15mm and provided for scale.


August 11, 2019
The workbench didn’t see much action this week. This is in part due to the fact that I am still pondering what my next project will be. This has never been a real issue in the past because most of my previous projects were big and during the time I was working on them their ultimate look became clear well before the work was done, and in the time that followed, my mind tended to sort out where I would go next in terms of a project. But the Dr. Who and Mountain Men projects were relatively small and moved very quickly leaving me with no firm focus on where to go next. In the last couple weeks, I have been trending toward another large 15mm collection. I have several 15mm collections awaiting my attention. Two of those are large… North Africa 1941-42 and Napoleonic Spain in 1809. Right now Spain is having the greatest appeal.
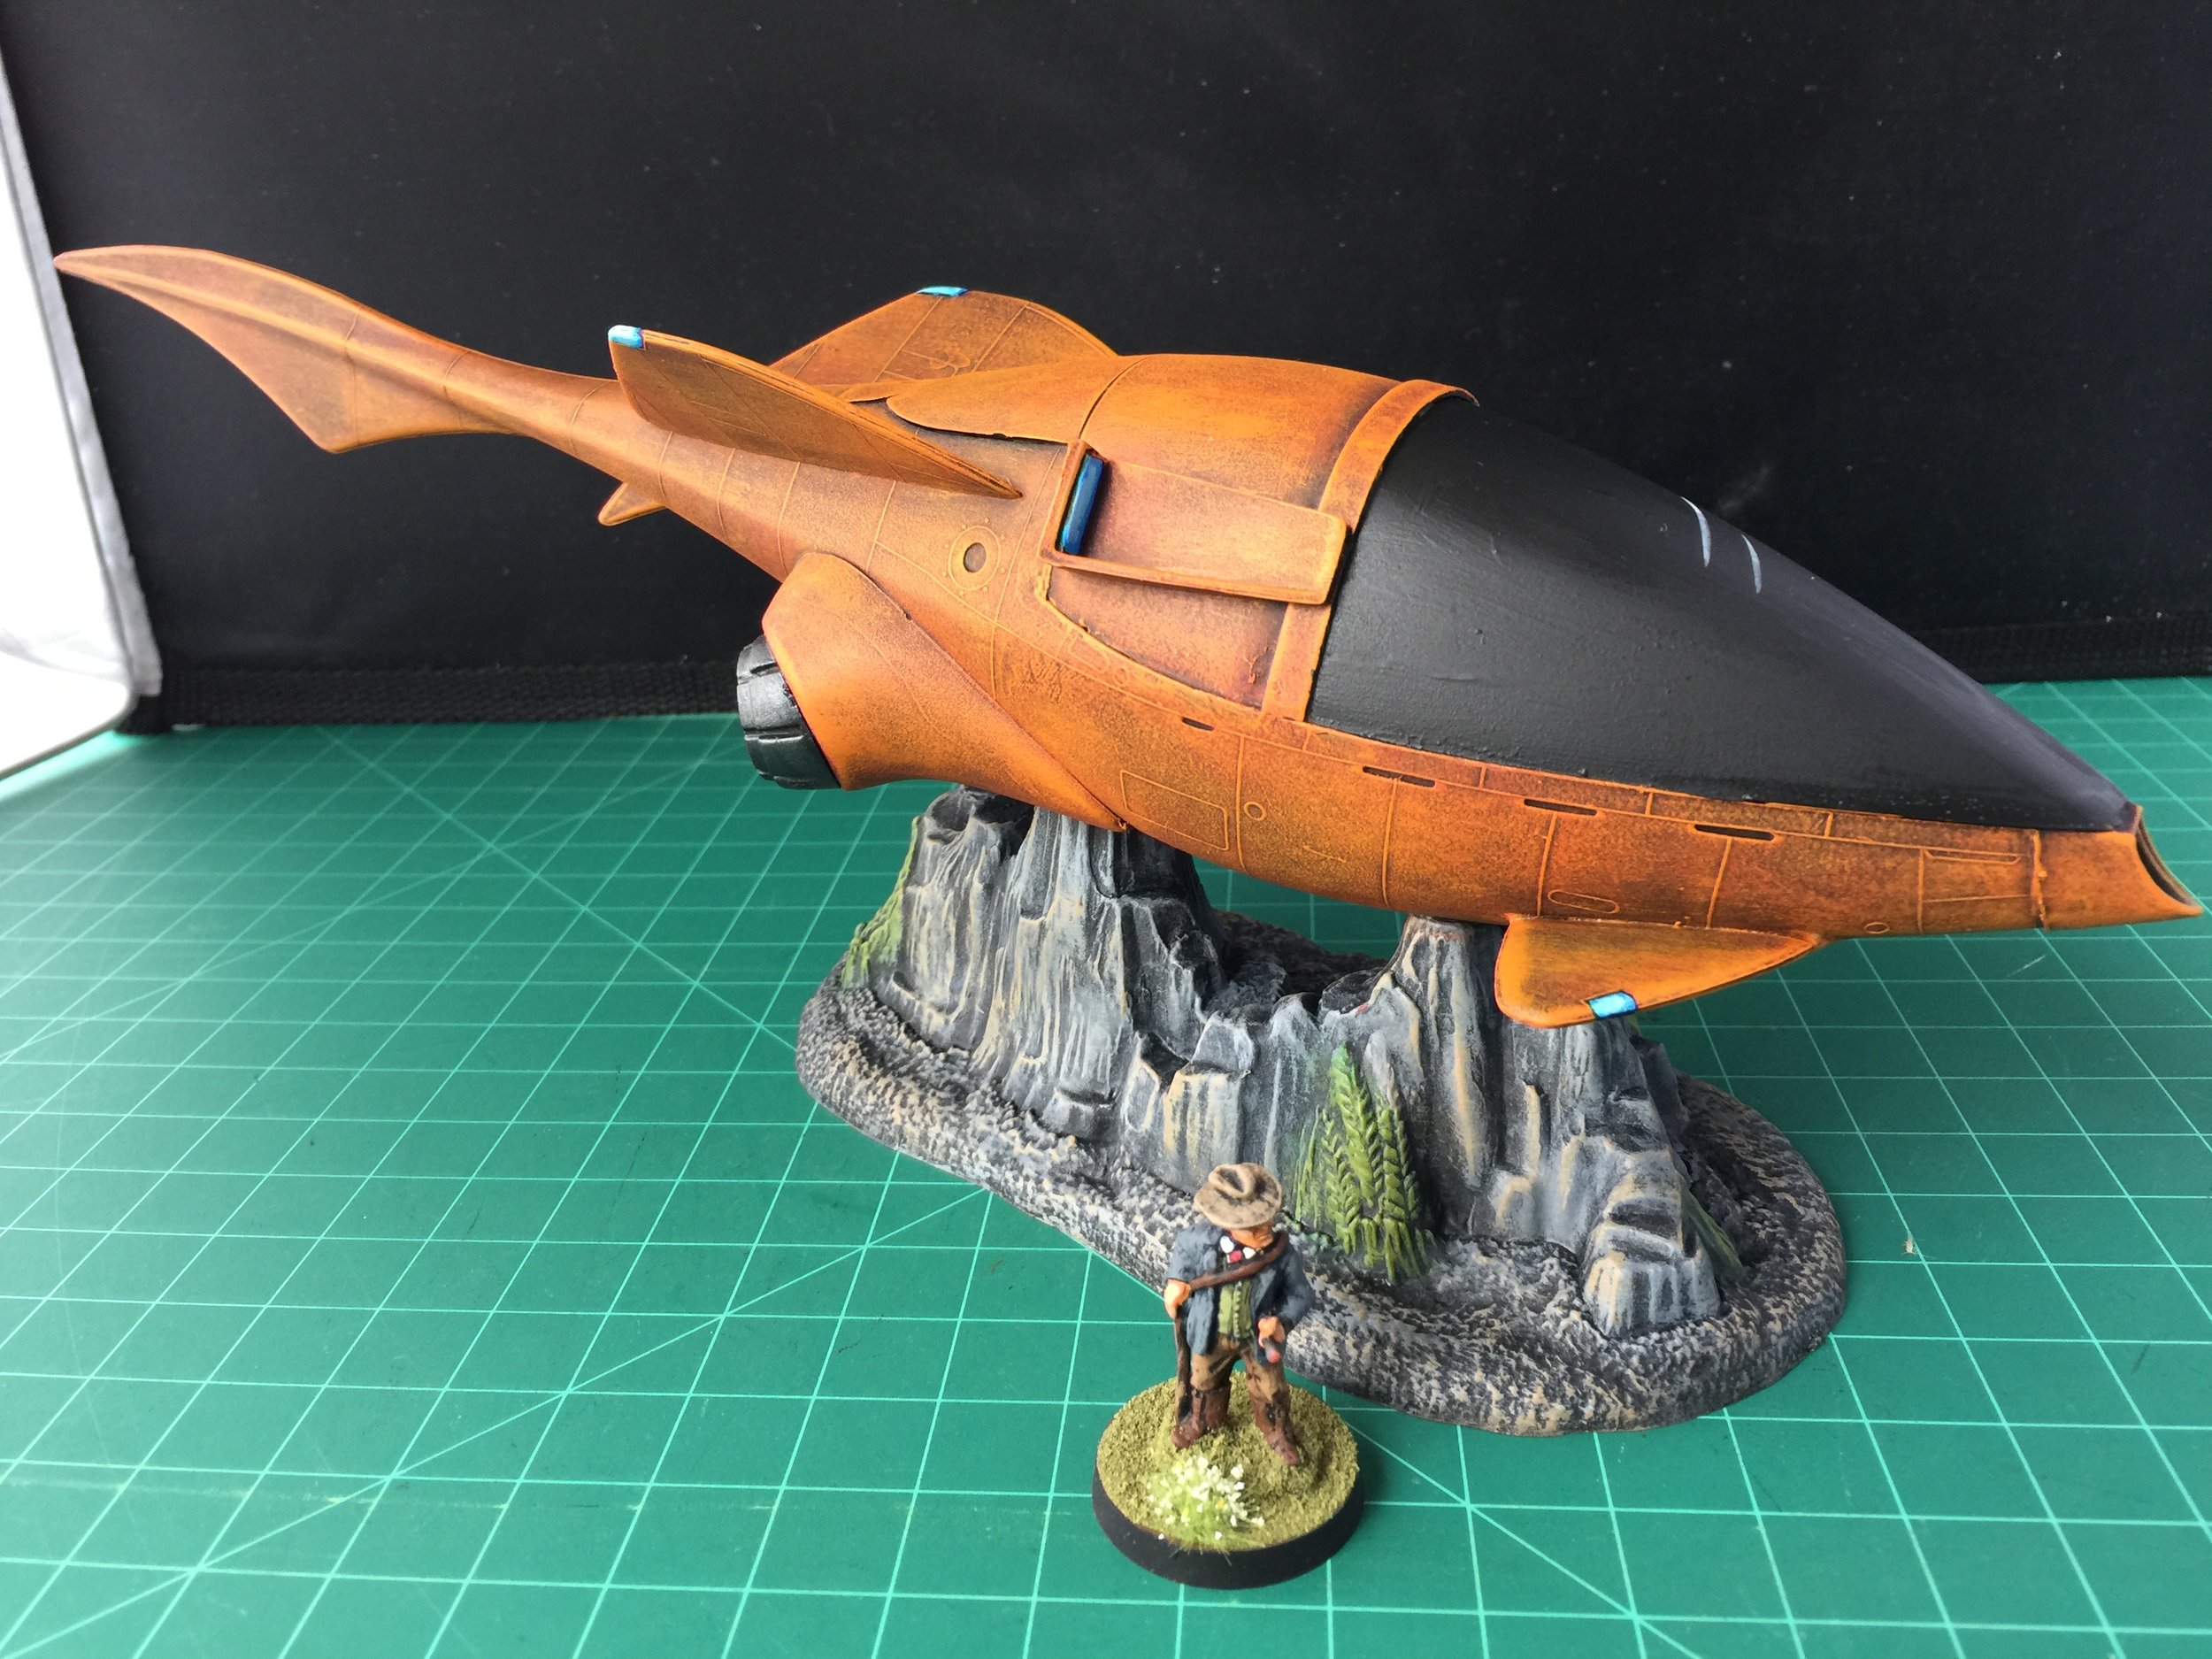
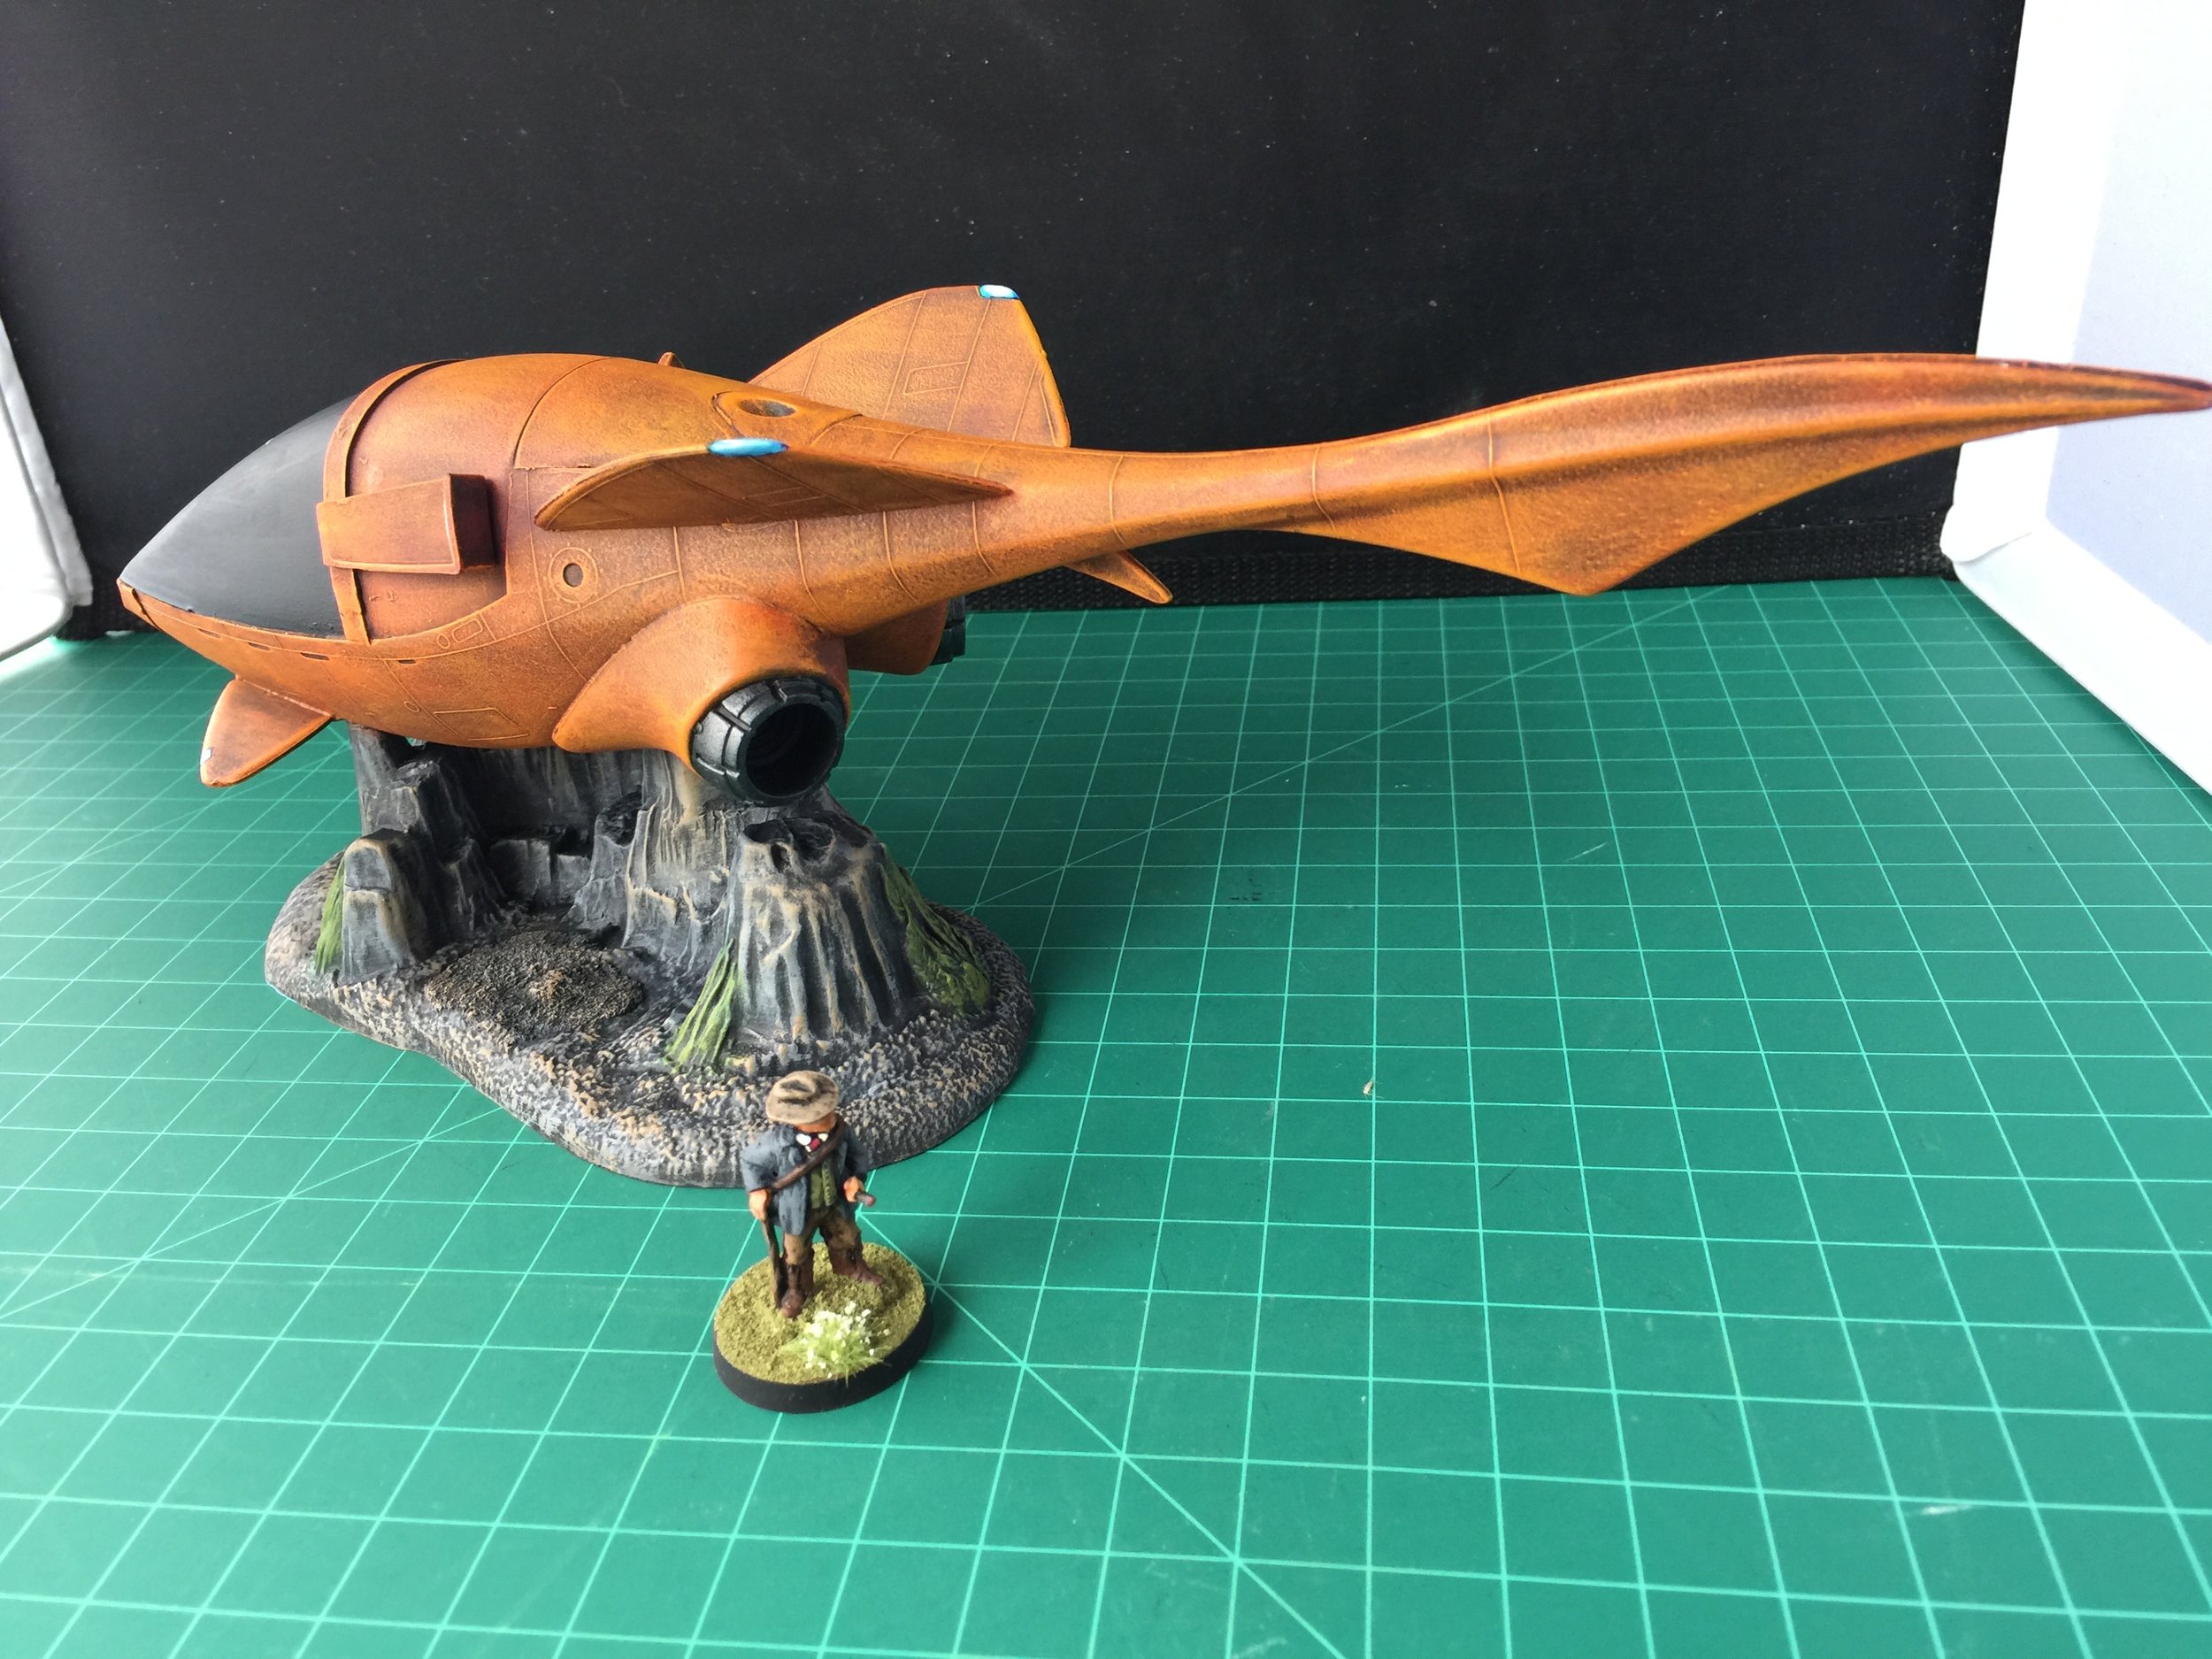
As to actual workbench efforts this week, I have done only one thing. At the end of last week I built and slightly modified the Monogram Stinger from SeaQuest. So I opened this week by spraying the entire model with Testors’ Flat Black and let it dry overnight. Once it was completely dry I began giving it some color. I started by drybrushing the hull with Vallejo Burnt Red. I followed that with a mix of Vallejo Amaranth Red (a deep orange) and Scrofulous Brown (a rich golden brown with a lot of yellow tone). I repeated the Amaranth Red and Scrofulous Brown coats several times, each time increasing the balance of the mix to Scrofulous Brown. When that was done I painted the canopy and lights black. I then painted the lights Vallejo Andrea Blue. I then highlighted the lights with a mix of Vallejo Andrea Blue and Off-White. I gave the canopy a couple of slanted swipes with Off-White, and then turned my attention to the base which I drybrushed first with Vallejo London Grey highlight and then highlighted very lightly with Vallejo Brown Sand. I painted the plants with Vallejo Flat Green highlighted with Vallejo Yellow Green. Once it was done and dry, I sprayed the finished model with Testors’ Dullcote.
As the week comes to a close, I haven’t done much on the workbench, but I am very close to a decision on what my next focus will be in terms of a collection… looks like I’m leaning hard toward Napoleonic Spain in 1809. If that is where I go, it will include British, Spanish, Portuguese, and French infantry and cavalry. Most of the French are done because I have them in my 1809 France vs. Austria collection although I do intend to make a few ragged French units (too long in Spain) and the 13th Cuirassier which is the only French Cuirassier regiment that saw service in Spain. As for terrain, it will include a good sized Spanish town, as many as three forts (the old Ian Weekley semi-star forts/Vauban-style fortifcations) and some vineyards by Flames of War… now out of production but fortunately I bought a few for this purpose years ago. I’ll probably find a way to slip in some siege trenches like those I used with my FIW collection (in fact the same ones), and a river. Could be a good-looking table and will keep me busy for 6 to 9 months.
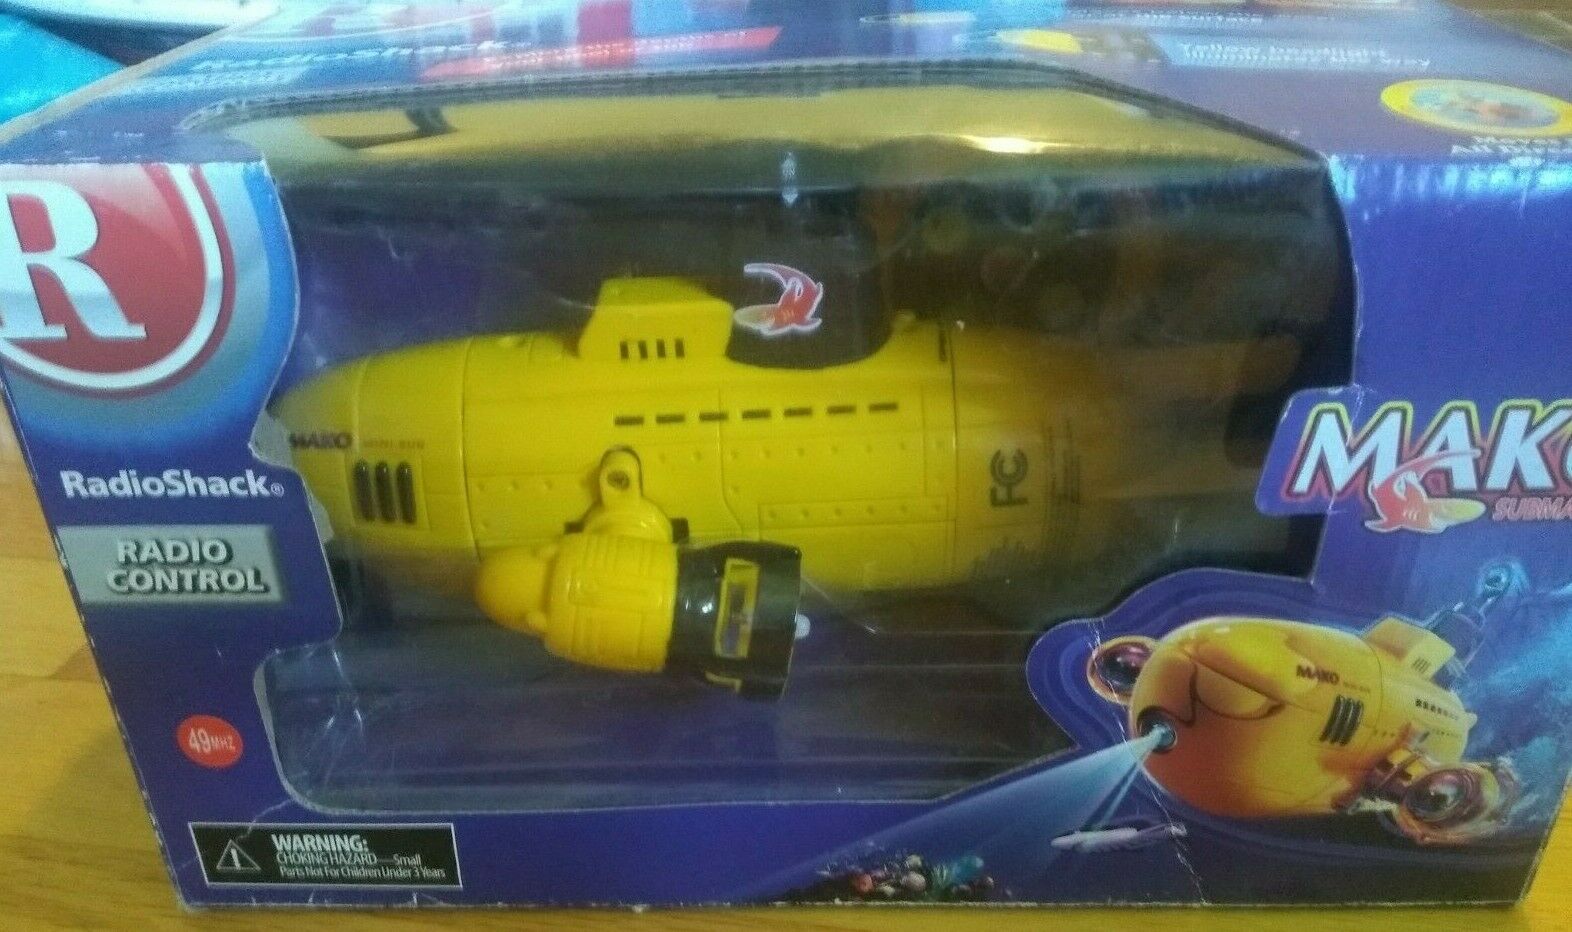
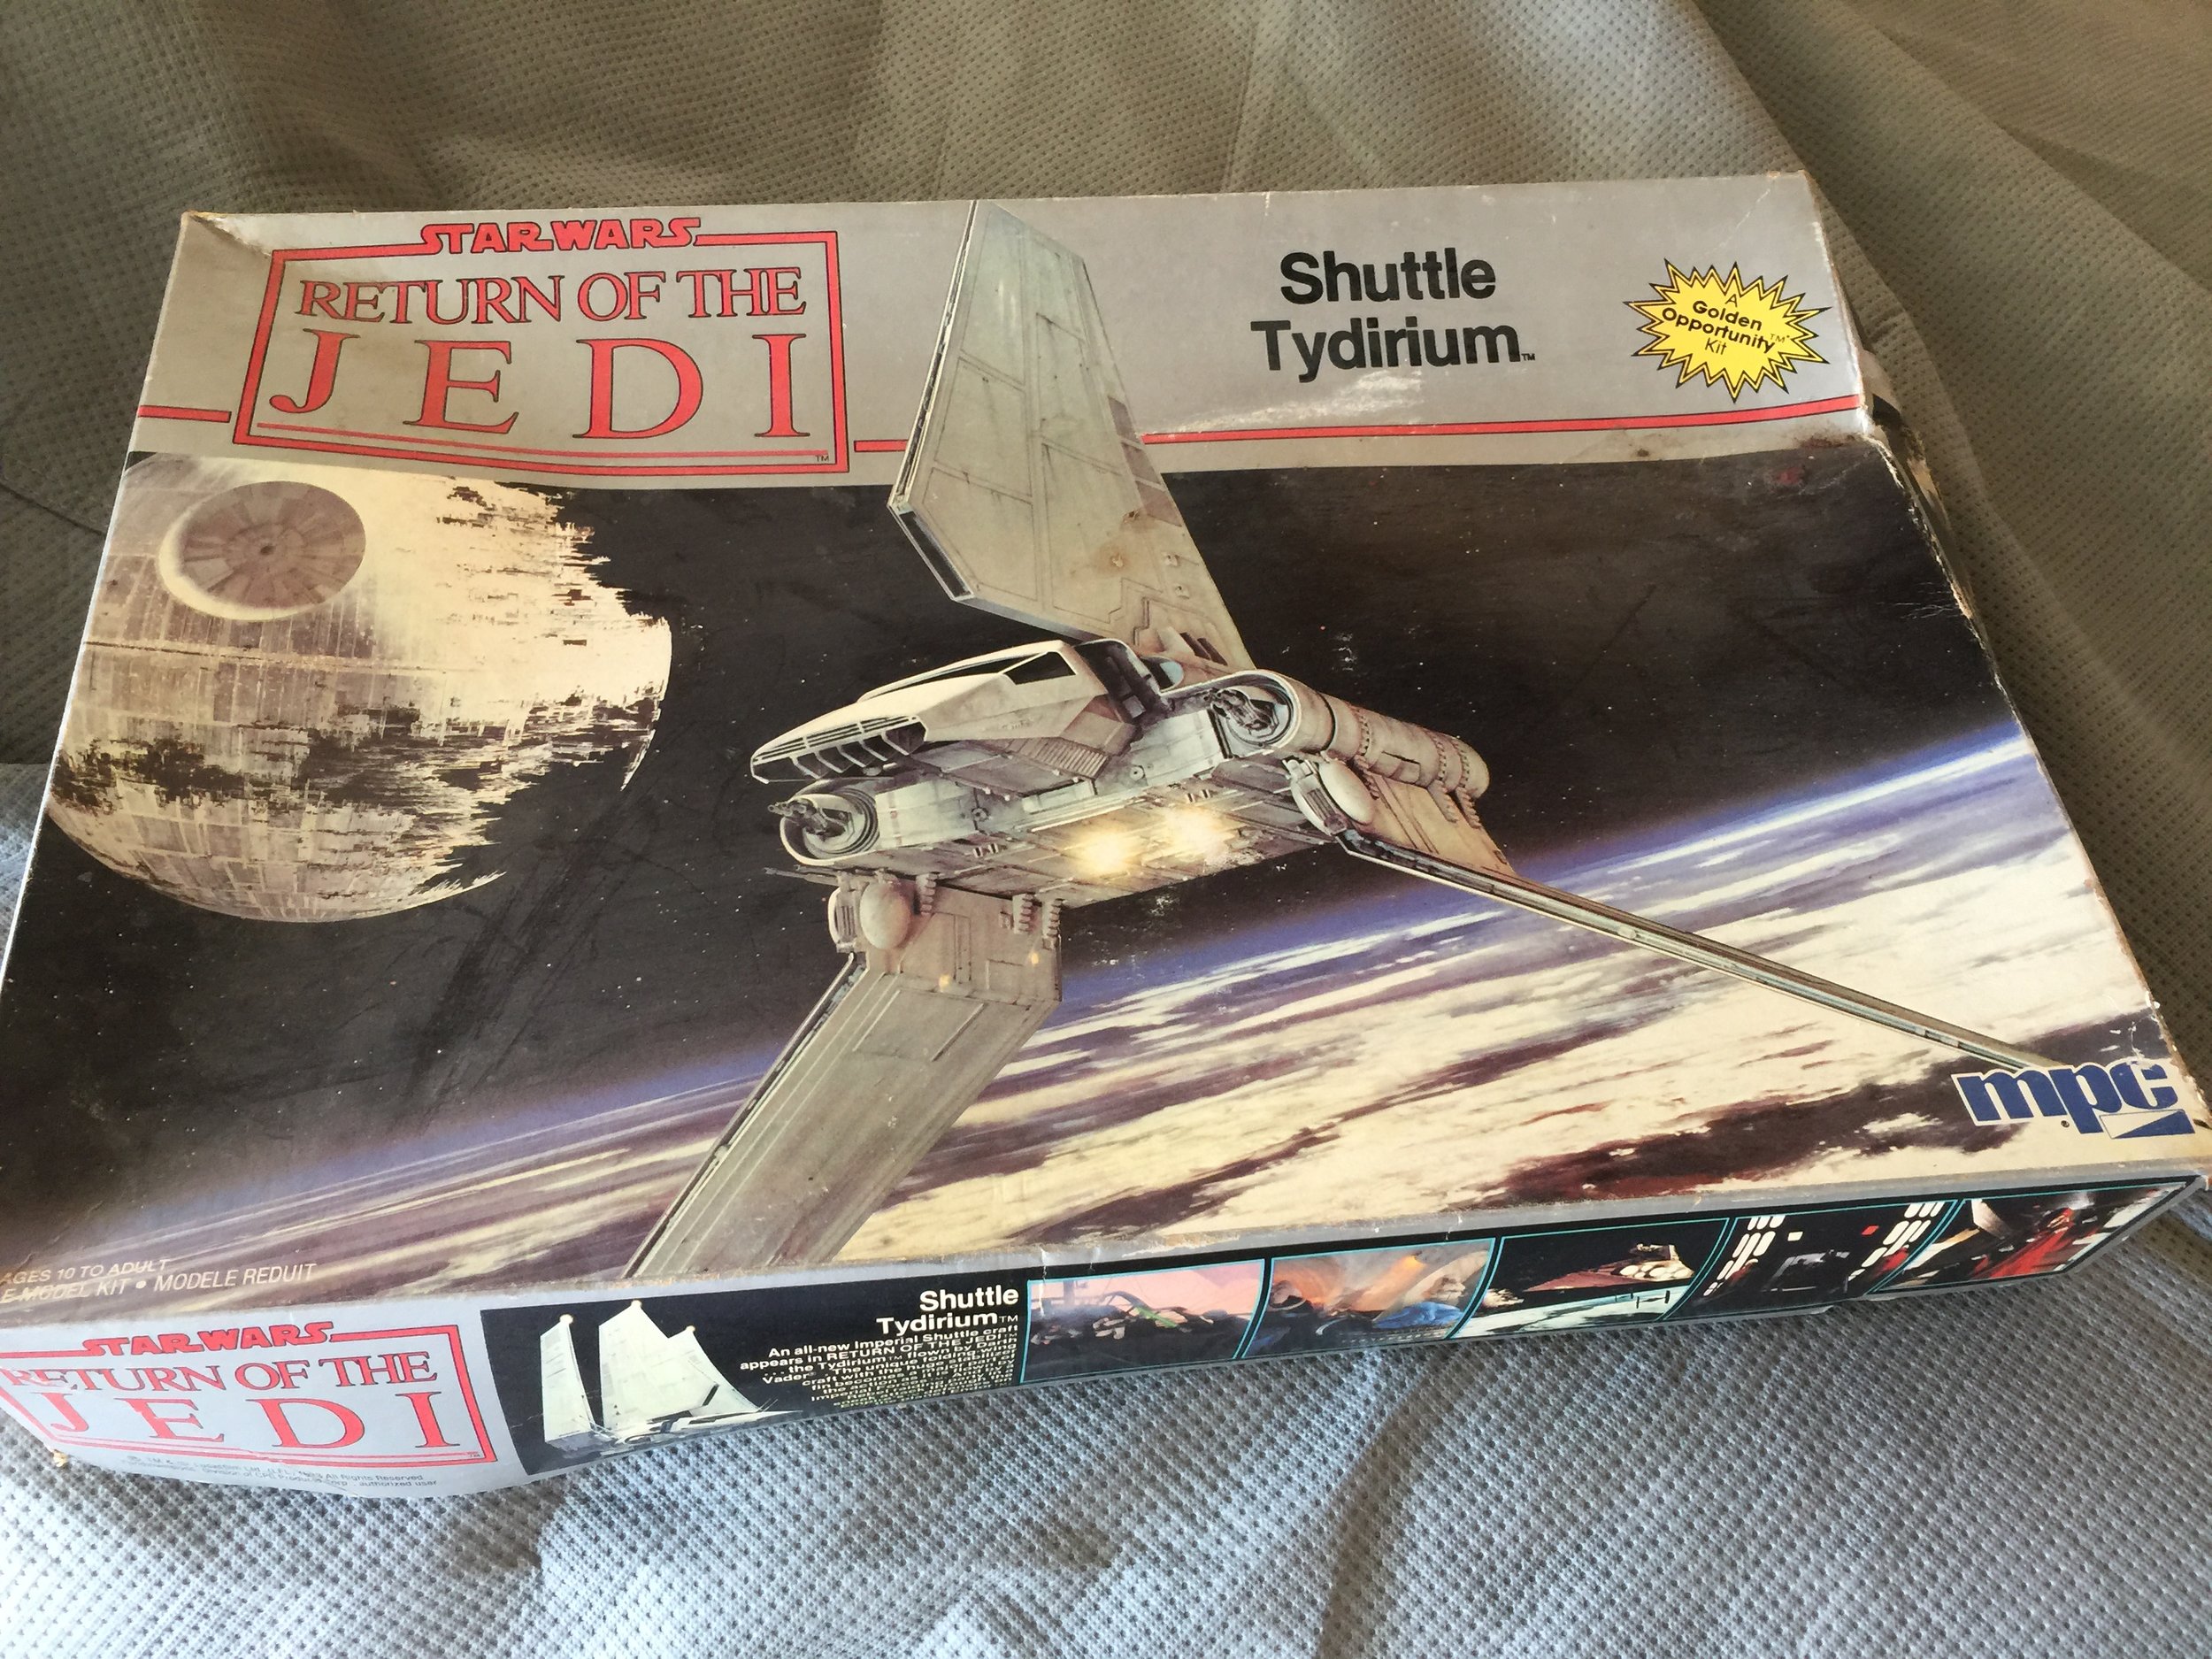
What time I spent at the workbench on Saturday was focused on a purchase I made that day at the swap meet. One of the vendors had tables piled with old models. Most were missing some parts, some were missing nearly all the parts and a few seemed complete. The vendor’s stall was made up of six tables, each six feet long and about three feet wide and set end to end and side by side in two rows of three. As I passed around the tables, I first found a box of Preiser HO scale farm figures and wagons. It appeared to be complete with perhaps a few extras included by the previous owner. The next model I found was another Monogram SeaQuest model, the Deep Ocean Transport which appeared to be complete or close to it, and like the Stinger I found last week would serve well with my Gordon Institute’s Loch Ness research team. Nearing the end of my tour of the tables I came upon a very large box of a model by MPC. The model was of the Star Wars’ Shuttle TyDirium. I knew this to be a rare and expensive piece but I doubted that it was complete. When I spoke to the vendor I was told I could have all three for $10. When I got them home I sat down at the workbench to see if I could do an effective inventory of the shuttle. It took a bit more than an hour because I went through the piece three times, each time finding it hard to believe my luck. It appeared to be complete. When I checked the model out on eBay I found that the current asking prices ranged from $68 (price and shipping) to more than $100. That was a nice way to end the week.

August 4, 2019
It’s been a slow workbench week. My workbench is in the garage and it’s been a hot week and really warm in the garage so my stays out there have been limited. On top of that we had two power outages in the neighborhood this week… no lights, no painting. That said I did work on a couple things. Because of the heat and the amount of concentration I need to work on my Oh Jenny house remodel, I put that aside and turned my attention to a motorized submarine I bought at the swap meet two weekends ago as a broken toy. When I saw it I immediately thought that with some modification and a new paint job it would work well as a 2-man research sub for my Loch Ness research division of the Gordon Institute For Archaeology And Paranormal Study… and it was only $2. It’s 9” long, which is a nice size. I unscrewed the hull pieces and removed the engine and wiring. I then cut it to waterline and set it in a “water” base of Milliput. Once the Milliput was dry, I gave it a new paint job.
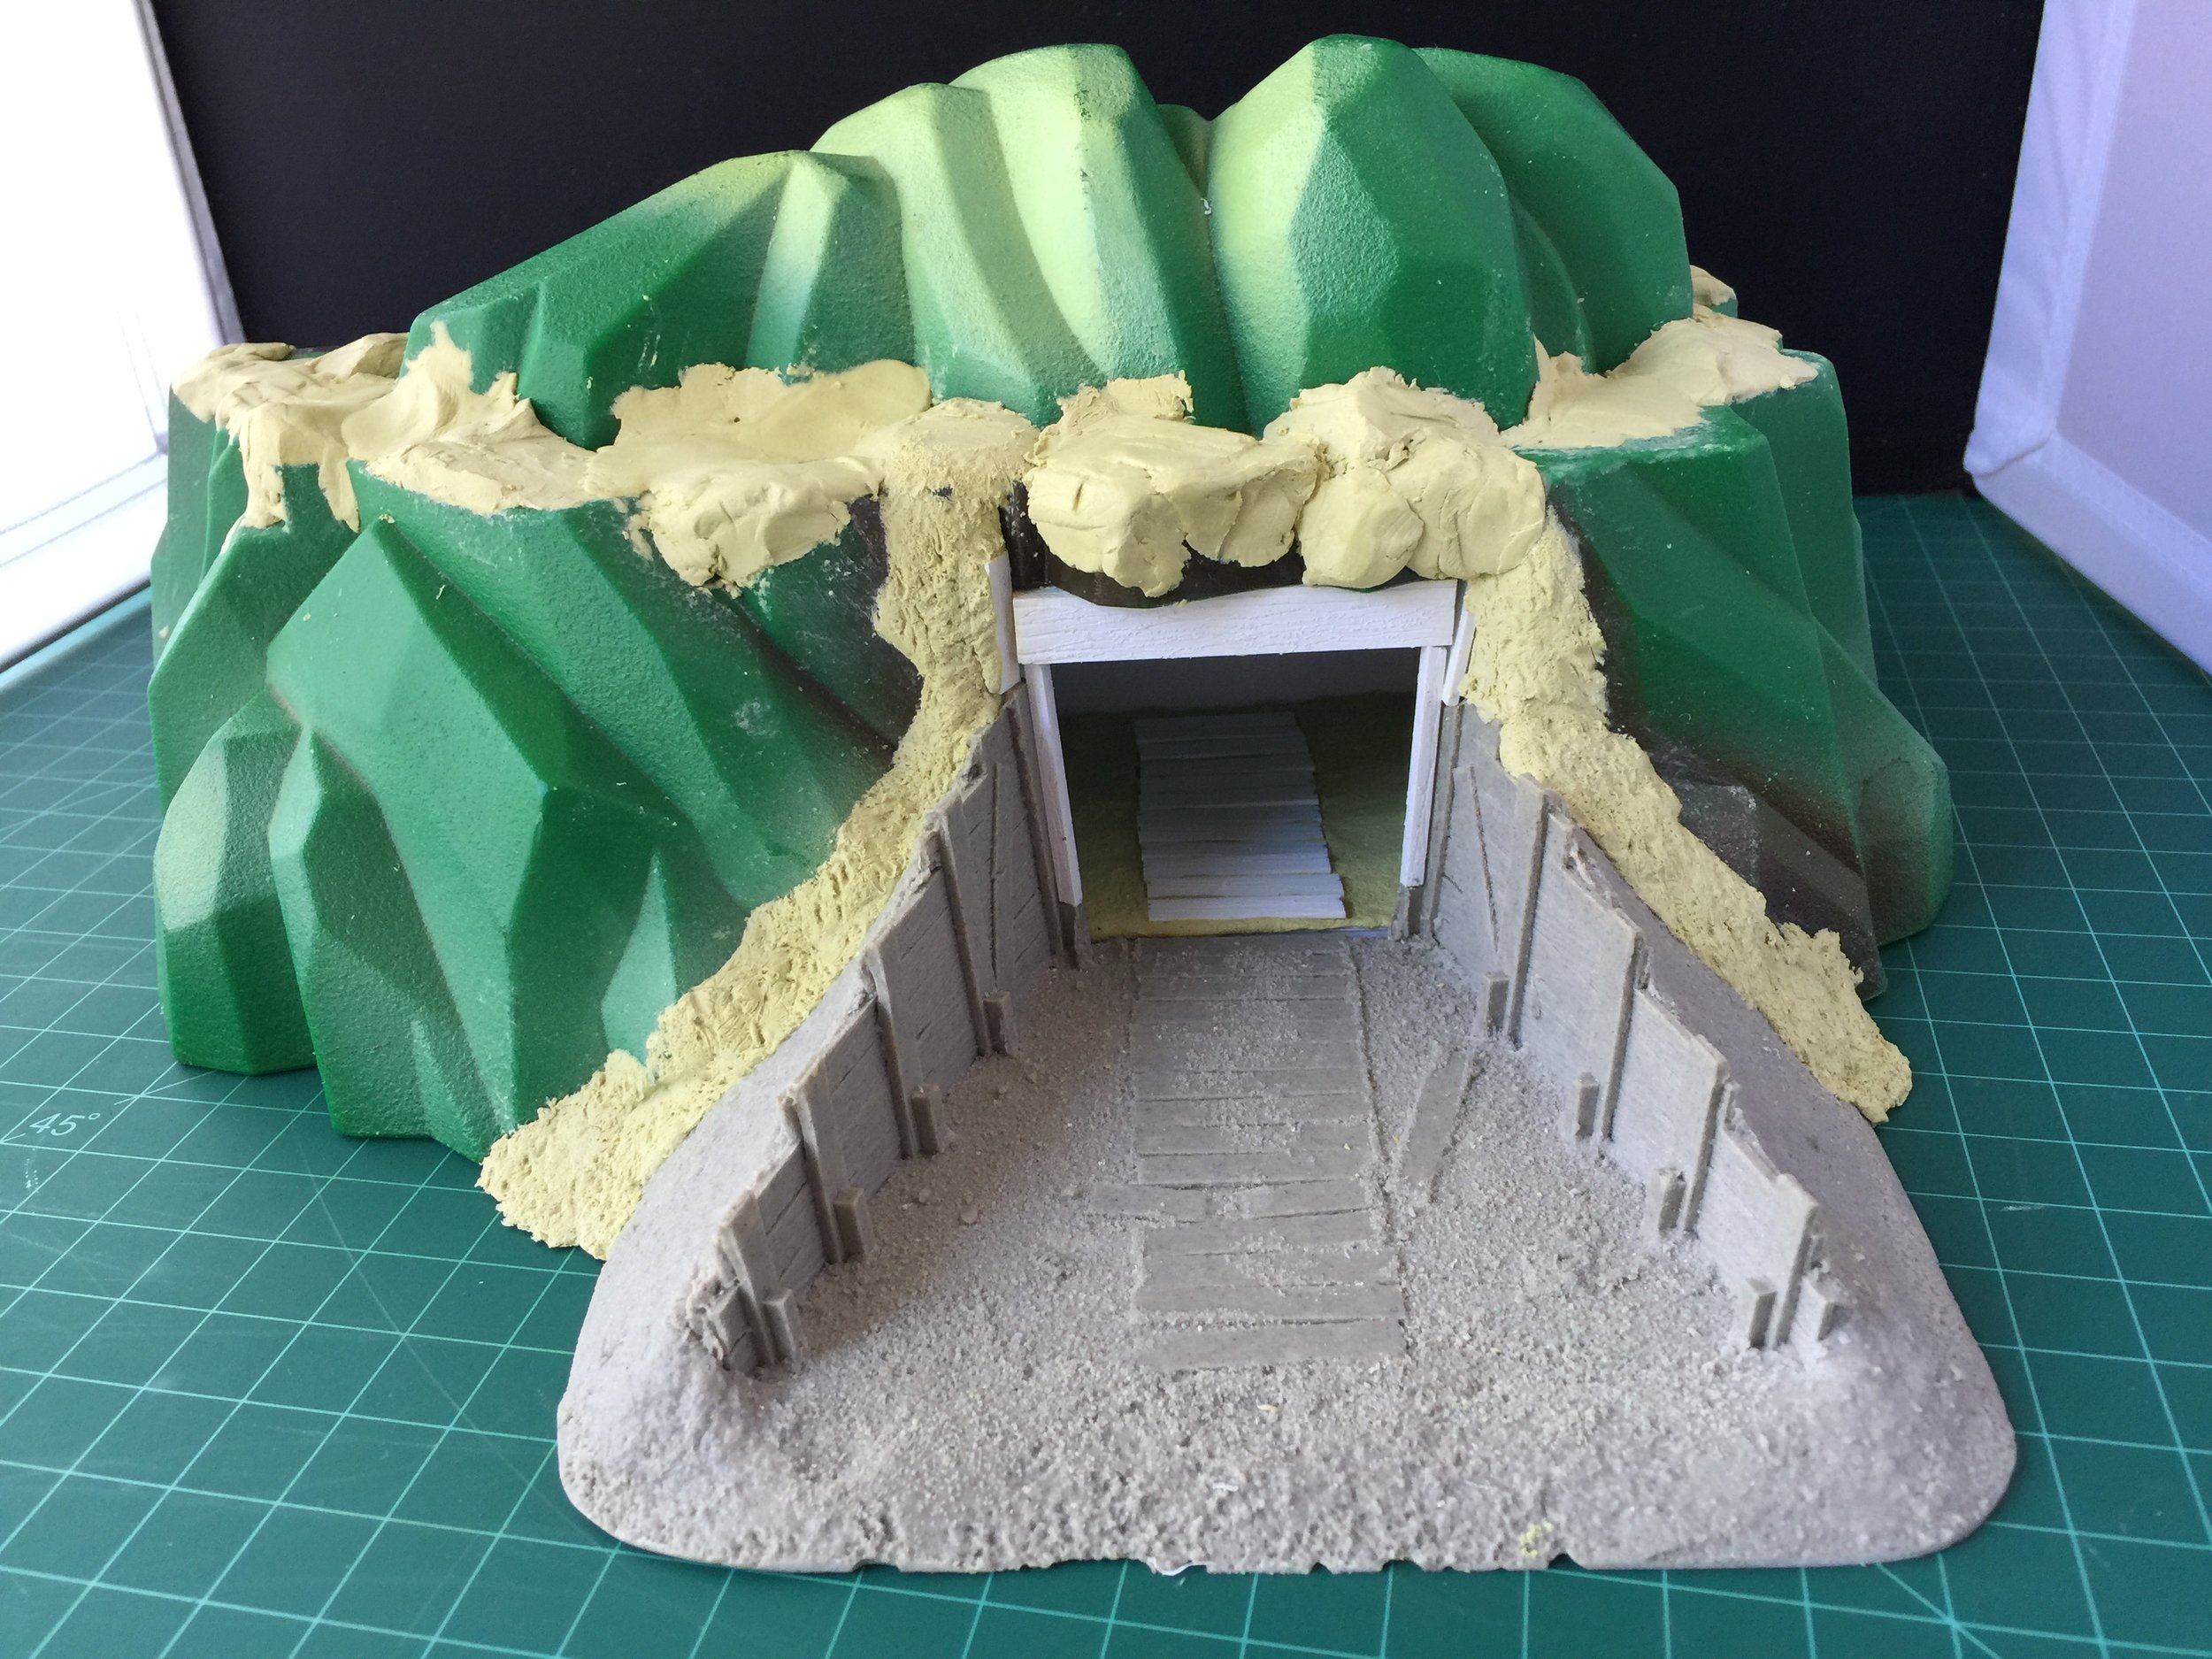
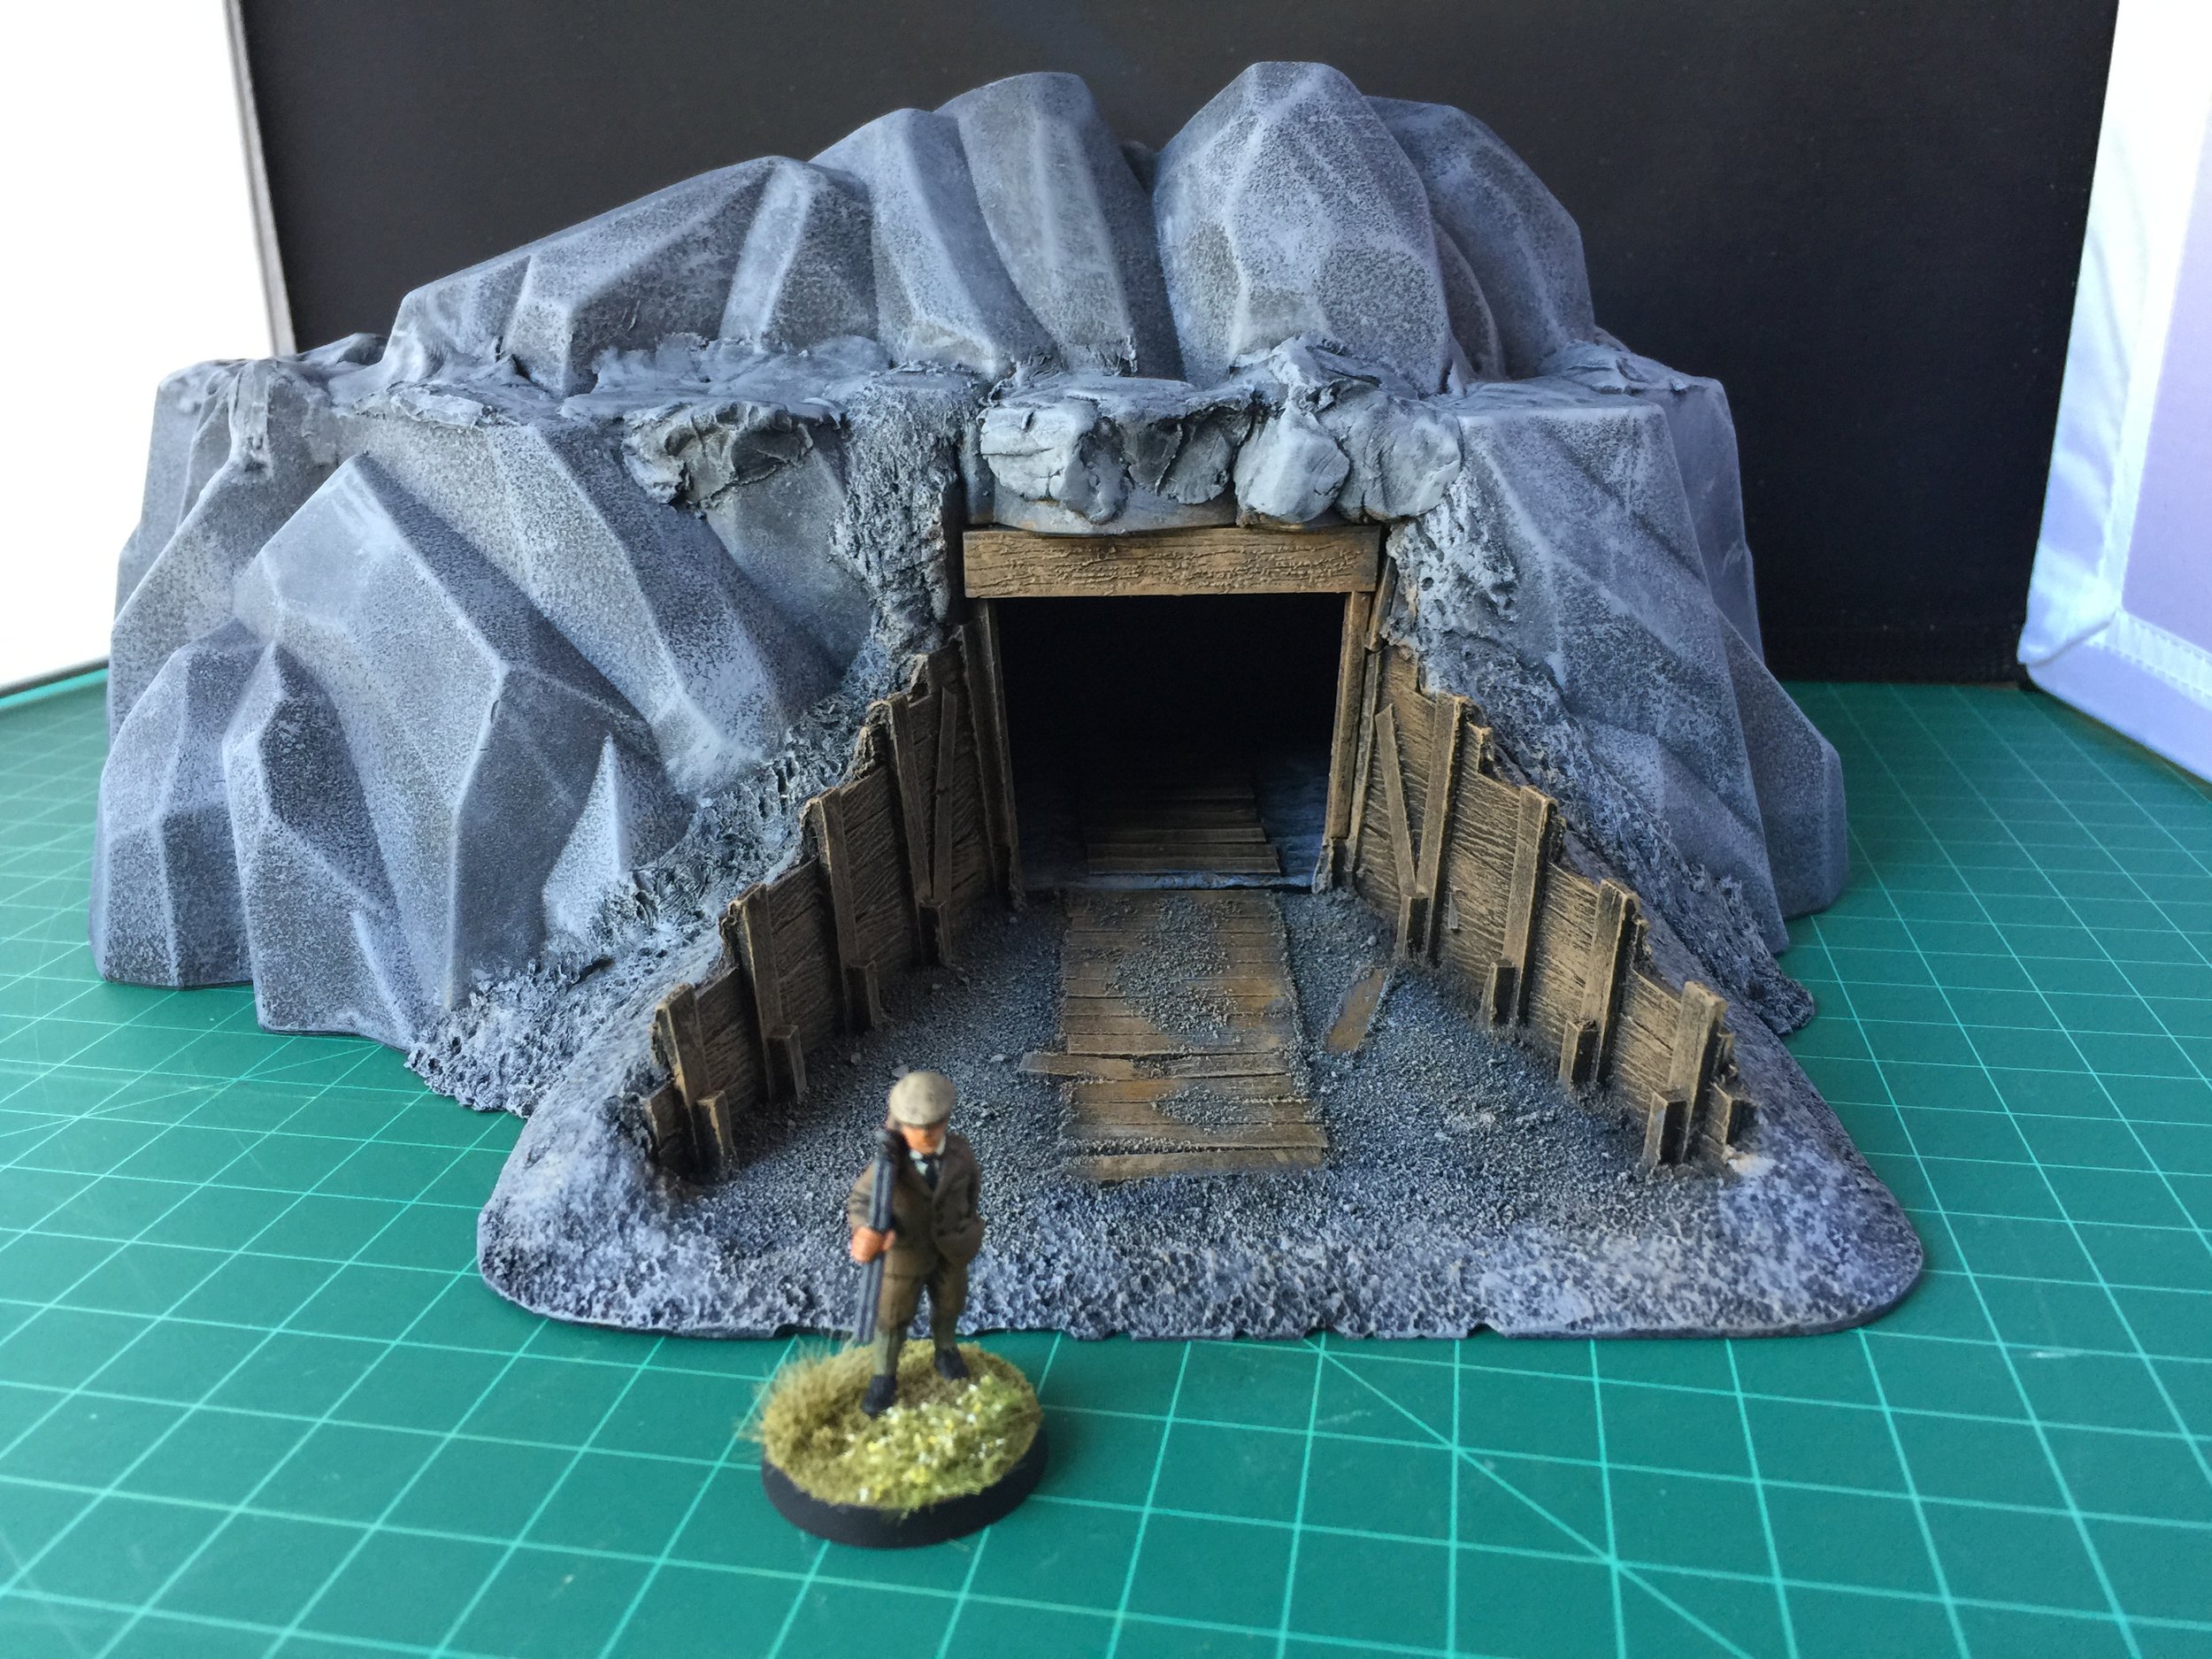
With the submarine done, I decided I would take on another Loch Ness-related project. For reasons that I can’t explain in terms of the practical, I decided that my Loch Ness research team should not only be looking at the Loch but also at what might lurk beneath the ground near the Loch. For that I decided to create a mine entrance. I used a resin mine entrance feature by Ainsty Castings that I purchased awhile back and attached it to a plastic rock feature I bought at the swap meet for a dollar about a year ago. I added some Milliput-shaped rock, created the illusion of an interior (as viewed from the outside) using Milliput and Evergreen Plastic, and crowned the entrance with some shoring lumber made from Evergreen Plastic.
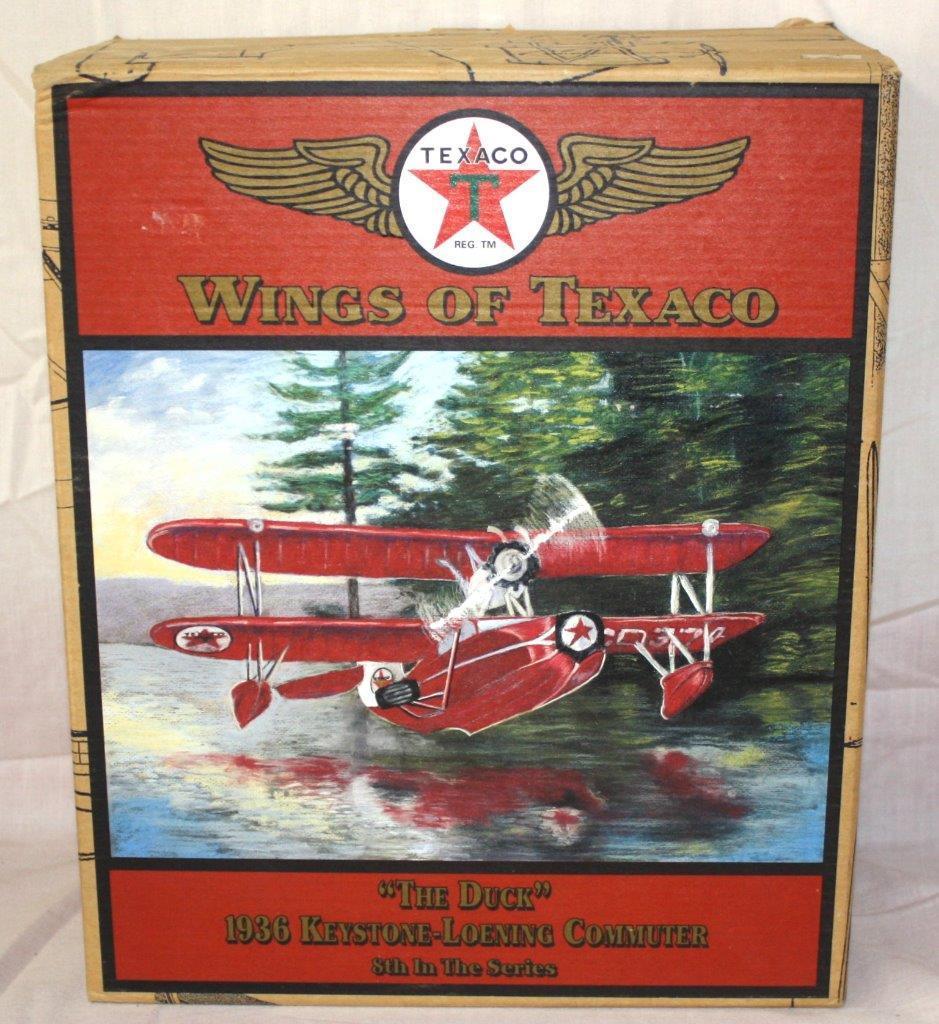
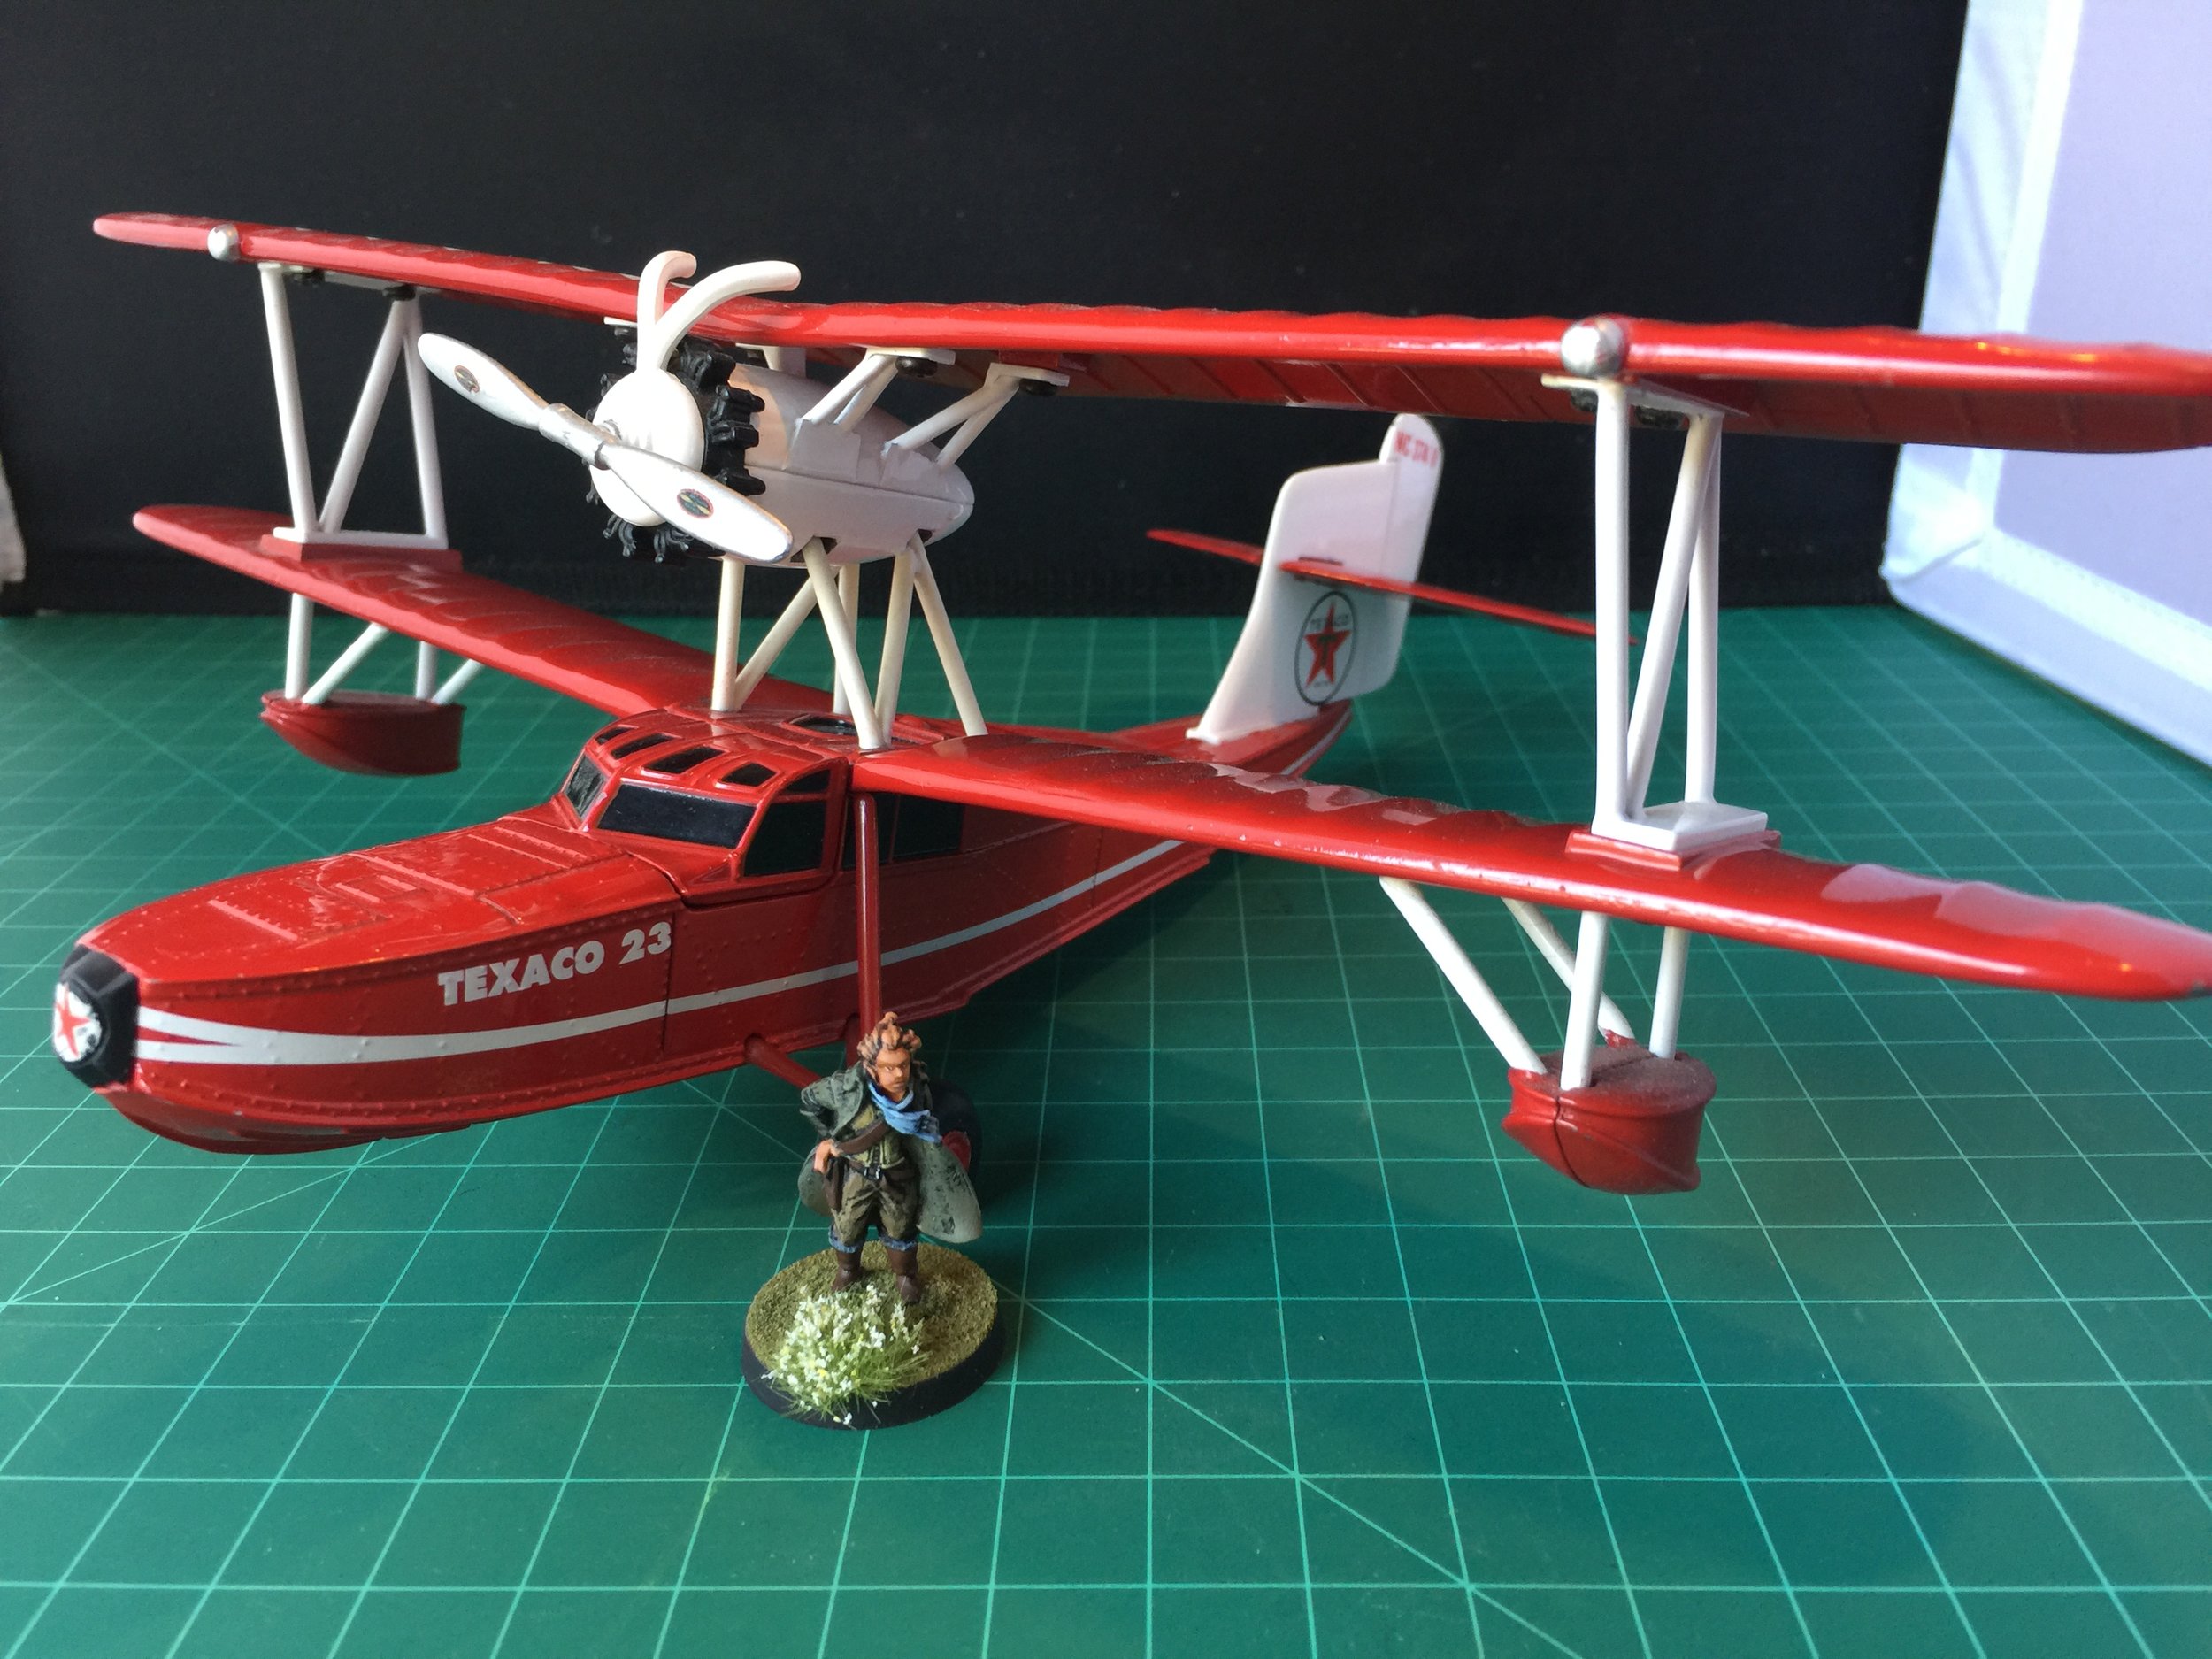
As mentioned in my open, it’s been a hot week and the heat sapped my workbench drive. On the upside, the US Postal Service delivered some Artizan Design Thrilling Tales figures for my planned Gordon Institute Loch Ness research group, and I realized that I needed a period seaplane for my Loch Ness collection. Fortunately, for a number of years I’ve had the perfect seaplane tucked away for the future use… the “future” is coming. It’s a beautiful plane, the 1936 Keystone-Loening Commuter (“The Duck”) which is part of the Texaco diecast collection. It’s a swap meet find and perfect for 28mm. Since I will be painting it to make it blend in with the rest of my collection and to hide the Texaco emblems, I knew I would need some new letters and numbers for the wings since the current ones would be lost when I painted the plane. Unfortunately, 1” tall block letters in white are not easily found, and I say this as a guy who lives only a 20-minute drive from the home of Microscale Decals. I called them to see what they had… always nice people to talk with… and learned that they did not make letters and numbers in that size. I also learned that I was not the first person to ask that question and despite their own efforts to find a place they could direct customers, they had not found anyone who made them. I’ve decided to make homemade decals for this purpose in black since white (a non-color) is not practical in terms of my knowledge and skills… black will be fine.
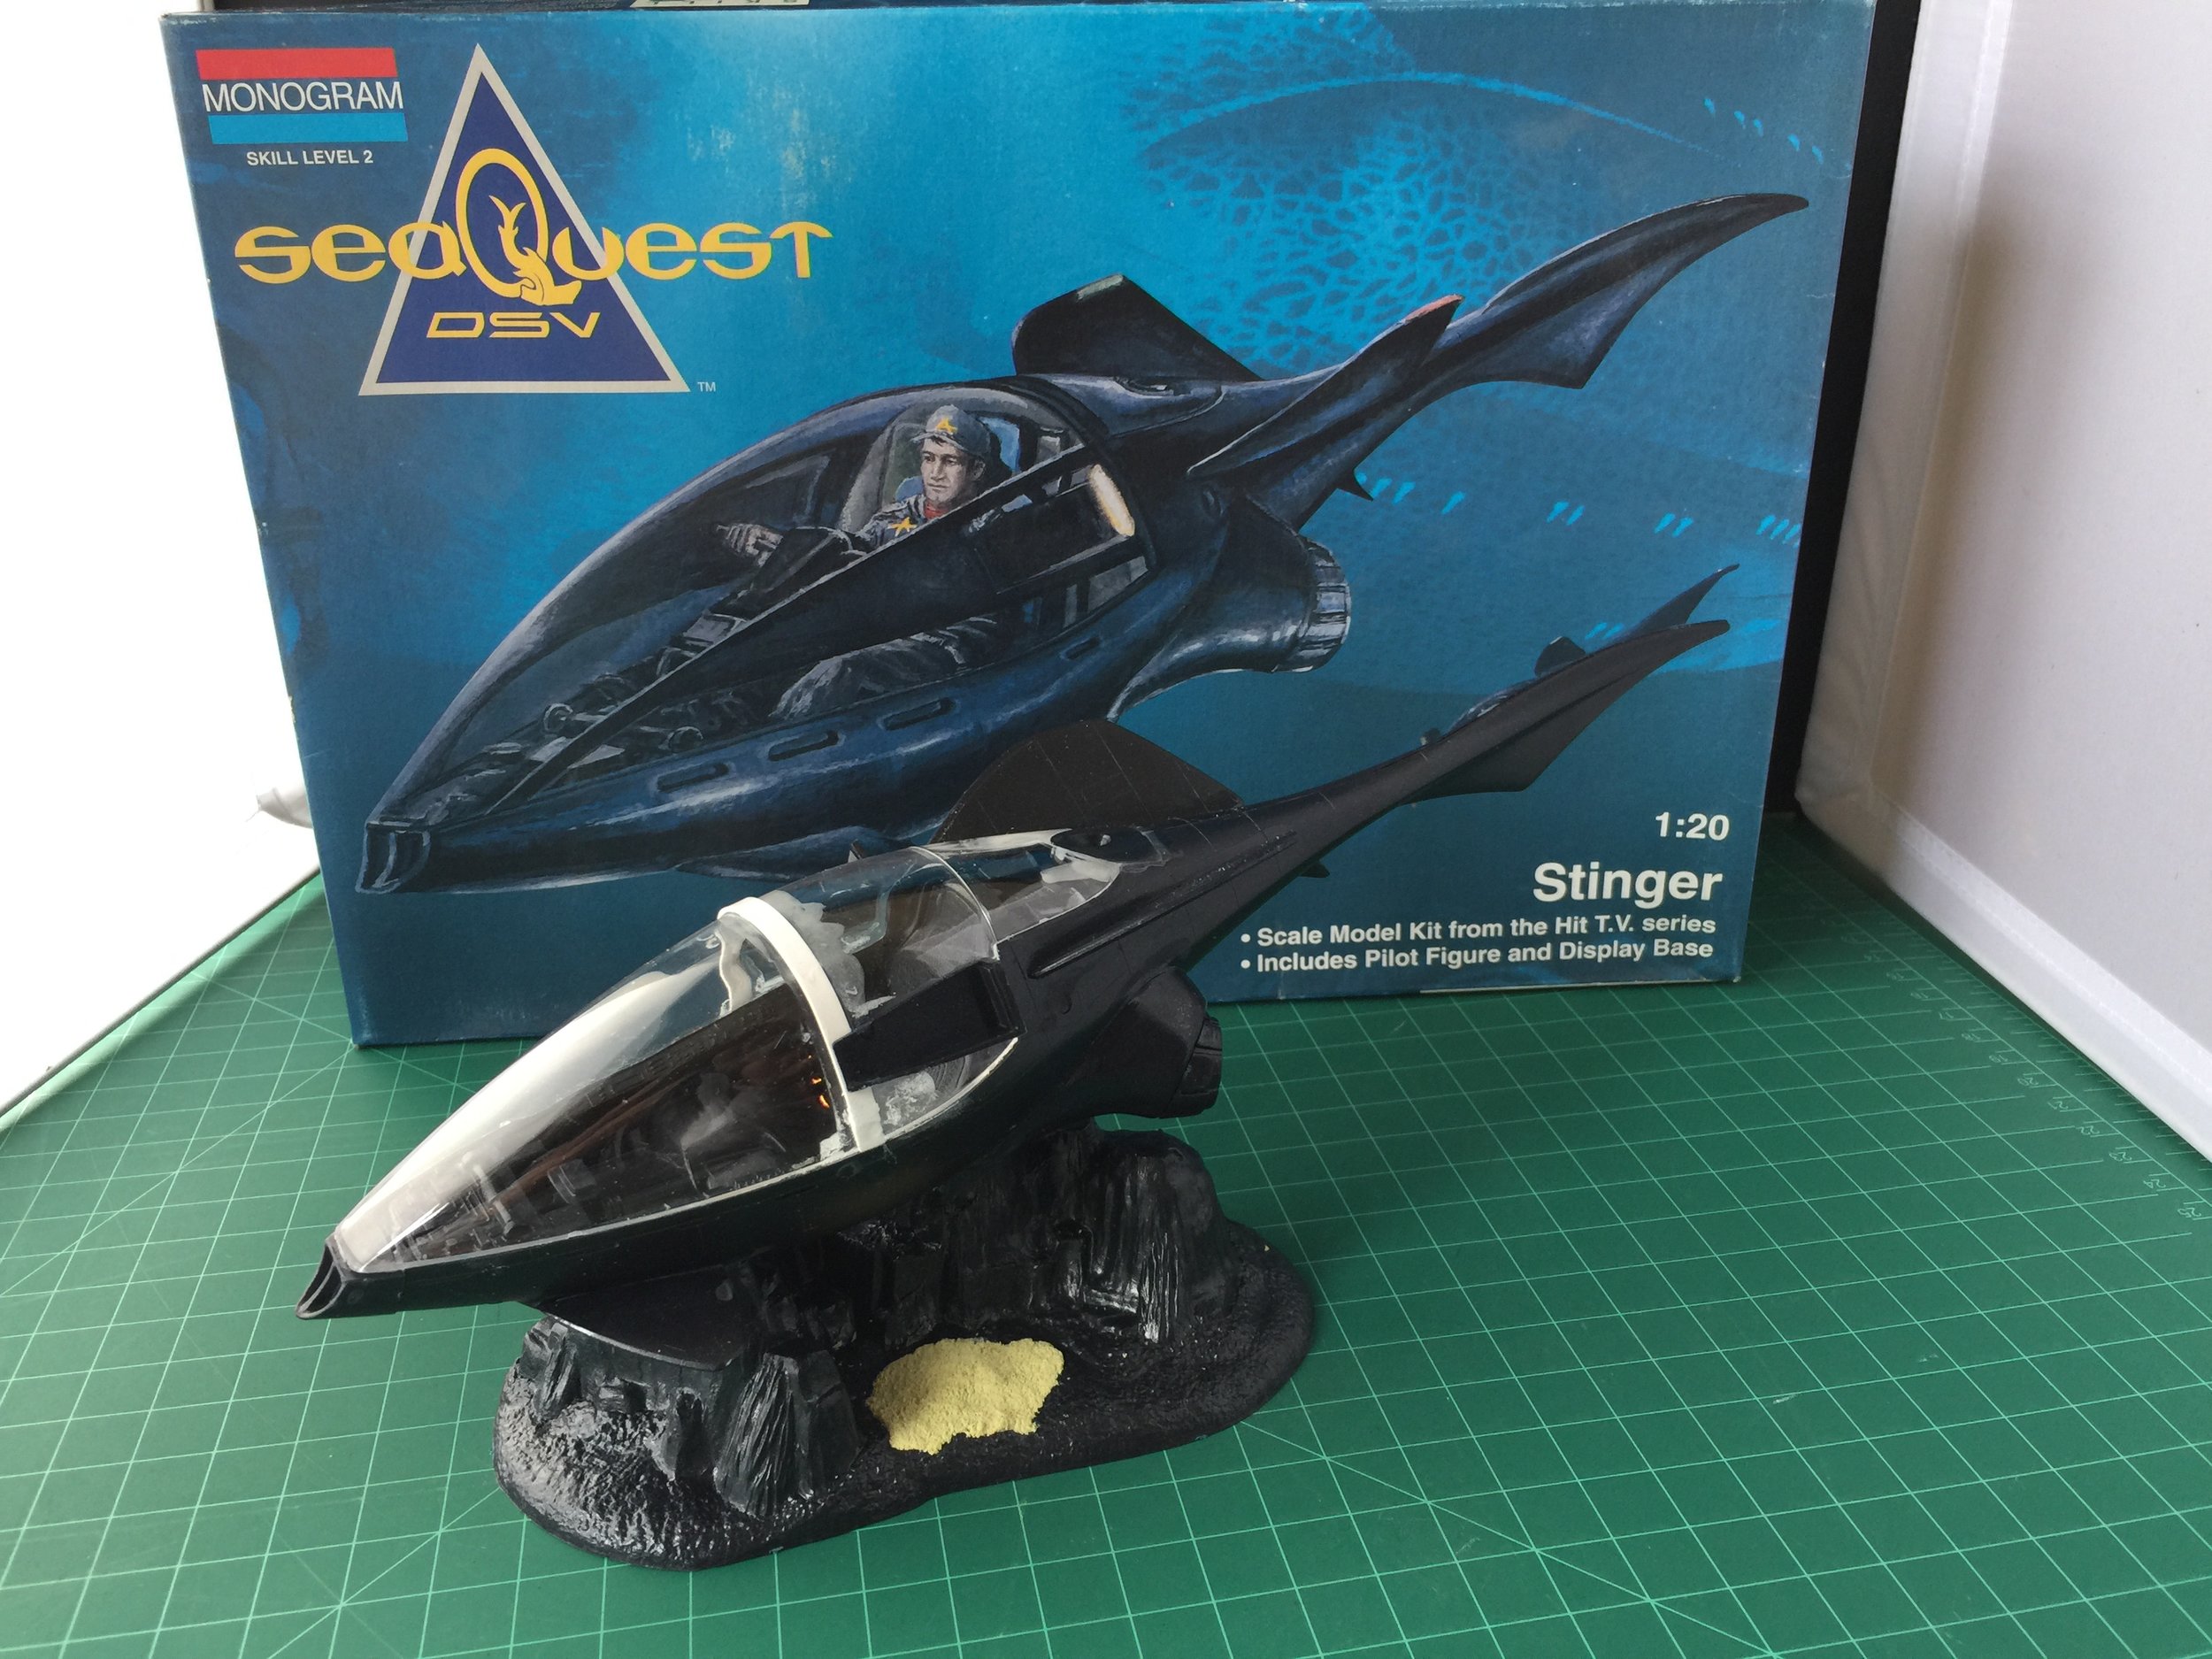
By Friday night I was sure that my time at the workbench was done for the week. Saturday was going to be another hot day; I had nothing planned to work on, and the renovation of the toy house requires too much thought and concentration for the heat. As it turned out I was wrong. During my Saturday swap meet visit I found Monogram’s model of the Stinger (1:20) from SeaQuest. It was $5 (best price on eBay about $25 including shipping, but it goes up a lot from there) and appeared to be complete… that is not the norm with models found at the swap meet. As the scale indicates, the Monogram Stinger is far too large to serve as a one-man craft for 28mm, but it would be great as a two- or three-man research sub for the Gordon Institute. It’s a simple model; probably fewer than 20 pieces (skill level 2). When I got it home on Saturday, I couldn’t resist putting it together, adding a small modification to the cabin’s canopy and covering an oversized starfish on the model’s base with some textured Milliput. Next week I’ll paint the Stinger which will help give it a look more appropriate for 28mm. It probably should be noted that I began this week modifying a sub to serve as a Gordon Institute research sub and ended the week building a second sub that will probably replace the one I made at the start of the week. That said, both will find a place in some collection.