April 28, 2019
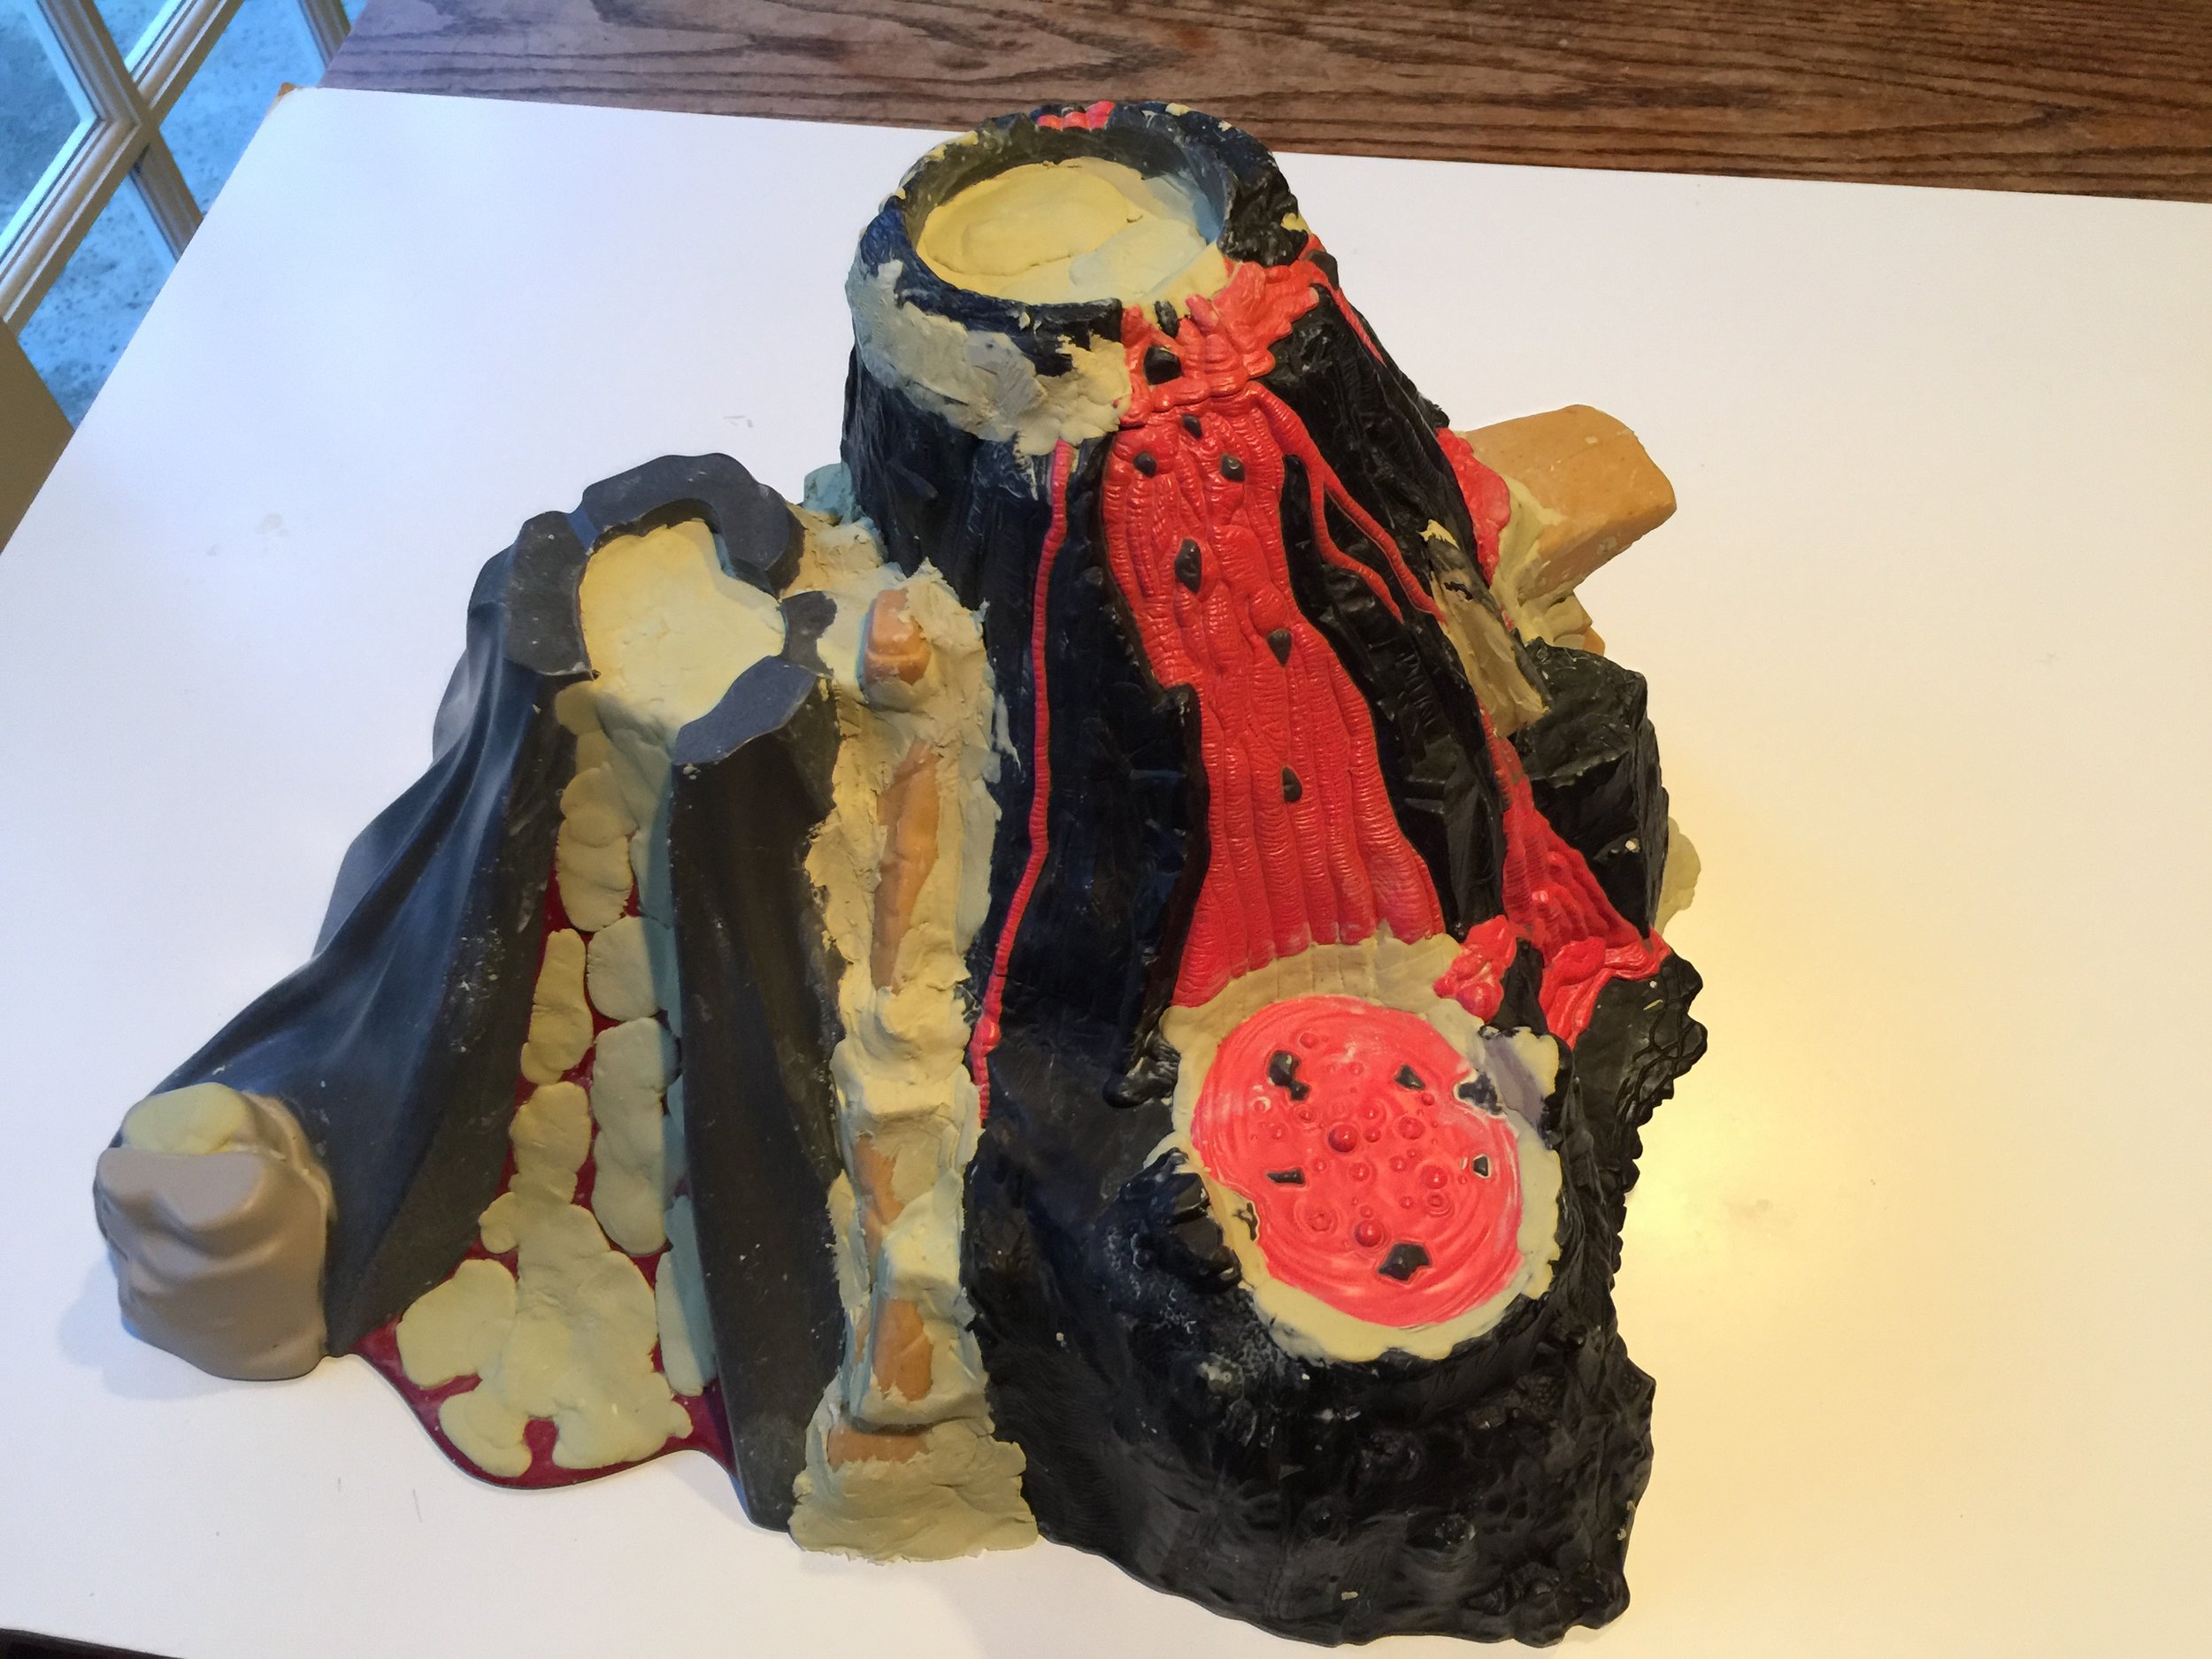
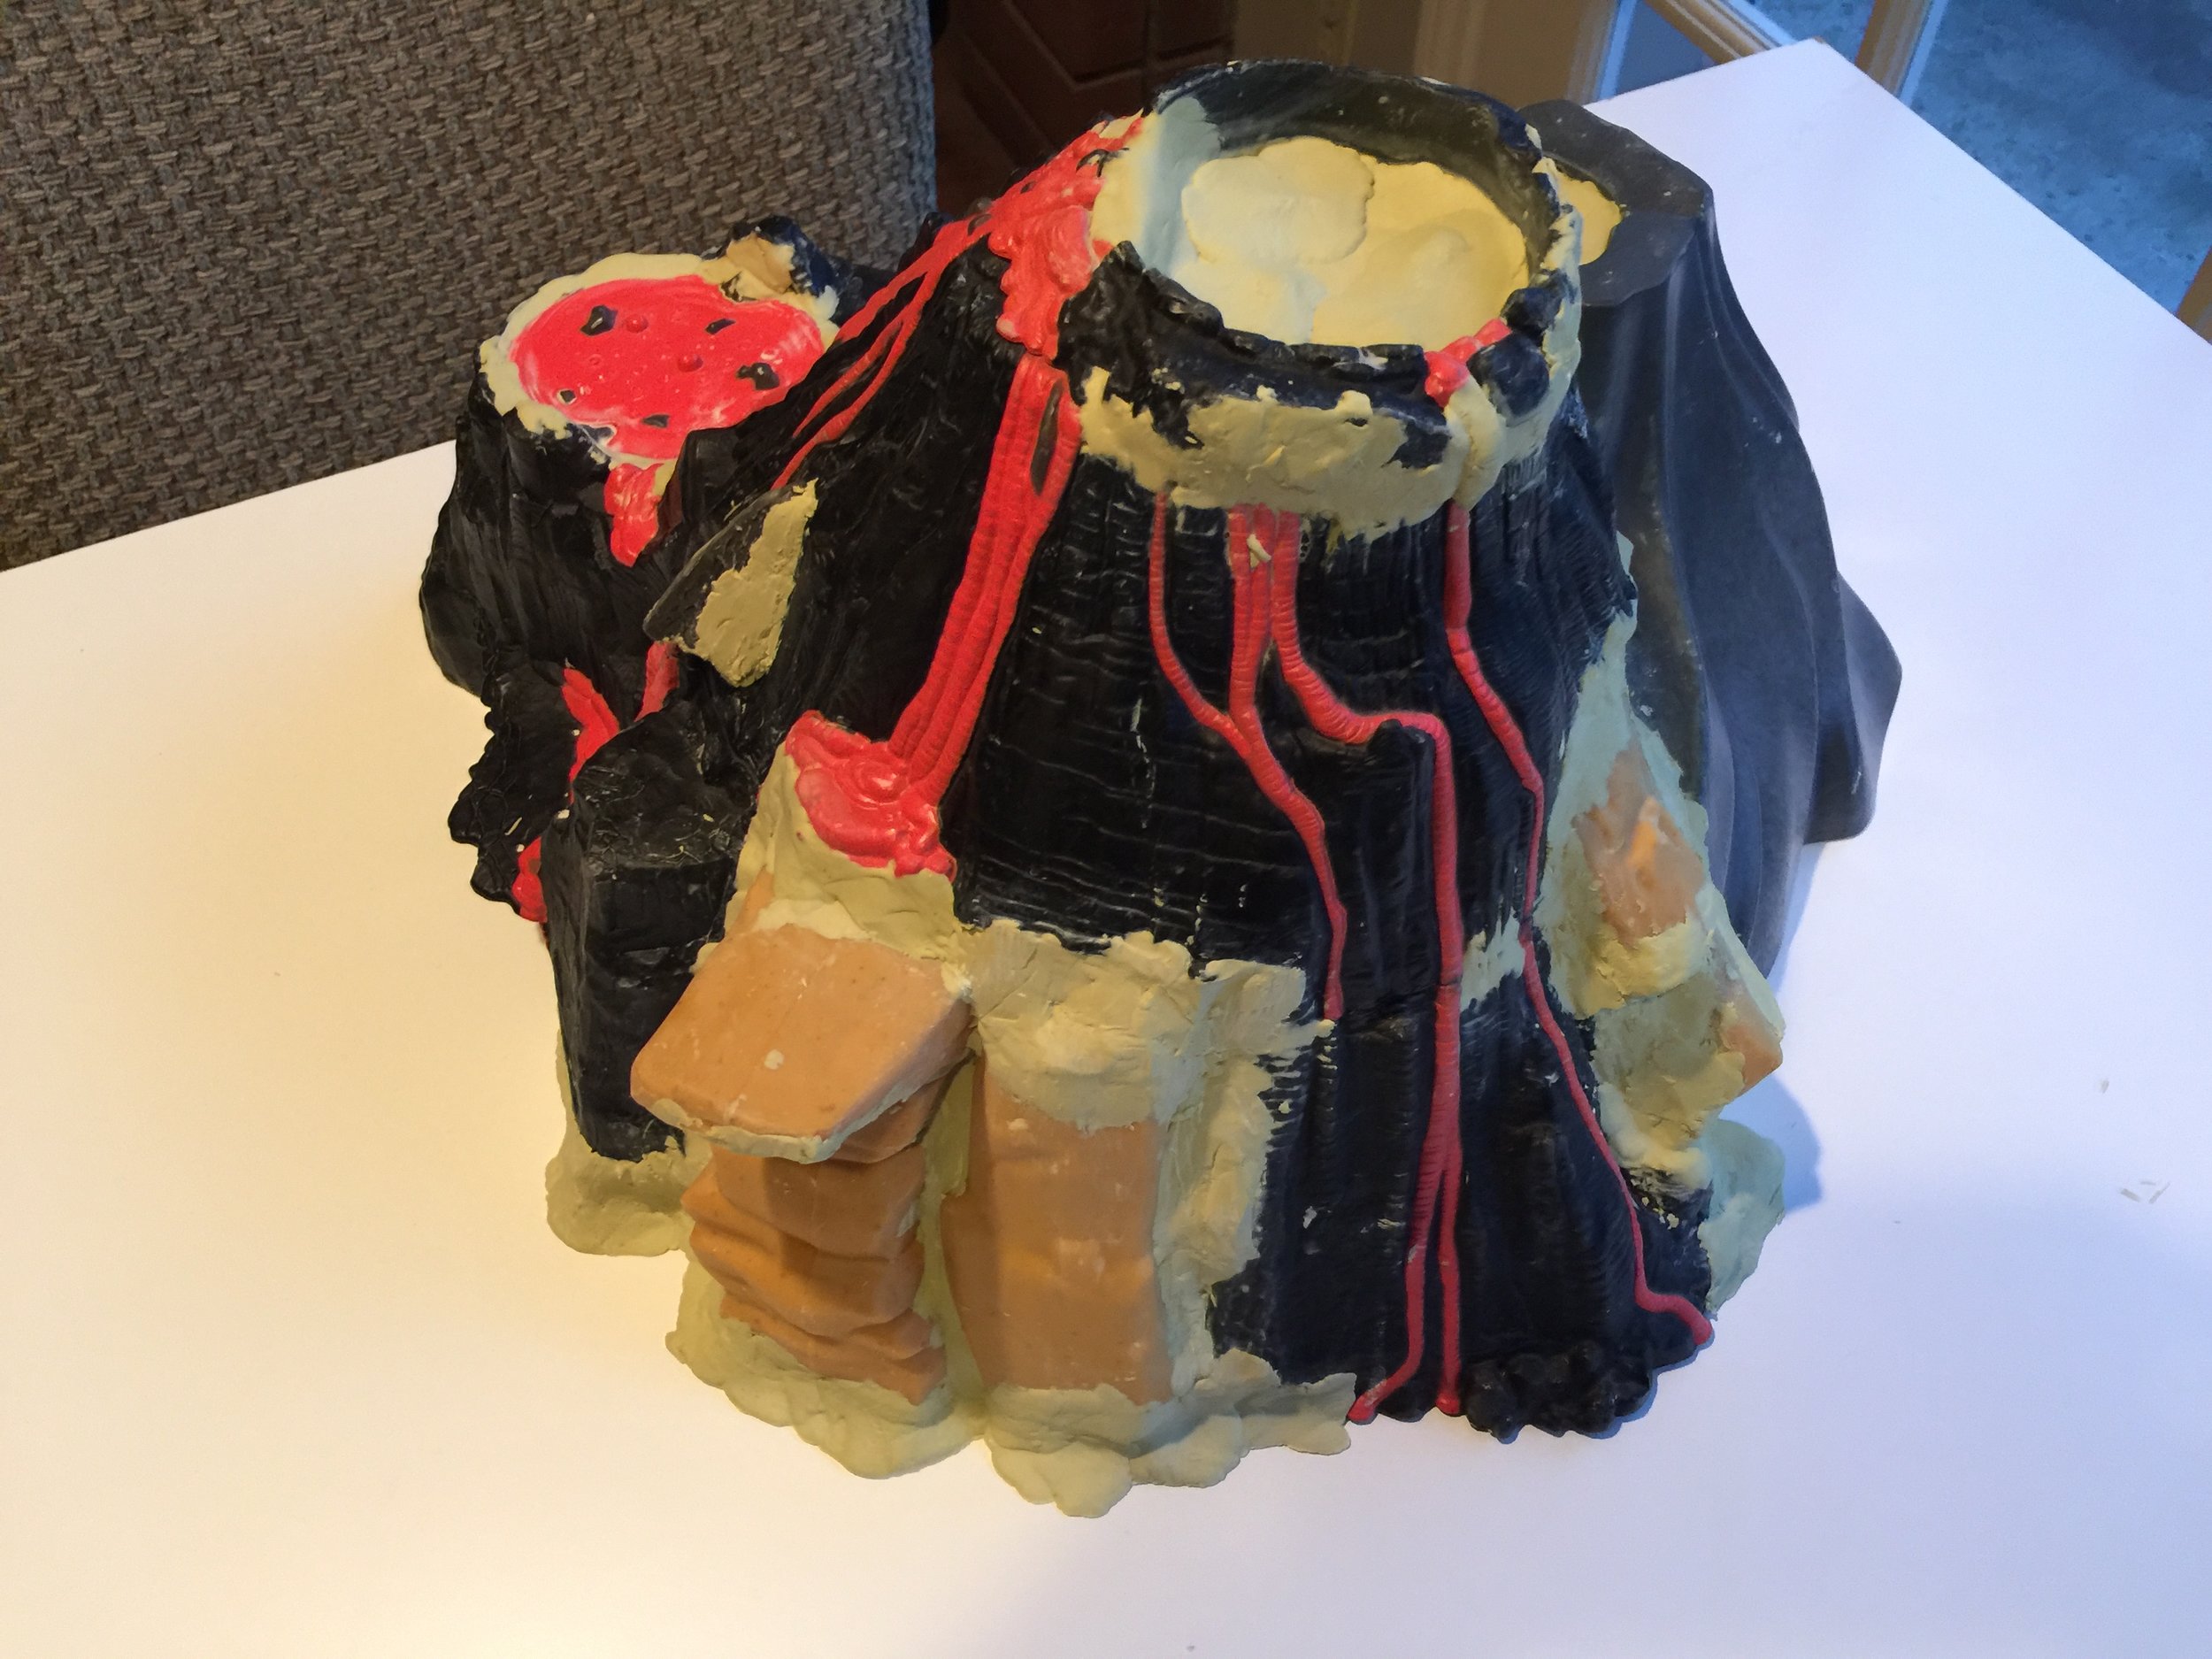
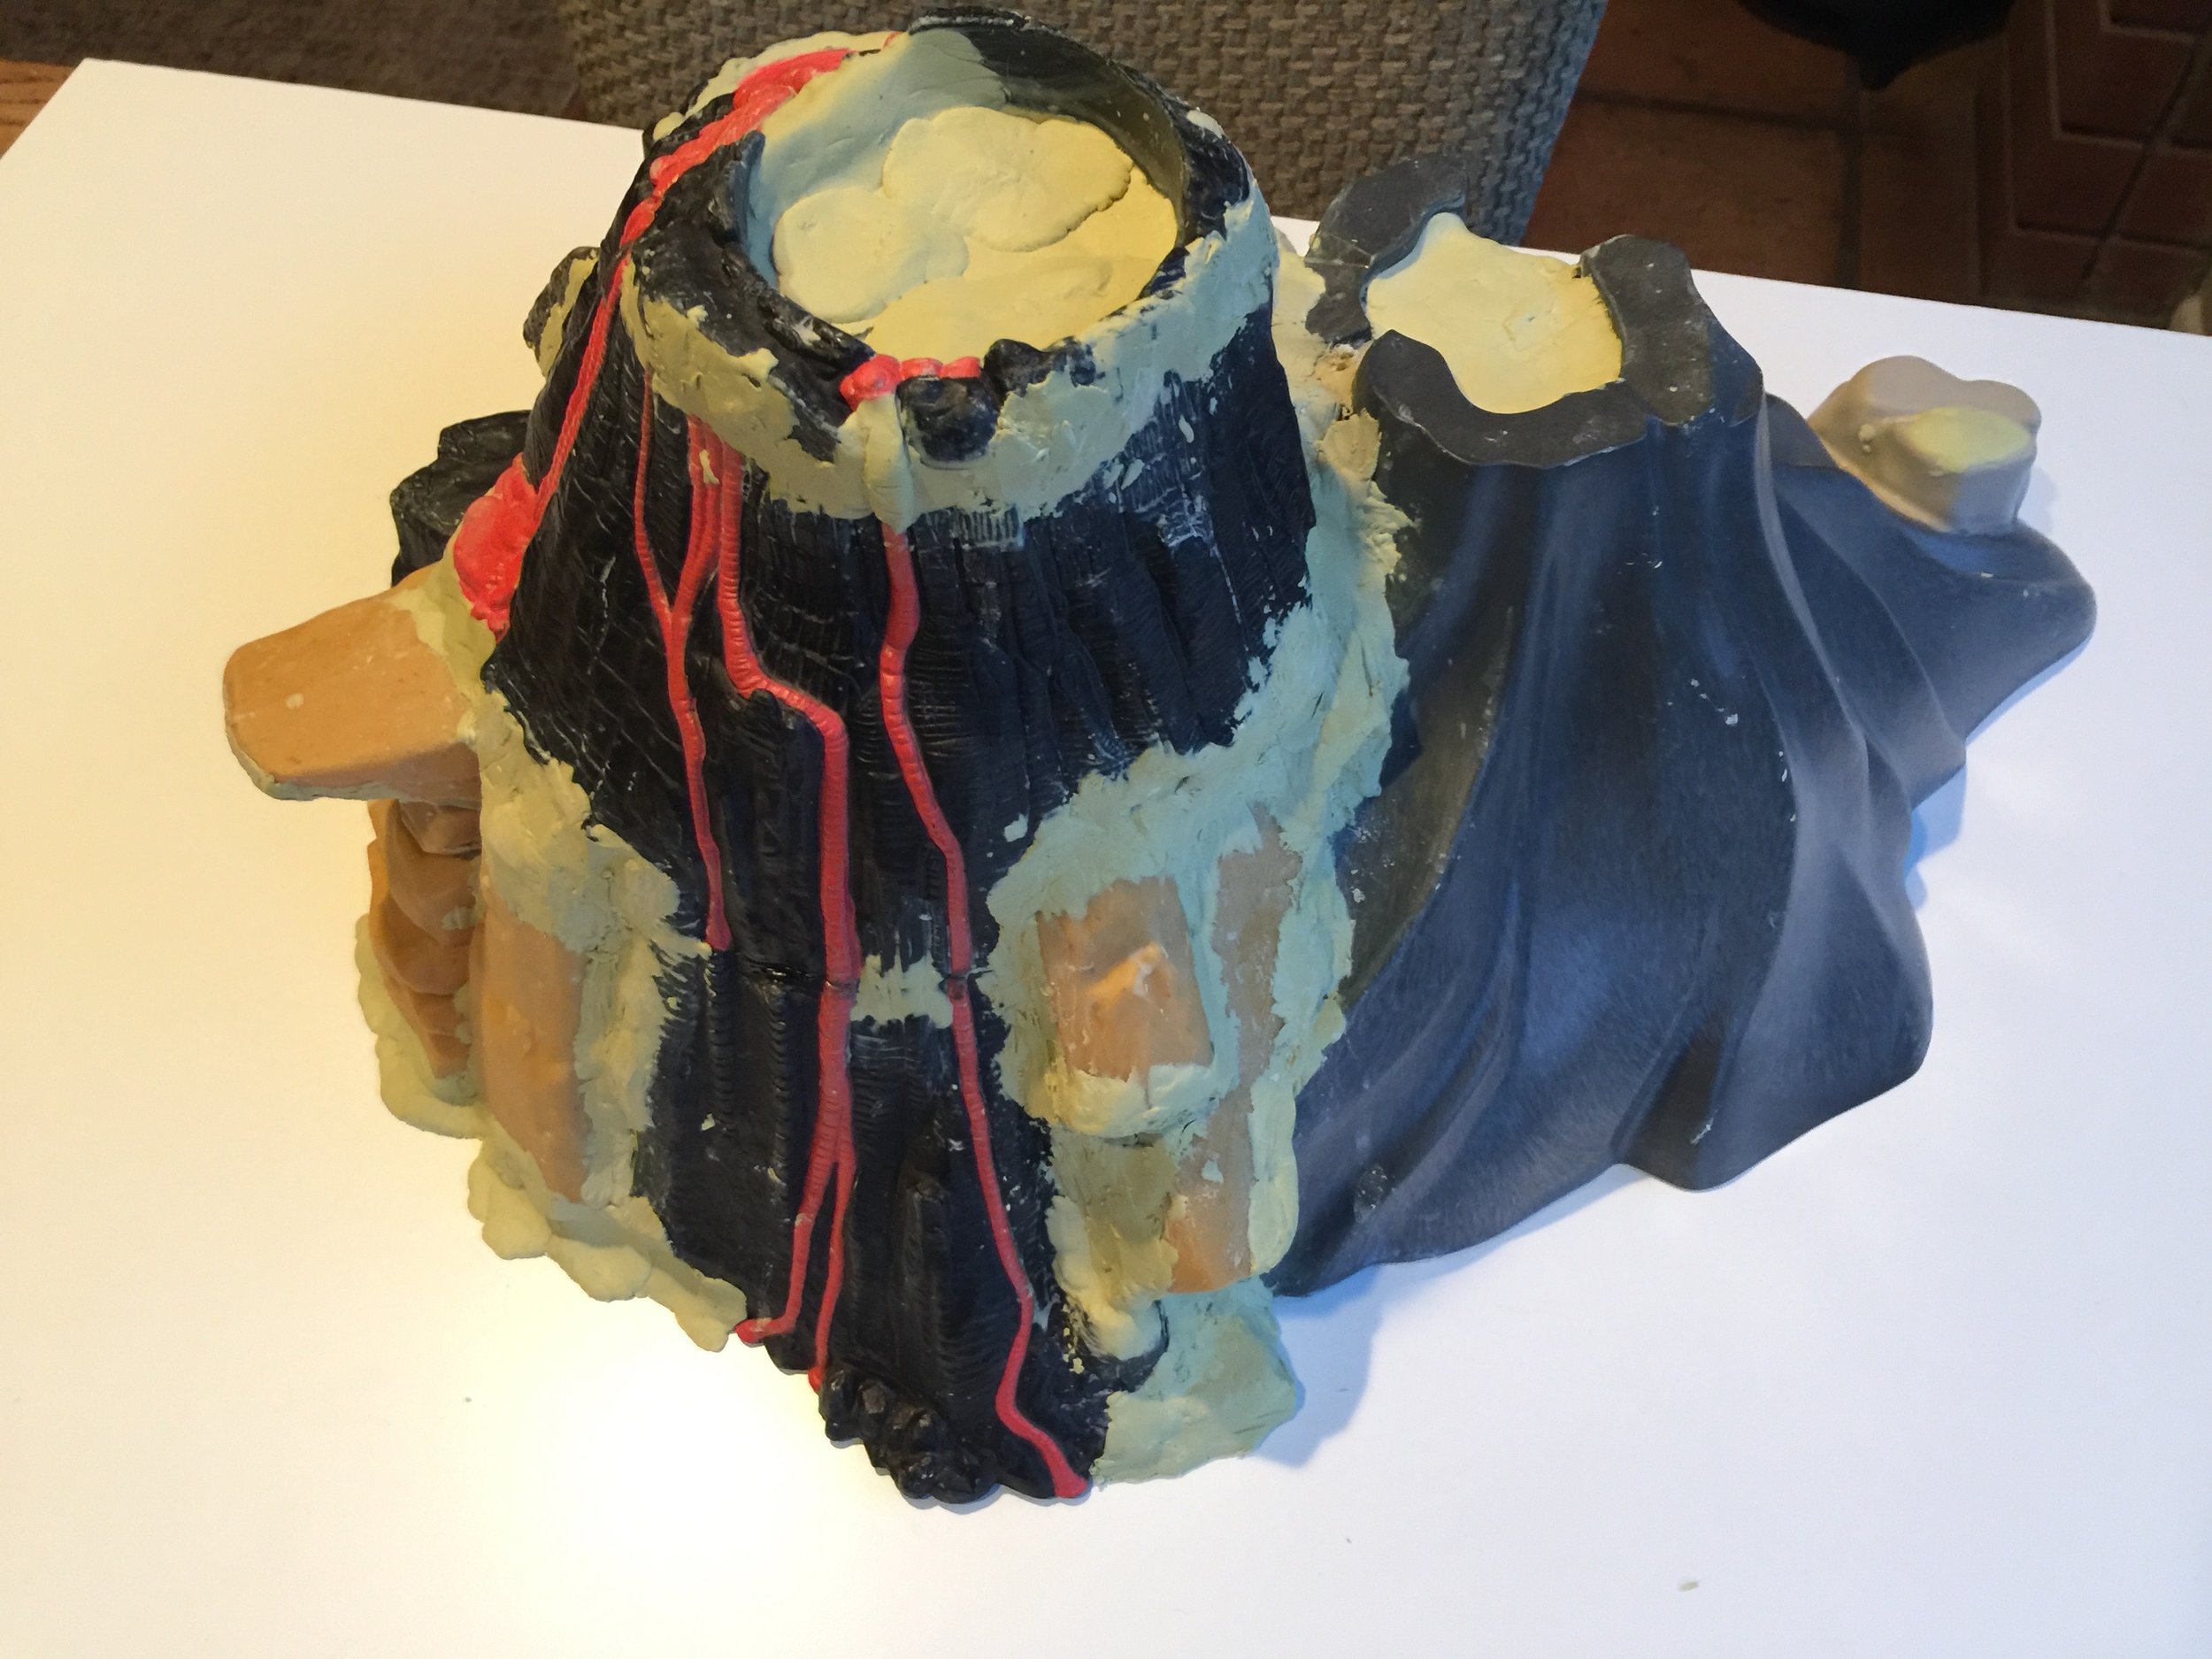
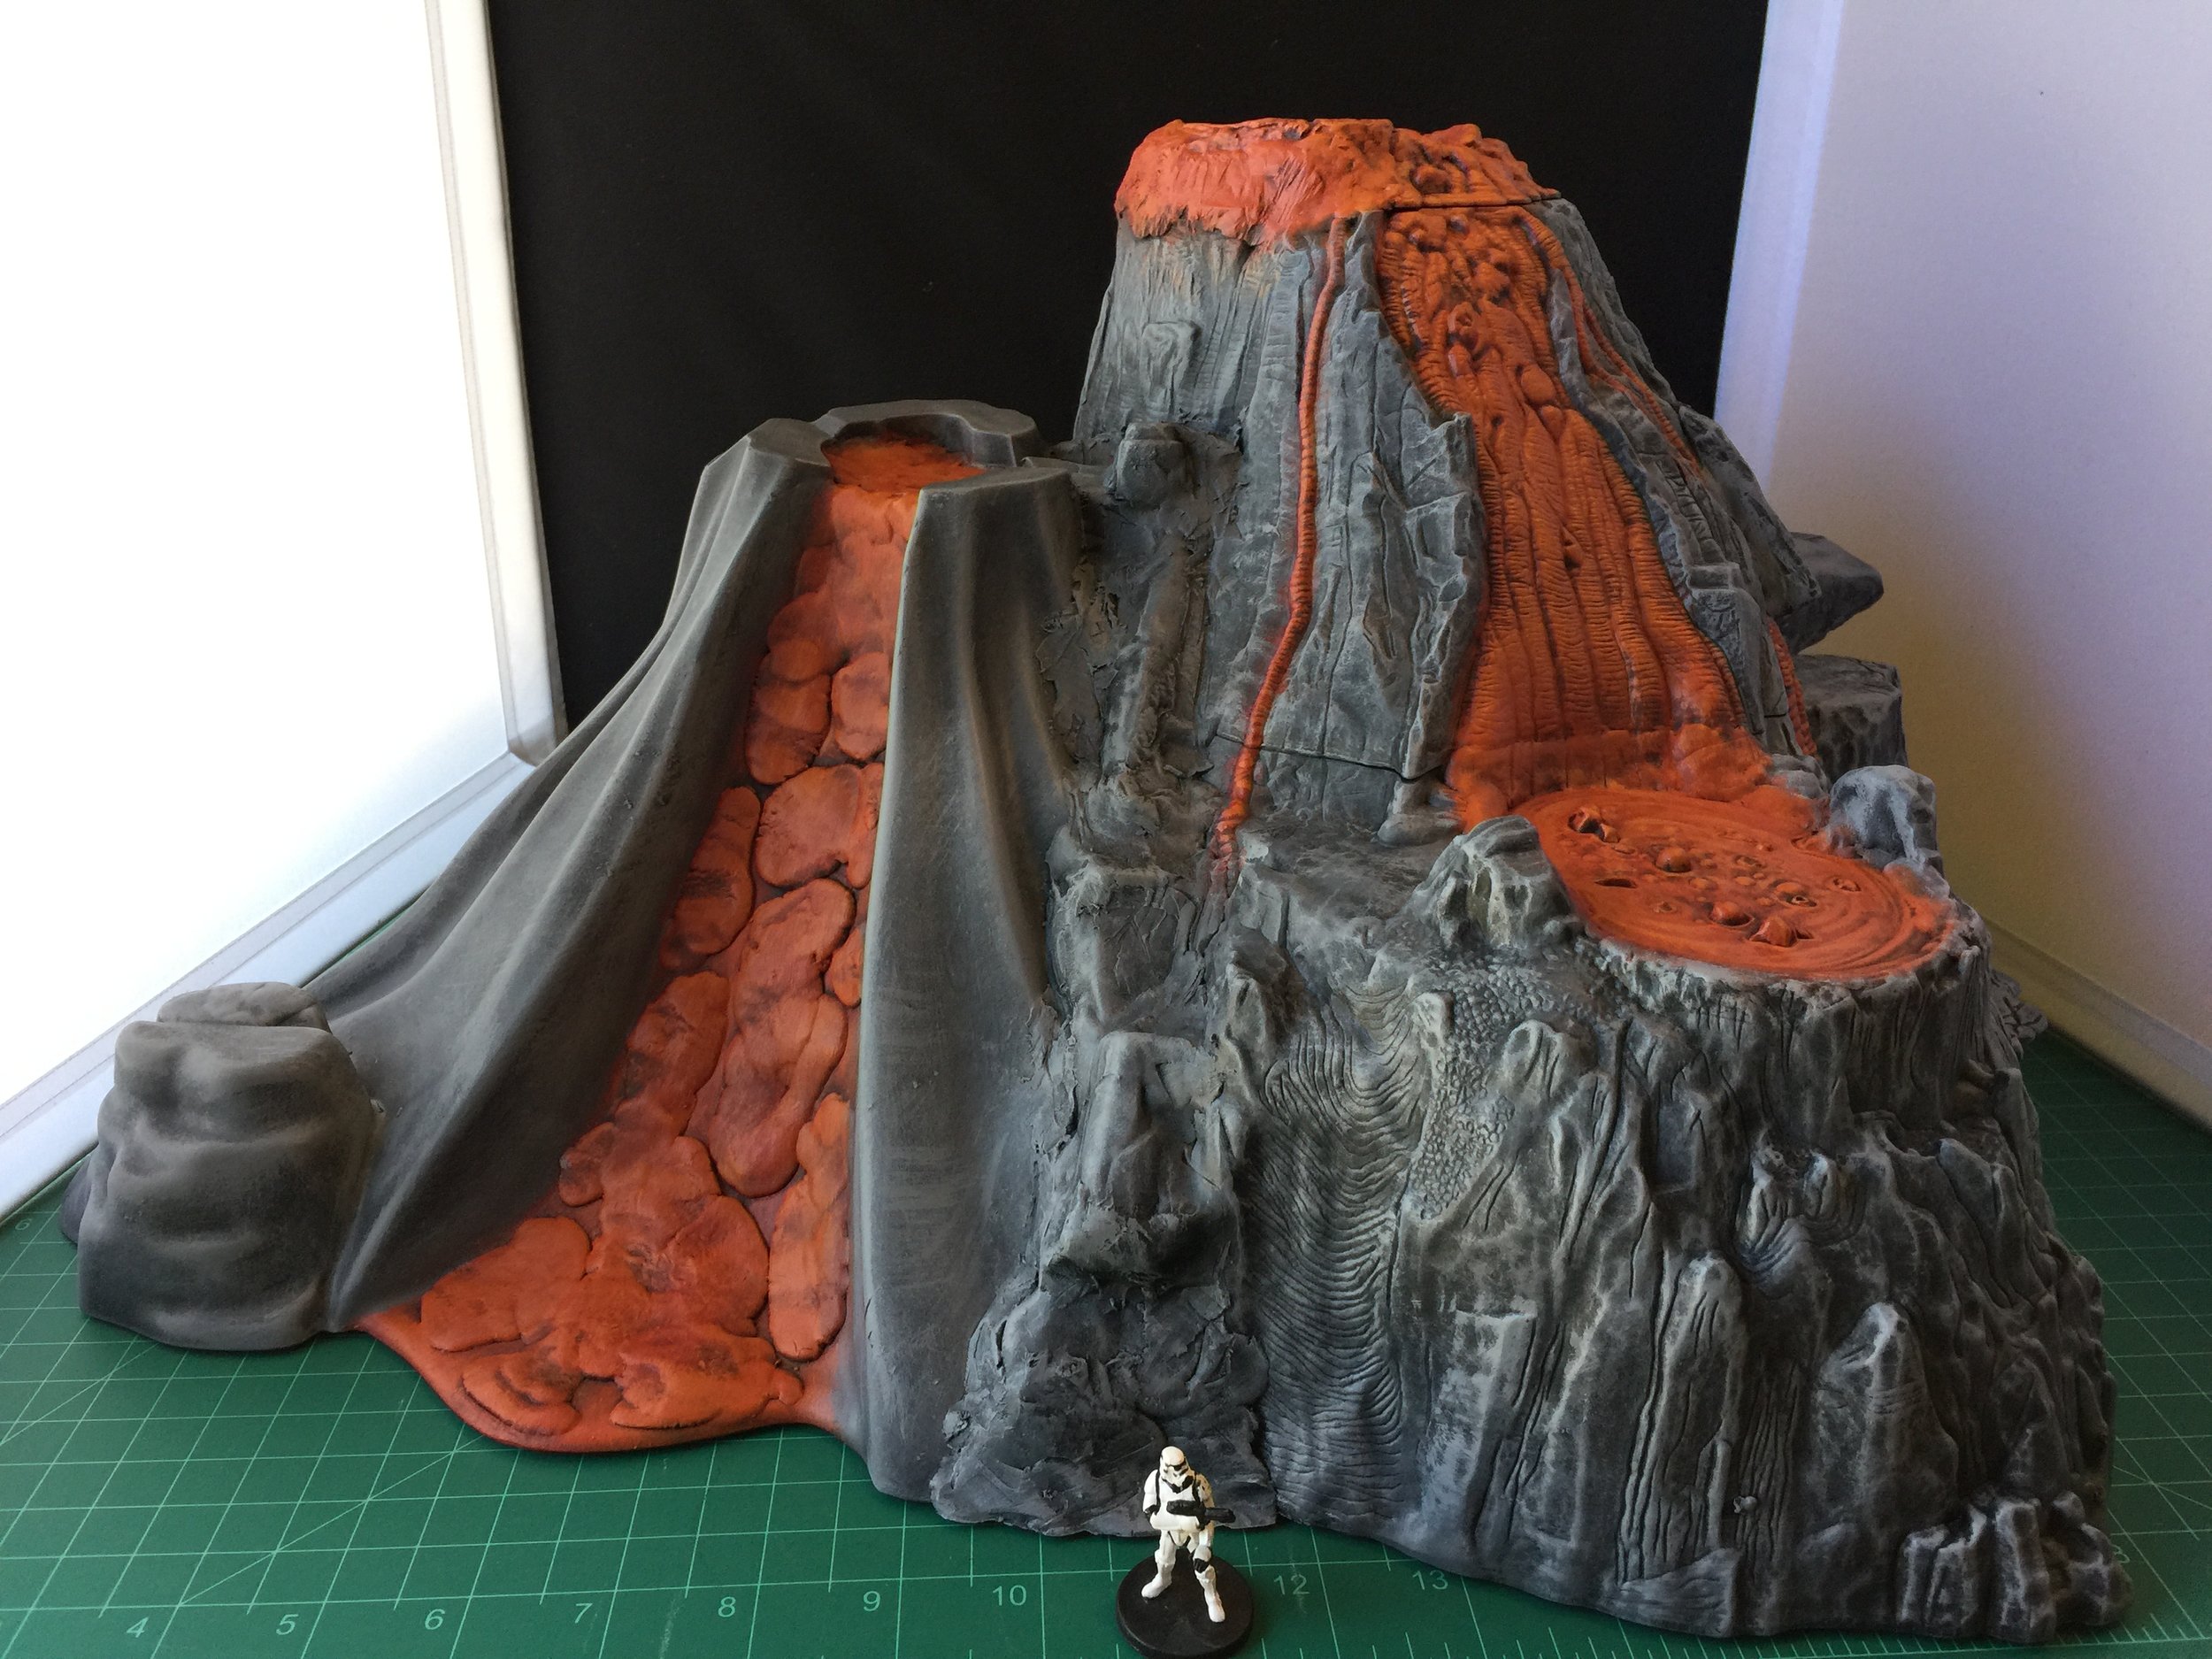
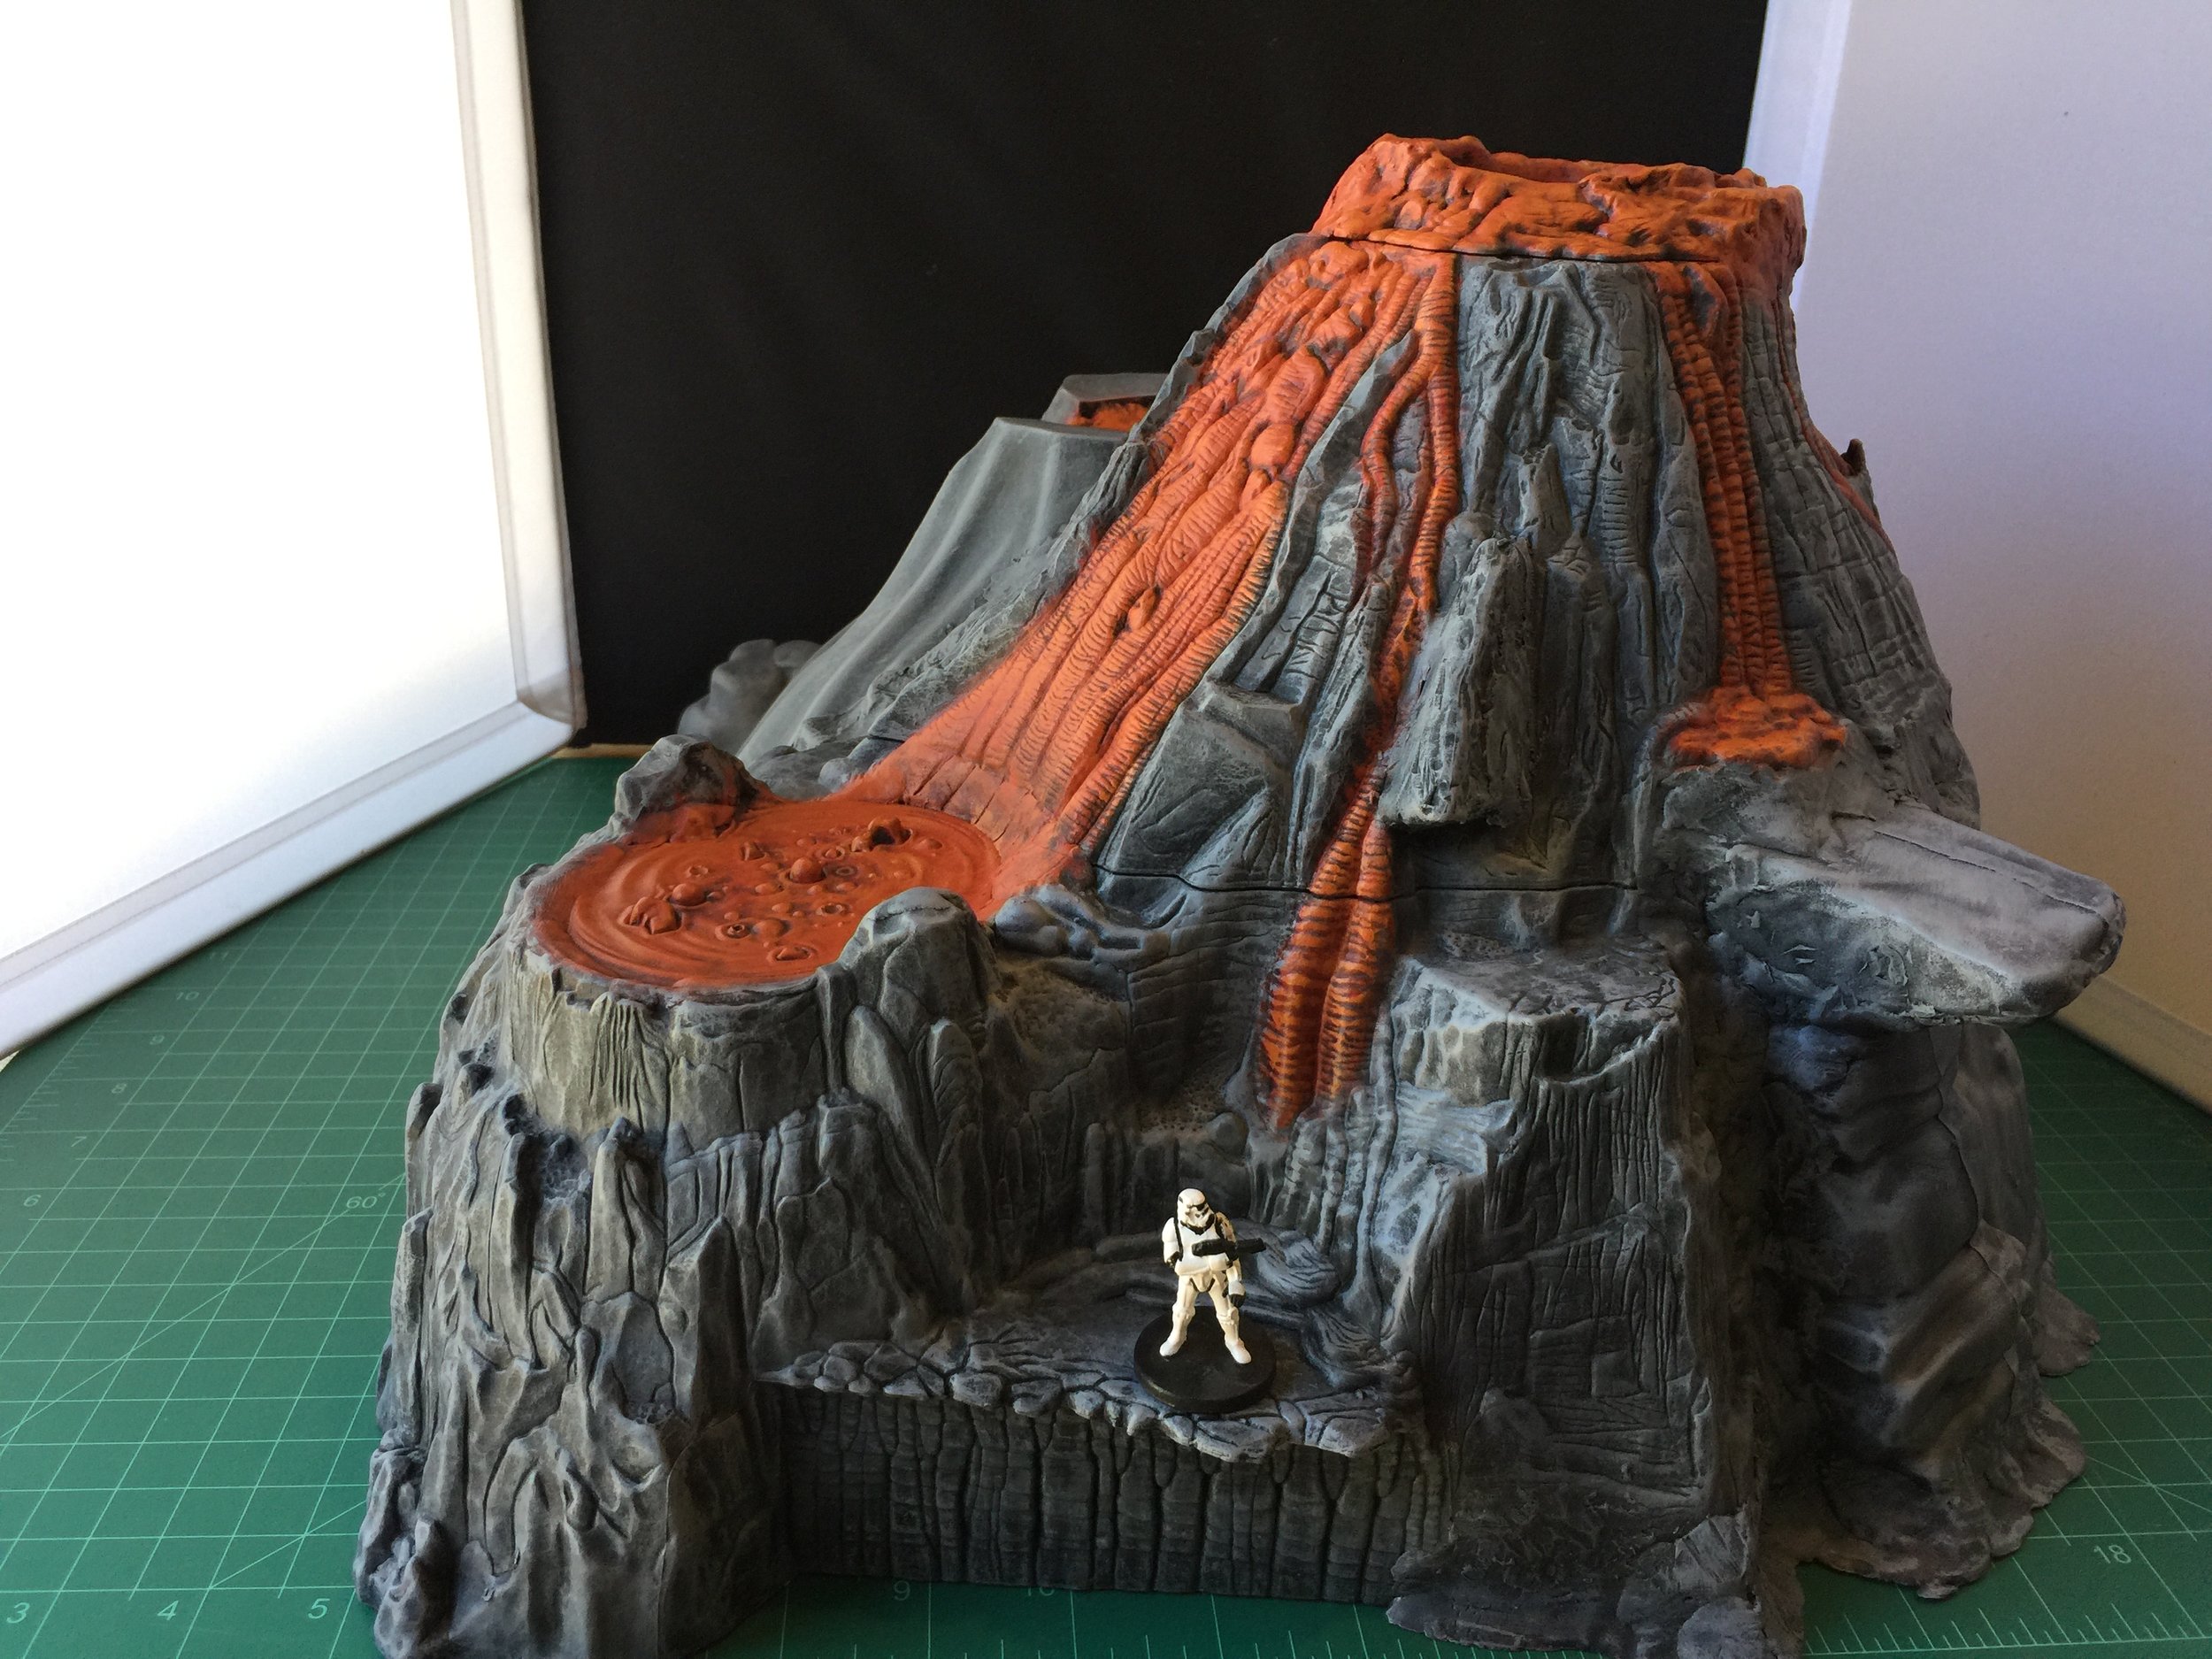
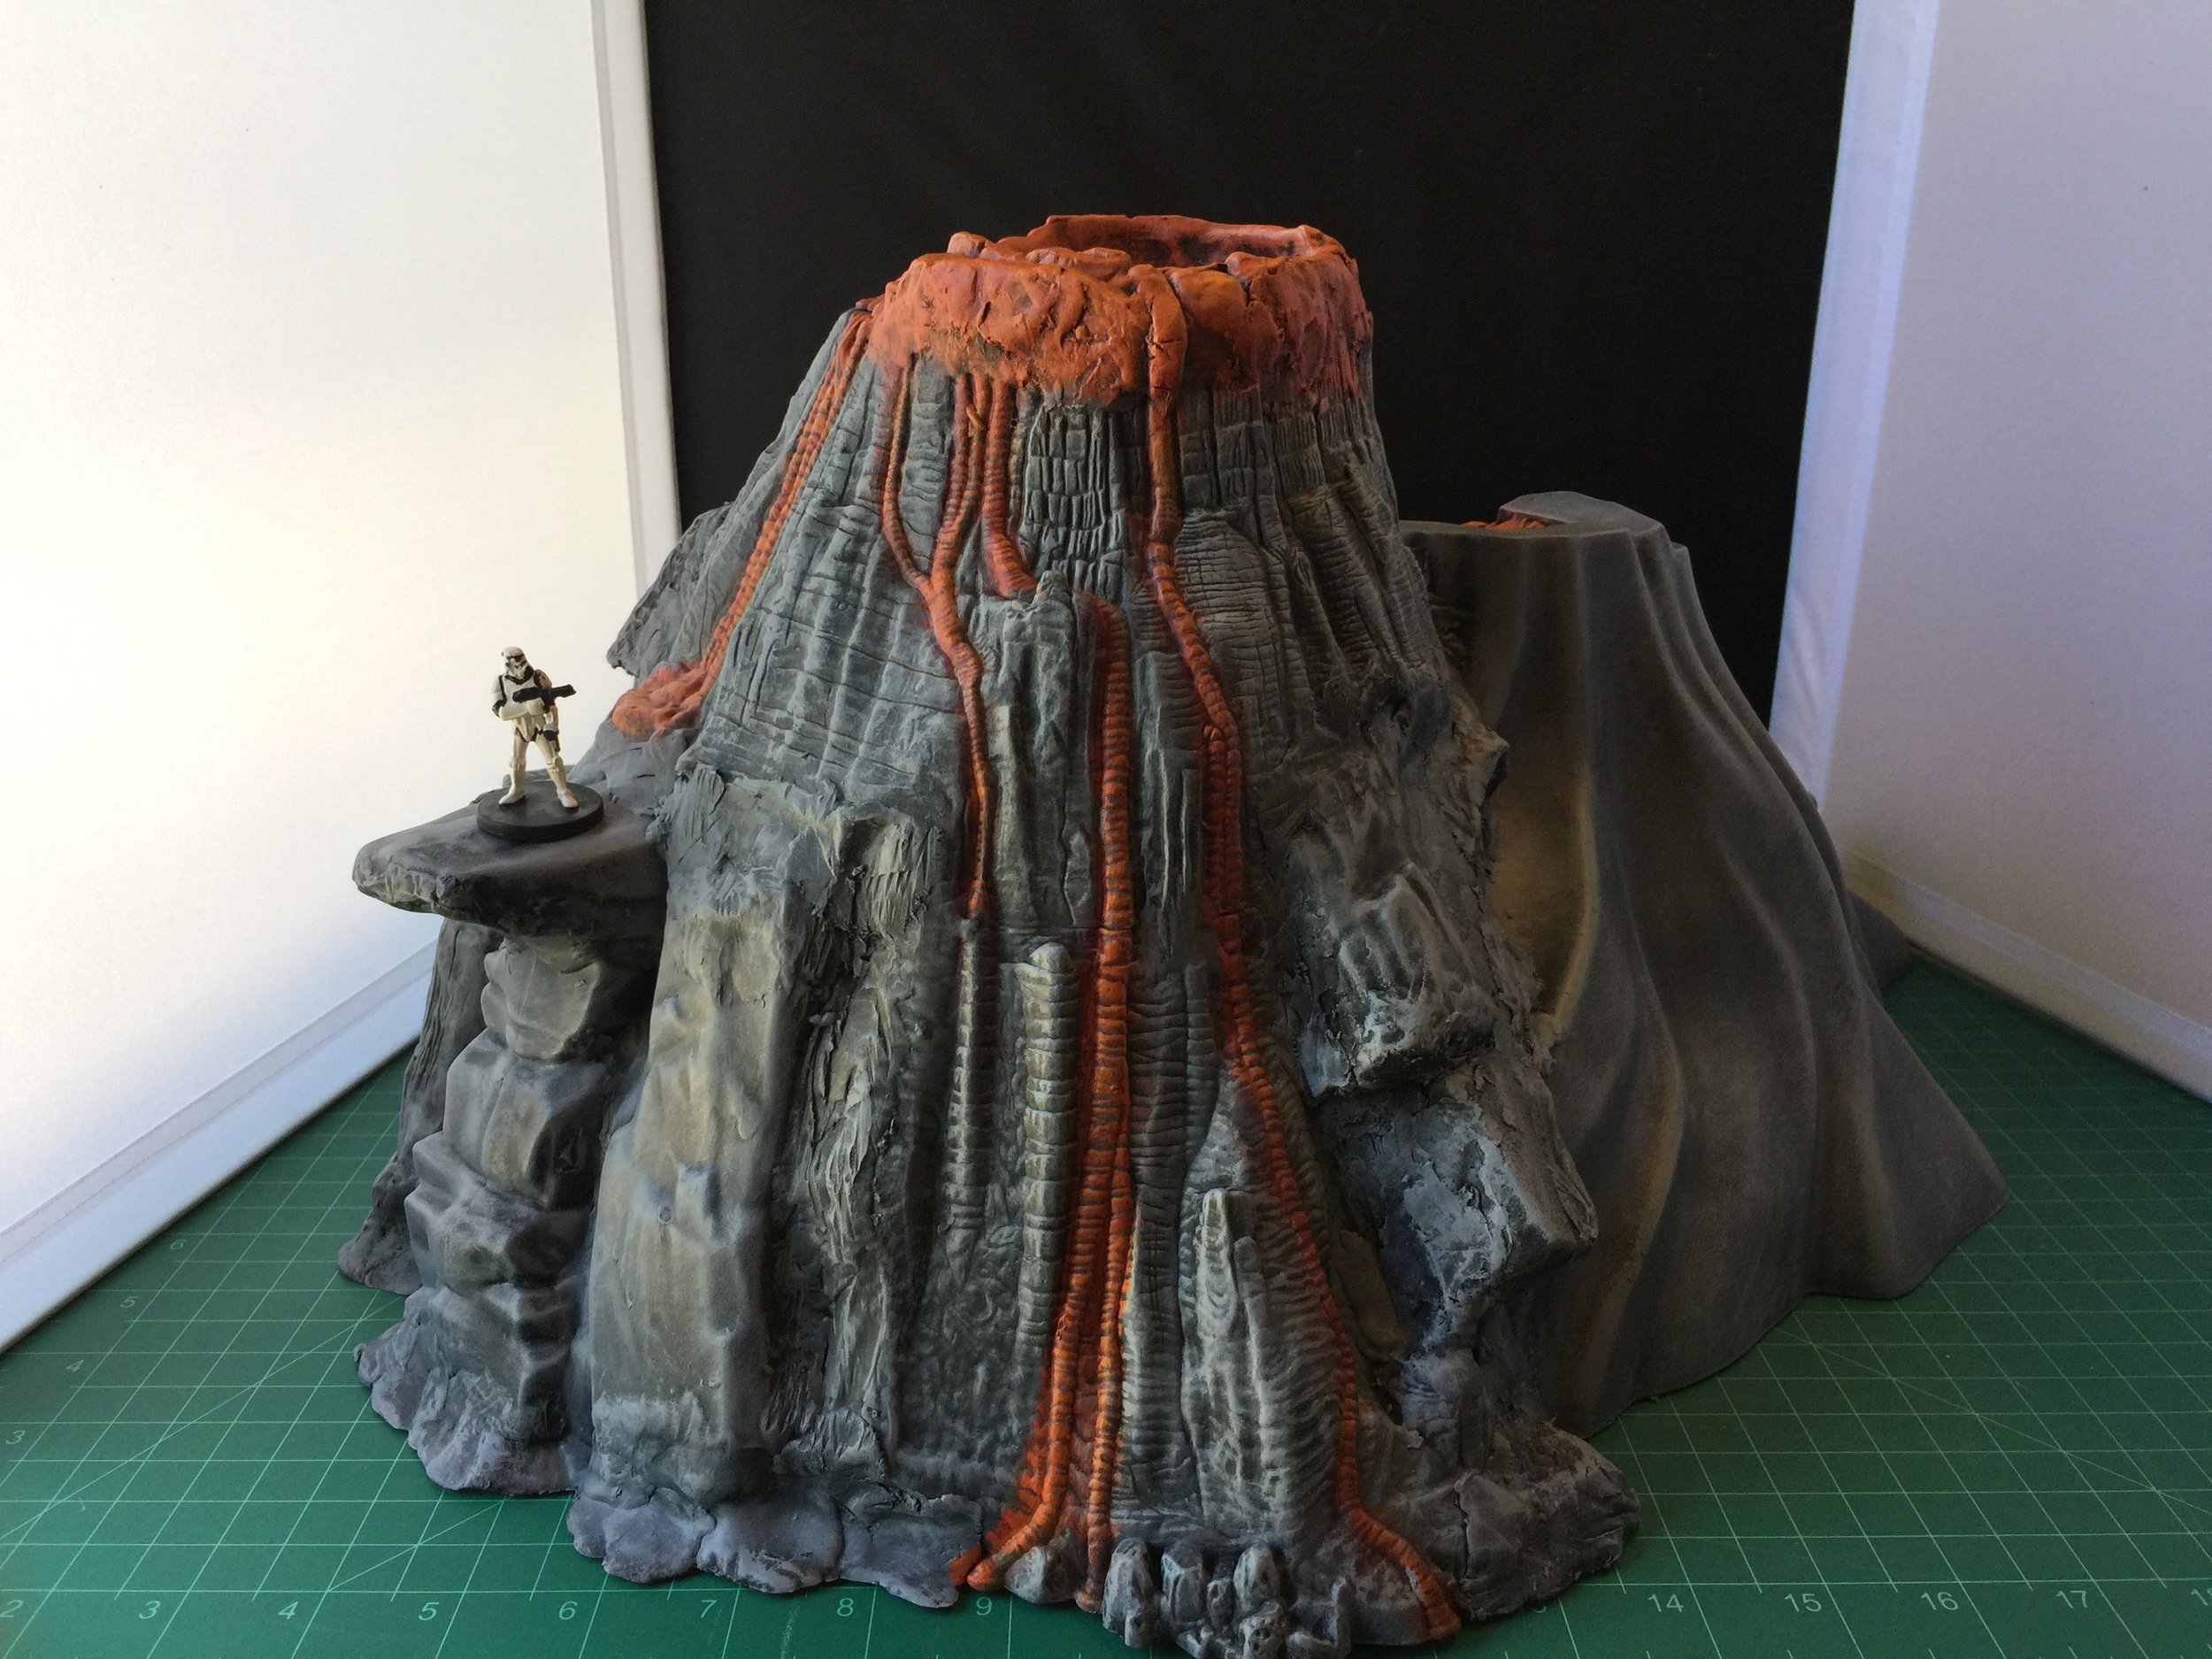
At the swap meet last Saturday, just as I was finishing my pirate refuge, I found another toy volcano ($3). It is the largest I have found so far… significantly larger/taller than the Playmobil volcano which up to that point was my largest. I have no idea who manufactured this toy. Apparently that information was on the part or parts of the playset missing from what I found. As is the case with most of these playset toys, the problem they pose is that in order to allow the children to play inside the toy, in this case the volcano, they construct them with large openings in their sides. For my purposes I need to close those openings which means finding other appropriate toys to fit in the holes and then sealing the gaps with Milliput. In the case of this volcano, I closed the smaller of the two openings with a plastic train tunnel found at the swap meet (for $1) and then covered that with plastic rock taken from another unrelated playset (another $1) all of which was sealed with Milliput. The rear opening was a larger problem… a big opening. Fortunately, I had an unused Playmobil volcano ($2) which after I did some cutting slipped into the opening nicely and was sealed with Milliput and more of the plastic rock mentioned above. This new volcano is a big piece: 10 inches tall, 20 inches from side to side, and 16 inches front to back. I believe this is my last piece of terrain for the Dr. Who collection, but I’ve thought that before.
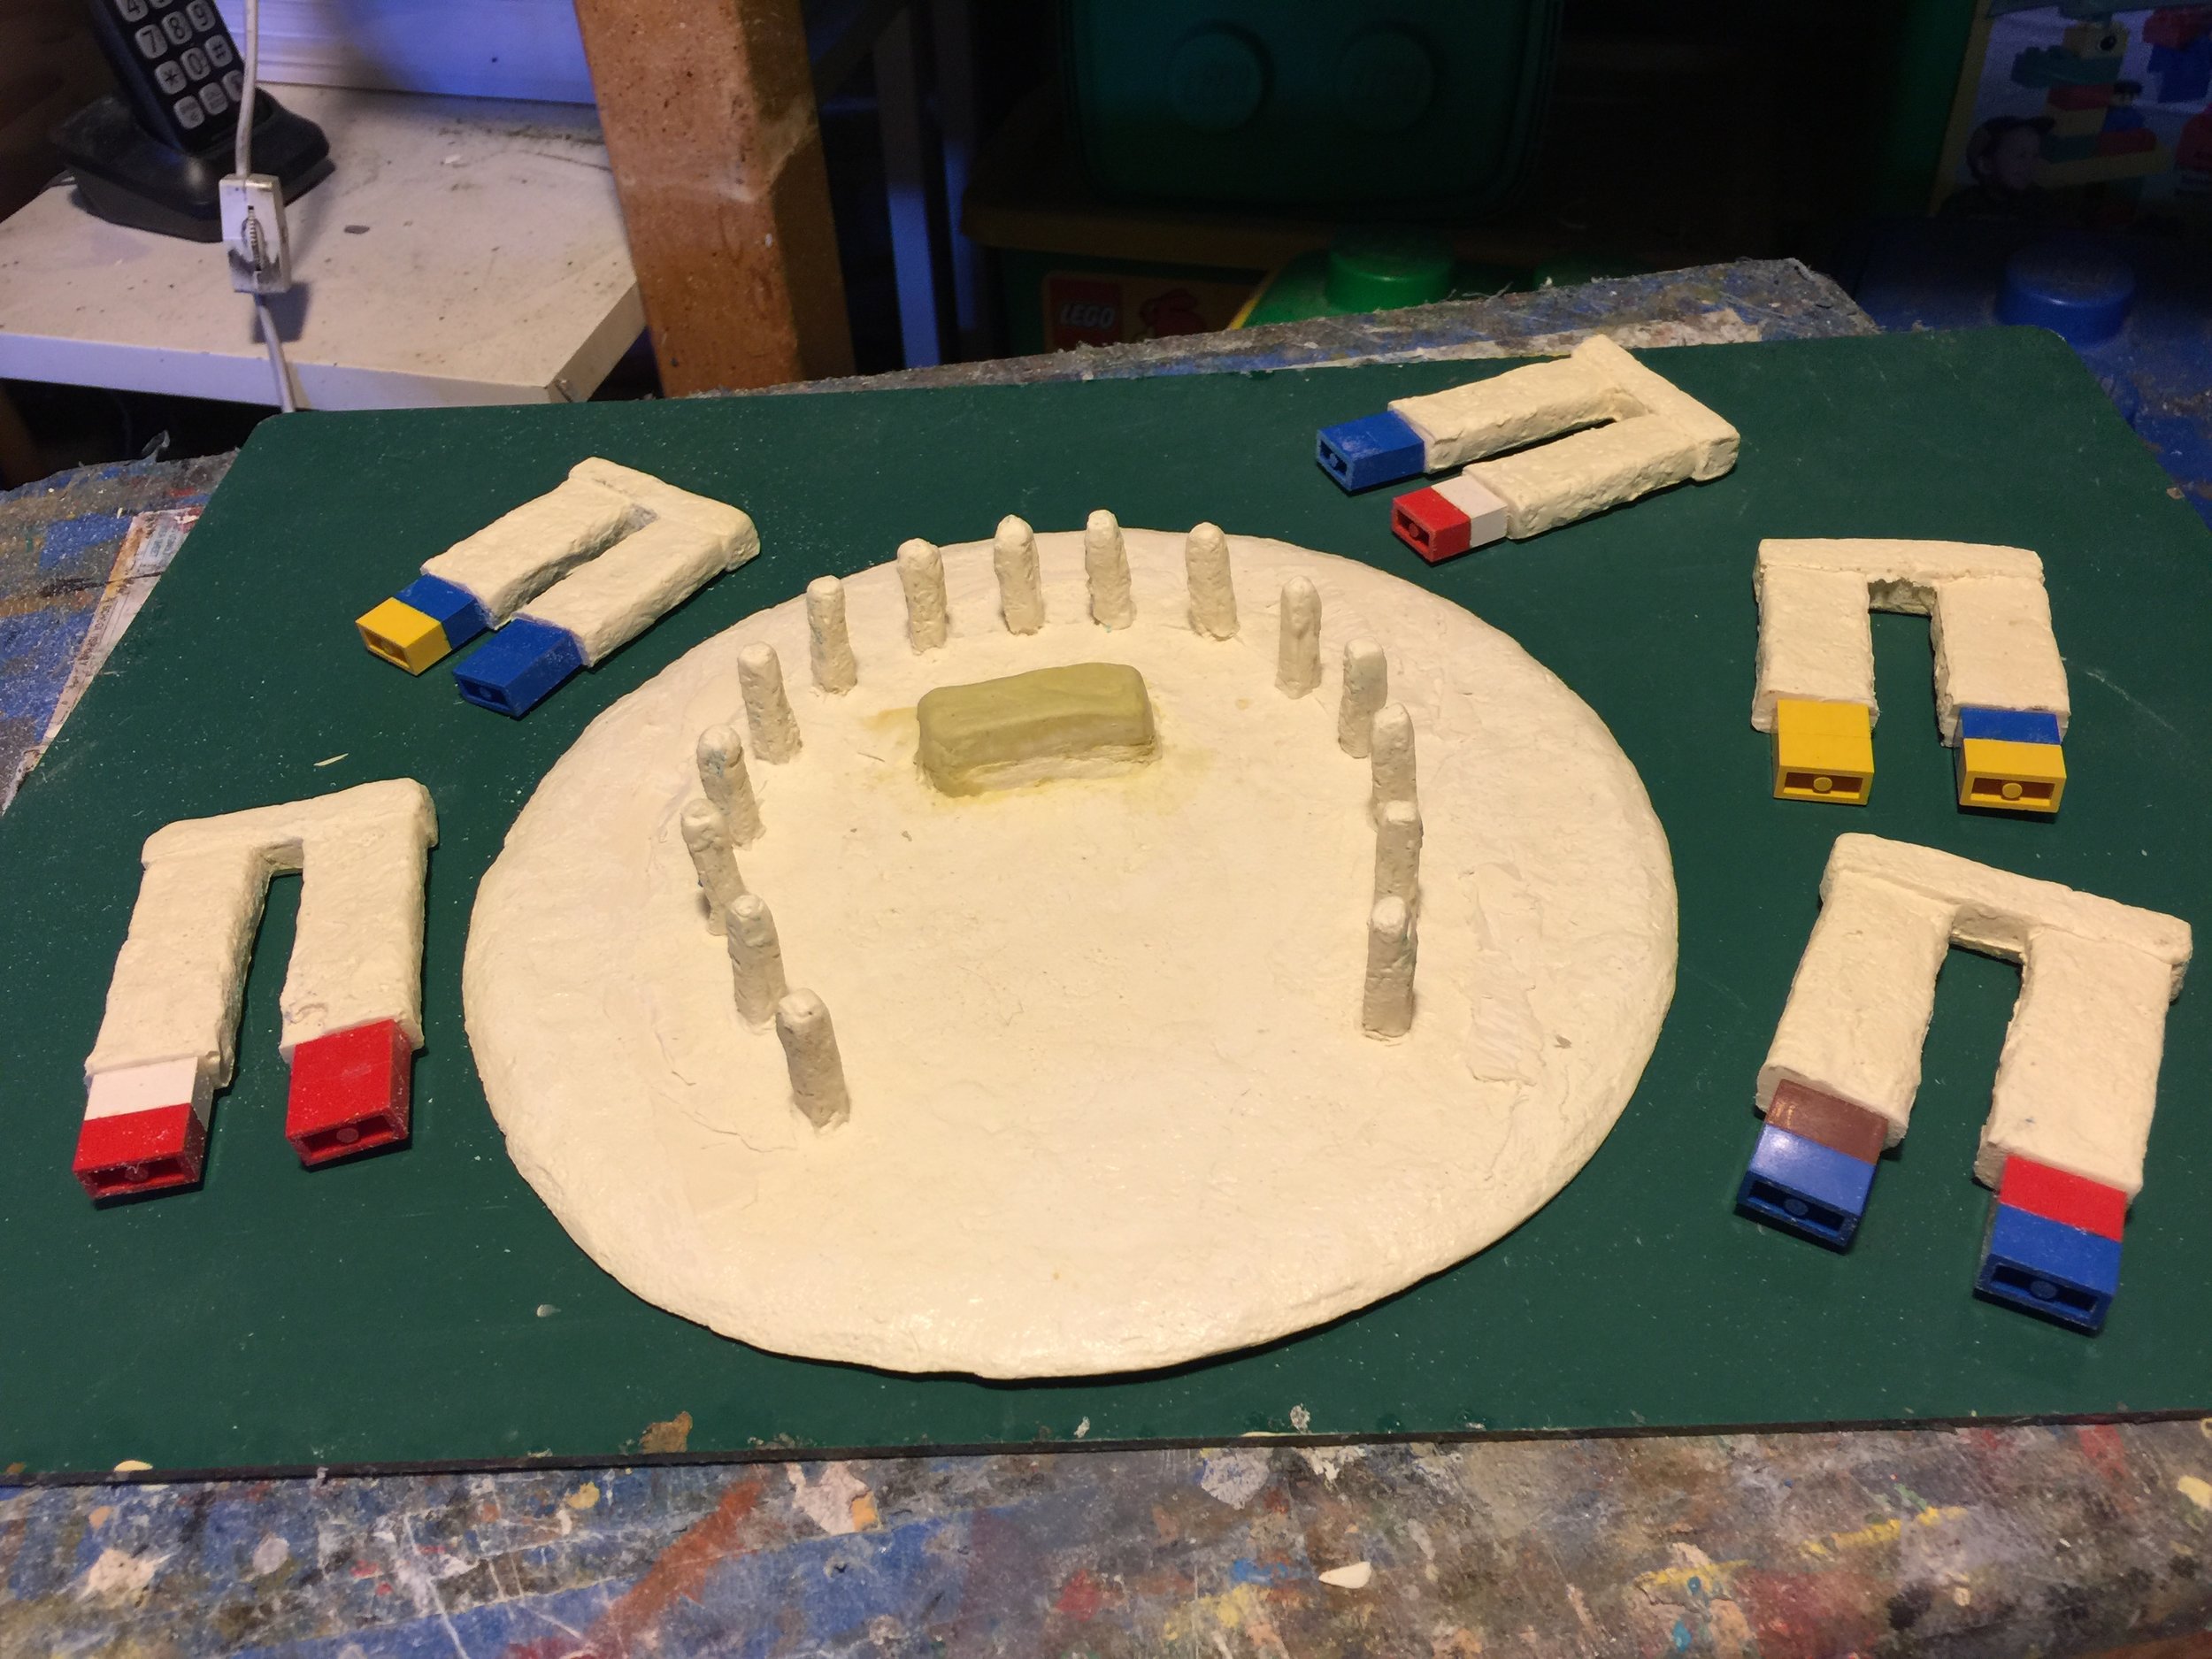
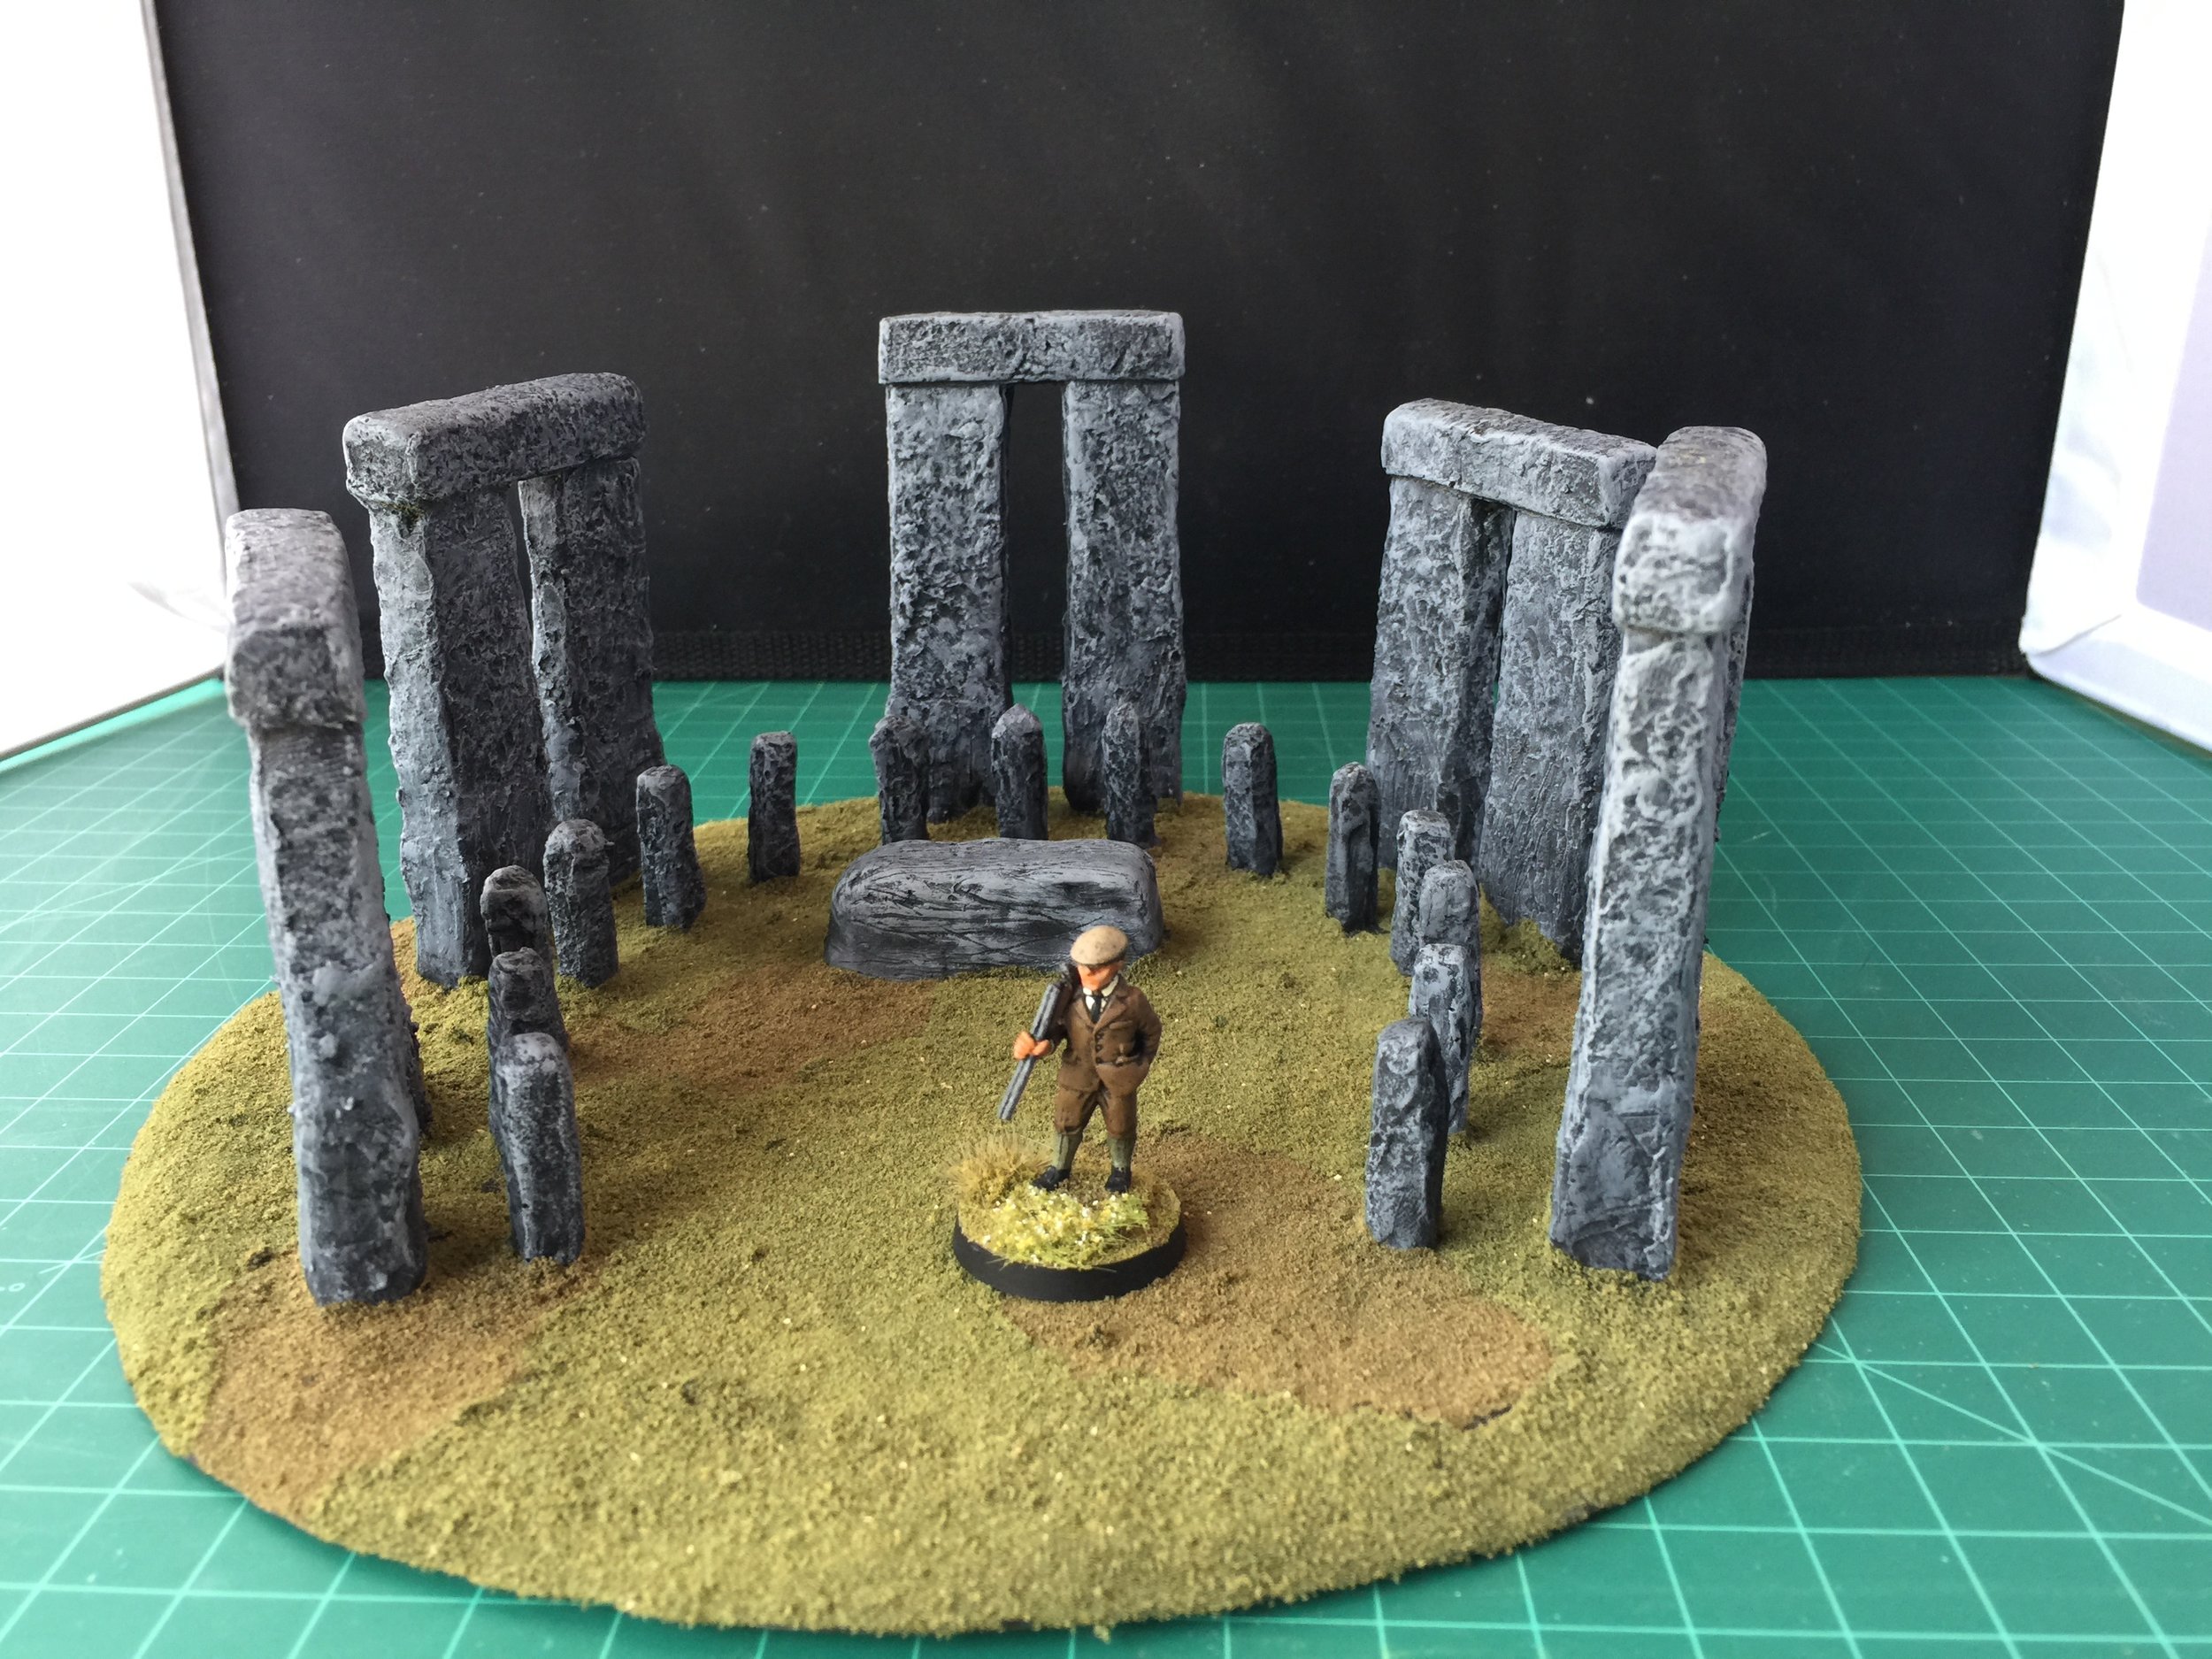
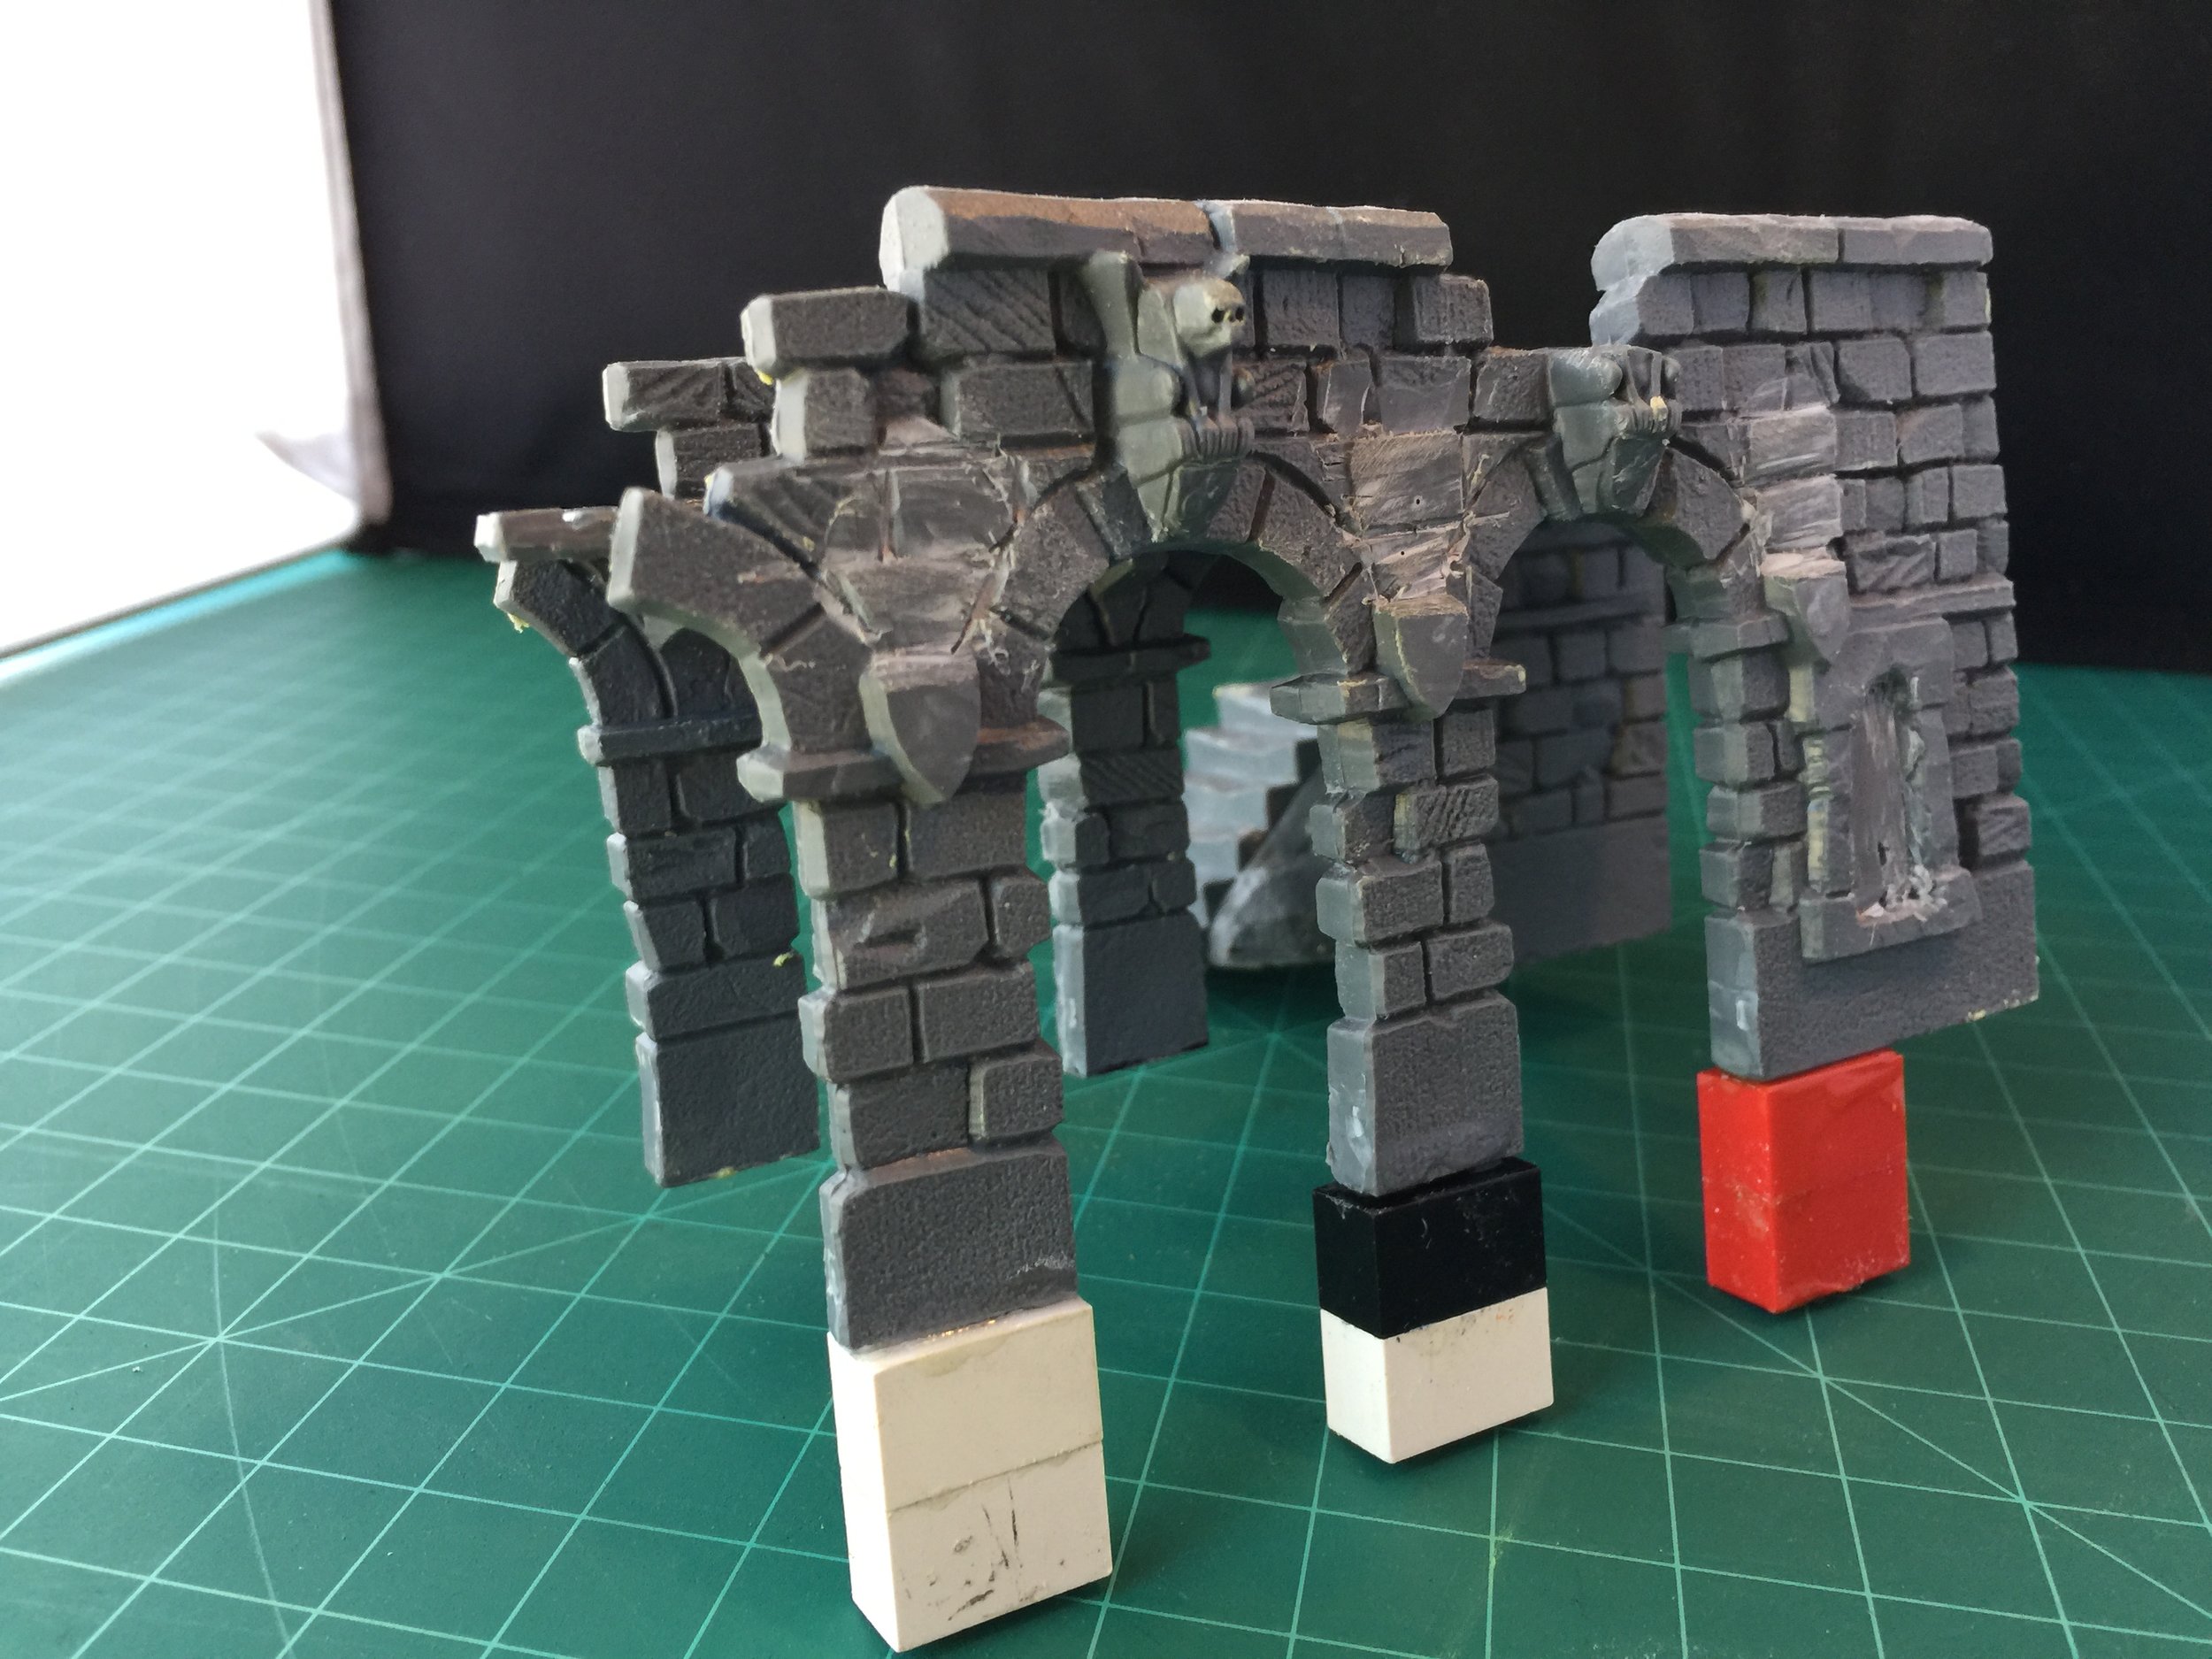
I finished the week with another project that has been sitting around for years and is not related to any collection. The fact is I’m between major projects and not ready to start another big one so I’m doing some things, like the pirate refuge, that I’ve been thinking about for a long time and just haven’t moved on because they weren’t directly attached to a larger project. This one is a Stonehenge-style circle that I purchased about a decade and a half ago. It’s by Stonehouse Miniatures. When I bought it I thought I would one day use it as part of some Pulp cult project, but over the years no Pulp cult project has stirred my imagination though I have always liked the Stonehenge piece. The big problem with the Stonehouse Stonehenge is actually a small problem… it’s 15mm not 28mm. In order to make it work with 28mm figures, the large stone uprights needed to be taller - about a half inch taller. That meant that I would have to cut those pieces off the base and use something to increase their height. As it turned out, increasing their height was the easy part. The hard part was cutting them off the base without ruining the whole thing in the process. Once I had them separated from the base I simply added two Legos to each leg and covered them with Milliput. I also increased the size of the altar using Milliput. Came out pretty well.

April 21, 2019
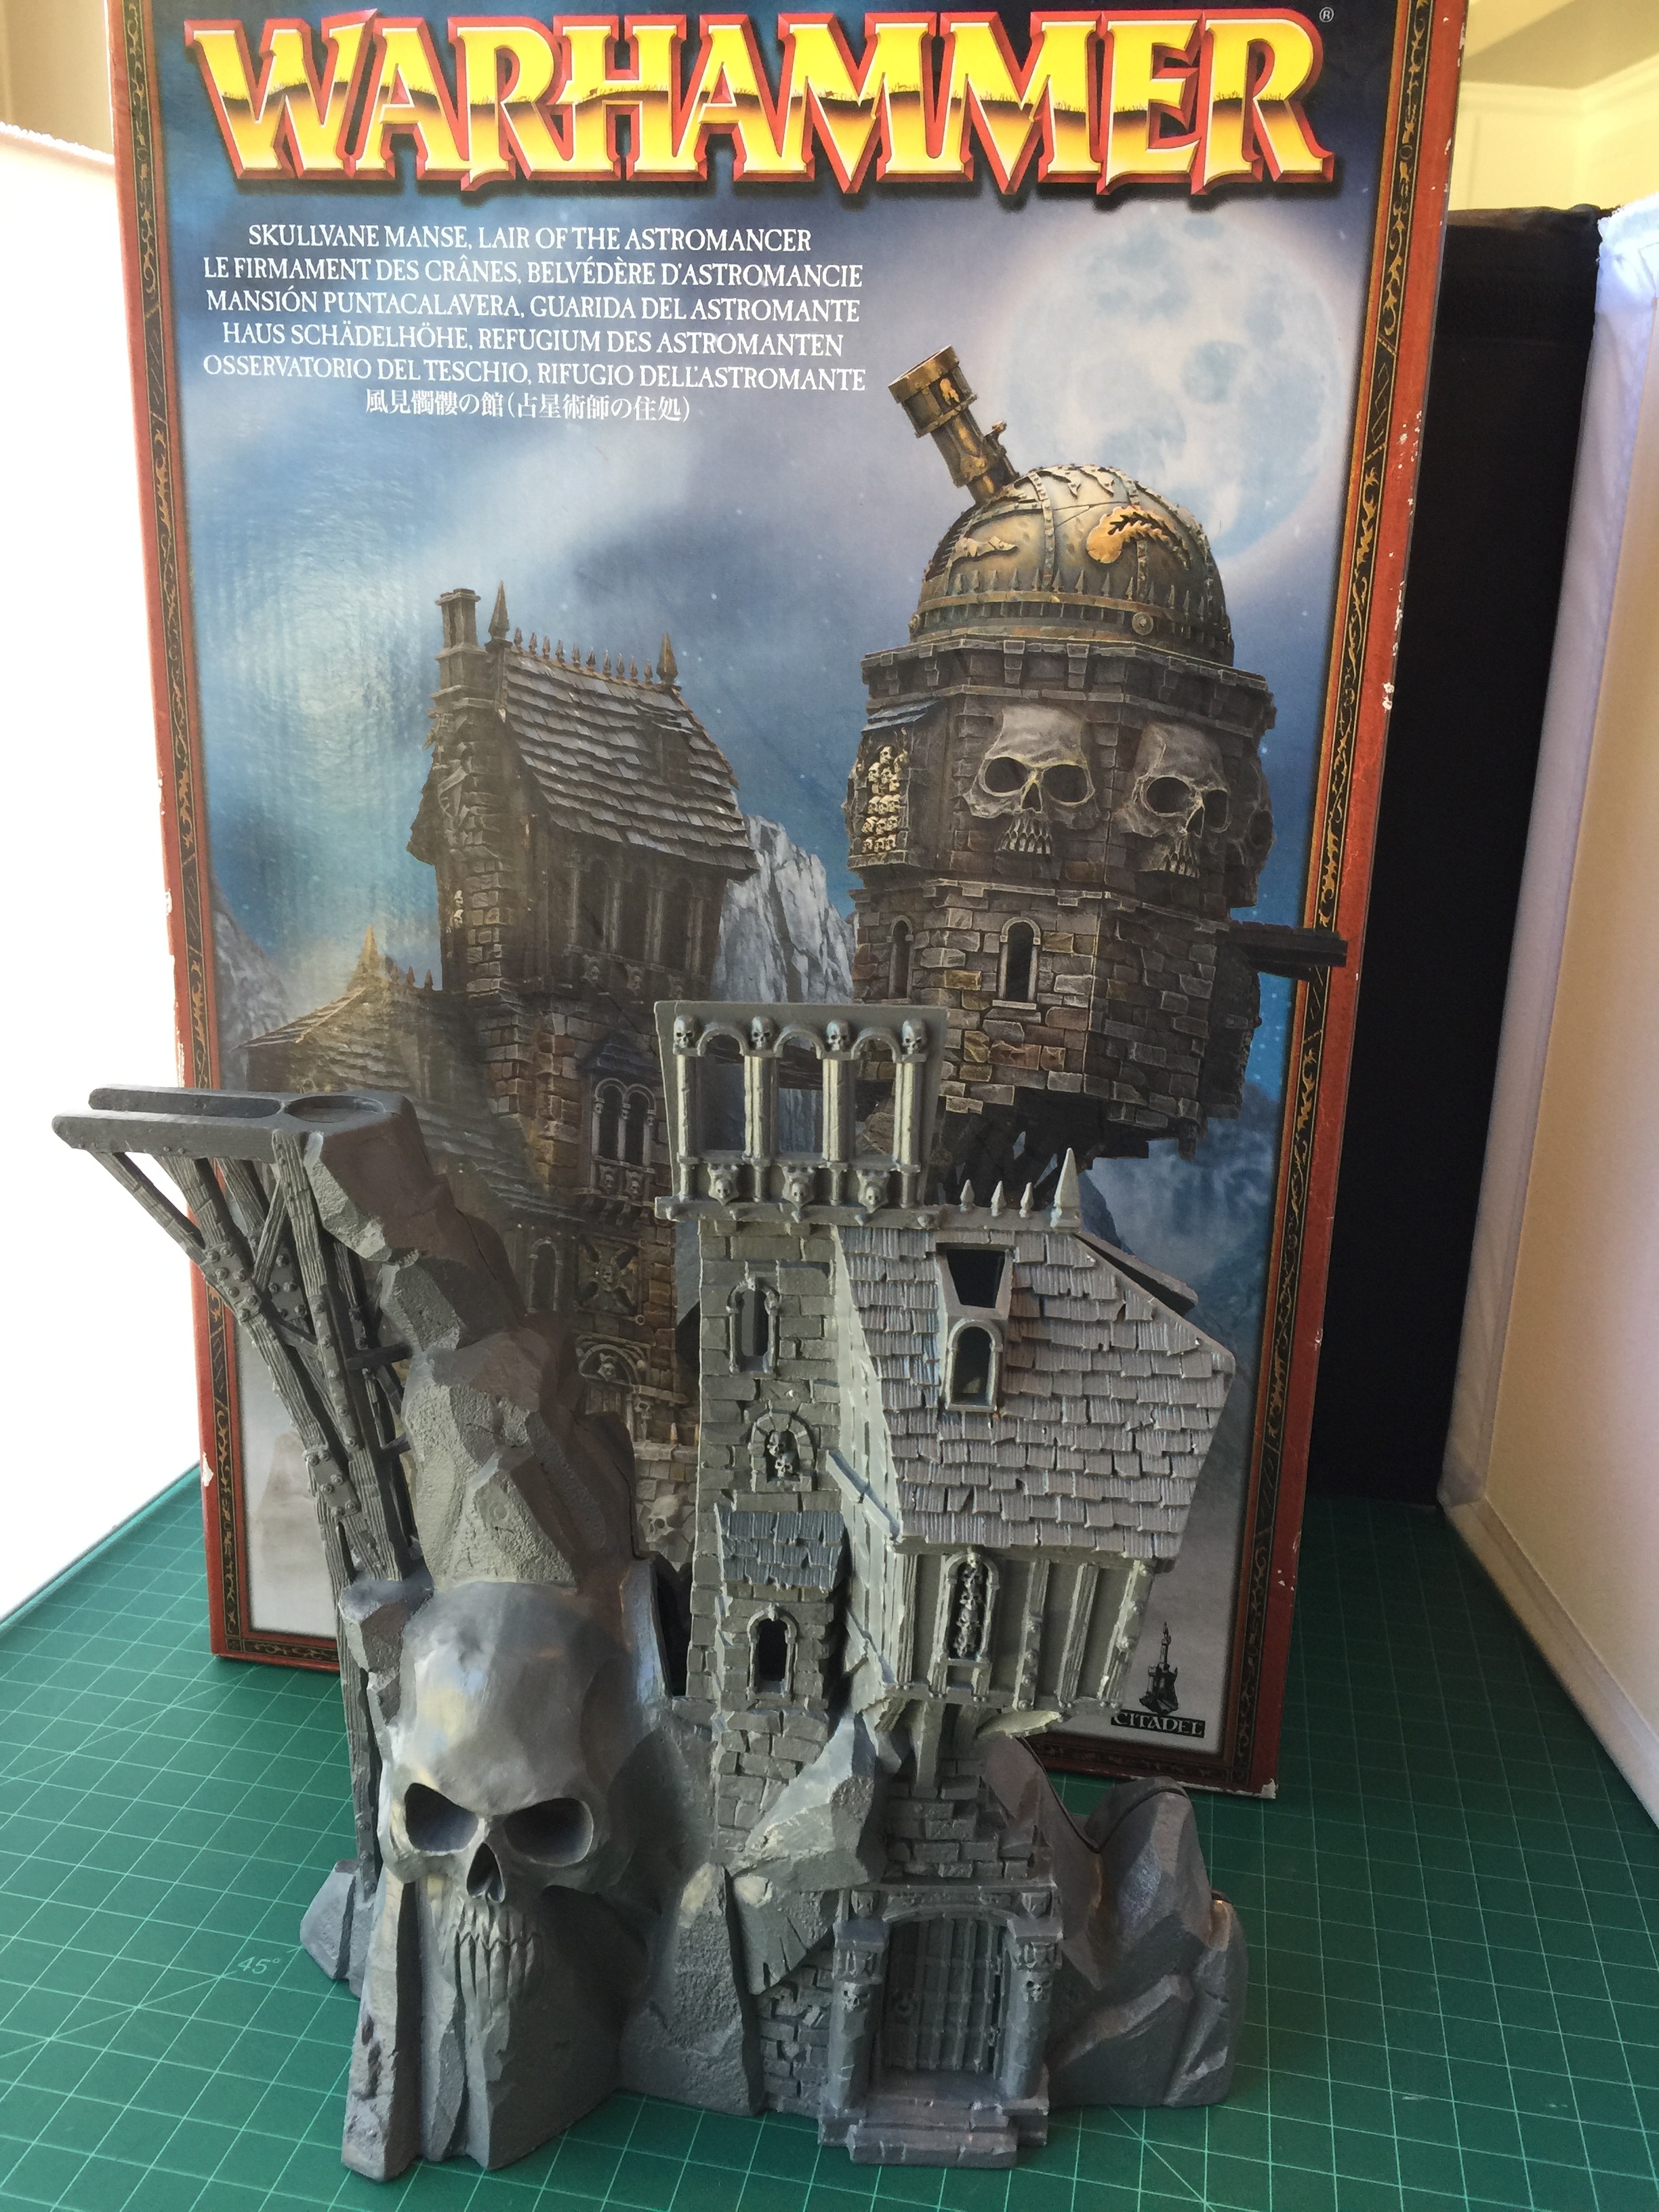
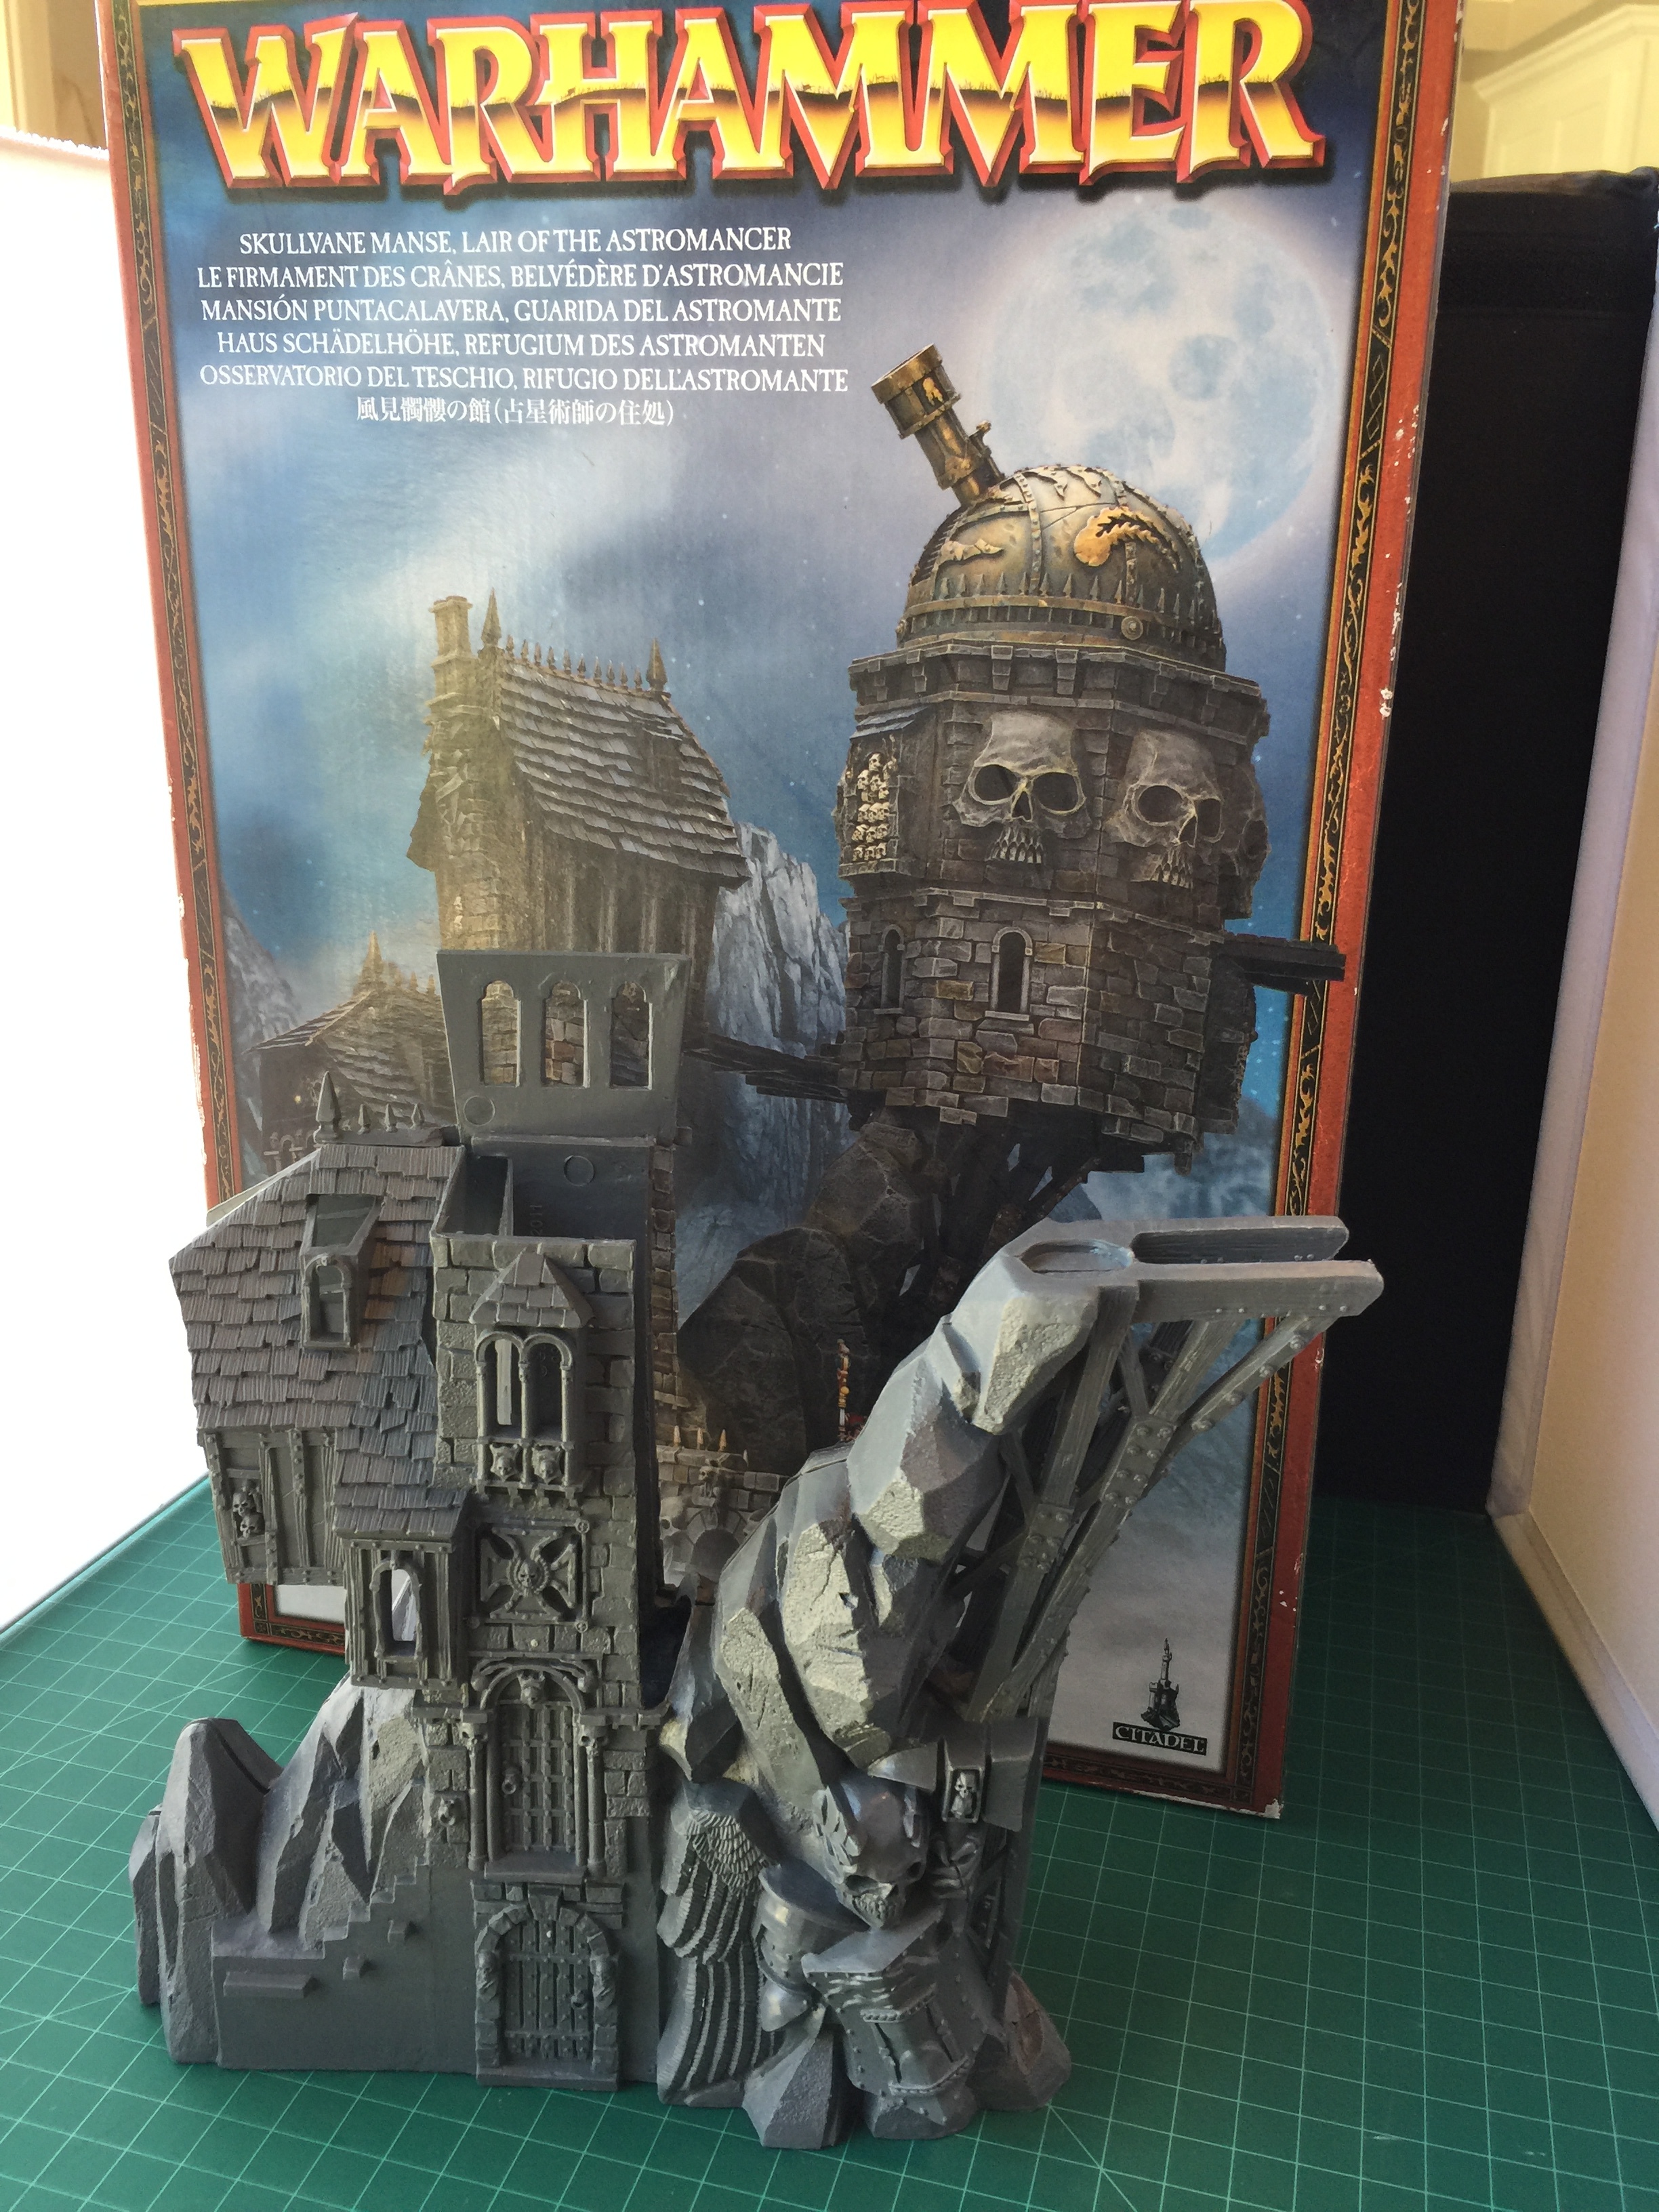
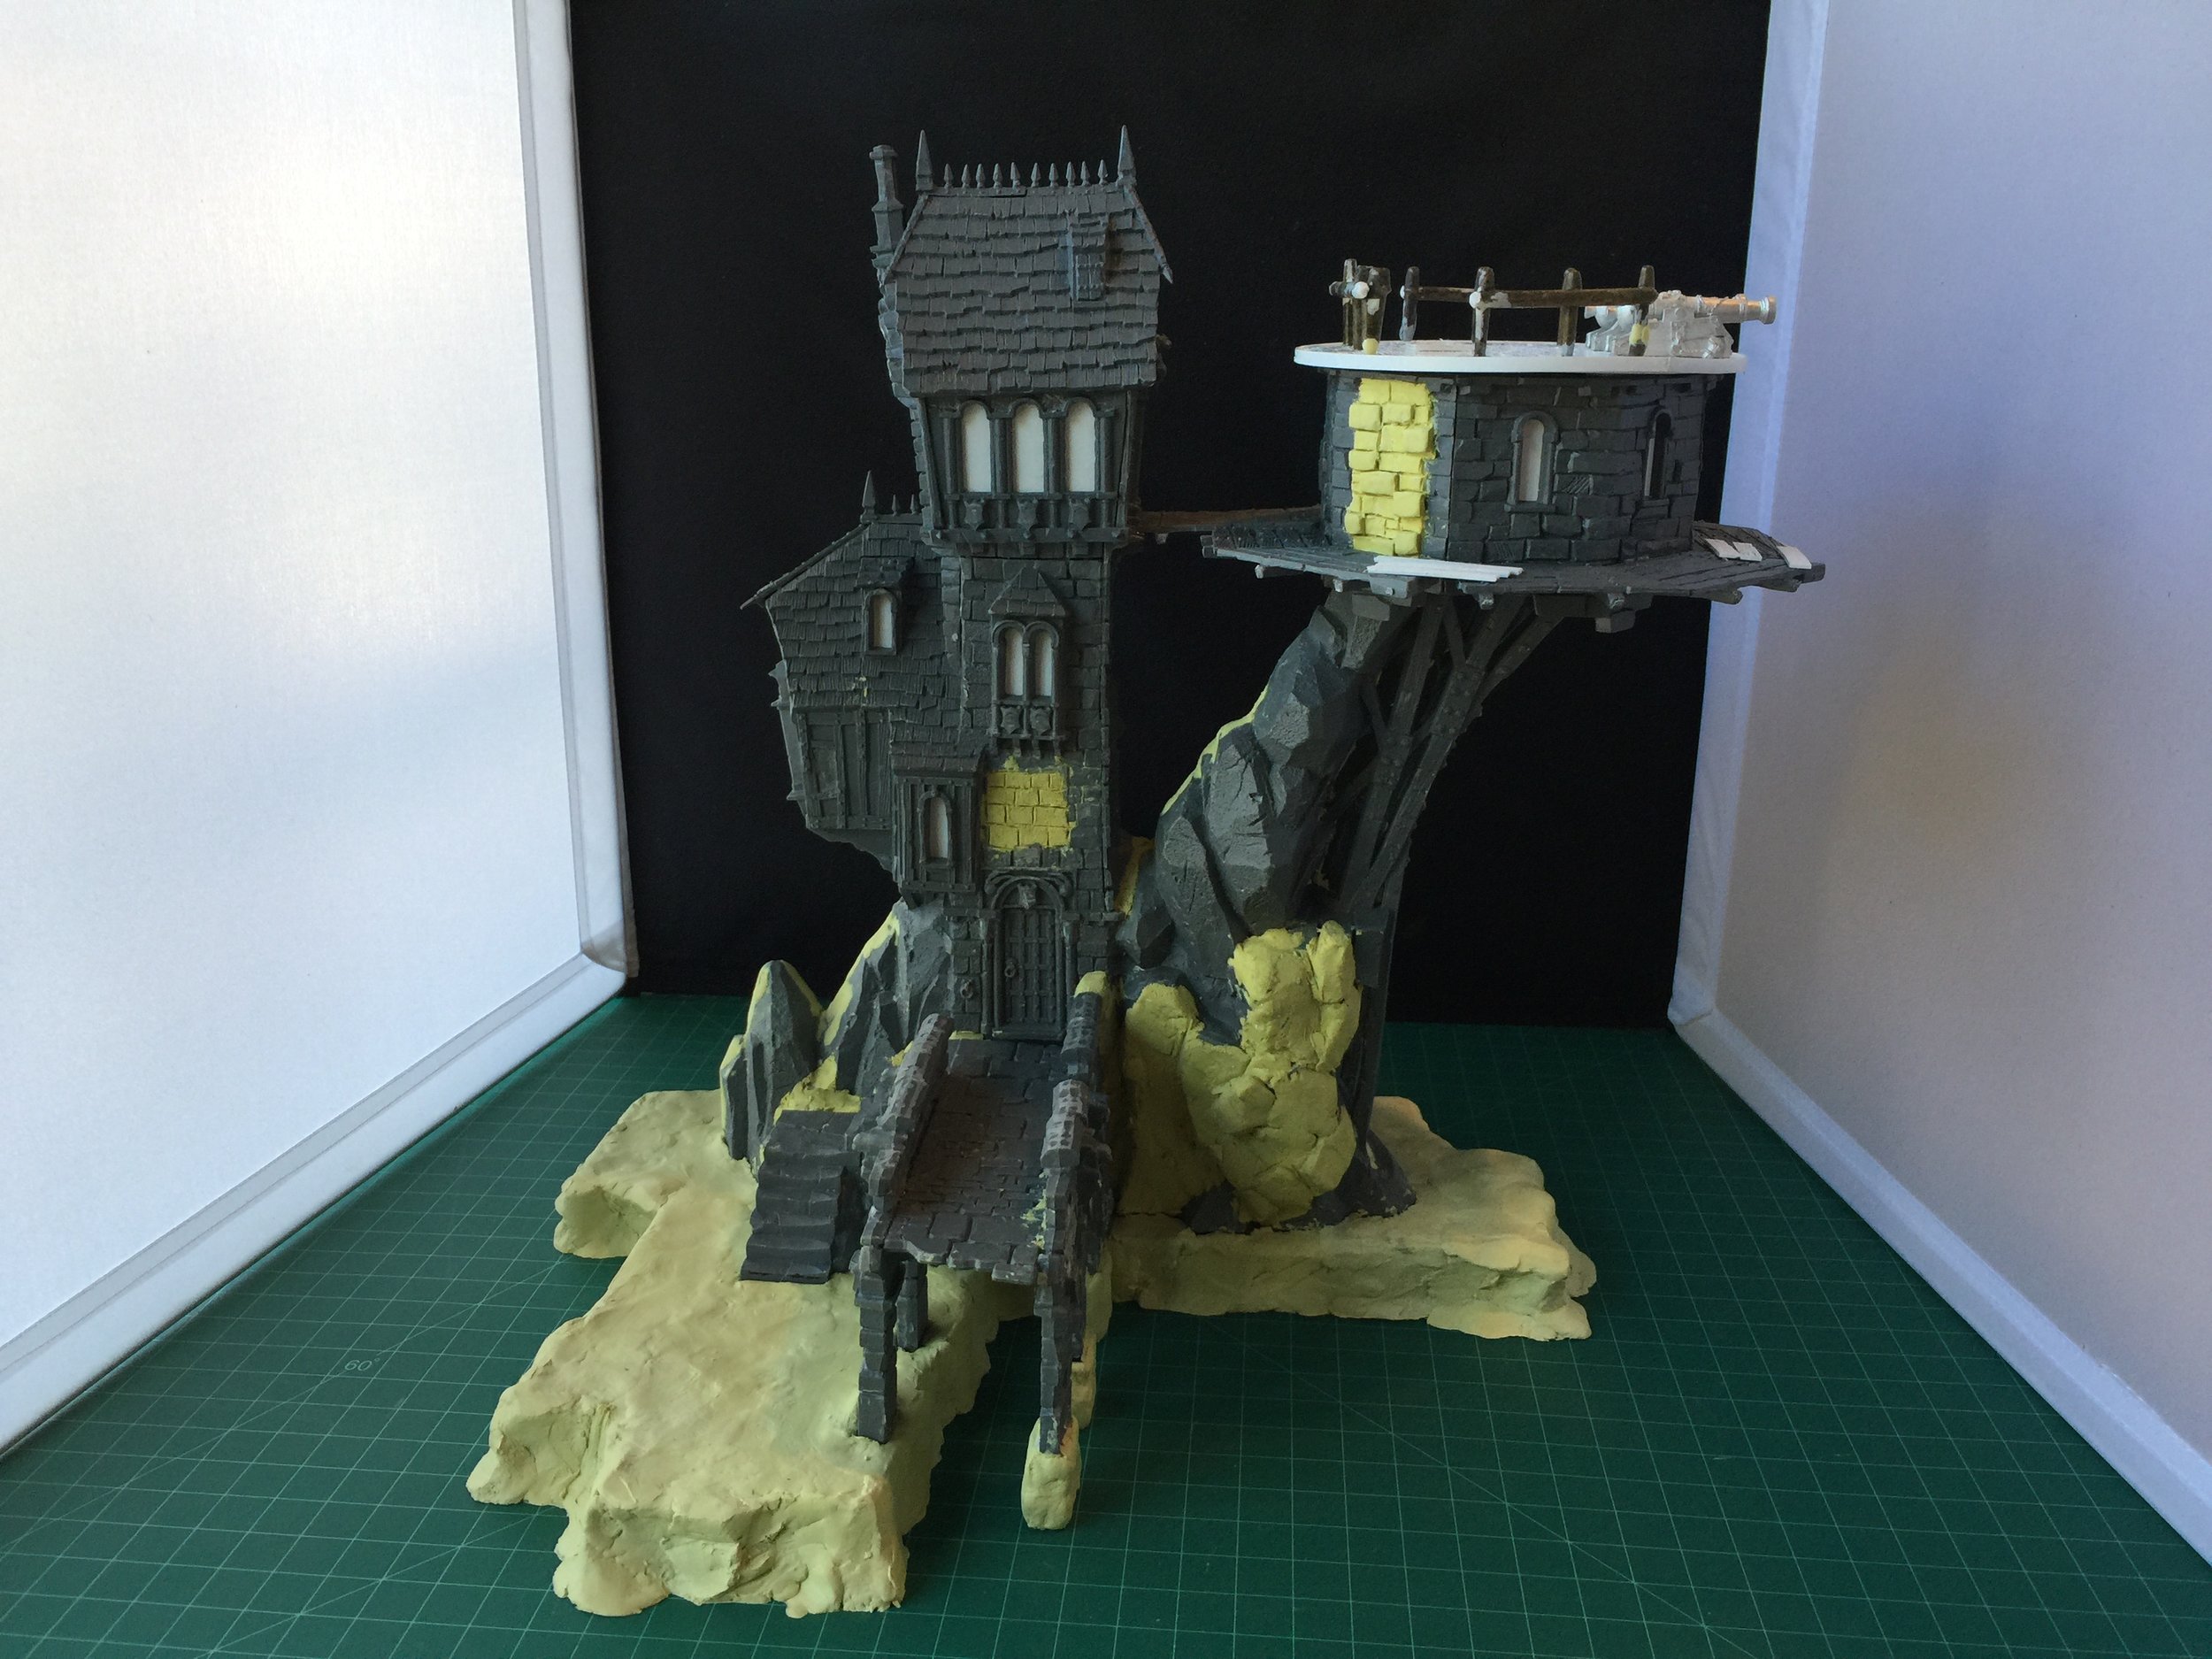
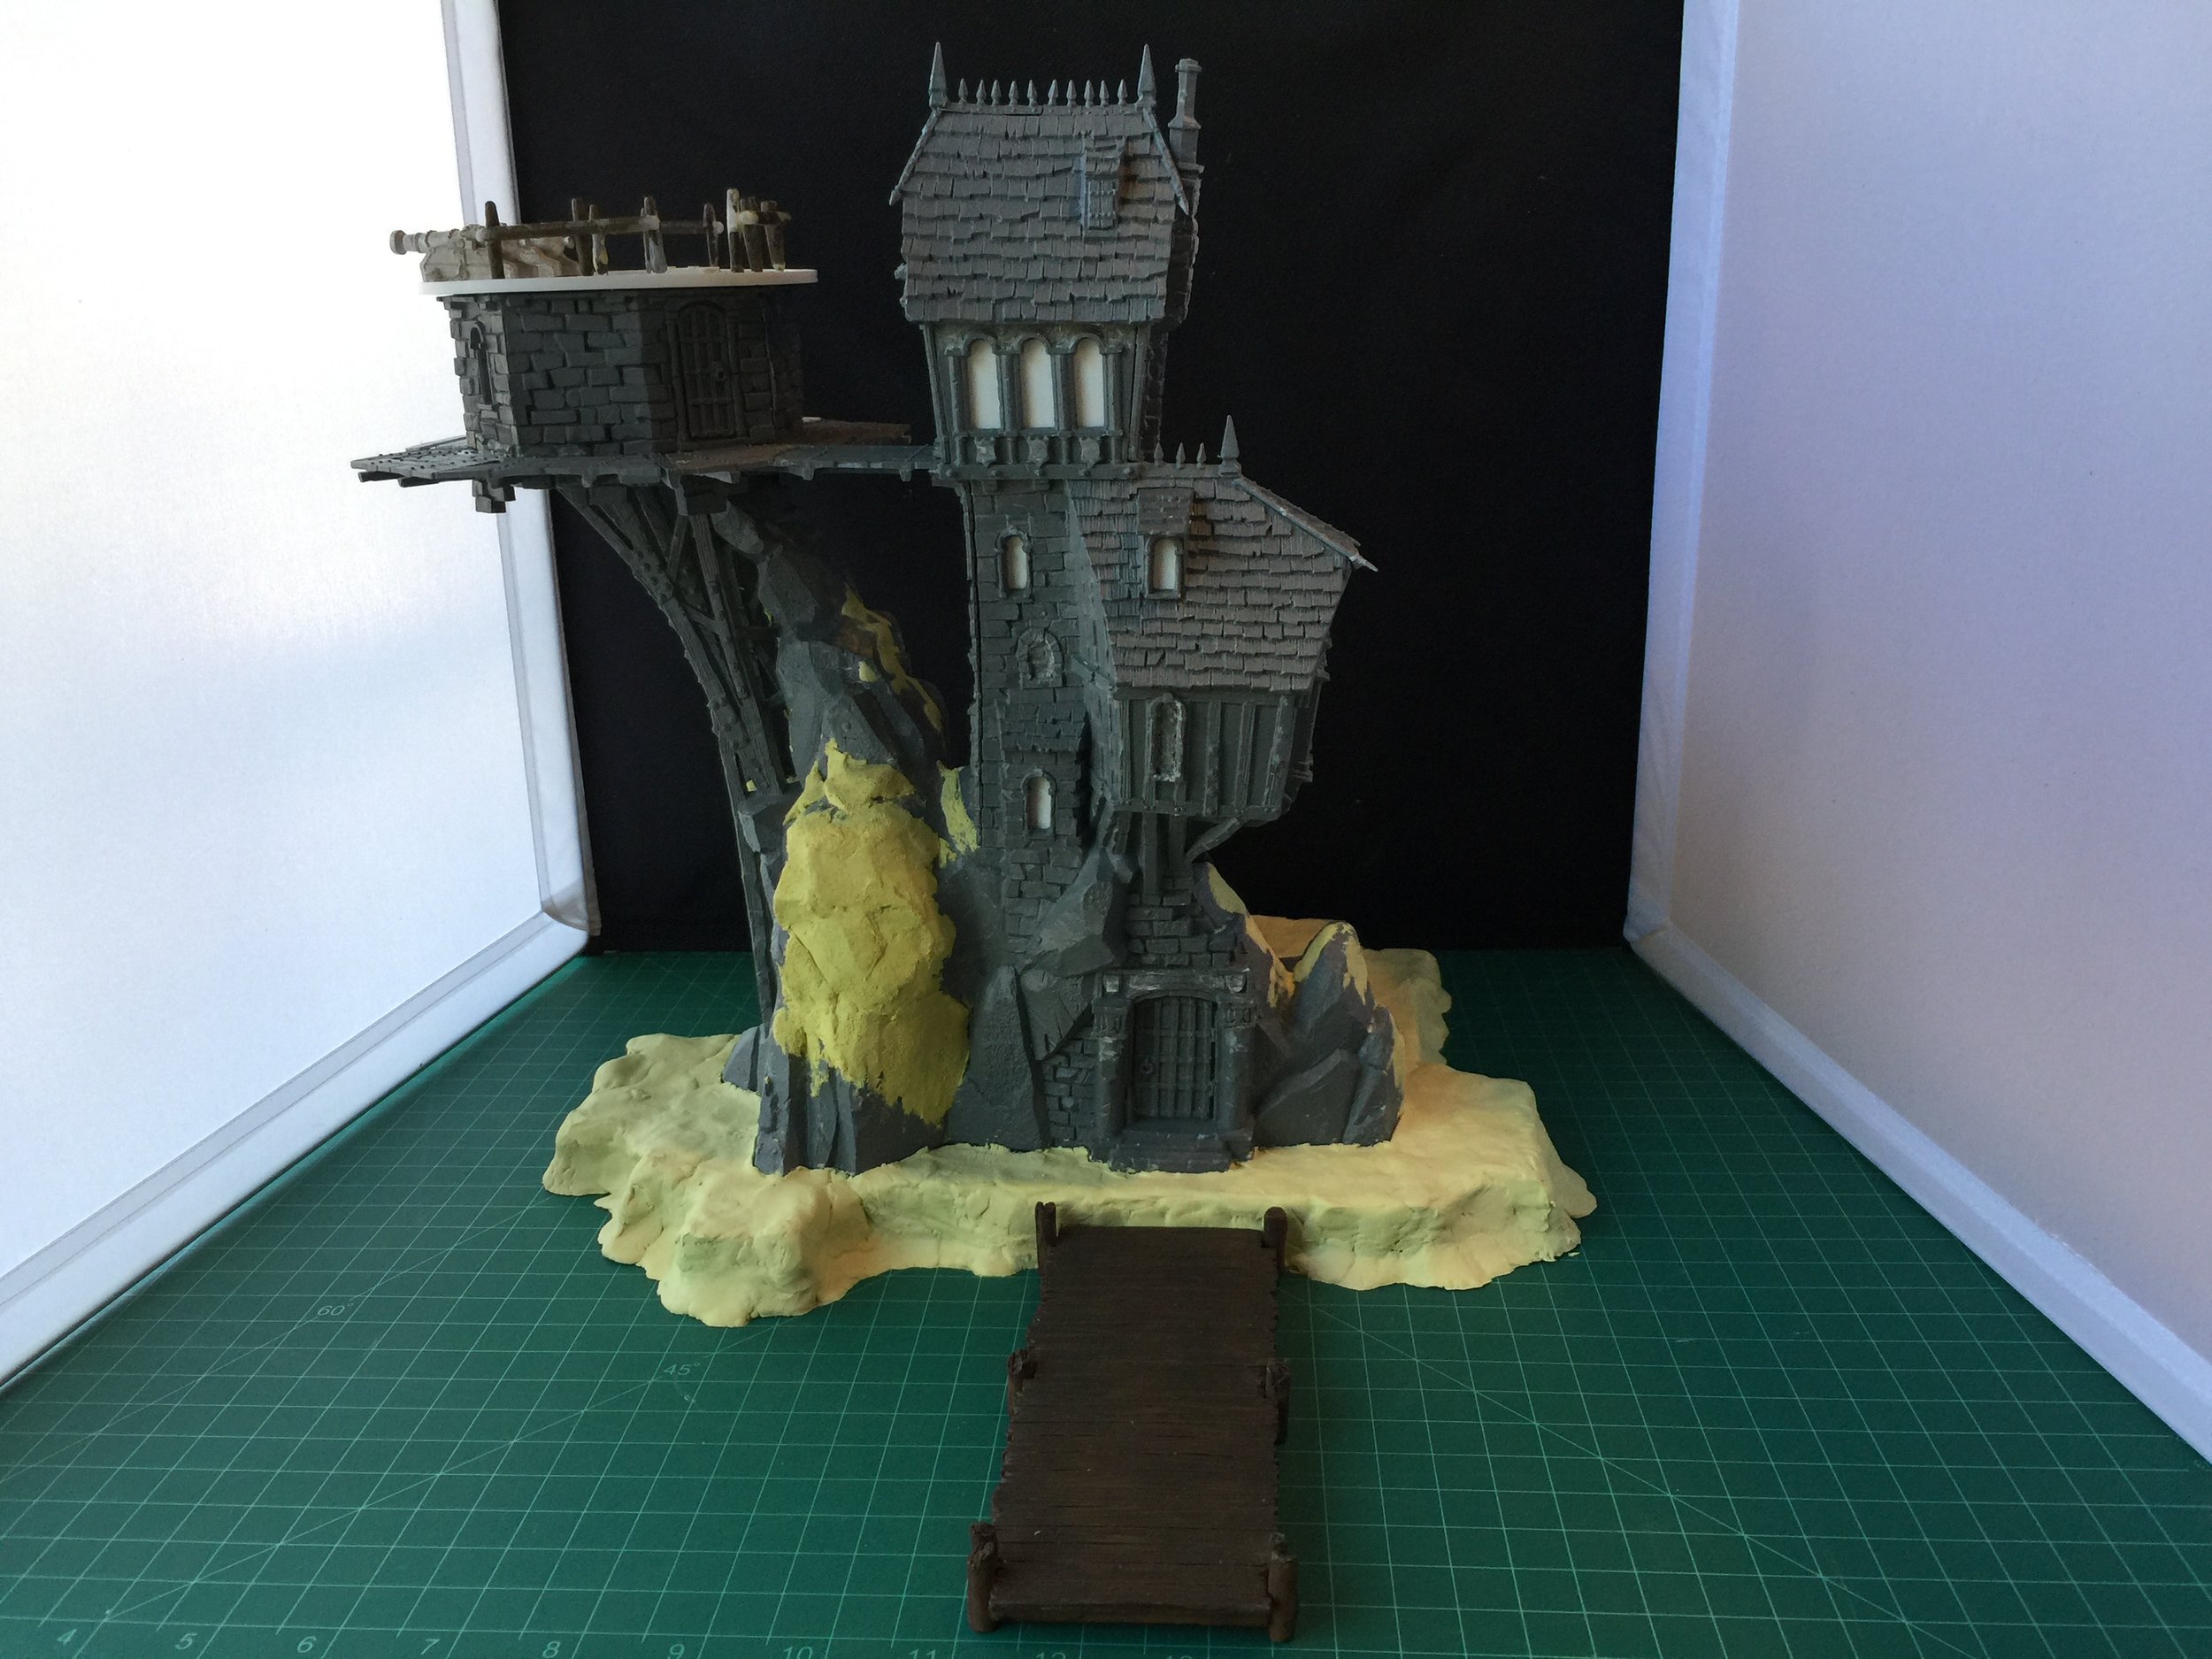
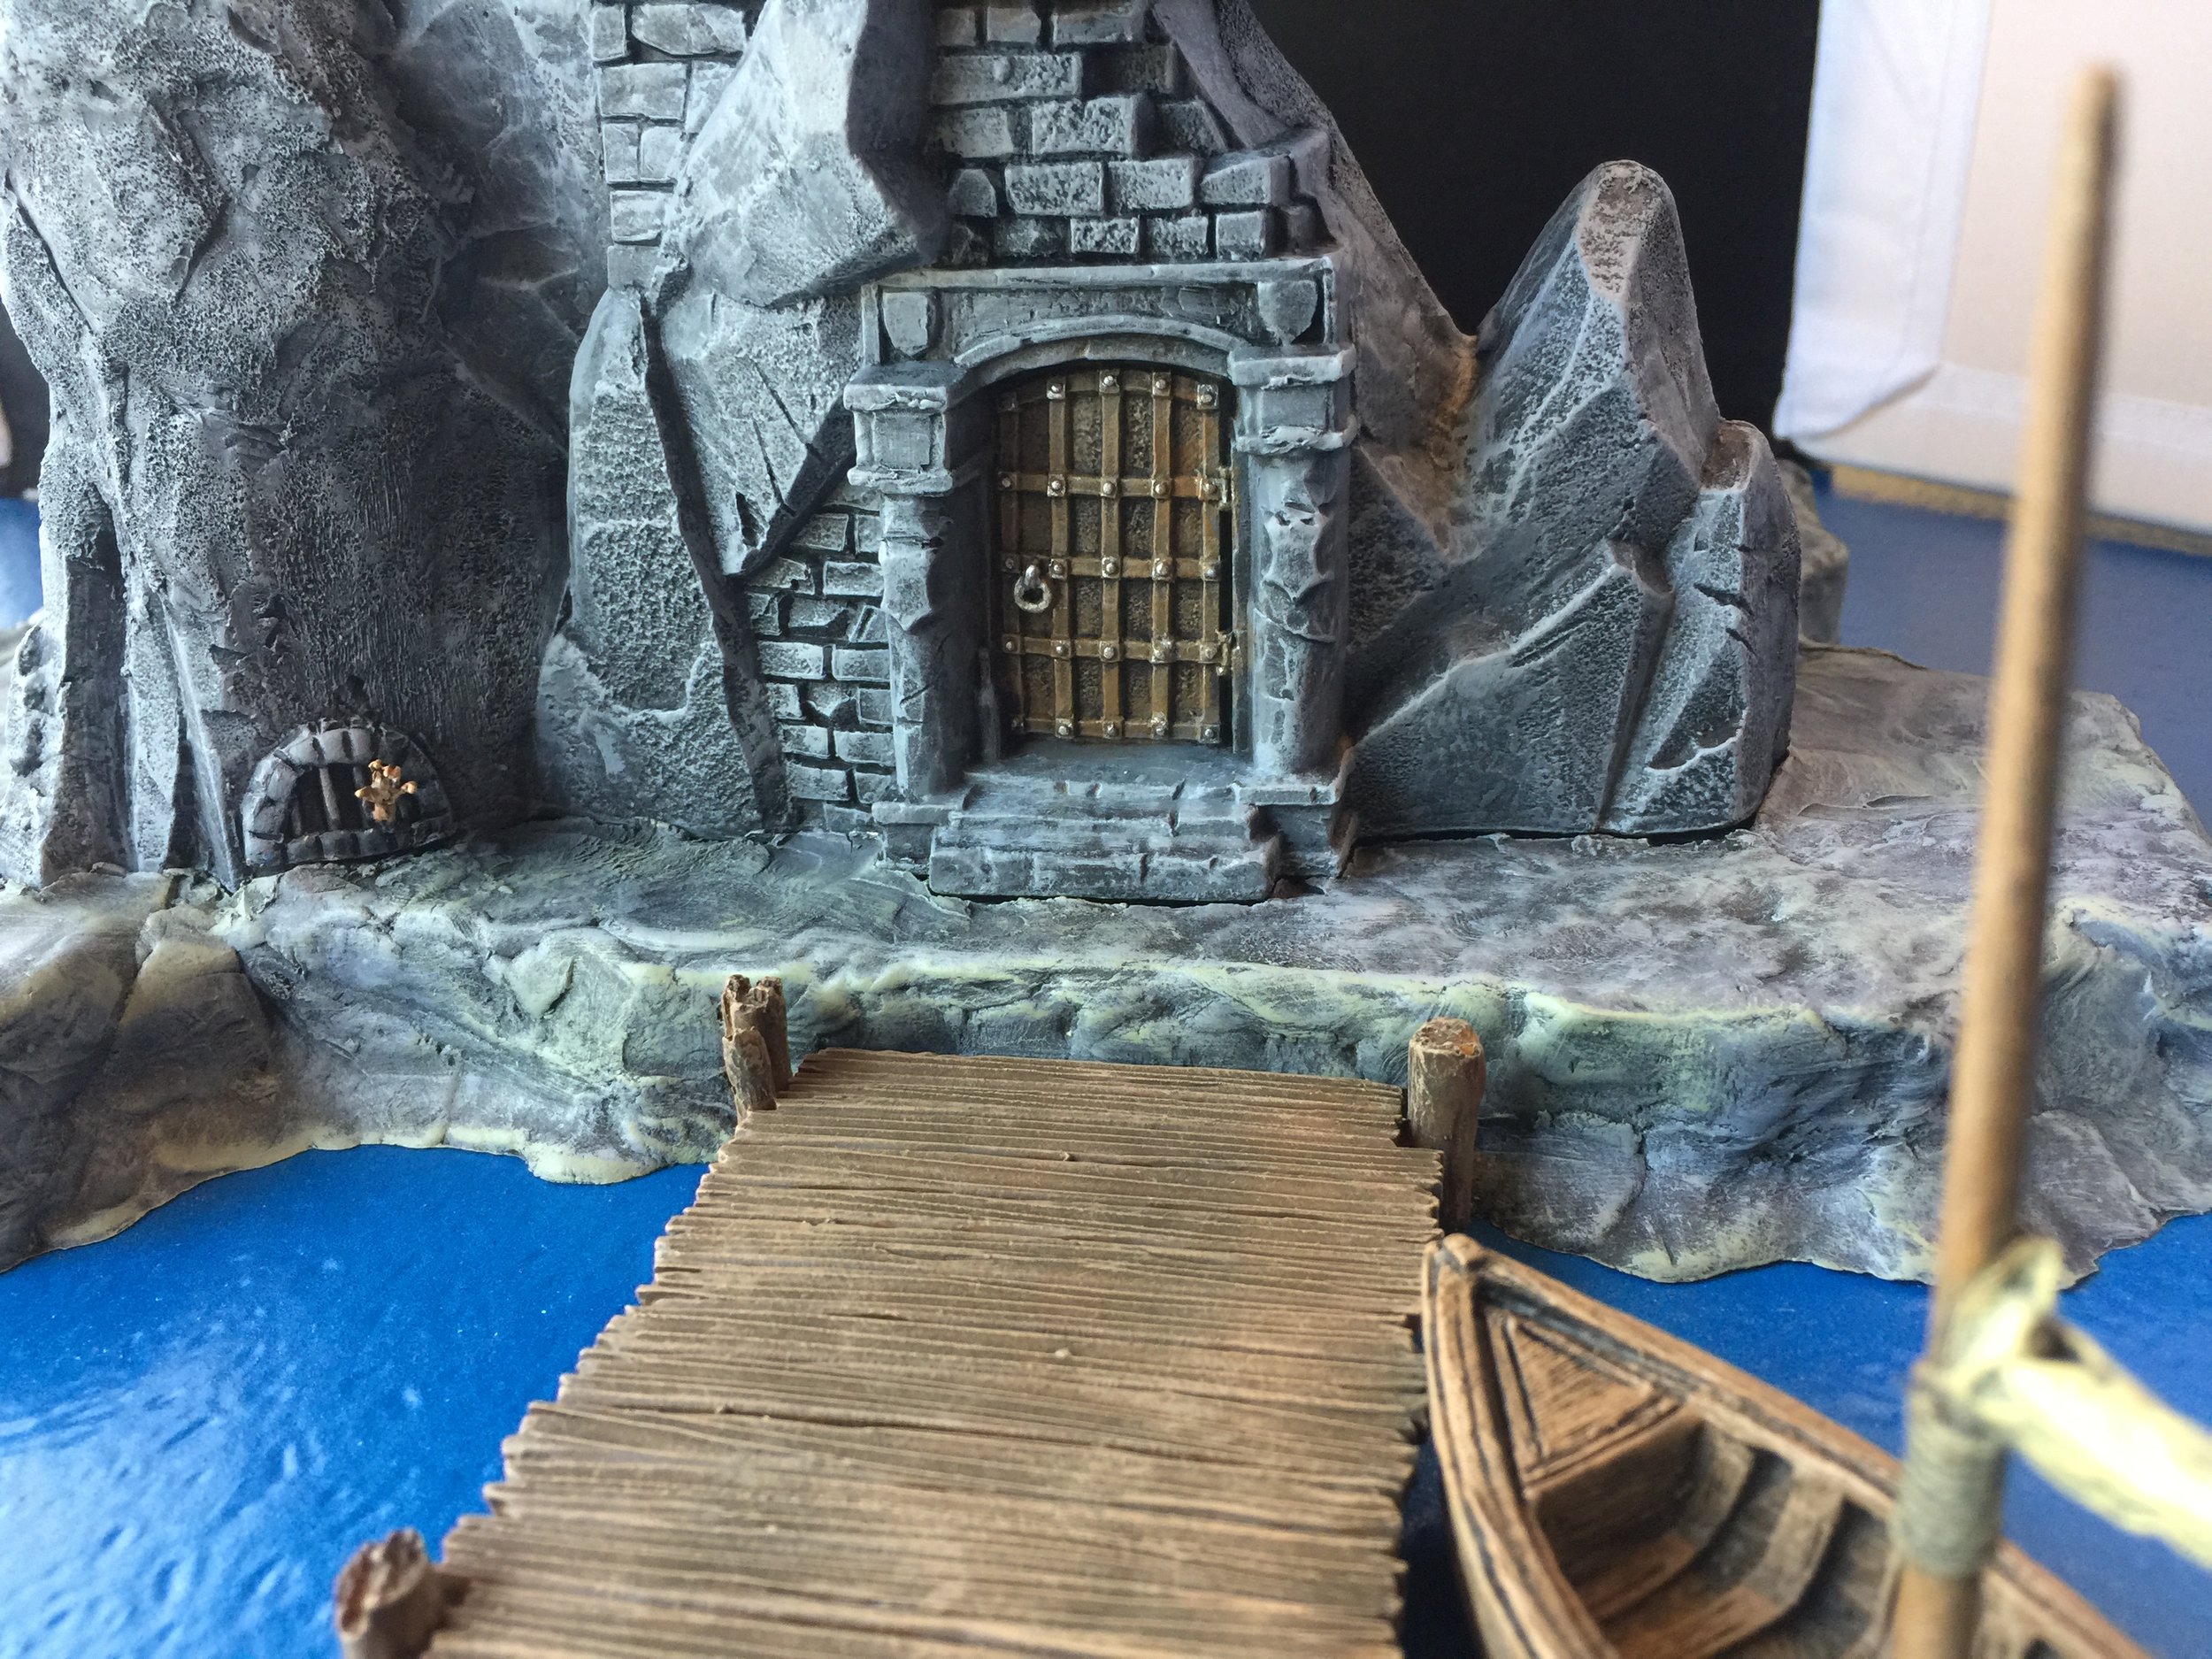
About a decade ago Citadel released their Skullvane Manse, Lair of the Astromancer. As is the case with all of their stuff it was overloaded with skulls (huge skulls, big skulls, medium skulls, tiny skulls… lots, and lots of skulls), but at its core, sans skulls, it was/is a beautiful piece of terrain. I bought it. In fact I bought a couple of them. I got them at sale prices. I understand that it is being re-released under a different name in November 2019 with a price of $110 which is significantly less than what eBay sellers are asking for the original version; happily that $110 is significantly more than I paid for the ones I have. More to the point because this is my weekly workbench, my plan for the Skullvane Manse has always been to modify it to serve as a pirate refuge set on a rock in some far off sea. The idea was inspired by a beautiful scratch-built diorama entitled “Piraten.” With my Boxer Rebellion collection posted and my Dr. Who collection finished and awaiting photographing, I decided to take on the manse as my next project.
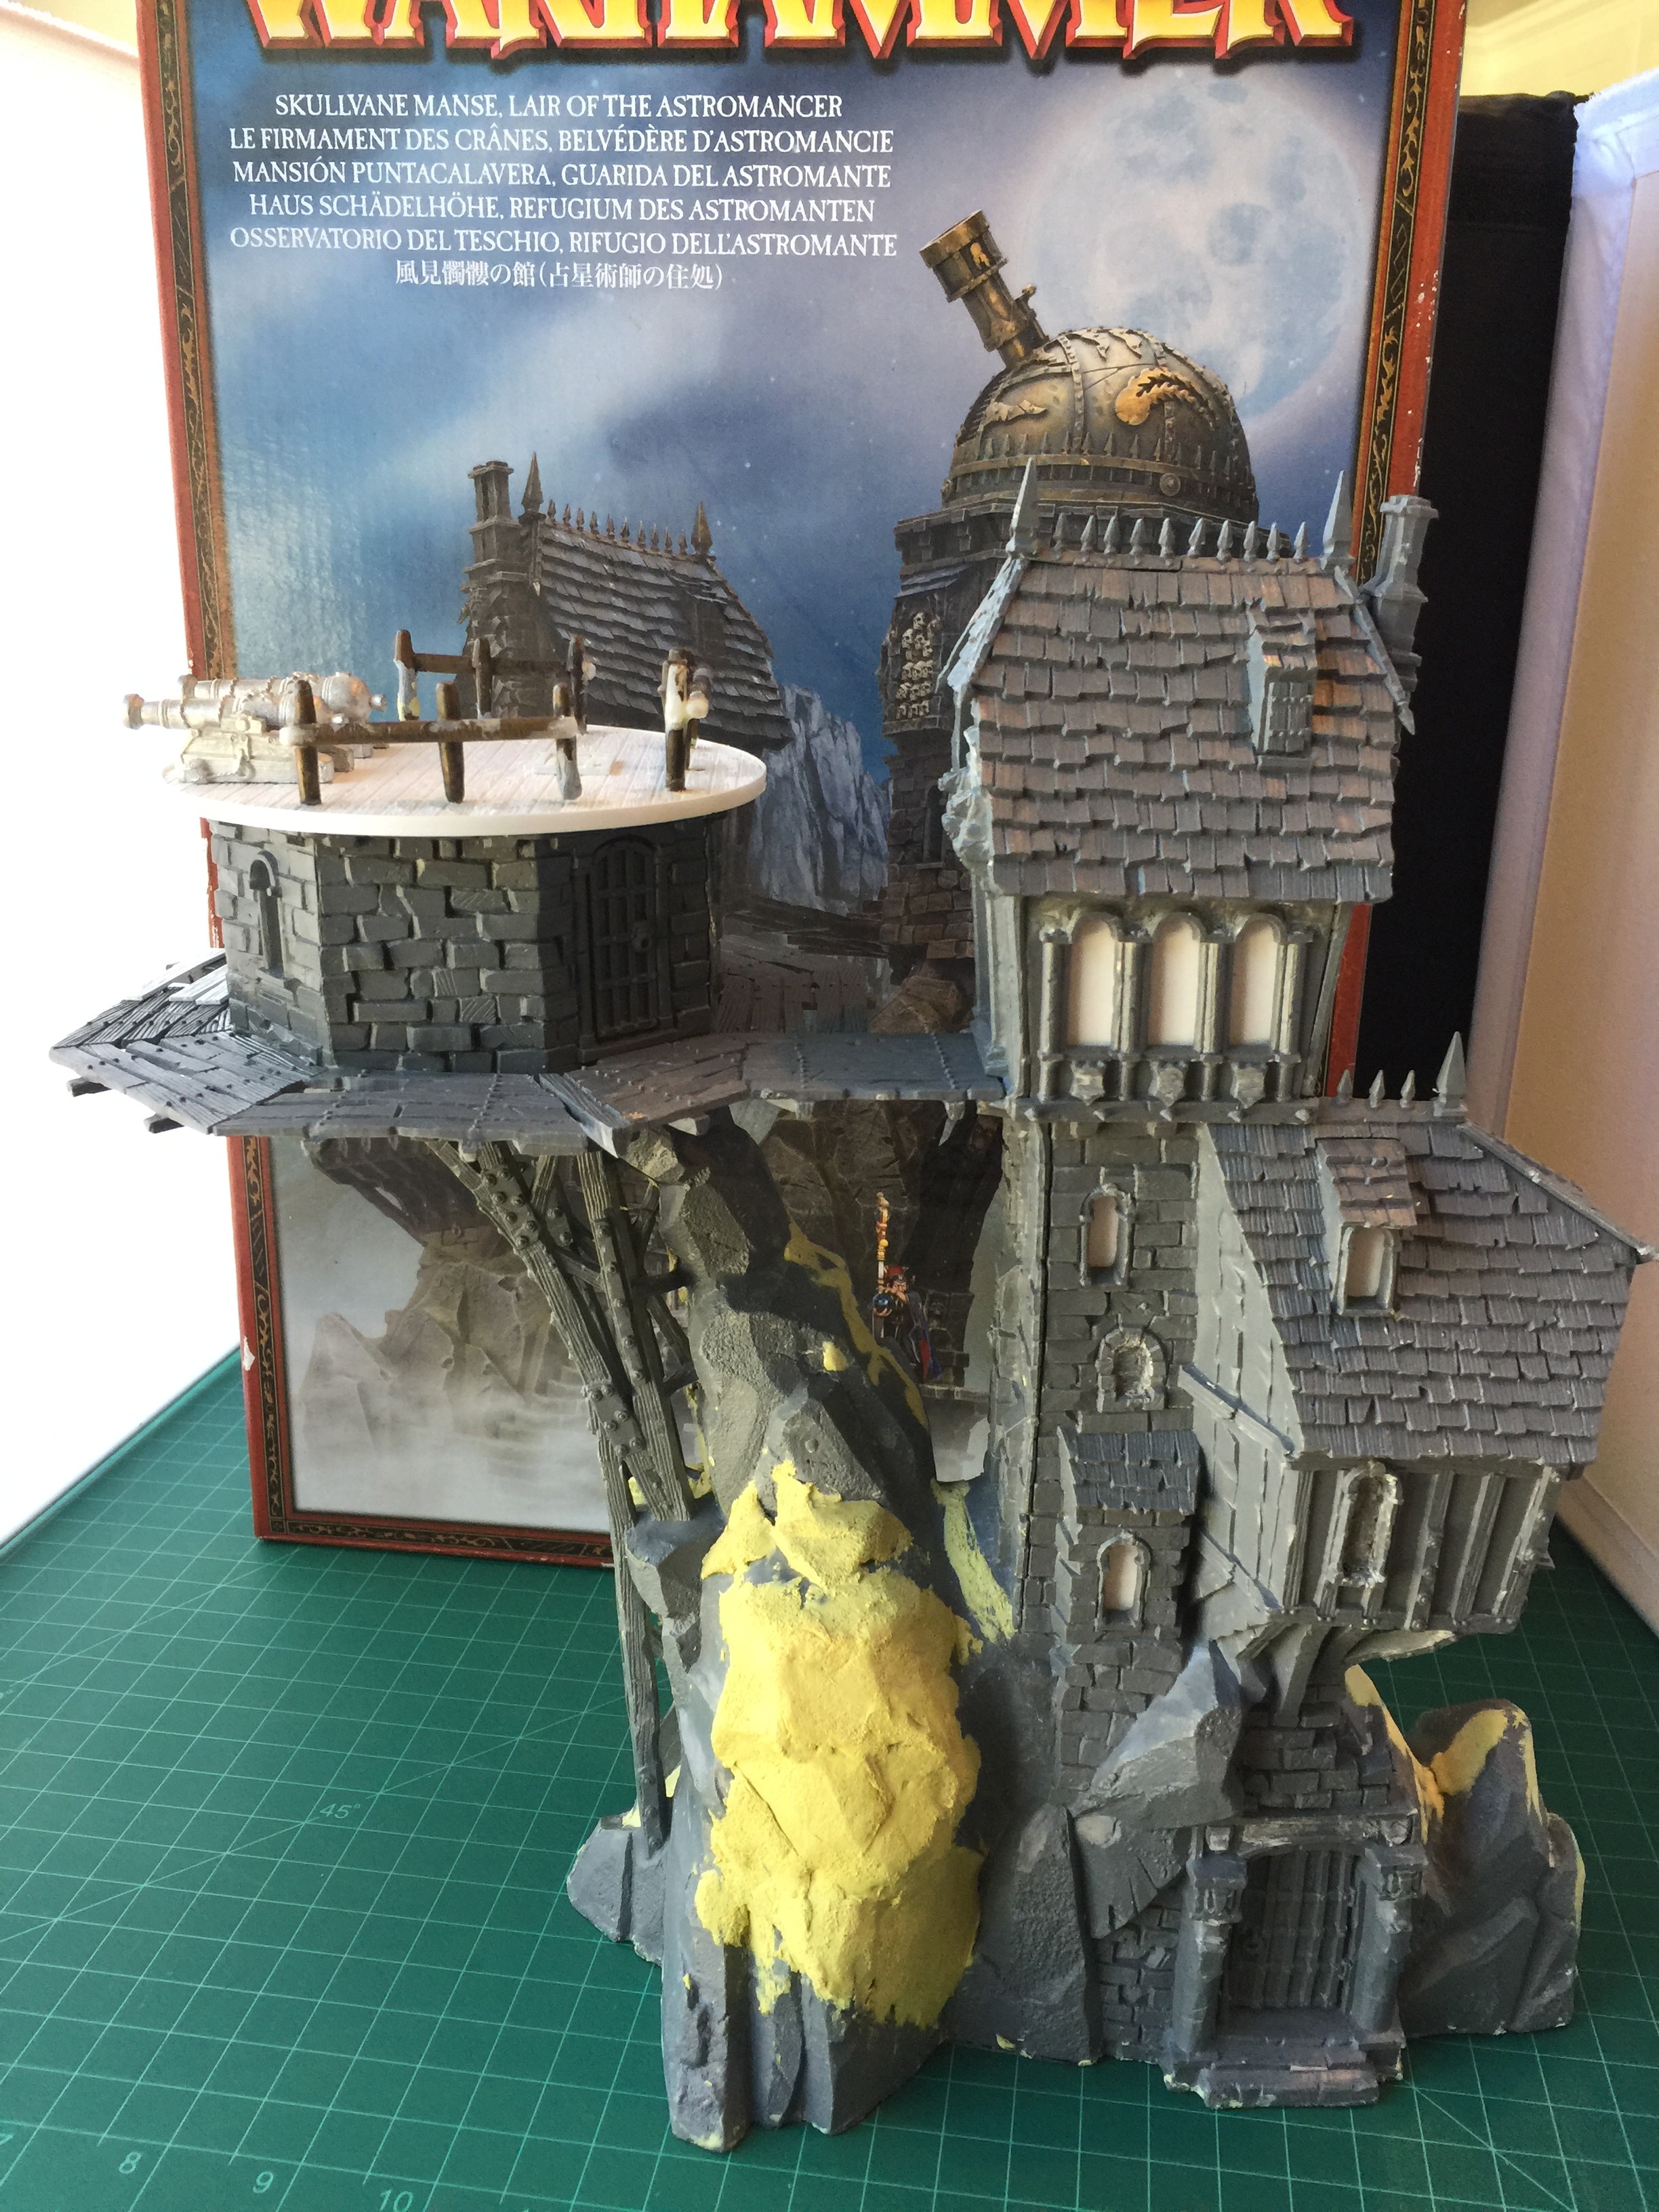
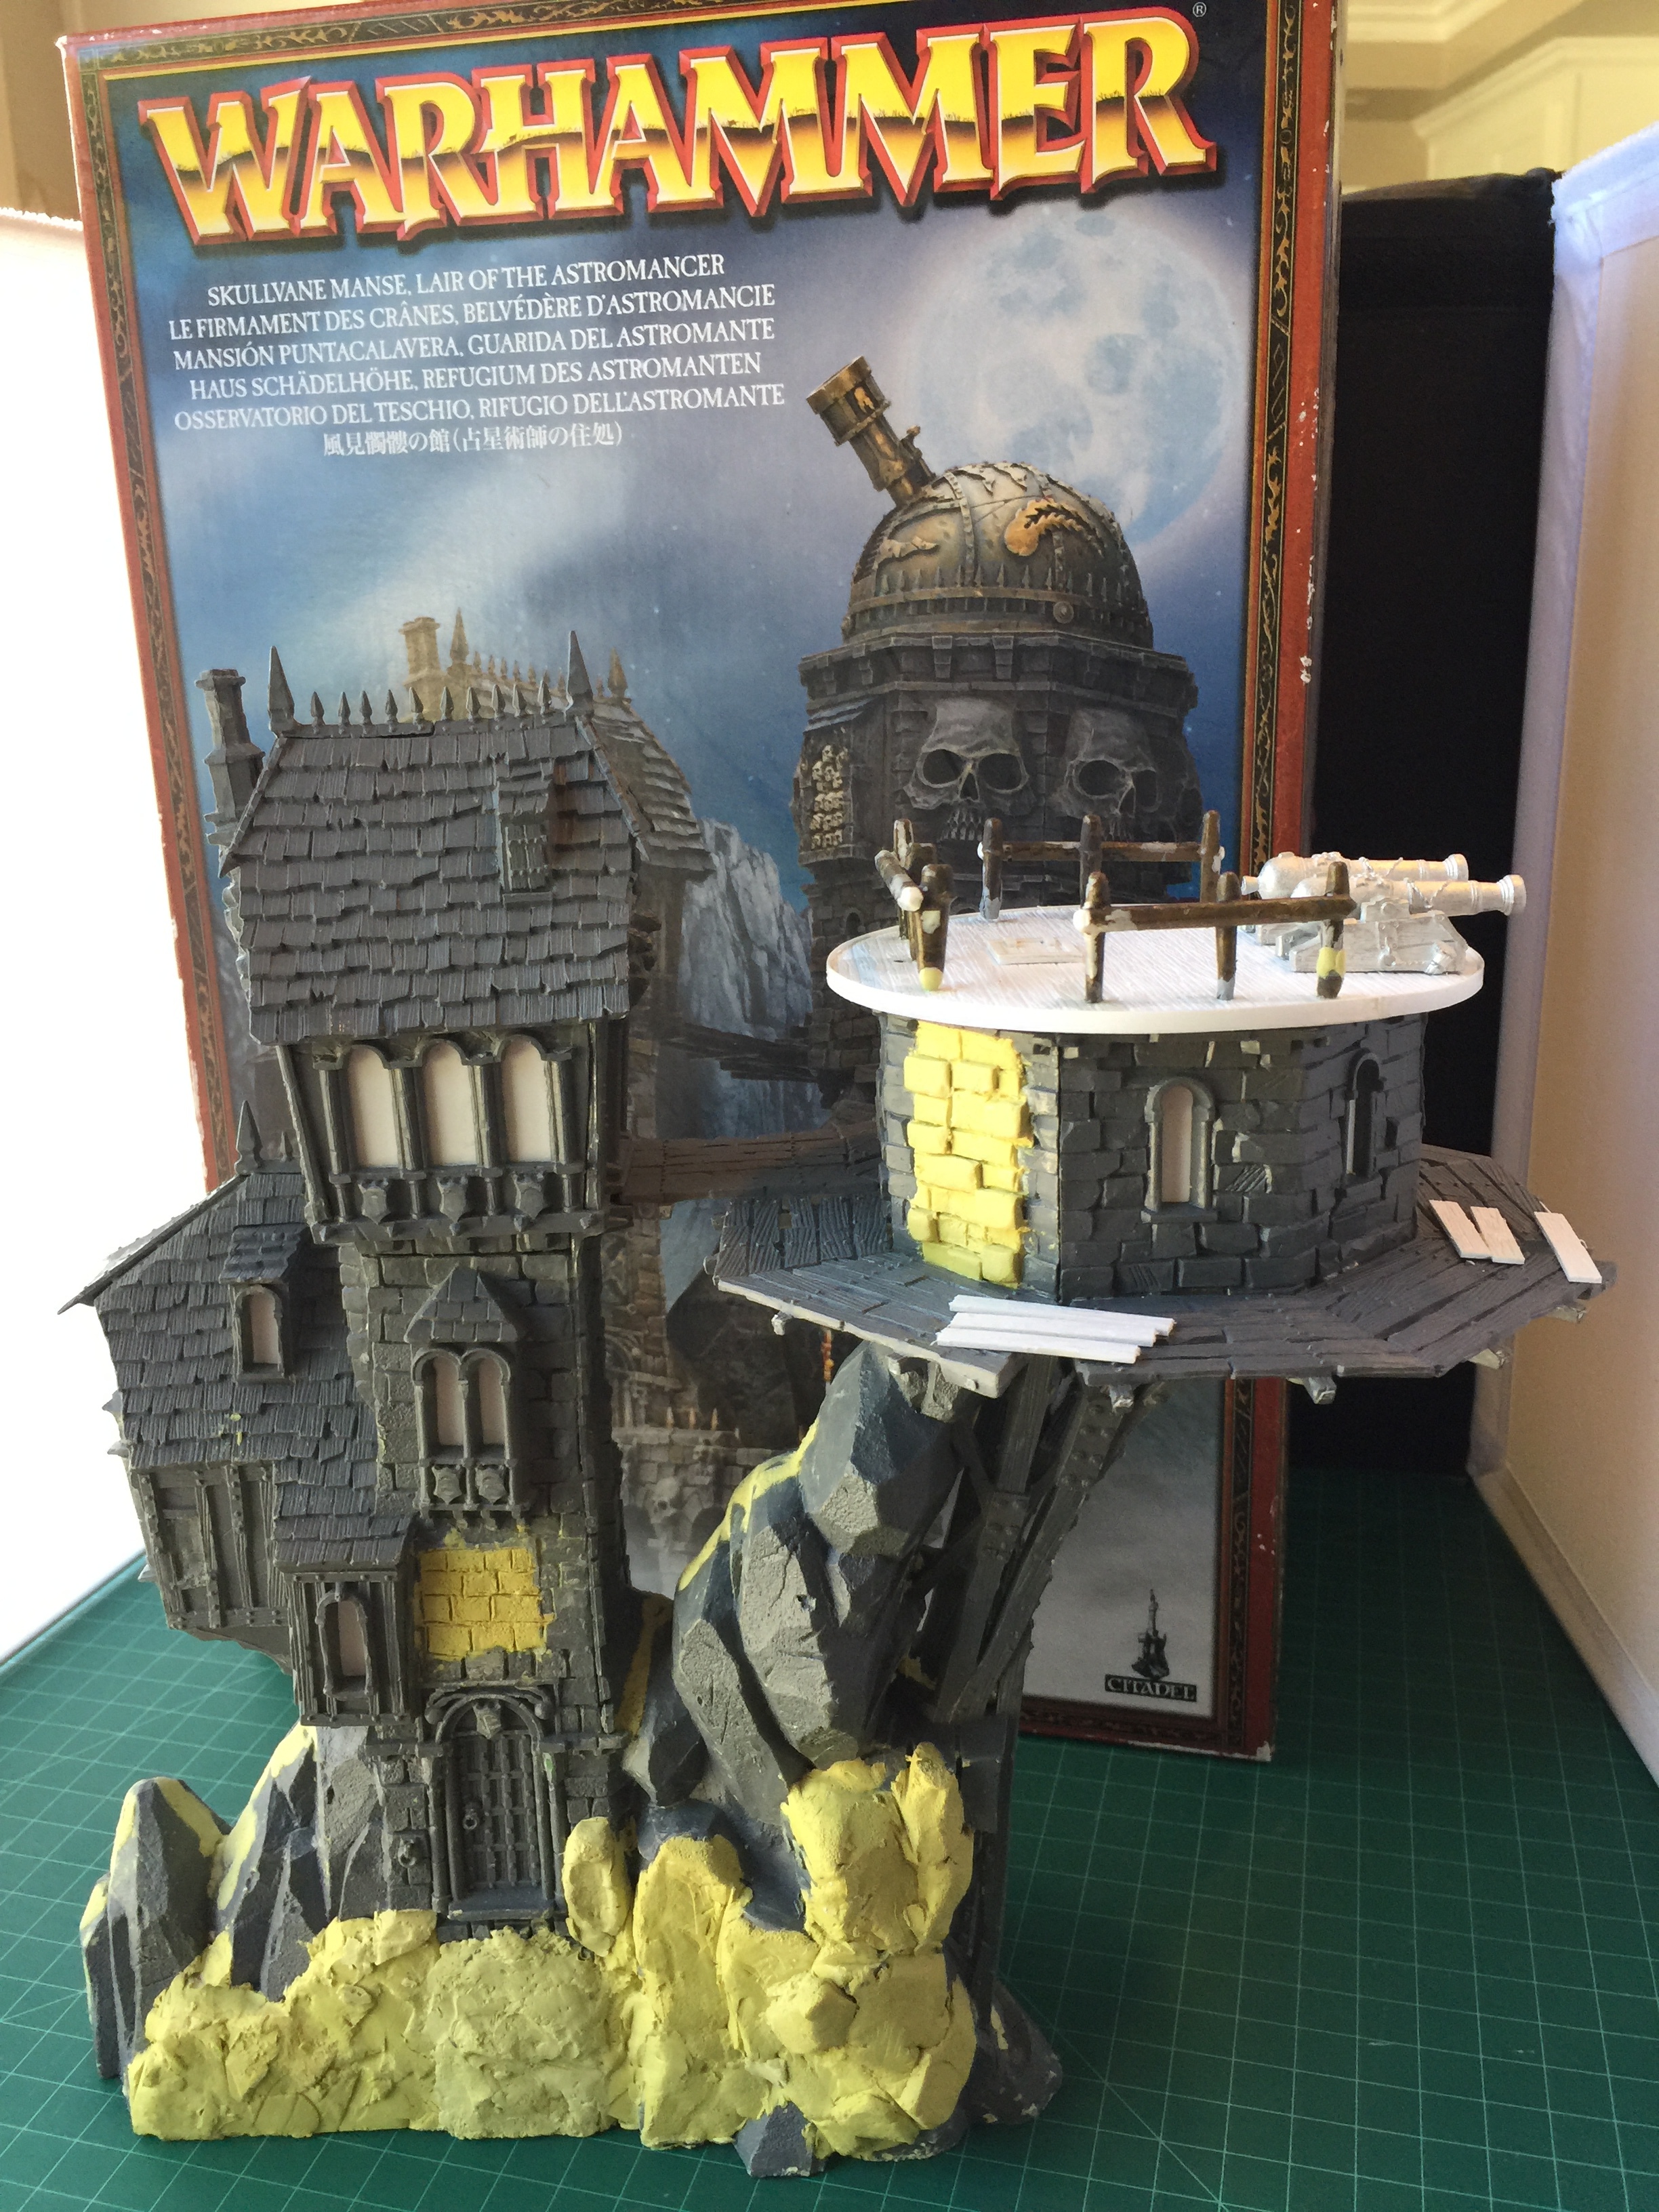
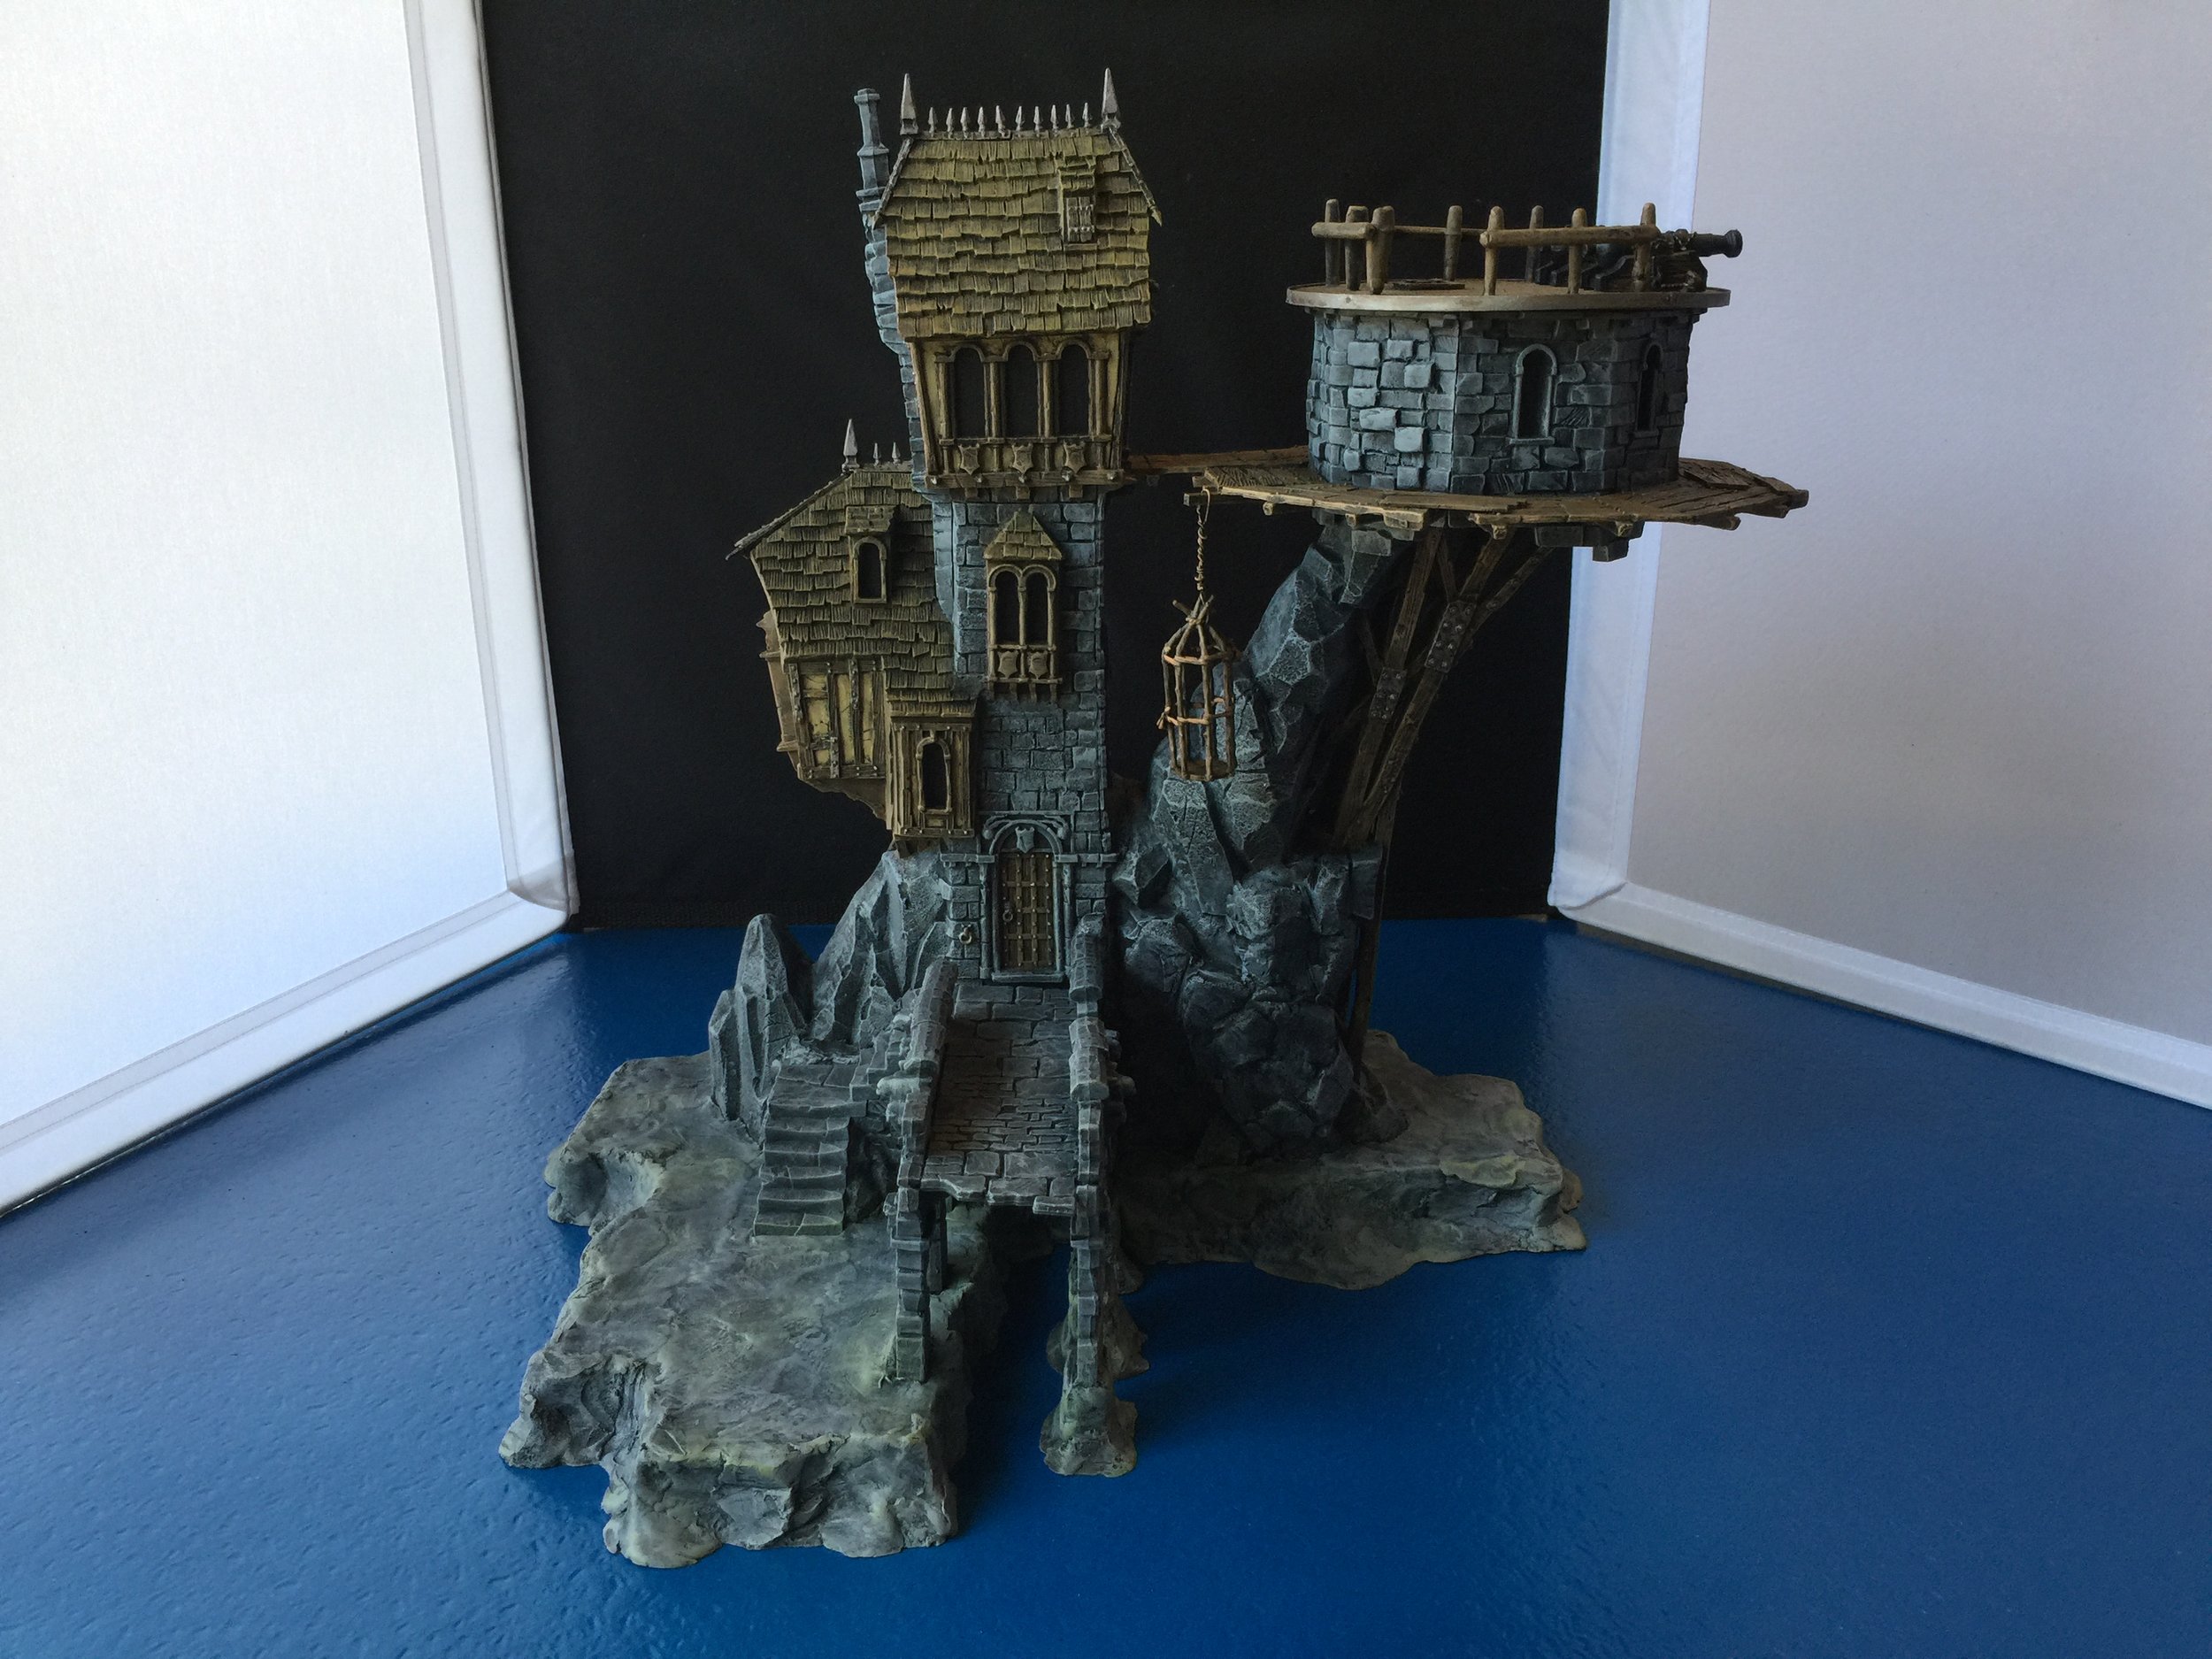
The first step in this task was to get rid of or hide the skulls. I cut off the smaller skulls and hid the others under rock facings shaped from Milliput. Once that was done I modified the telescope tower by cutting off the level of that tower rimmed with skulls thus leaving me with just the first floor of the telescope tower which had few skulls and those were easily hidden under a layer of Milliput shaped as brick. On top of that I constructed a gun platform using Evergreen plastic and some other odds and ends as railing. On that gun platform rest two big cannon from Warmachine. The platform itself can rotate in a circle (not really) based upon a system of gears and cranks hidden (thankfully) within the walls of the floor below.
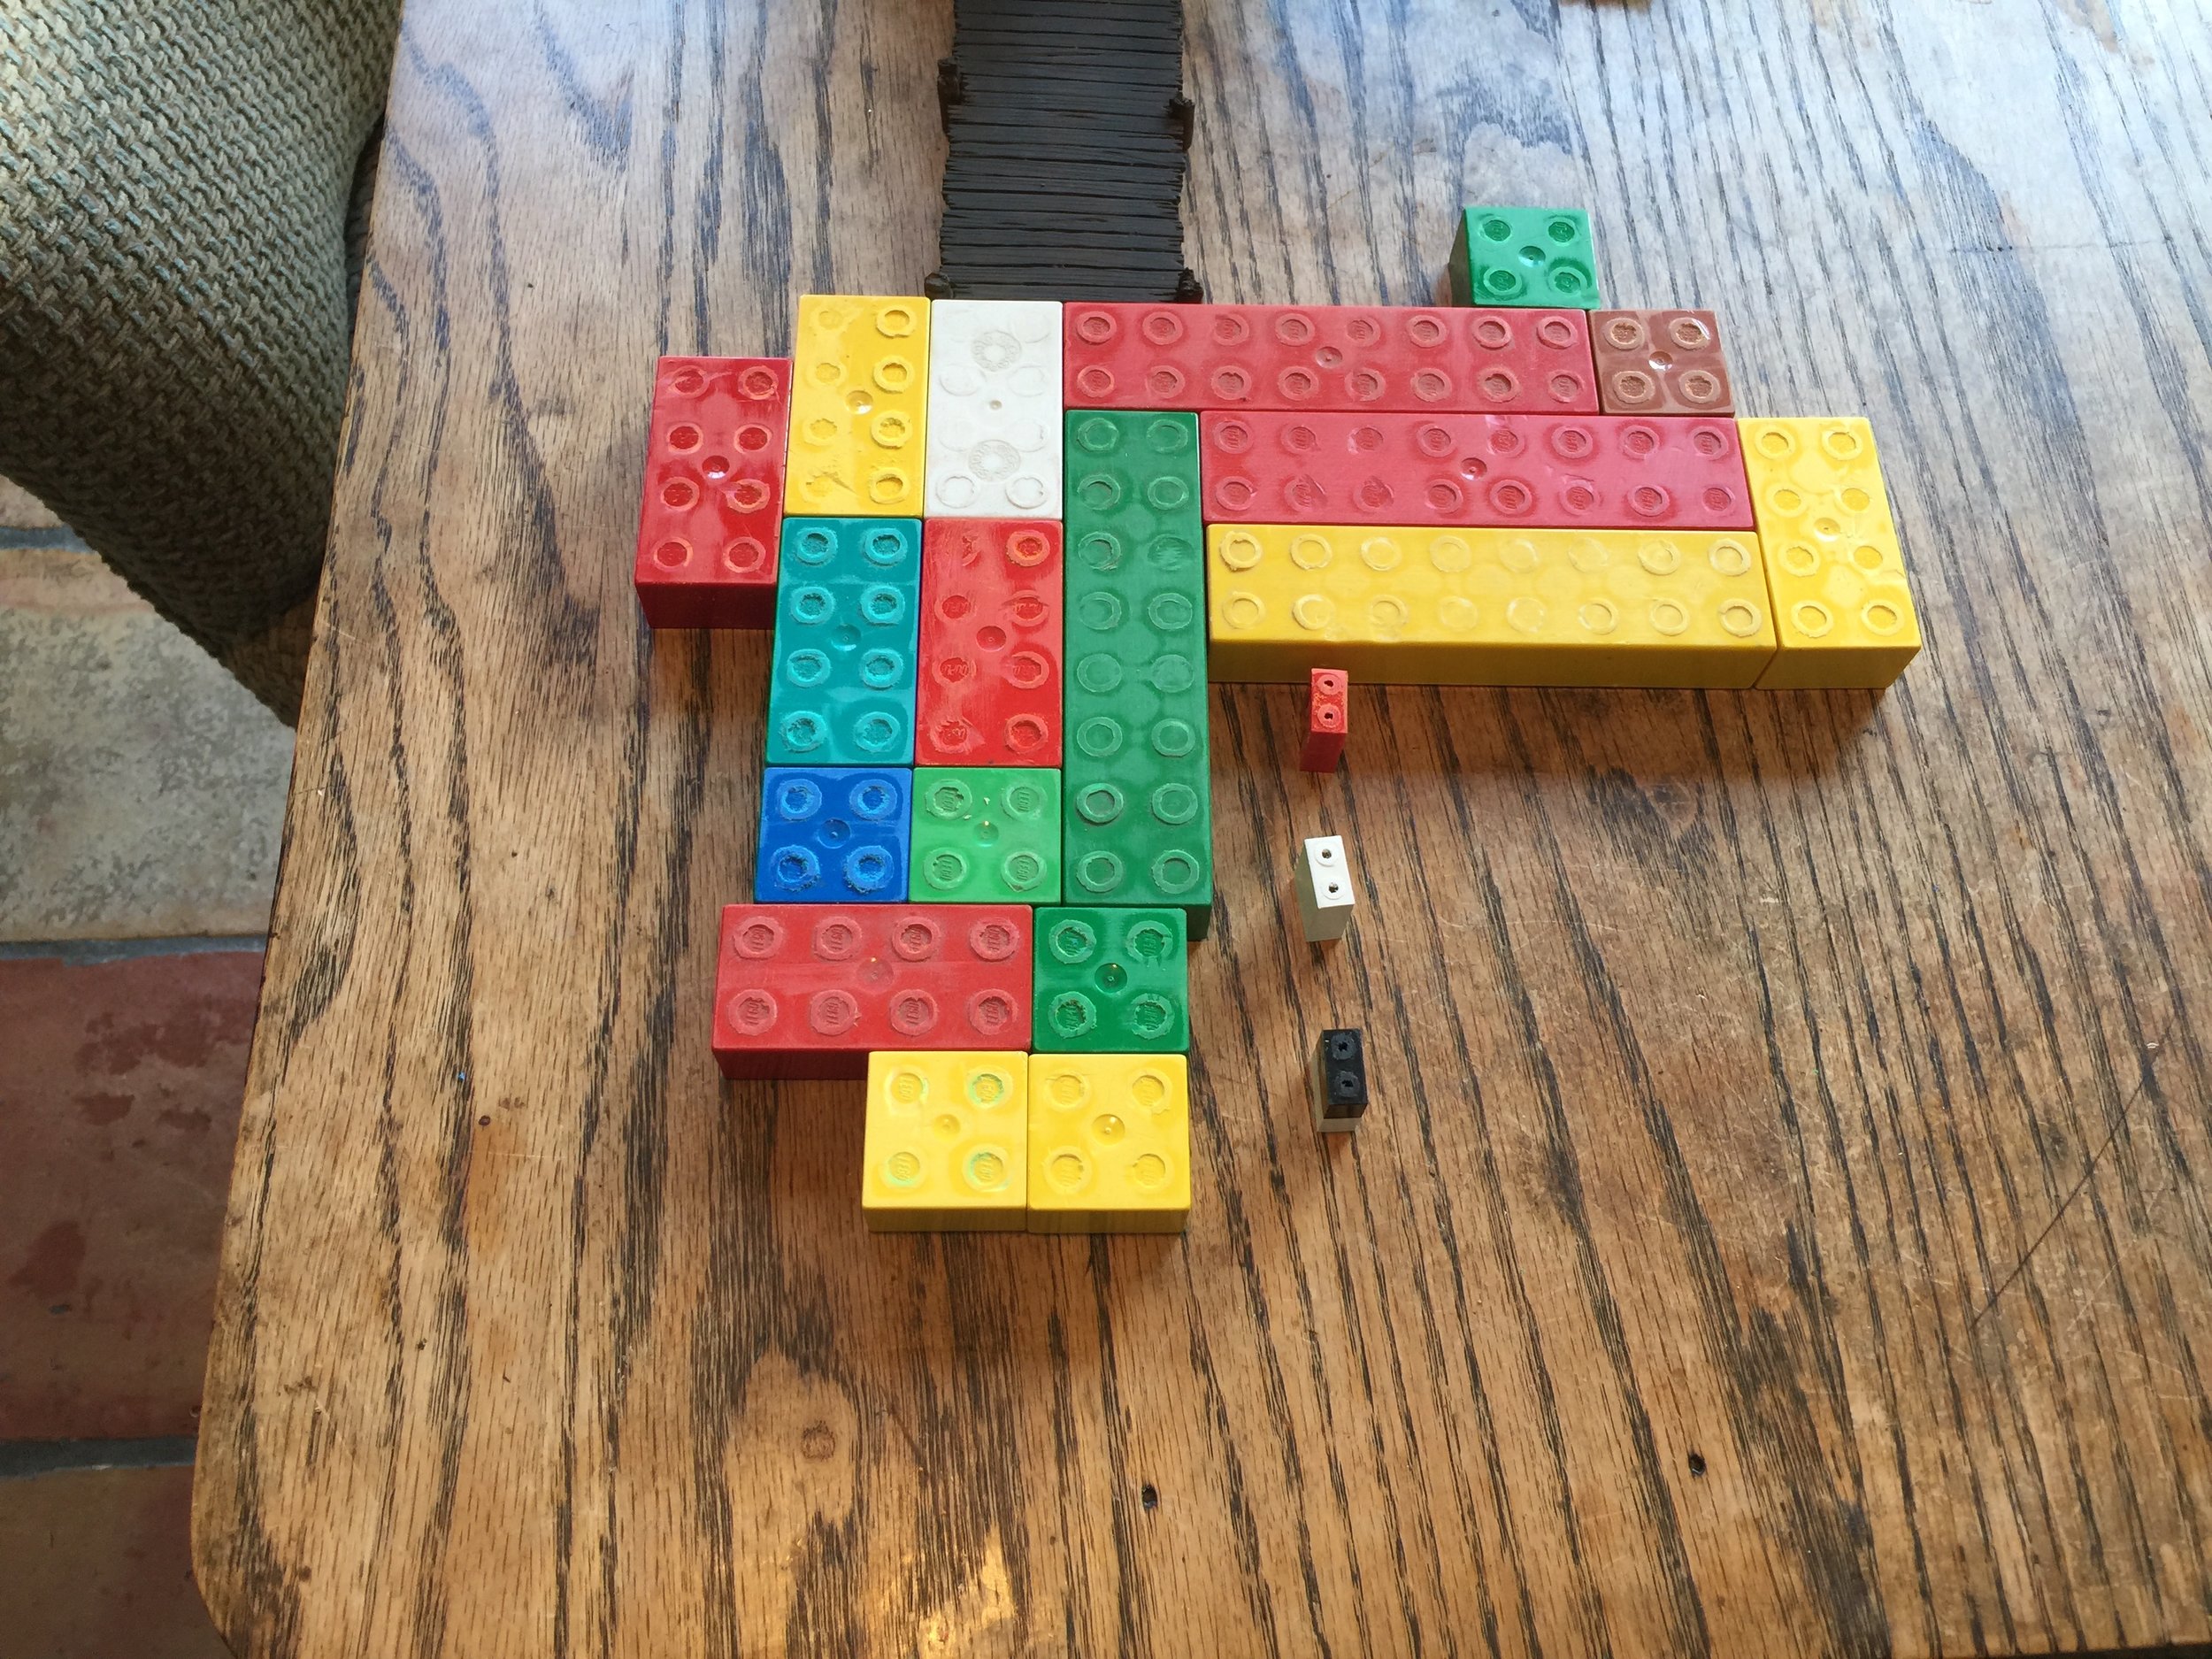
As I indicated this pirate refuge sits on a rock in the sea. Consequently I needed a rock in the sea for it to sit on. I accomplished this by using Duplos as a base and covering them with Milliput to give the base the rock face I required.
There is a broken arched ramp or bridge that leads out of the housing side of the refuge’s second floor. The ramp goes nowhere, but it looks good so I kept it. One side of it sits on the rock isle and the other side sits on rock supports just beneath the water… to accomplish this I added some Legos to give the side not on the rock isle the added length needed to reach the water and covered those Legos with Milliput. I do love Milliput.
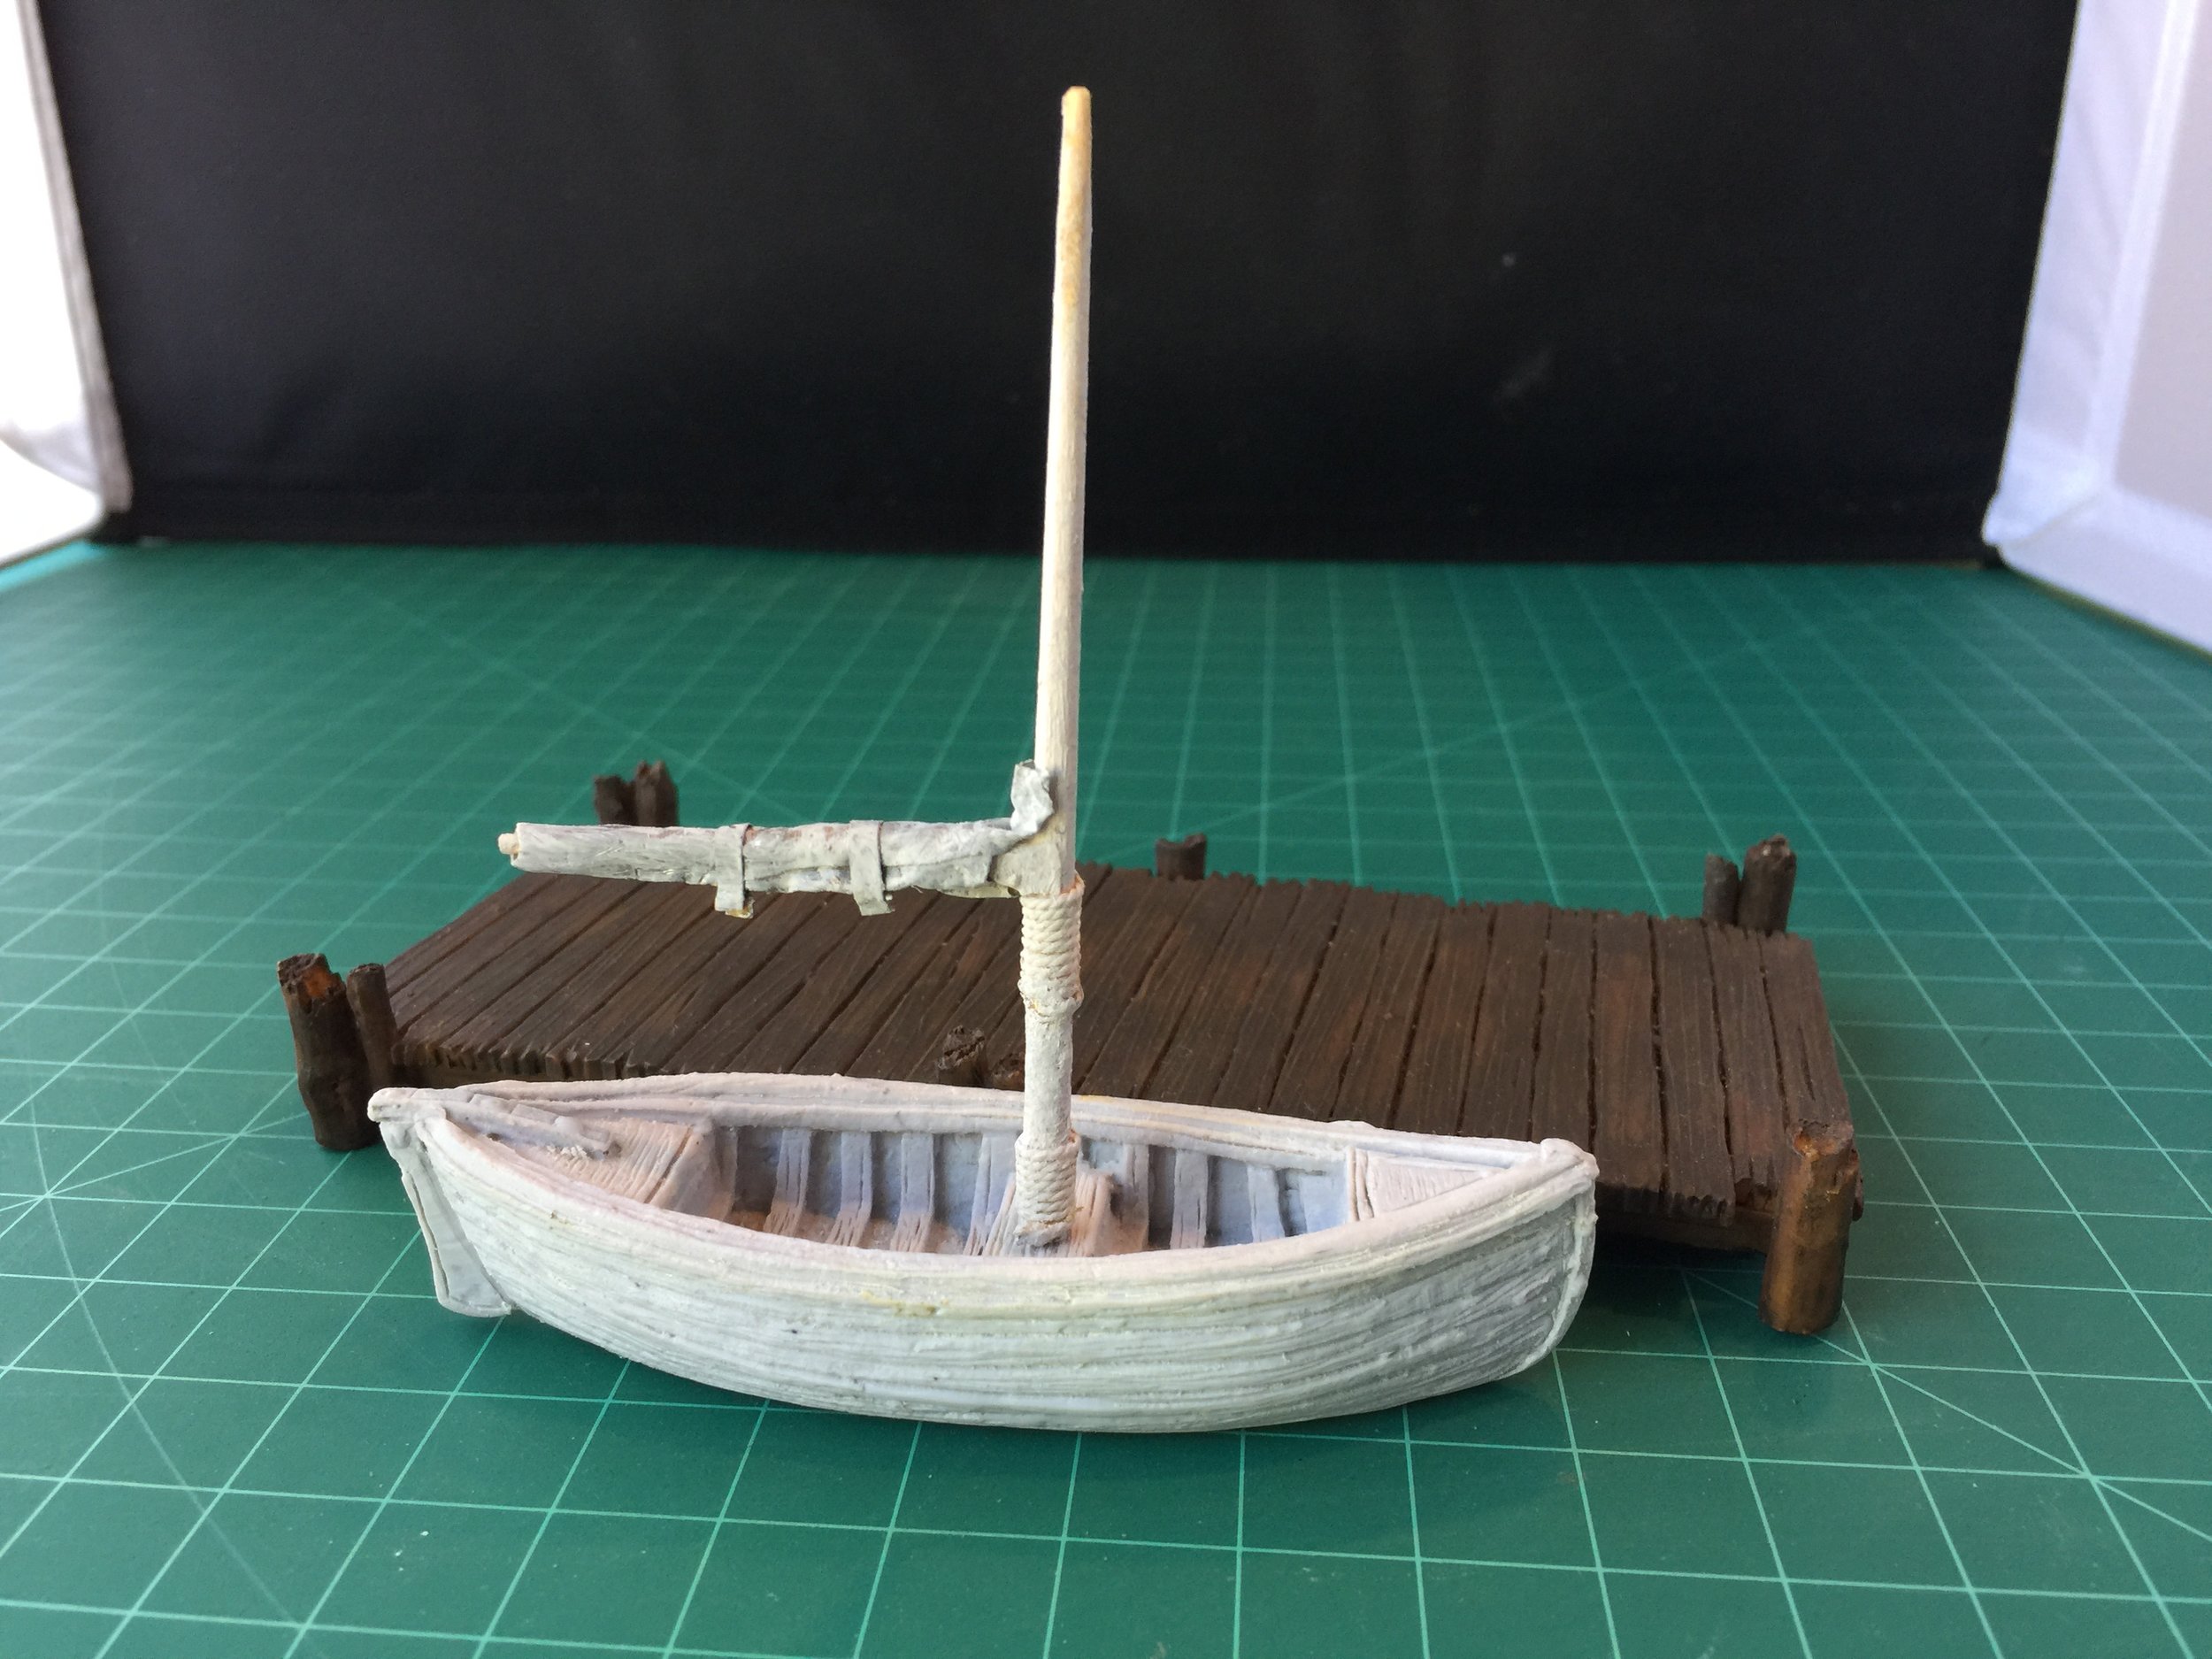
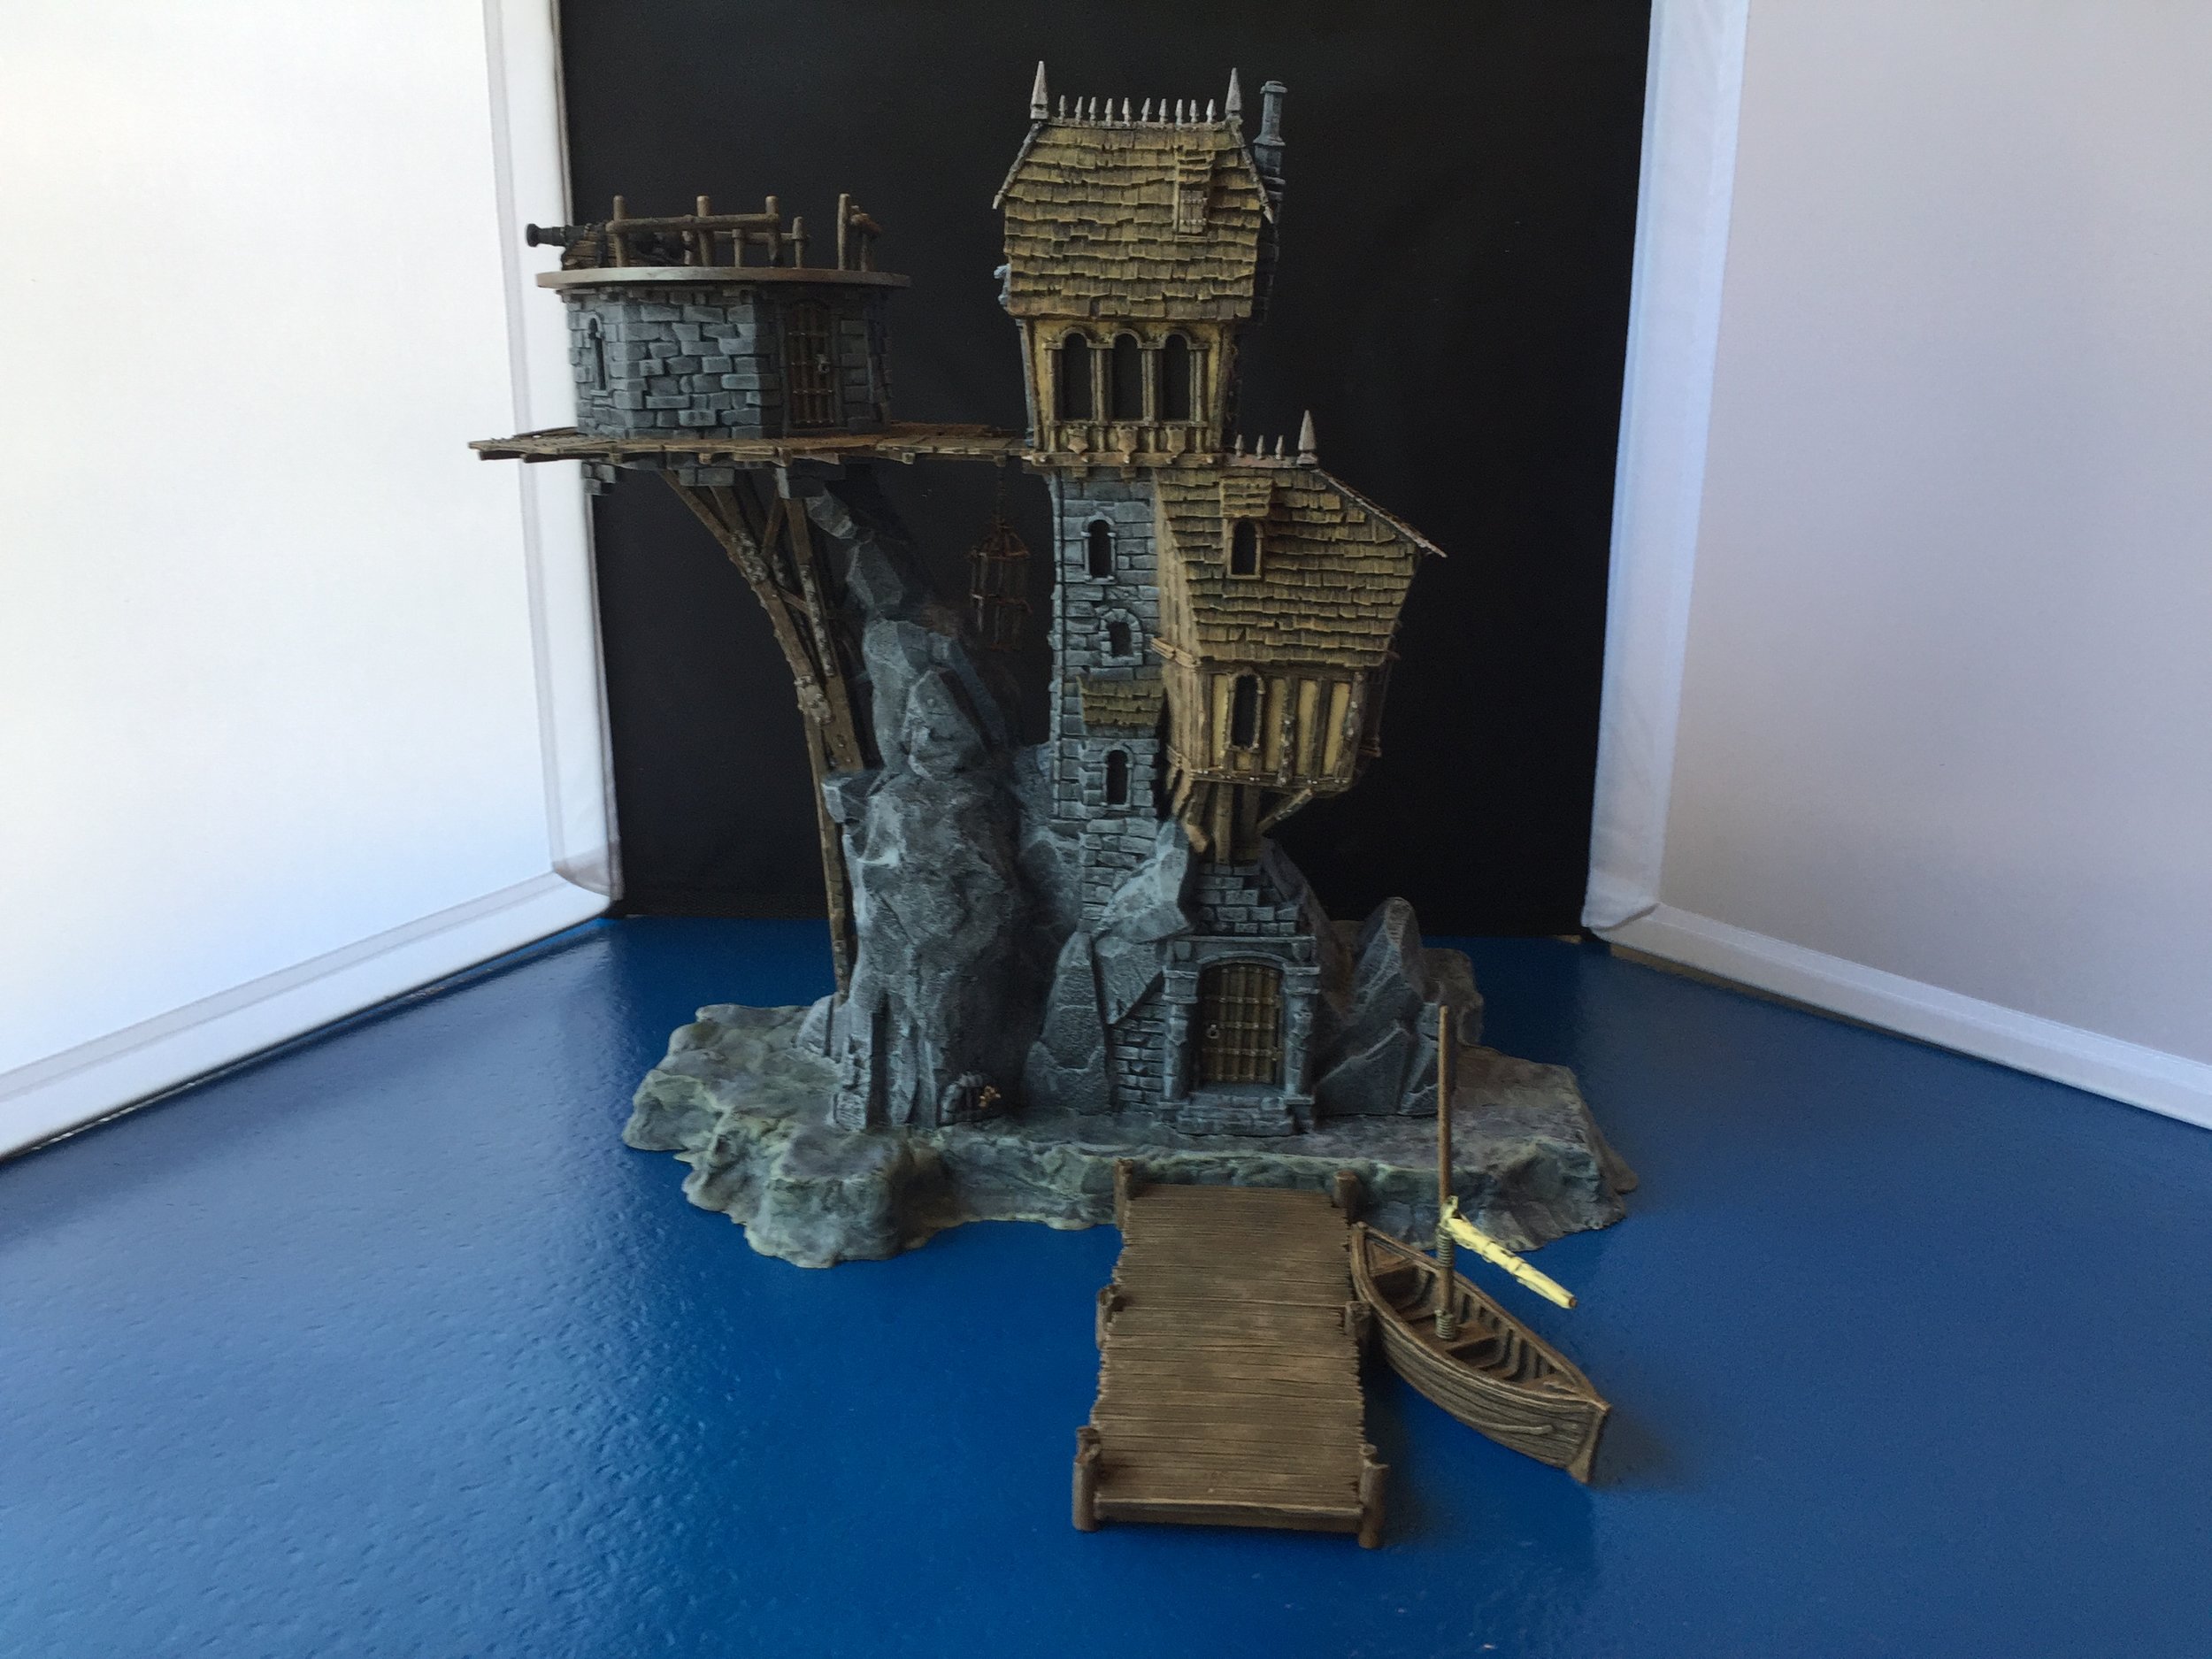
On the other side of the refuge there is another door at ground/rock level. It leads out to a wharf that I purchased years ago from Miniature Building Authority. I’m not sure if it is still in production. Sitting at that wharf is a small sailboat by Kobbelstone. It’s a beautiful boat, and I was extremely fortunate to get it because it is not one of the items that Kobbelstone lists for sale. I saw it as part of one of their showcase photos and asked about it at the time I was purchasing a lot of their Middle Eastern buildings (they make beautiful buildings). The owner informed me that it was not one of their normal products, but he would send one along as a gift for being such a good customer.
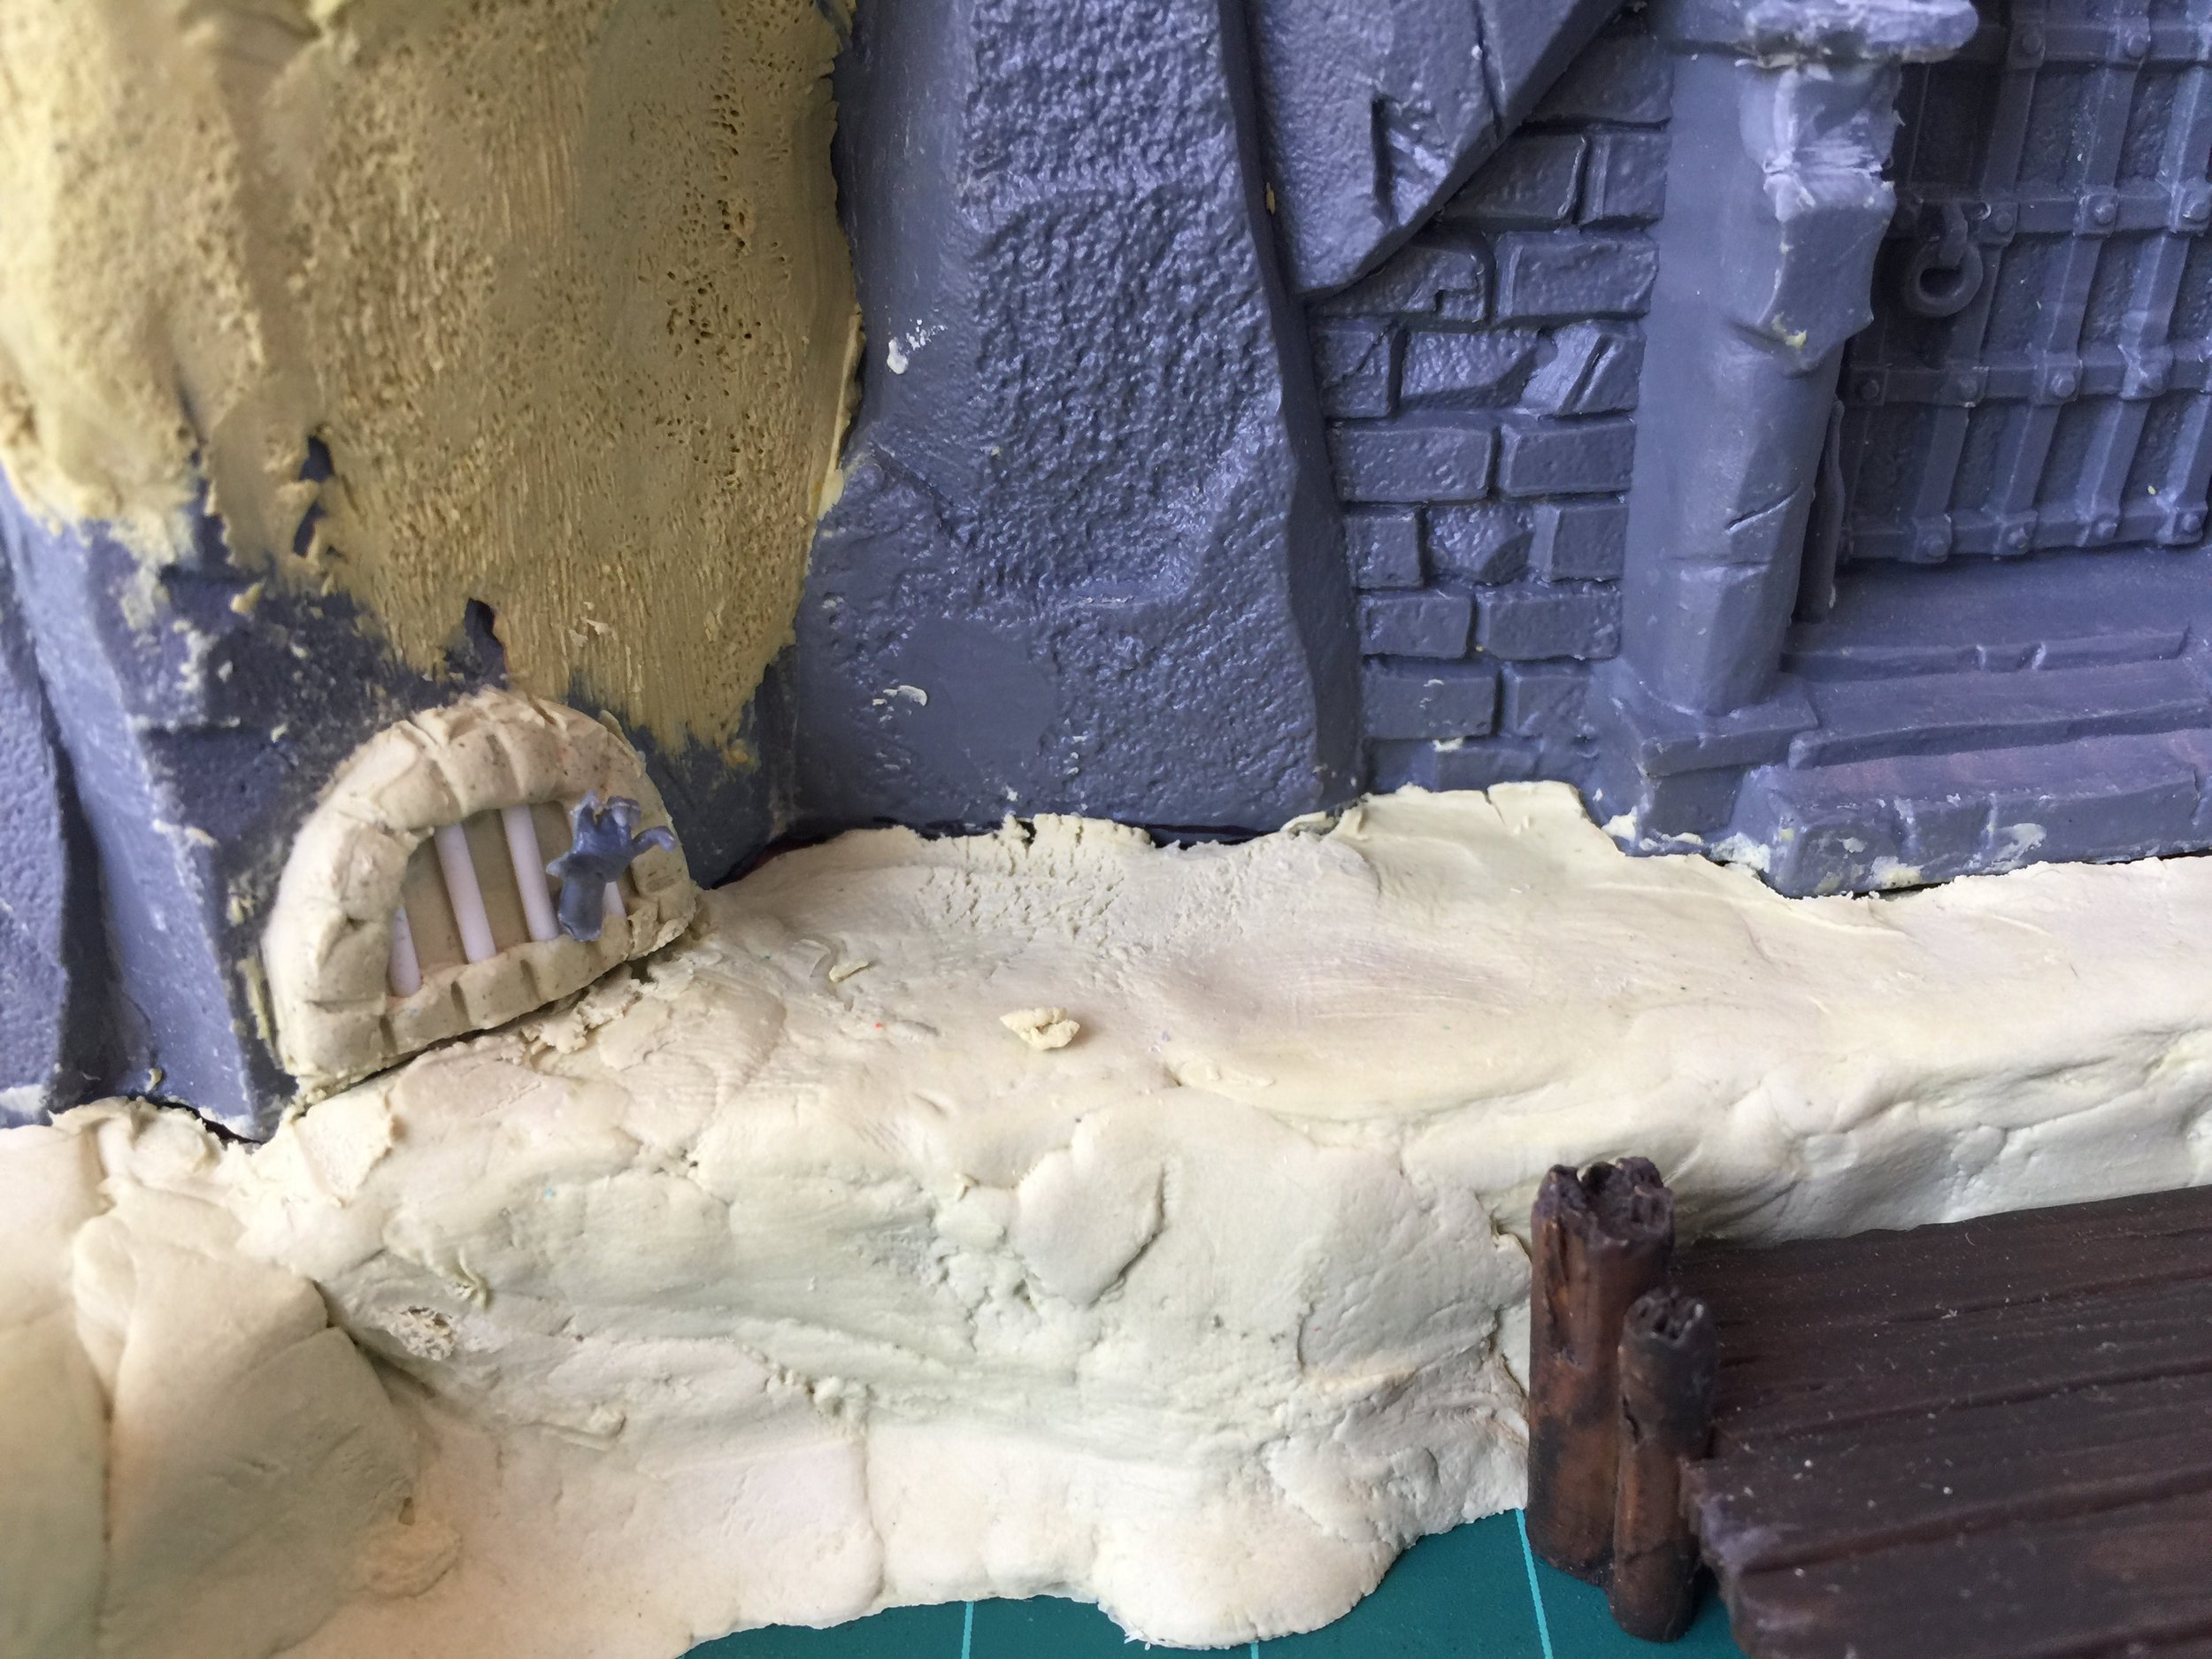
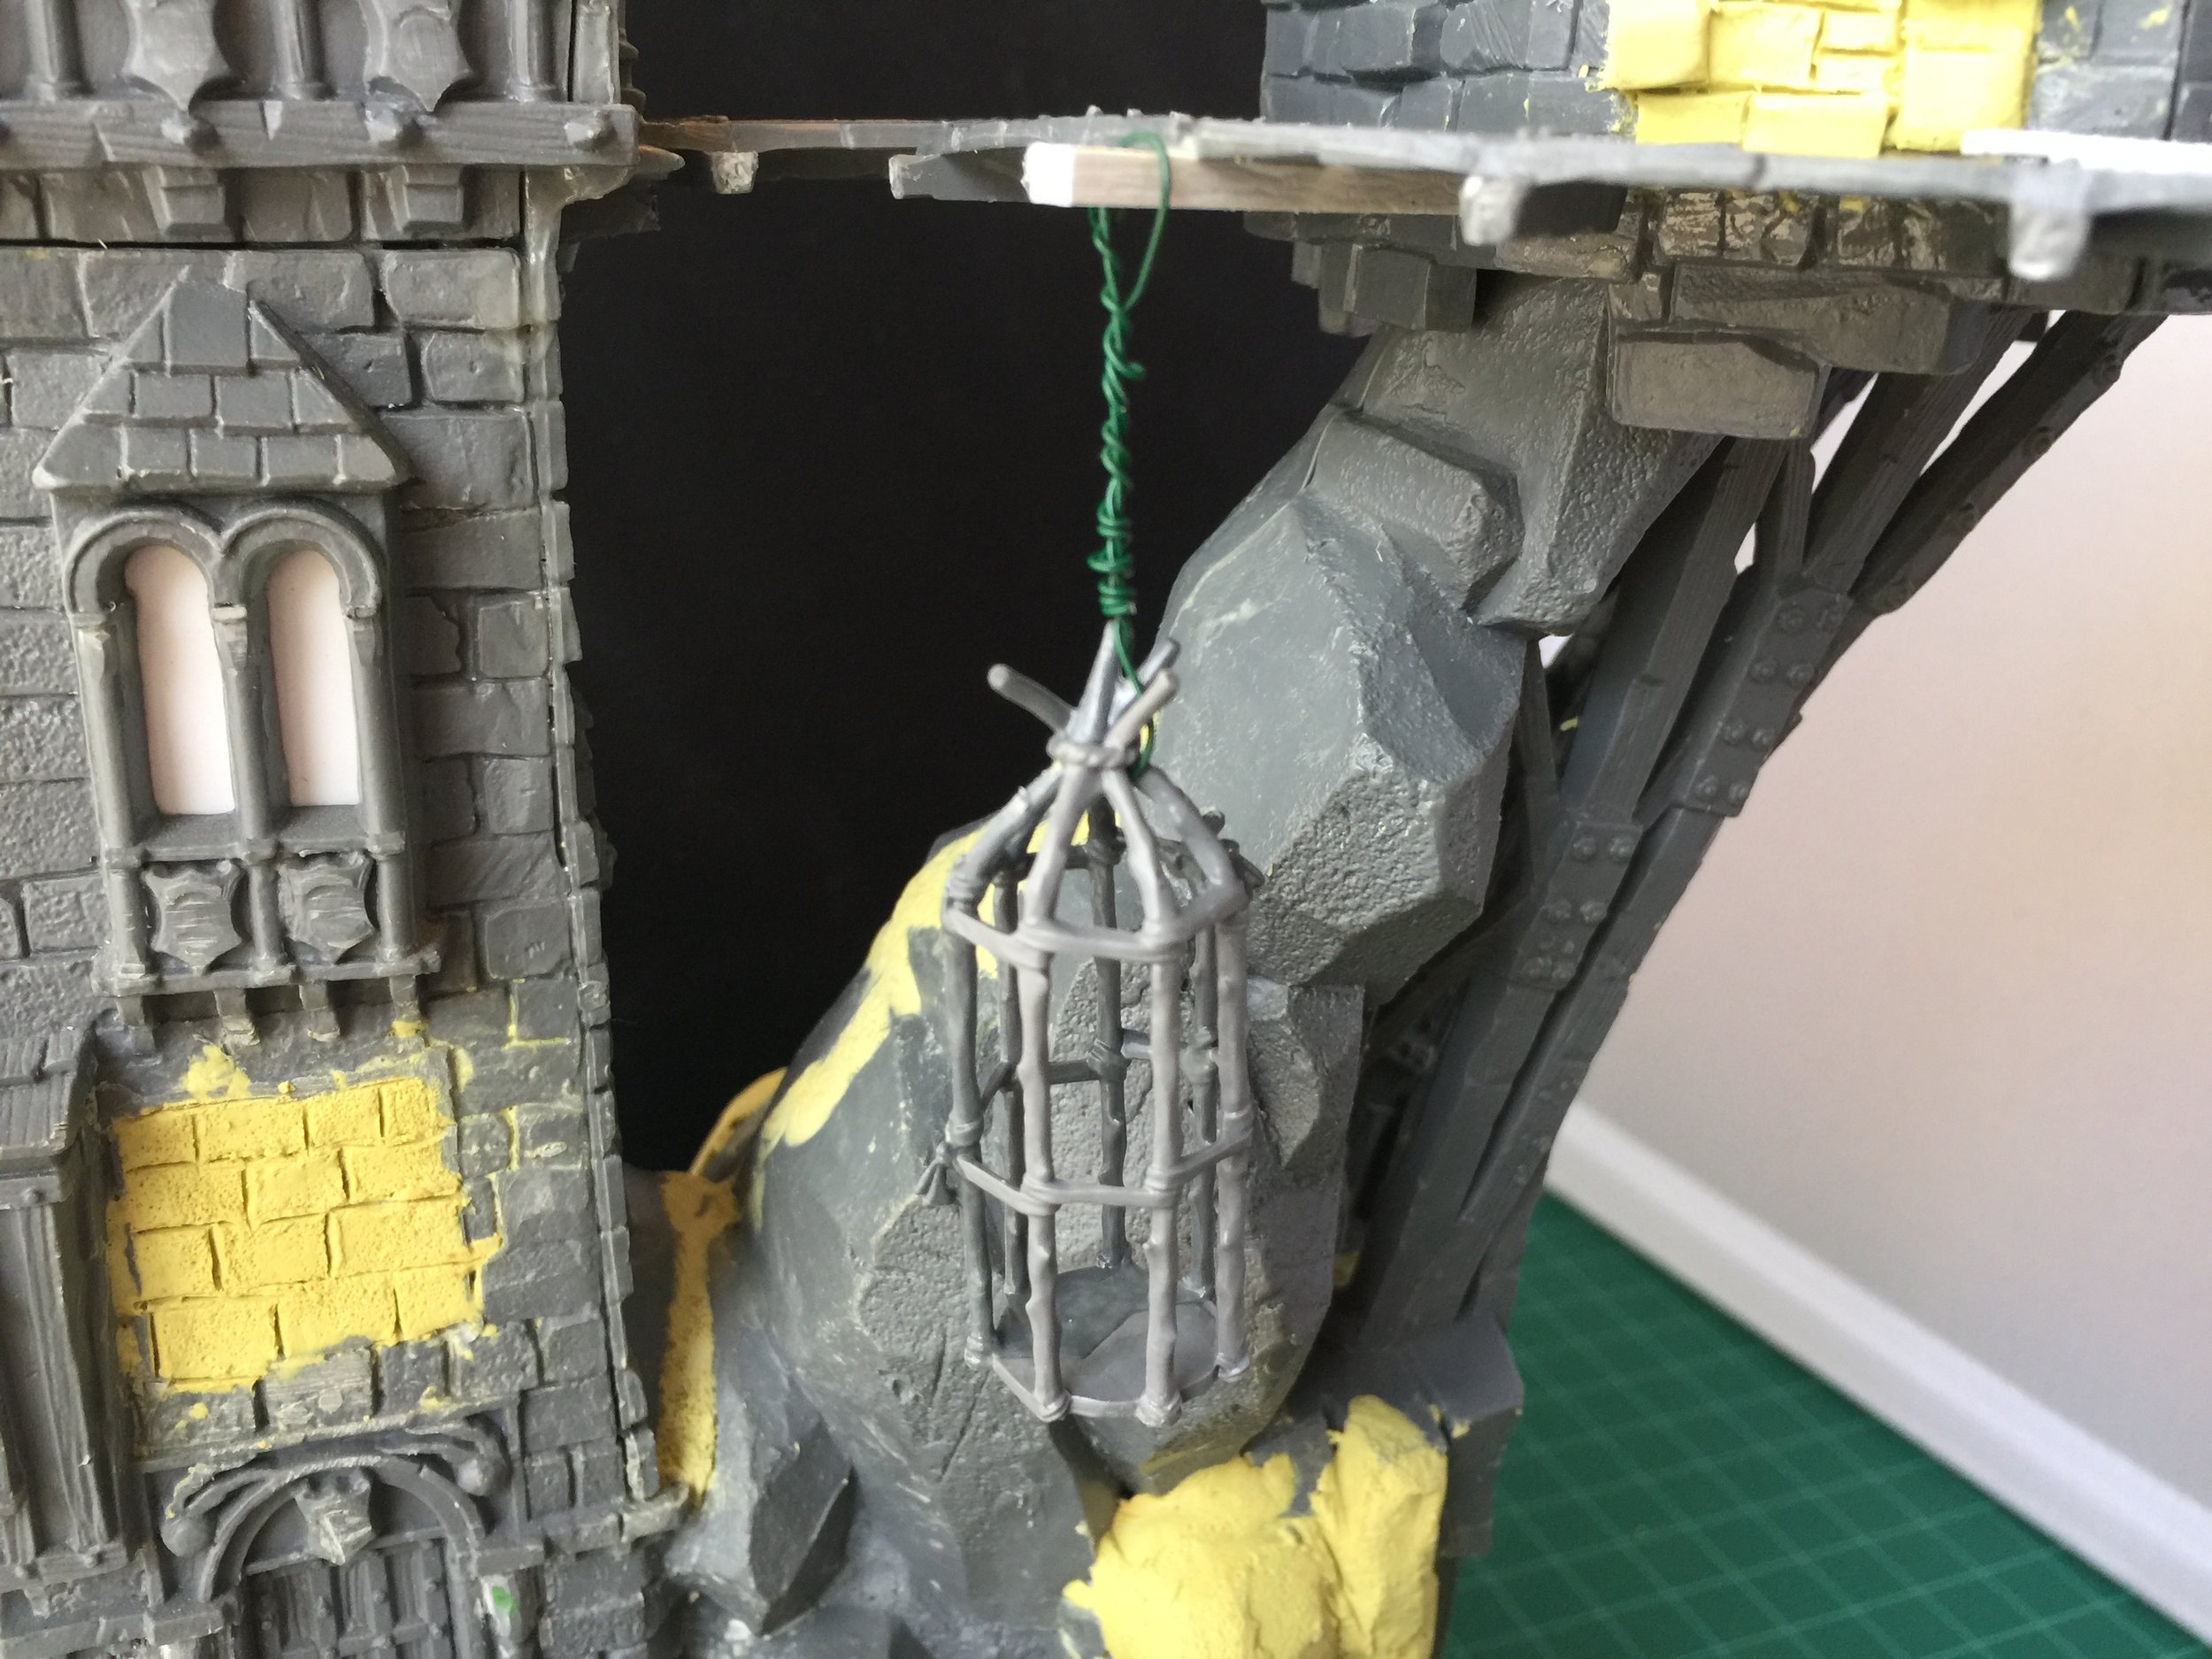
The last details I added to the refuge were some more Milliput to the base to give it a bit more shape. I also added a Milliput cell window with Plastruct bars and a plastic hand (originally belong to a Mantic/Kings of War zombie… he won’t miss it) reaching out from the cell. The final detail was a GW gibbet cage hanging from a beam by a rope of floral wire.
This is probably a good time to mention that the manse, arched bridge or ramp, wharf, and base are all separate pieces. I did this to allow both ease of painting and easier storage as well. It’s a big piece when all together: 13 inches tall, 12 inches wide (across the base), and 15 inches front to back (from the end of the bridge to the end of the wharf).
In painting the manse/pirate refuge, I kept the color scheme simple… greys, browns, tans, beige, black and steel. I added a little Vallejo yellow green to the tan and light grey to highlight the shingles and the rock/stone on the base. I’ve been thinking about this project for years, and I’m very happy with the way it turned out.
Yo Ho, Yo Ho! A pirate’s life for me.
We pillage, we plunder, we rifle, and we loot.
Drink up me ‘earties, Yo Ho!
We kidnap and ravage and don’t give a hoot.
Drink up me ‘earties, Yo Ho!
Yo Ho, Yo Ho! A pirate’s life for me.
April 14, 2019
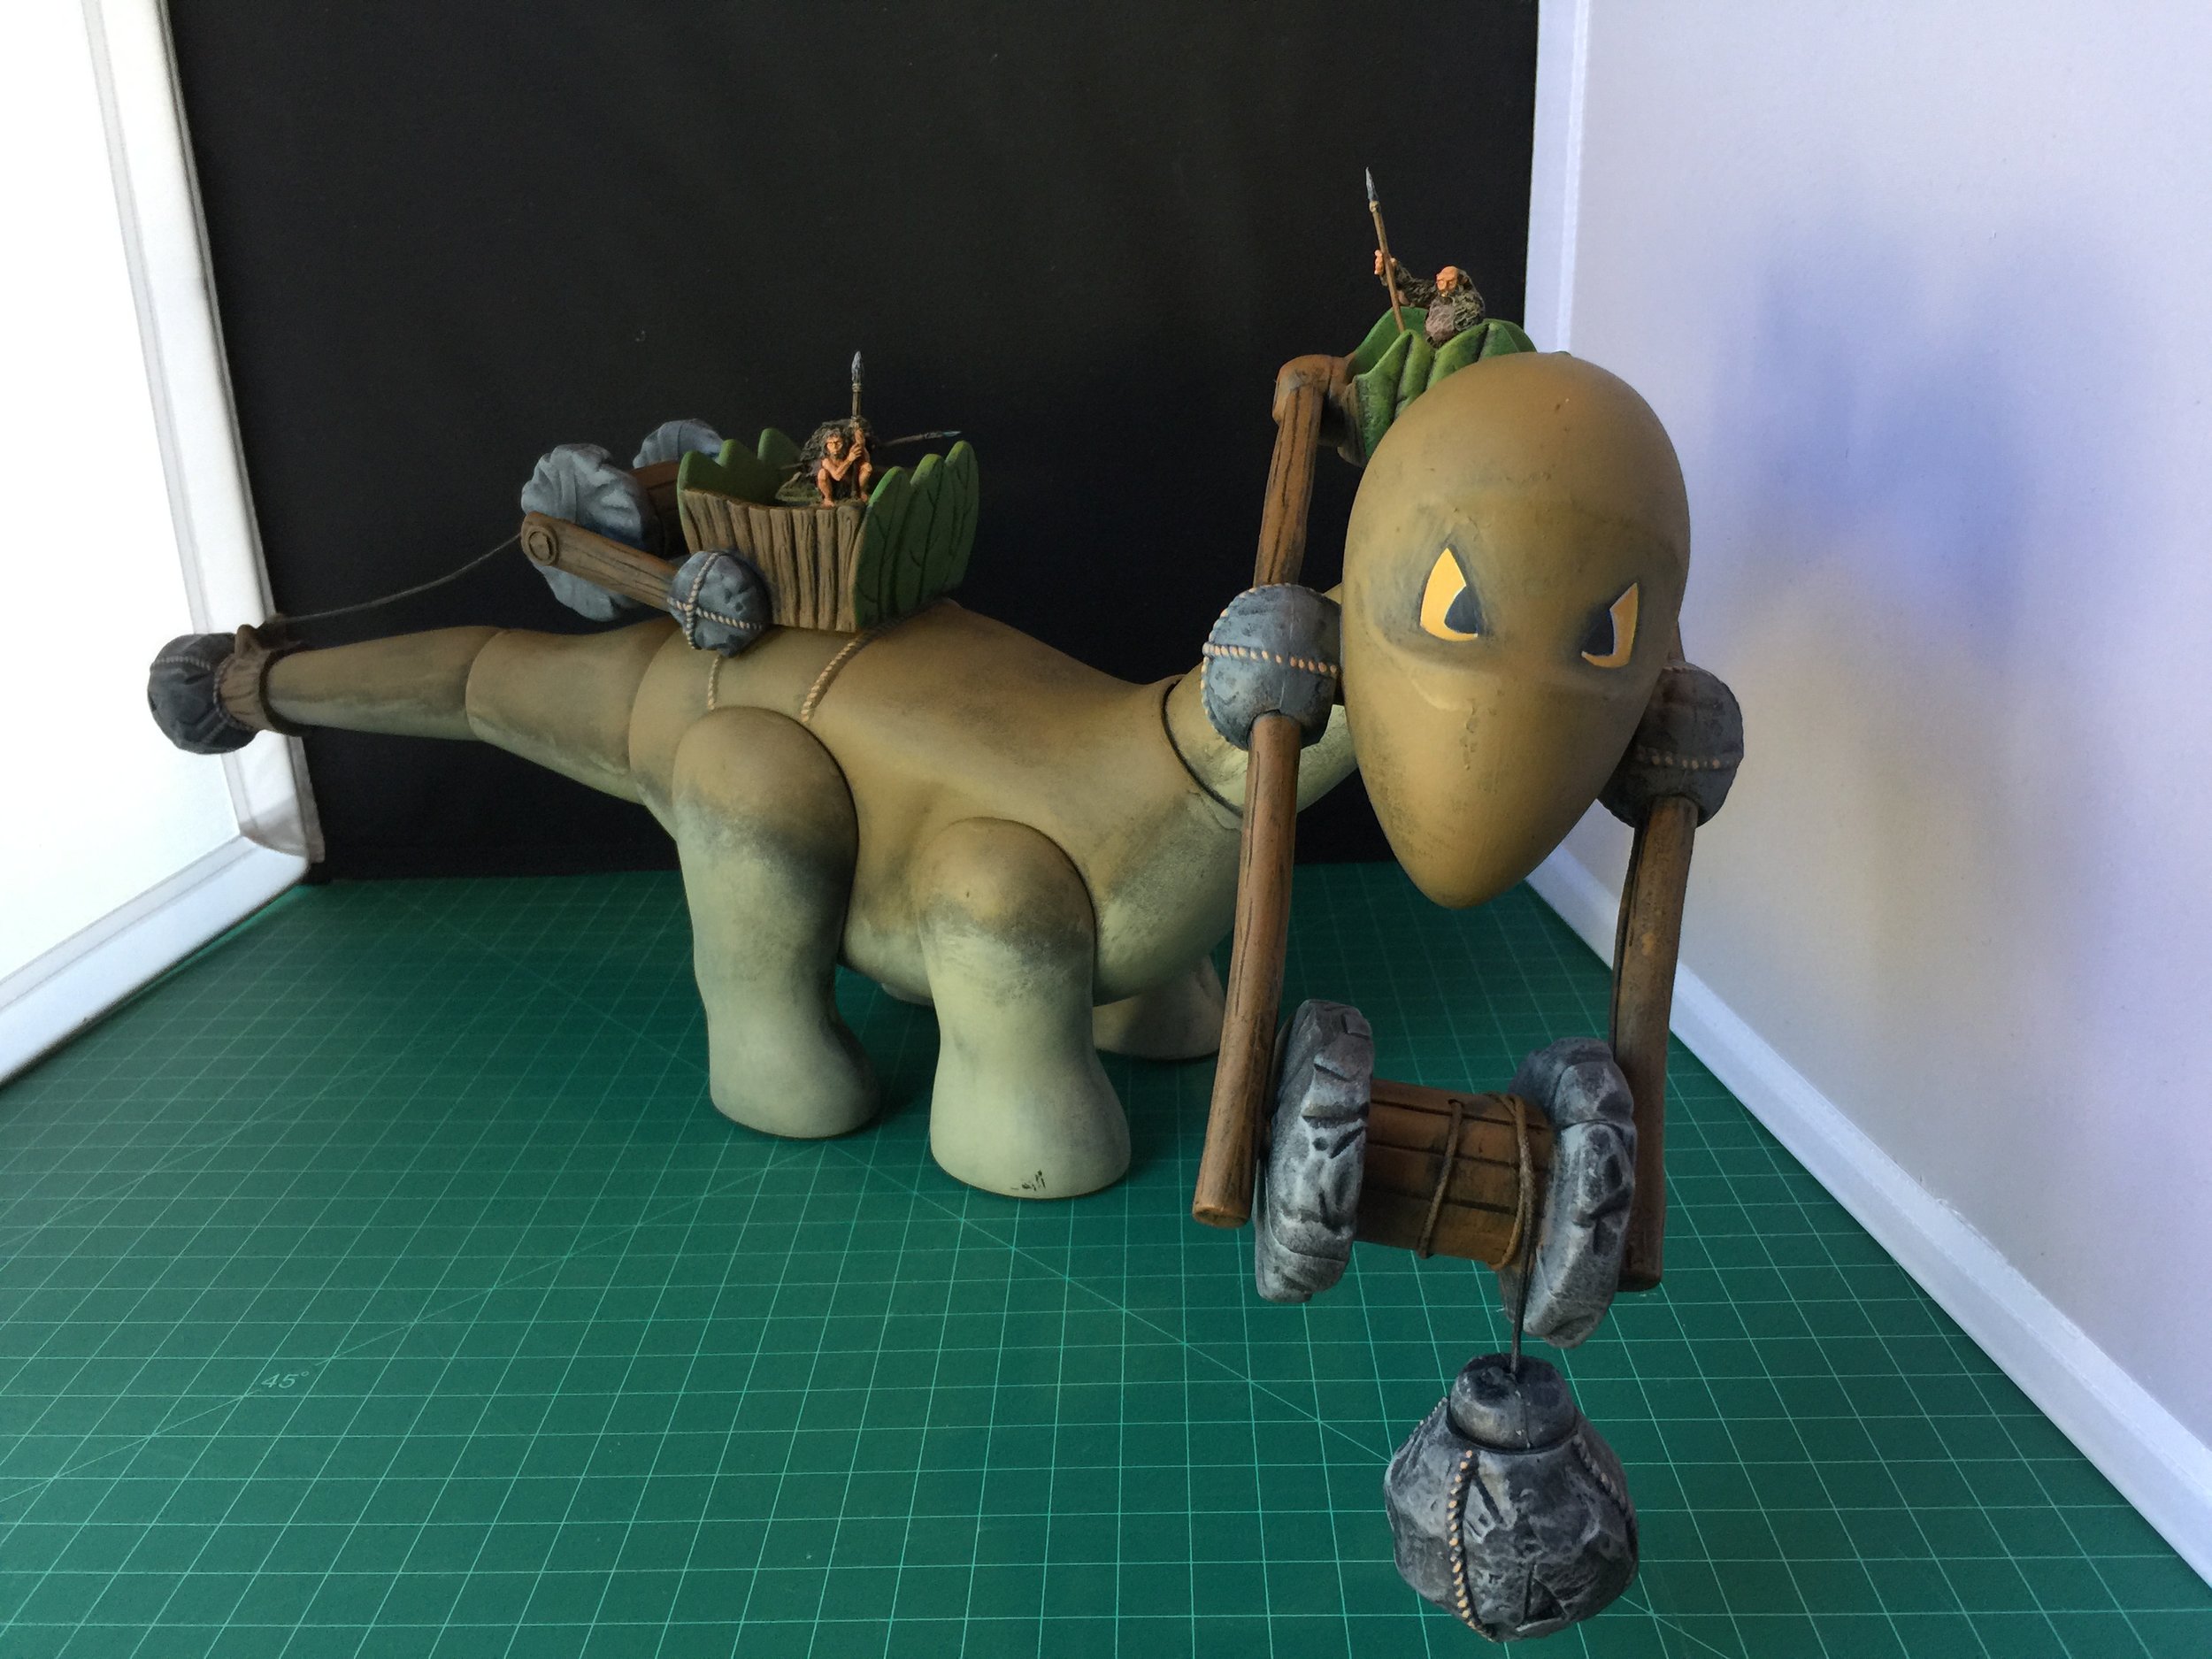
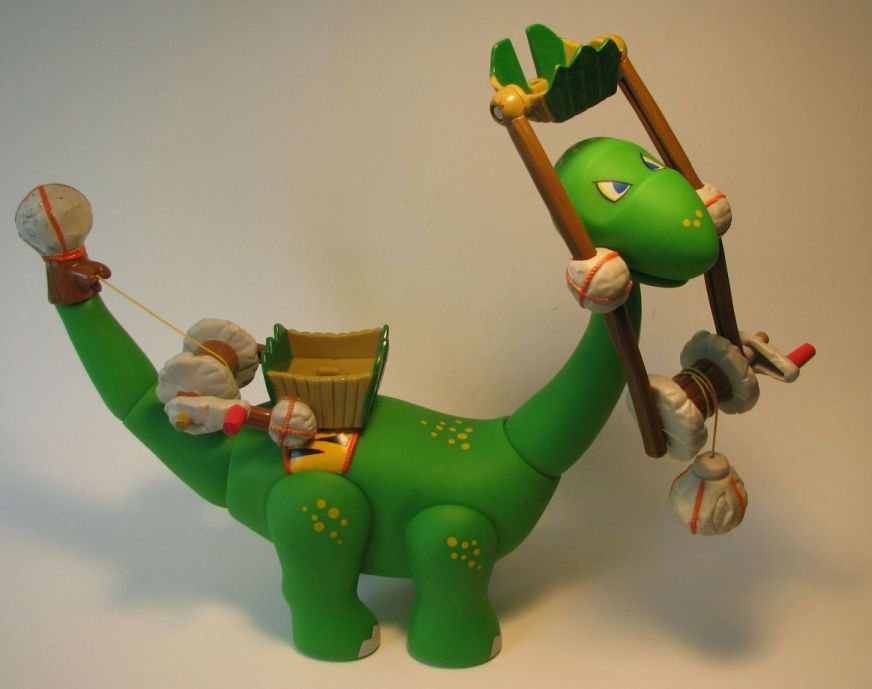
I began the workbench week repurposing and painting a Little Tikes’ dinosaur crane/wrecking ball or rock. It’s 19 inches long and 8 inches tall, and very awkward to paint. I picked it up several months ago at the swap meet for $3… just too funny to resist. I plan on using it as a tongue-in-check conclusion for my Dr. Who collection.
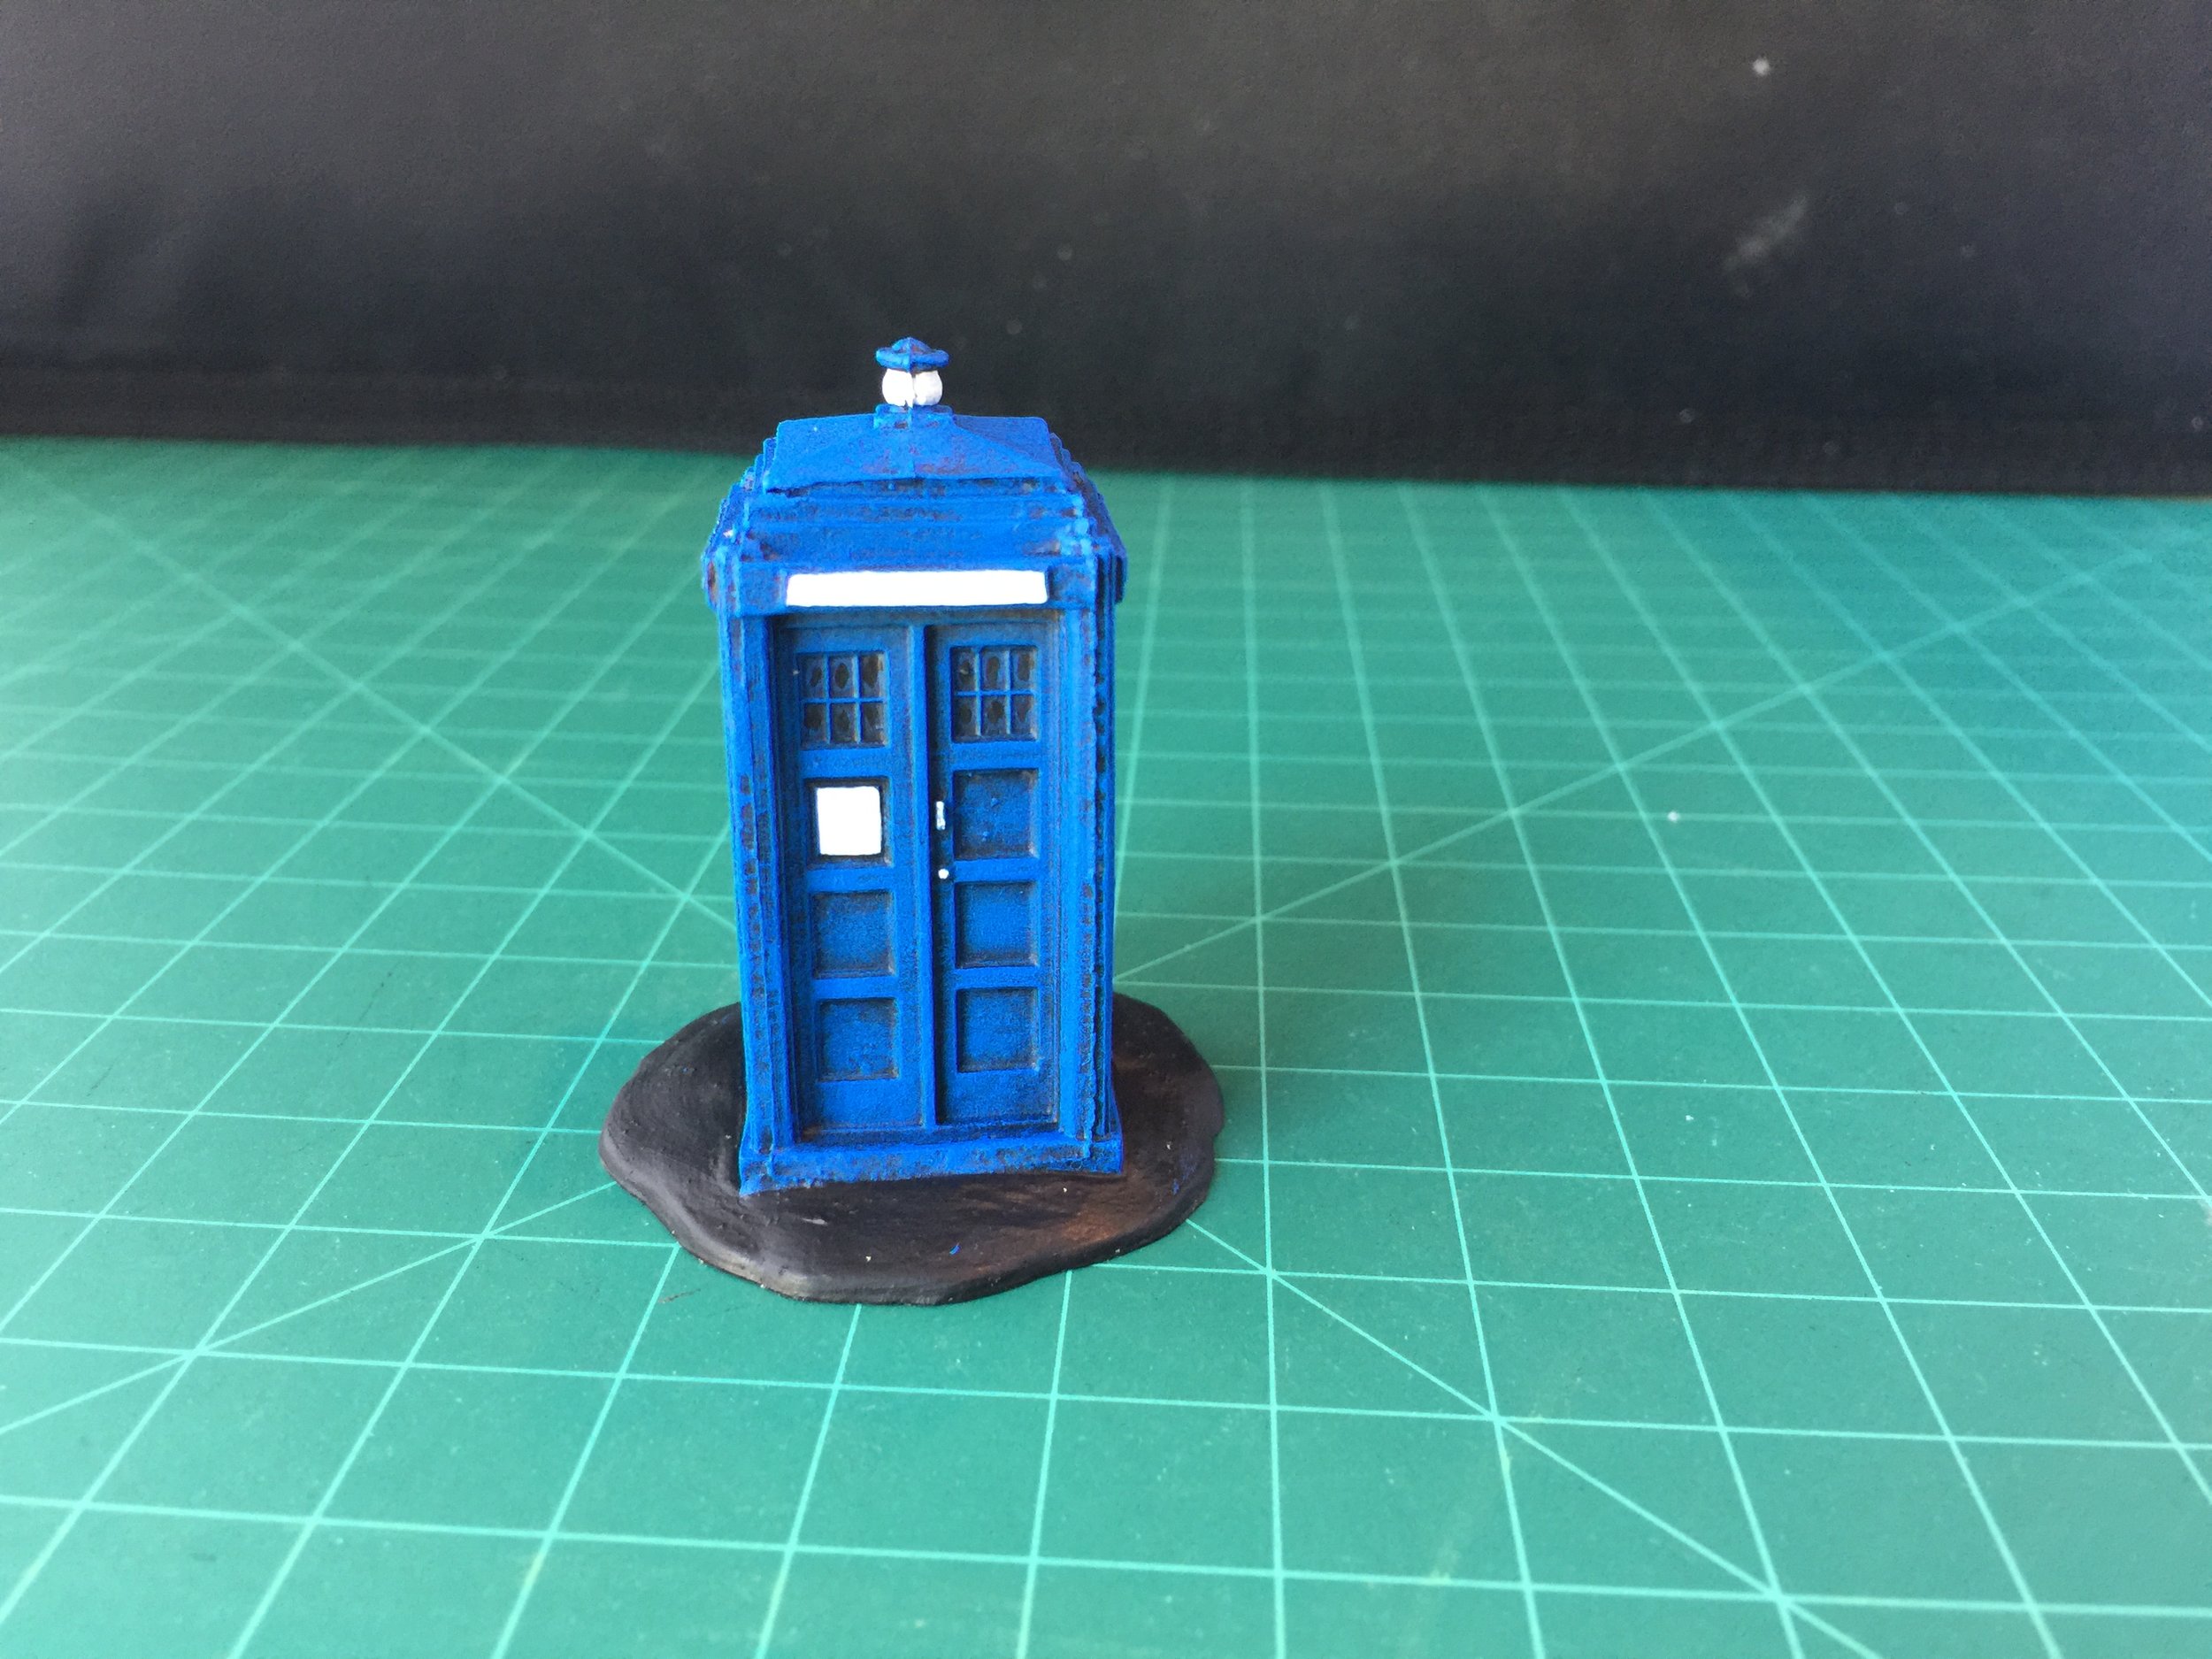
The final piece planned for use in the Dr. Who collection is the Tardis. The one I am using is by Reaper Bones. I am sure there are nicer versions, but it was easy to get at my local hobby shop (Brookhurst Hobbies), the price was reasonable ($4.29), and it painted up well. I have now finished painting two items that will need homemade decals: the Tardis and my Dino Tour tram. My daughter creates my decals for me, and I will get the information needed to make them to her soon.
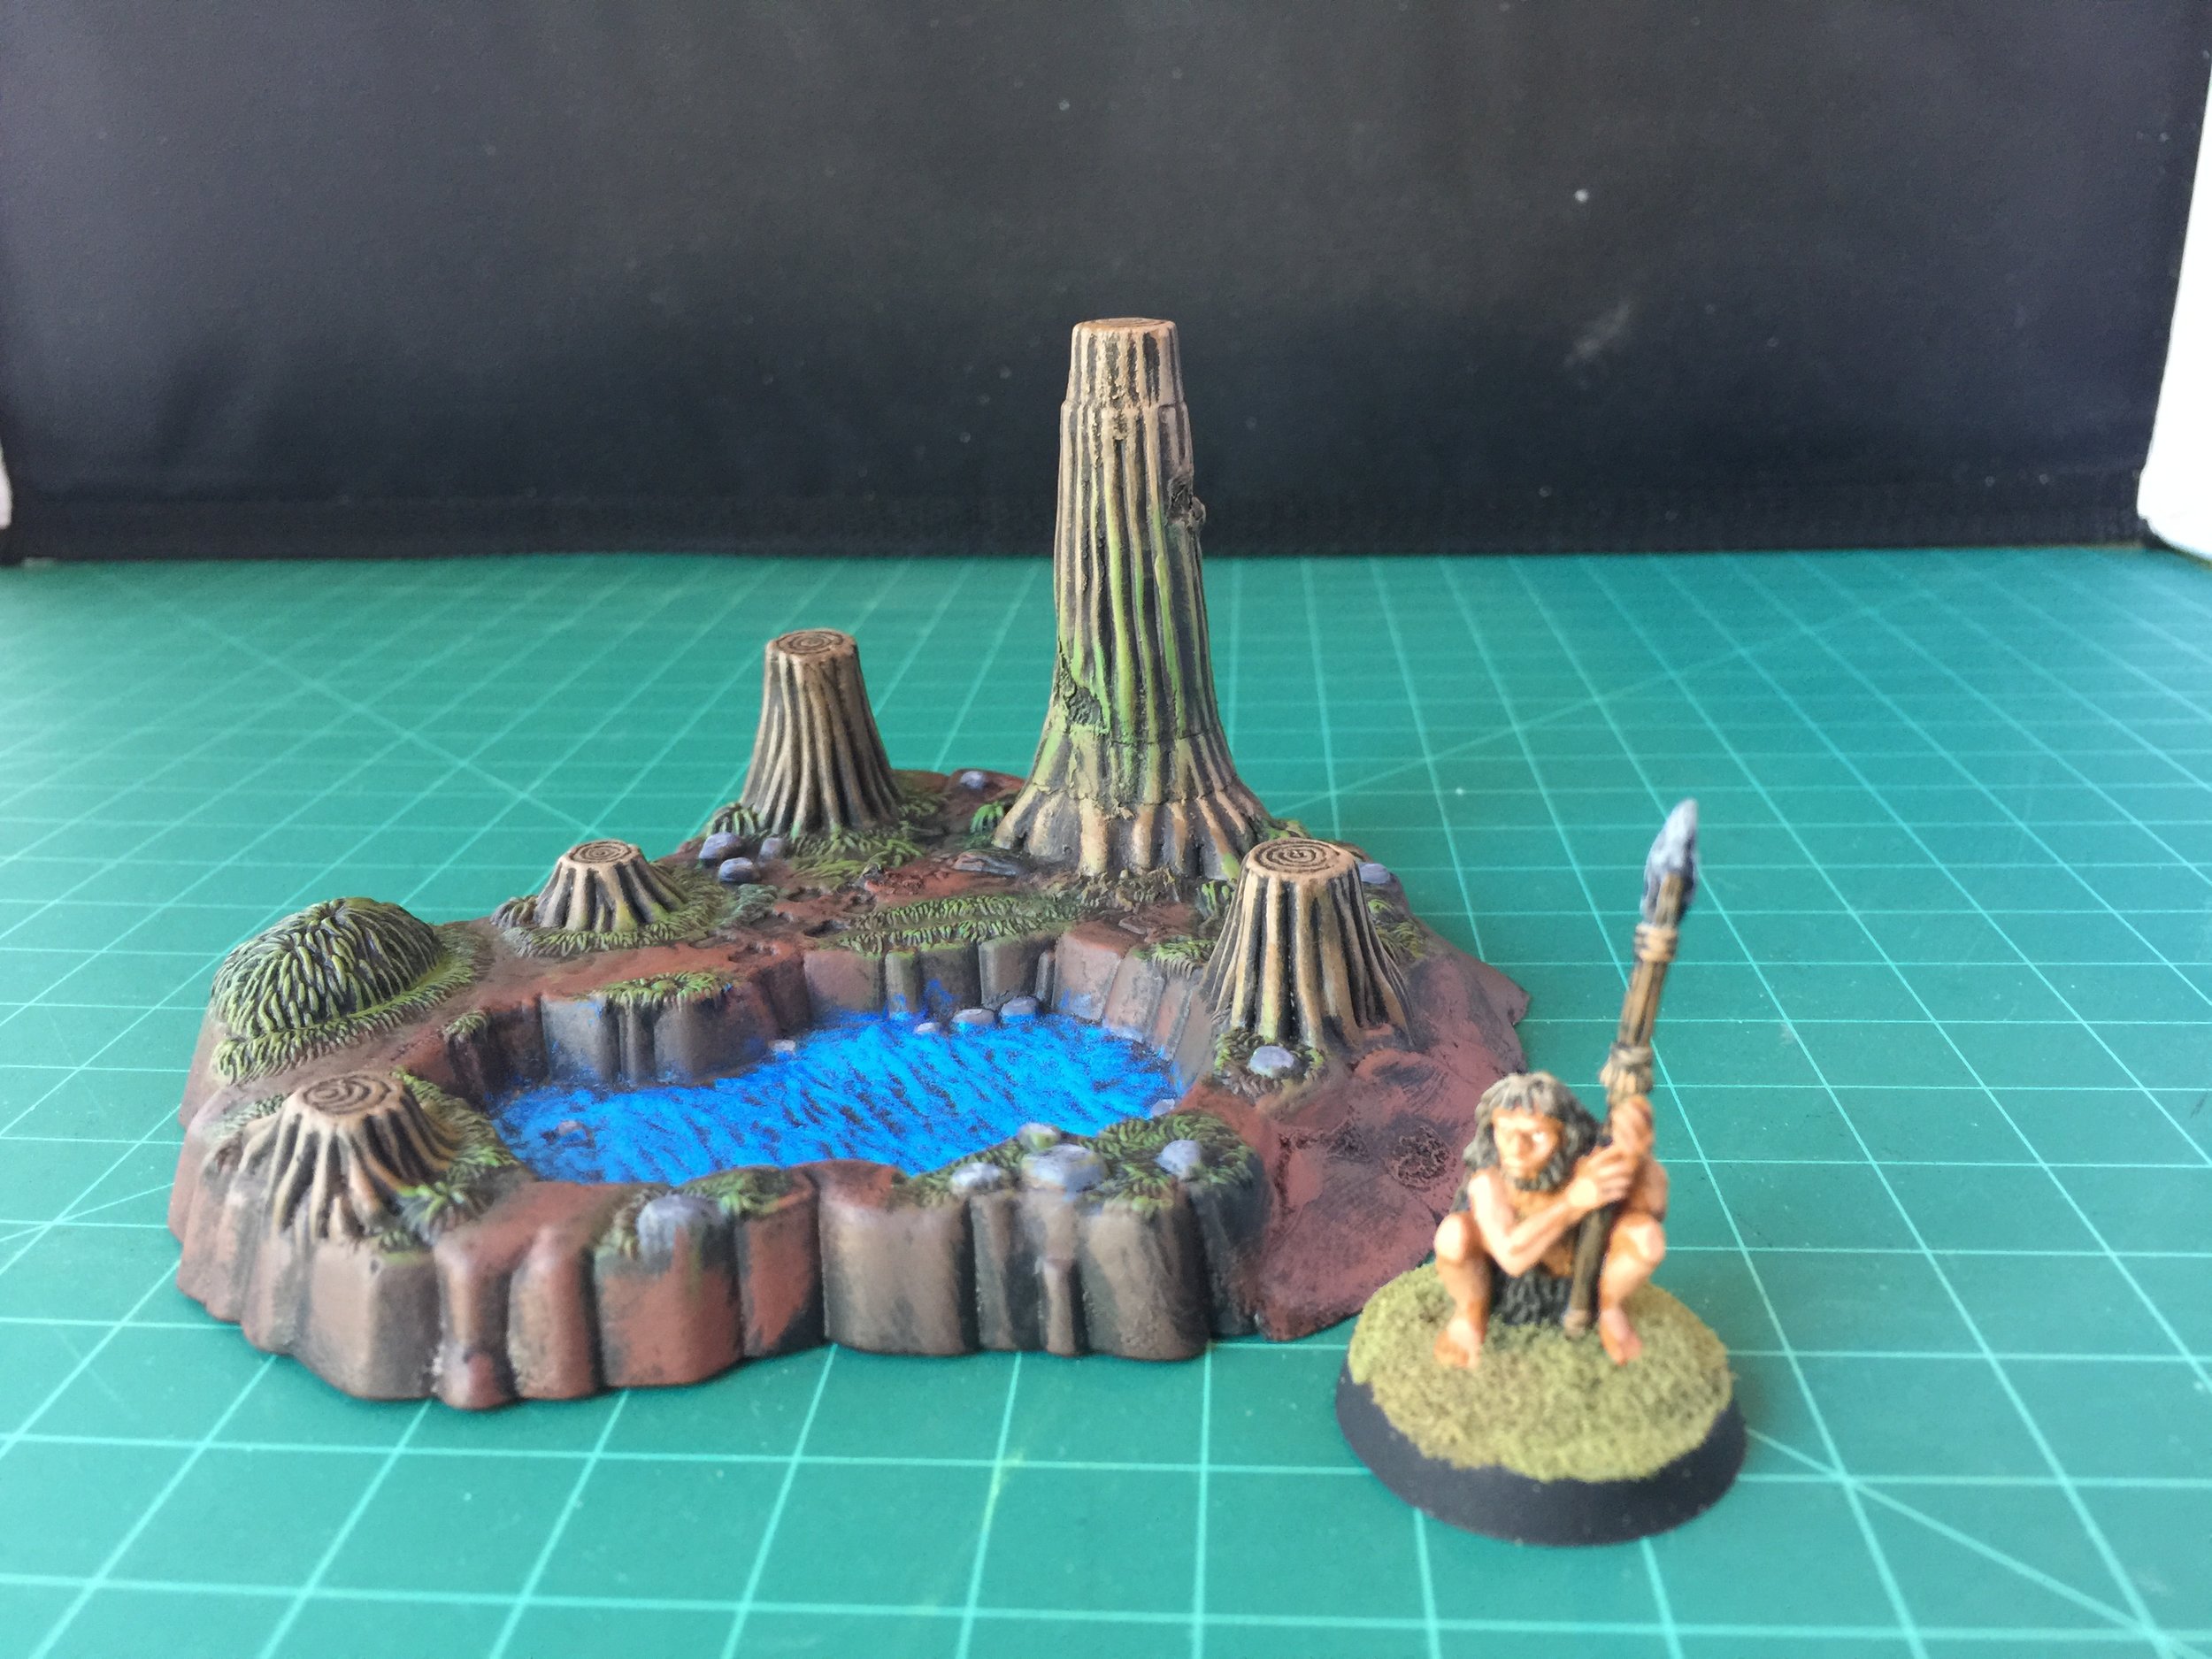
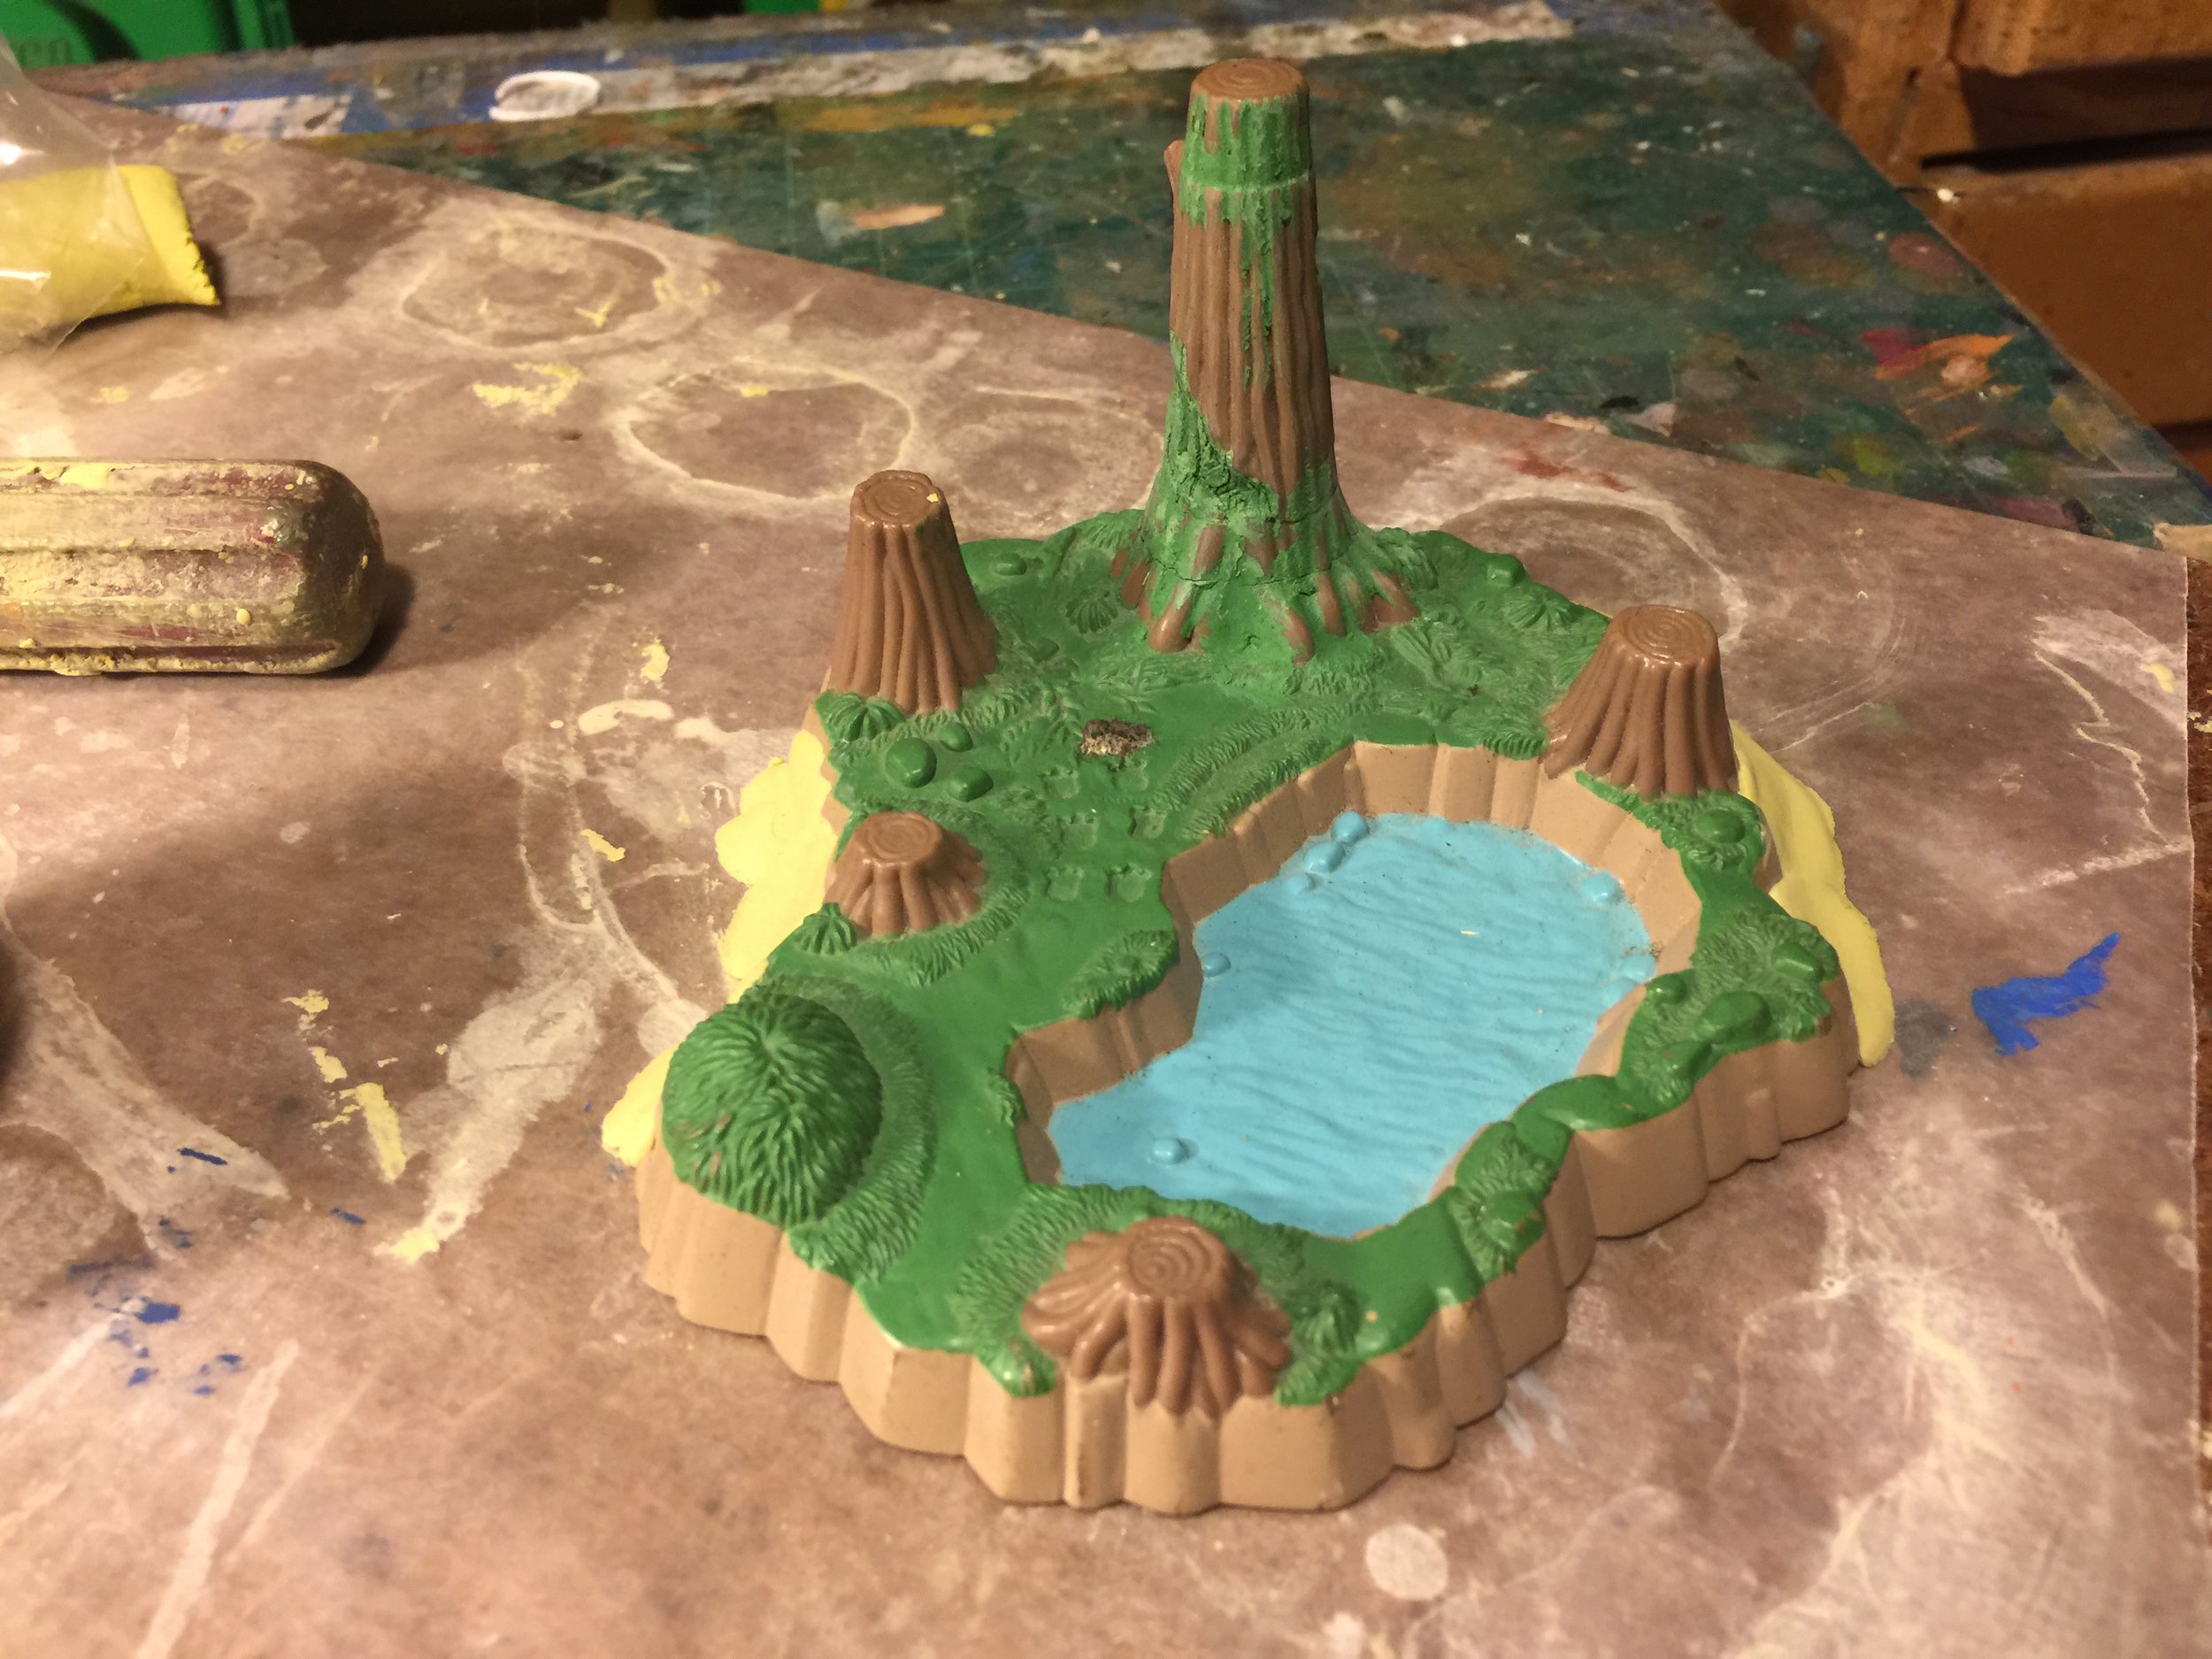
With the Tardis painted, I came upon another piece of small terrain that I decided to paint up for possible use with the Dr. Who collection. It’s a small pond that was originally part of a Star Wars’ playset… don’t know which one. I found it in a pile of broken toys at the swap meet several years ago. It required a little Milliput to hide a couple of open spaces on each side of the base, but other than that, all that was needed was a new paint job.
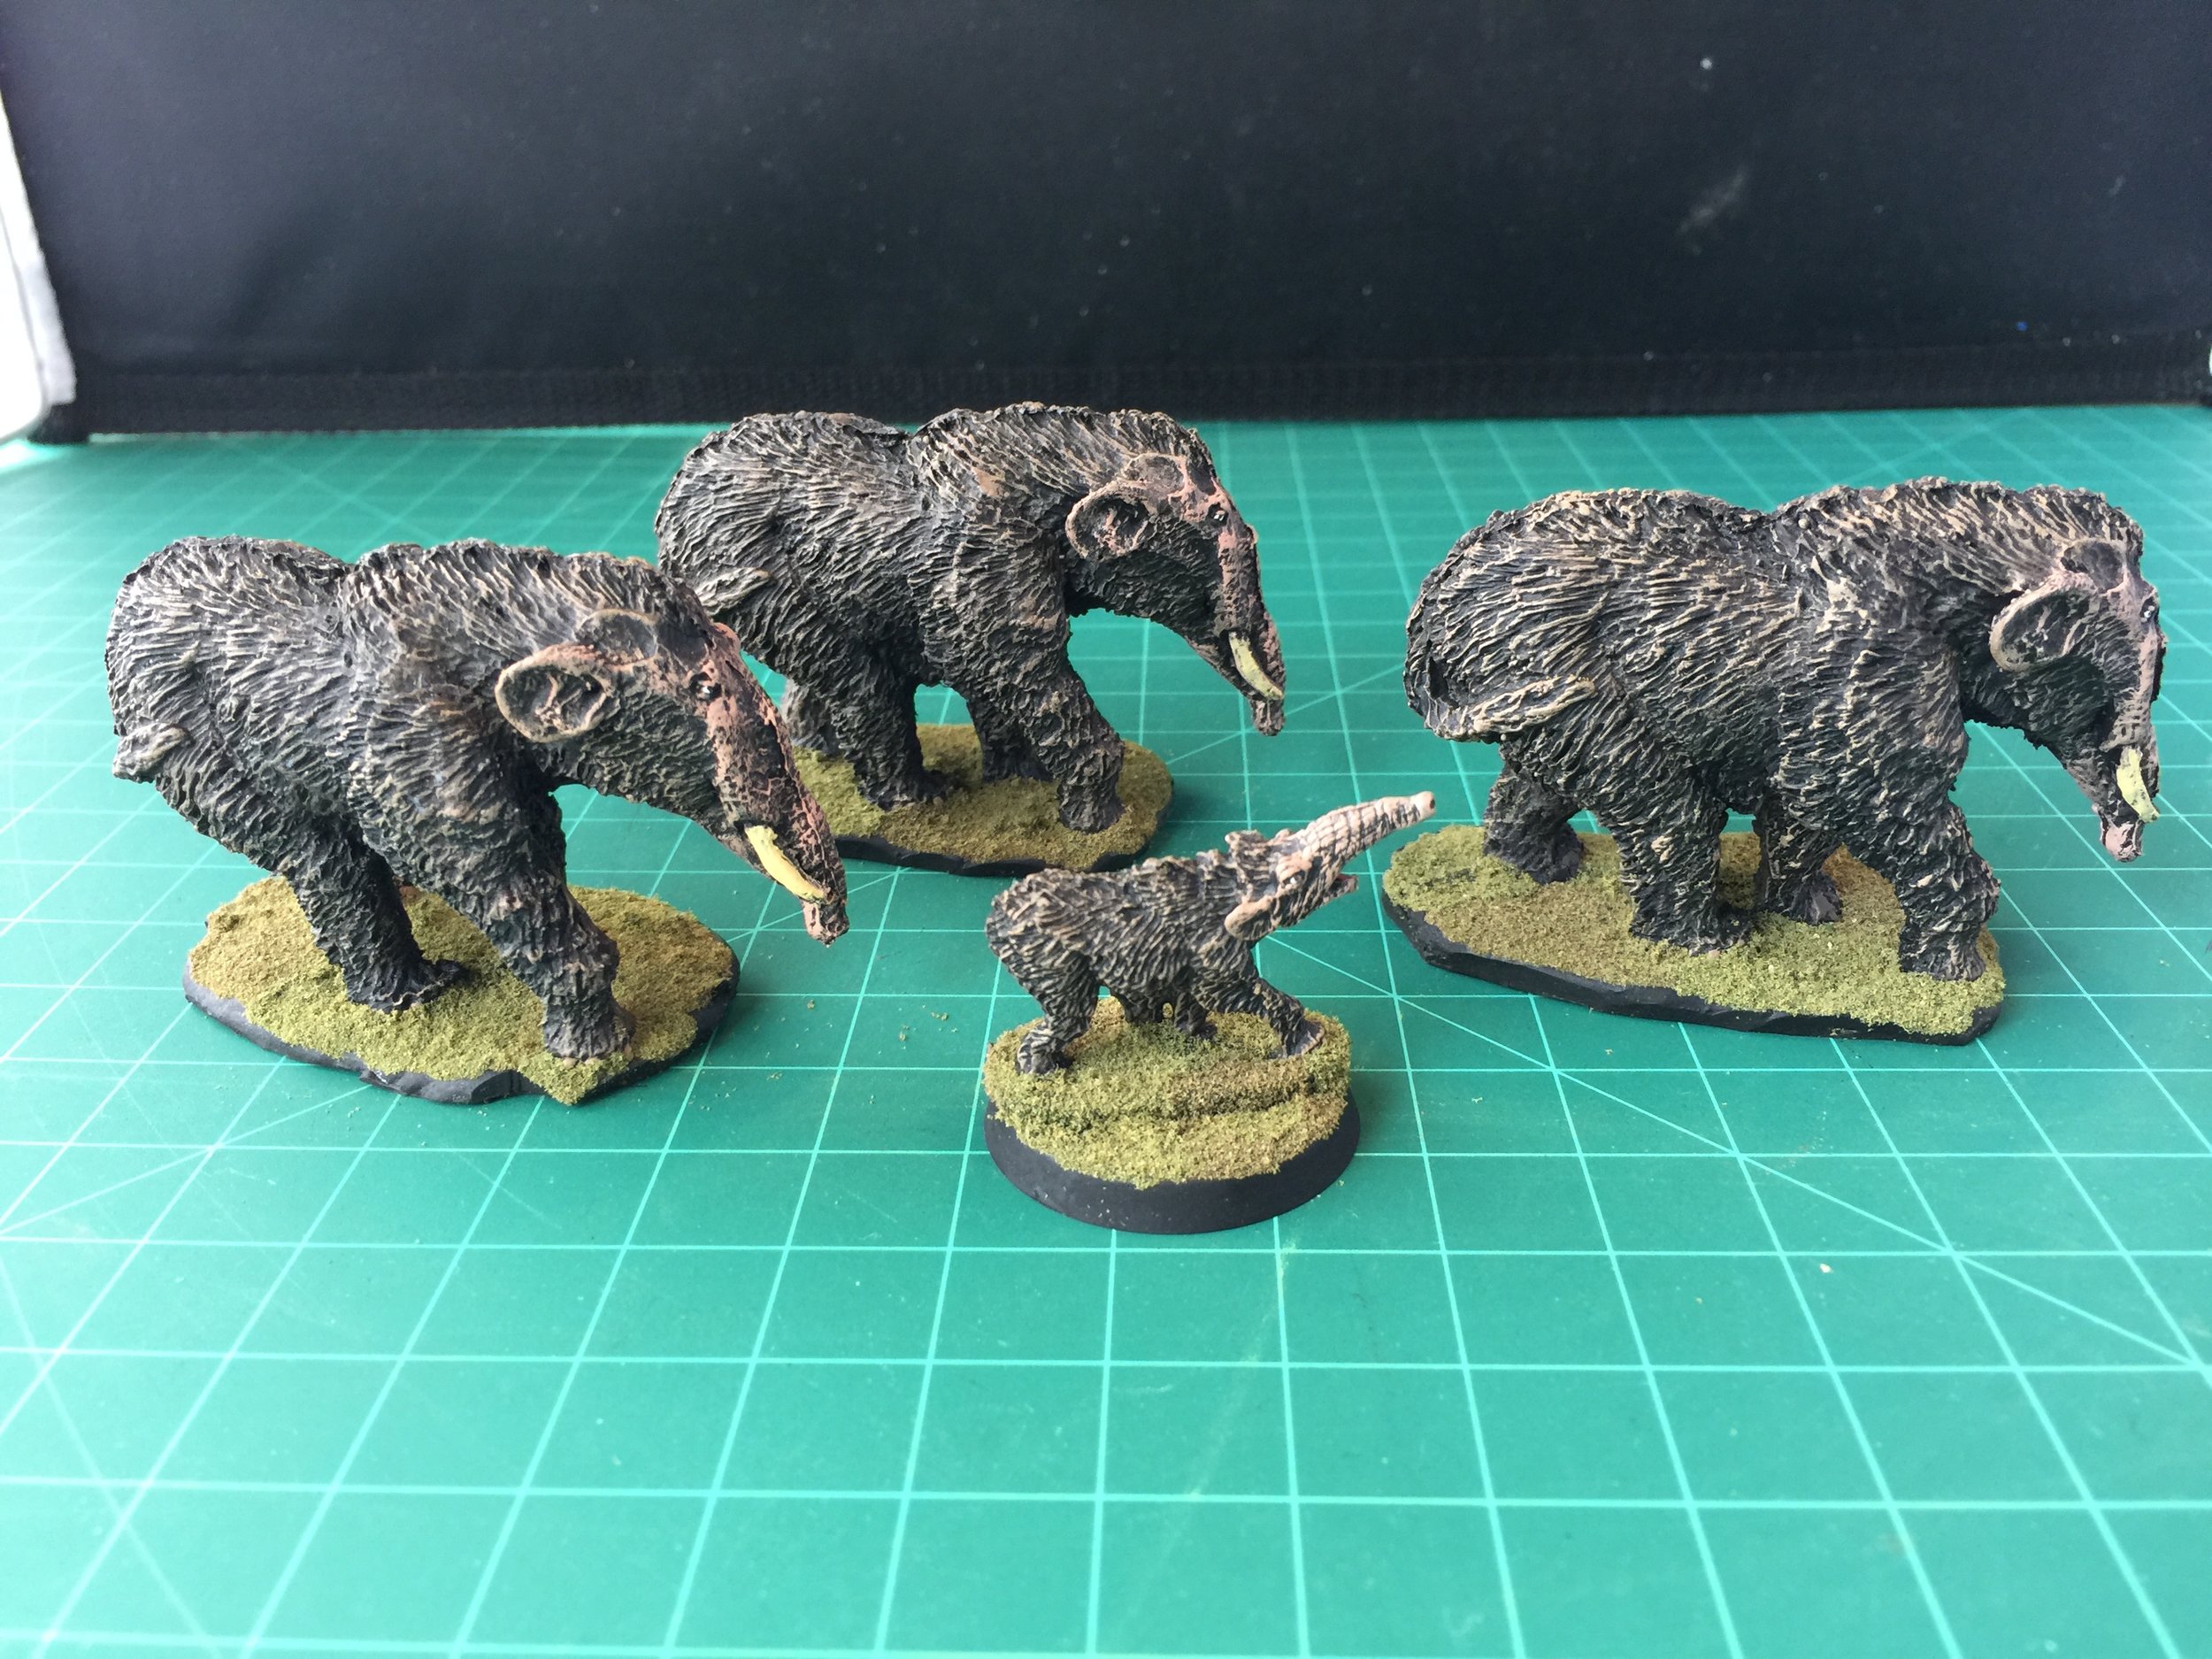
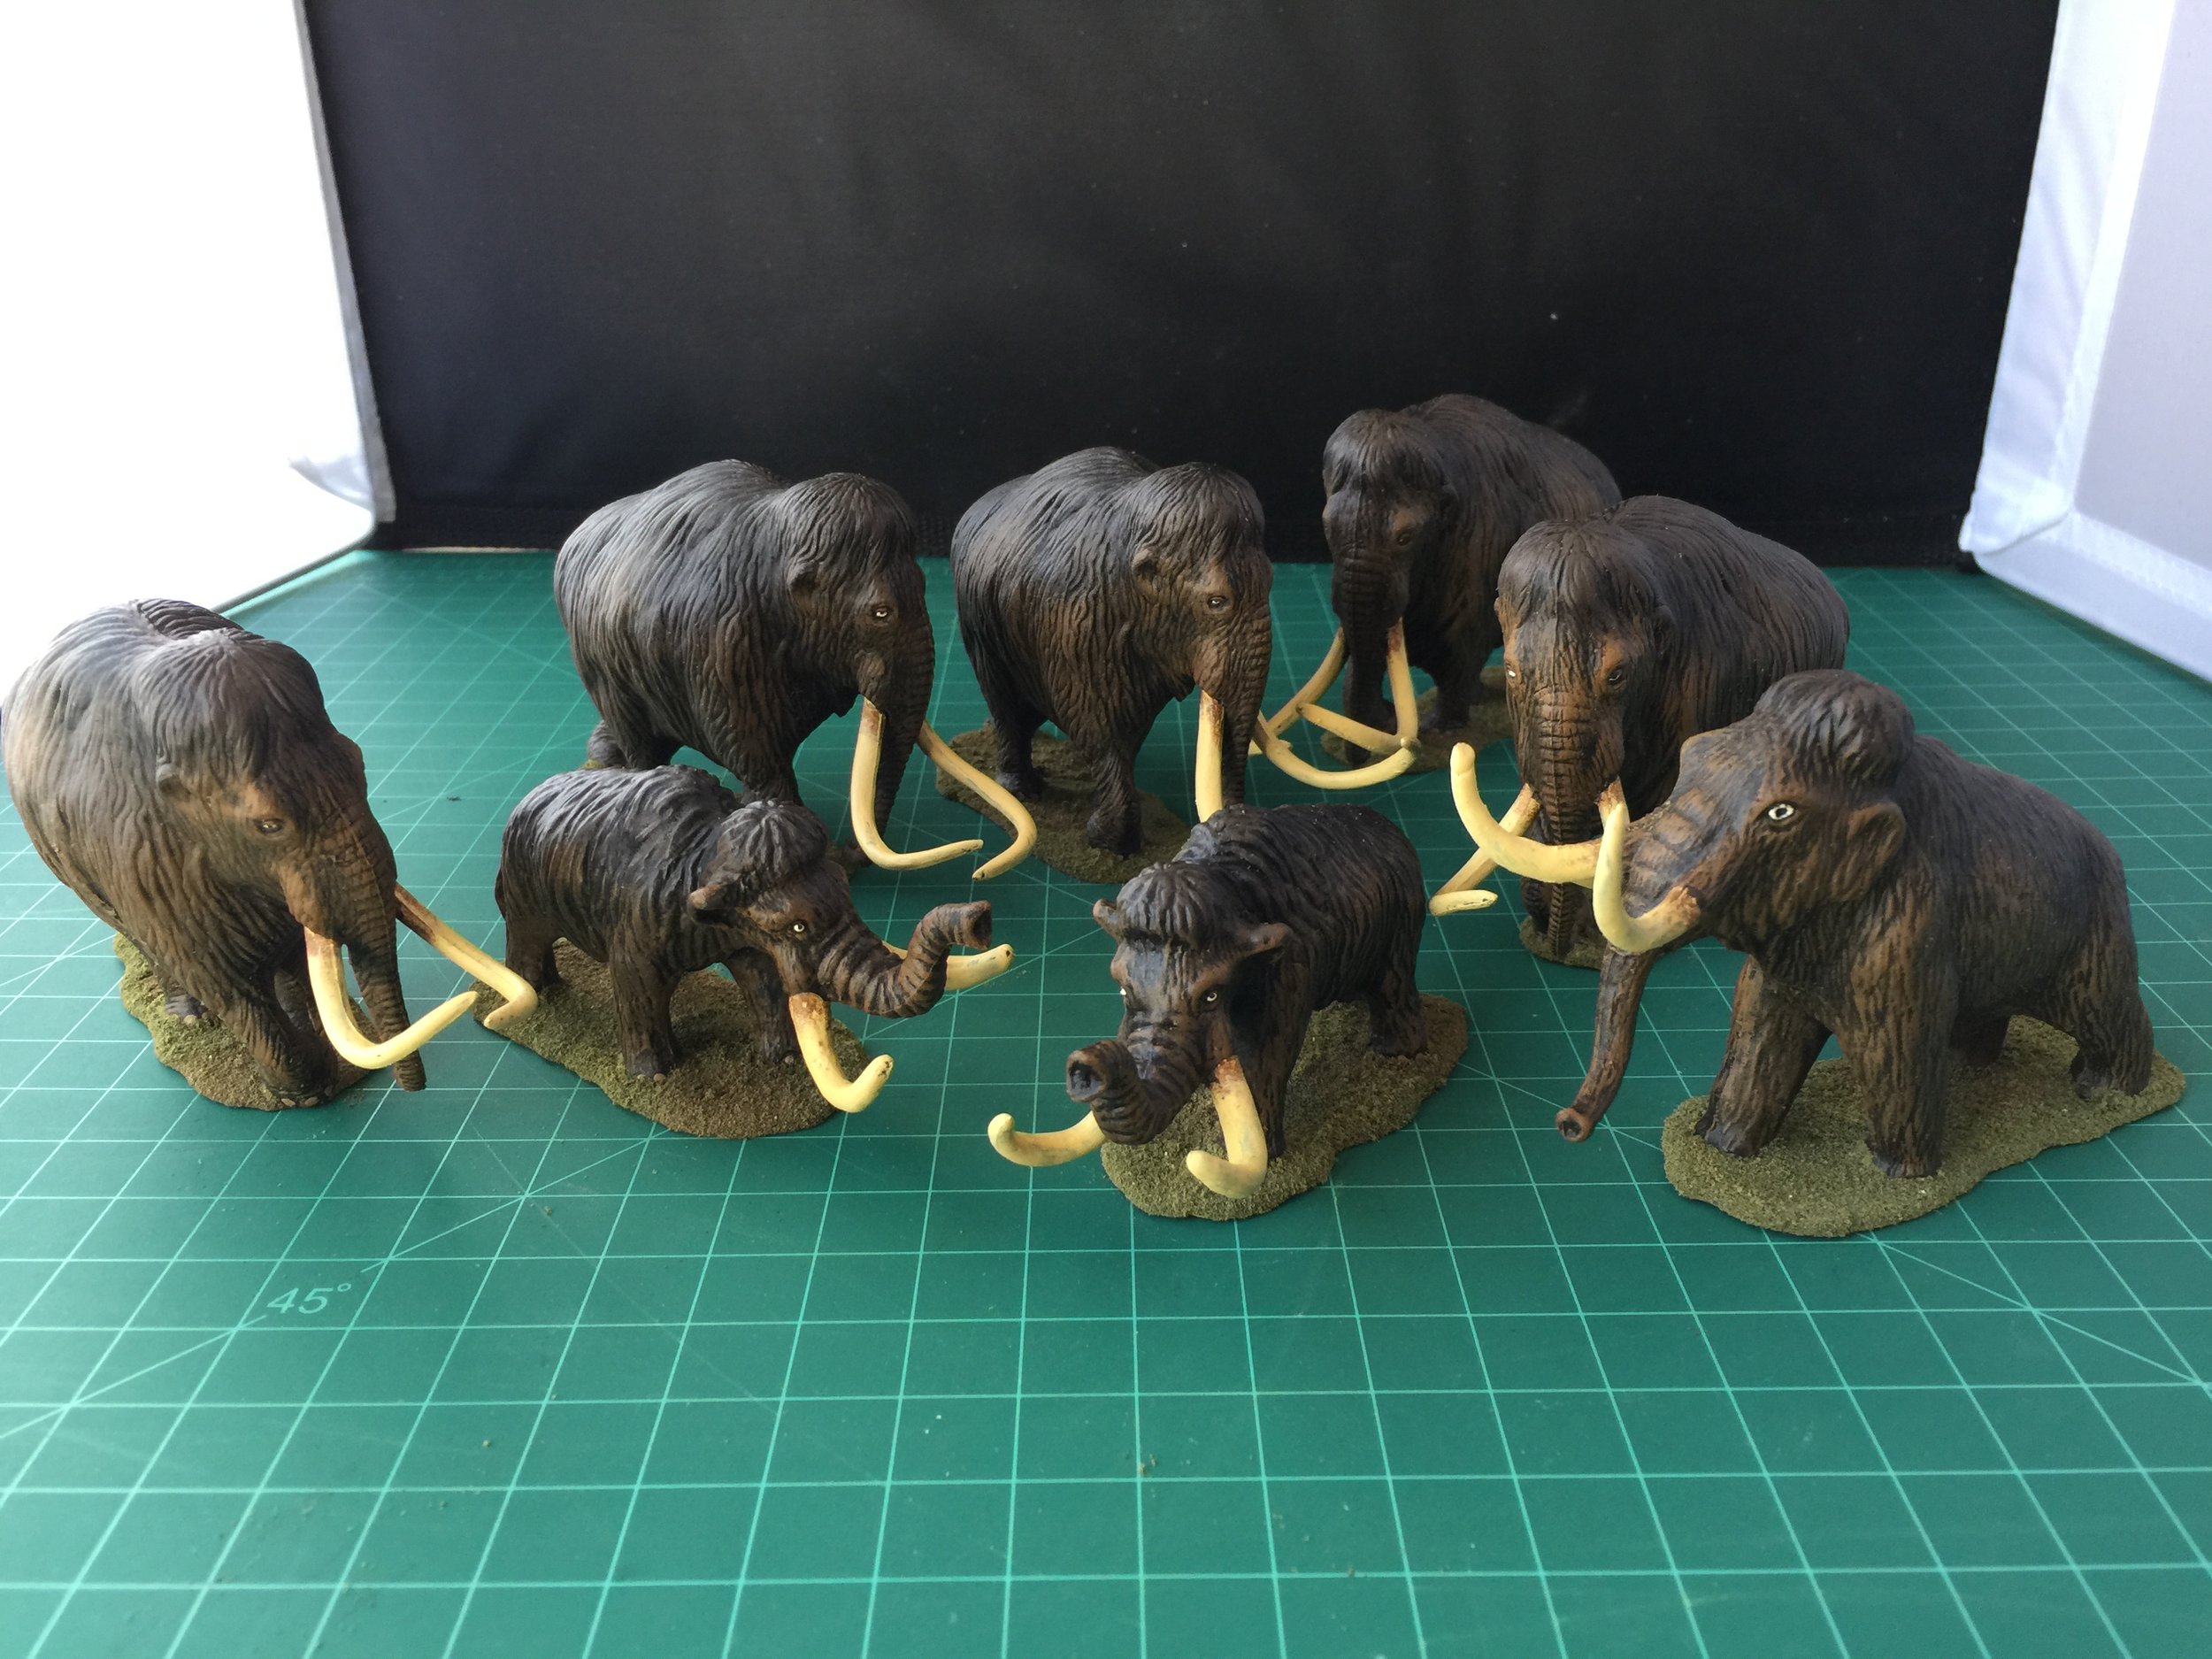
On Friday I finished the last of the figures associated (even distantly) with my Dr. Who collection. Over the last decade or so I have picked up eight wooly mammoths at the swap meet for between 50 cents and a dollar each. Because they don’t really work with the crazy feel of this collection I probably won’t actually make use of them, but since I have them and most of them are pretty nice I decided it would be foolish not to paint them.
With the Dr. Who collection complete except for the decals, my workbench time on Saturday was spent cleaning it up to get ready for the next project. I may have said this at some point in past months, but I should explain that because I tend to work fast, my workbench is not a neat and tidy place… it’s a mess. So at the end of a project I need to clean things up before I start something new.
April 7, 2019
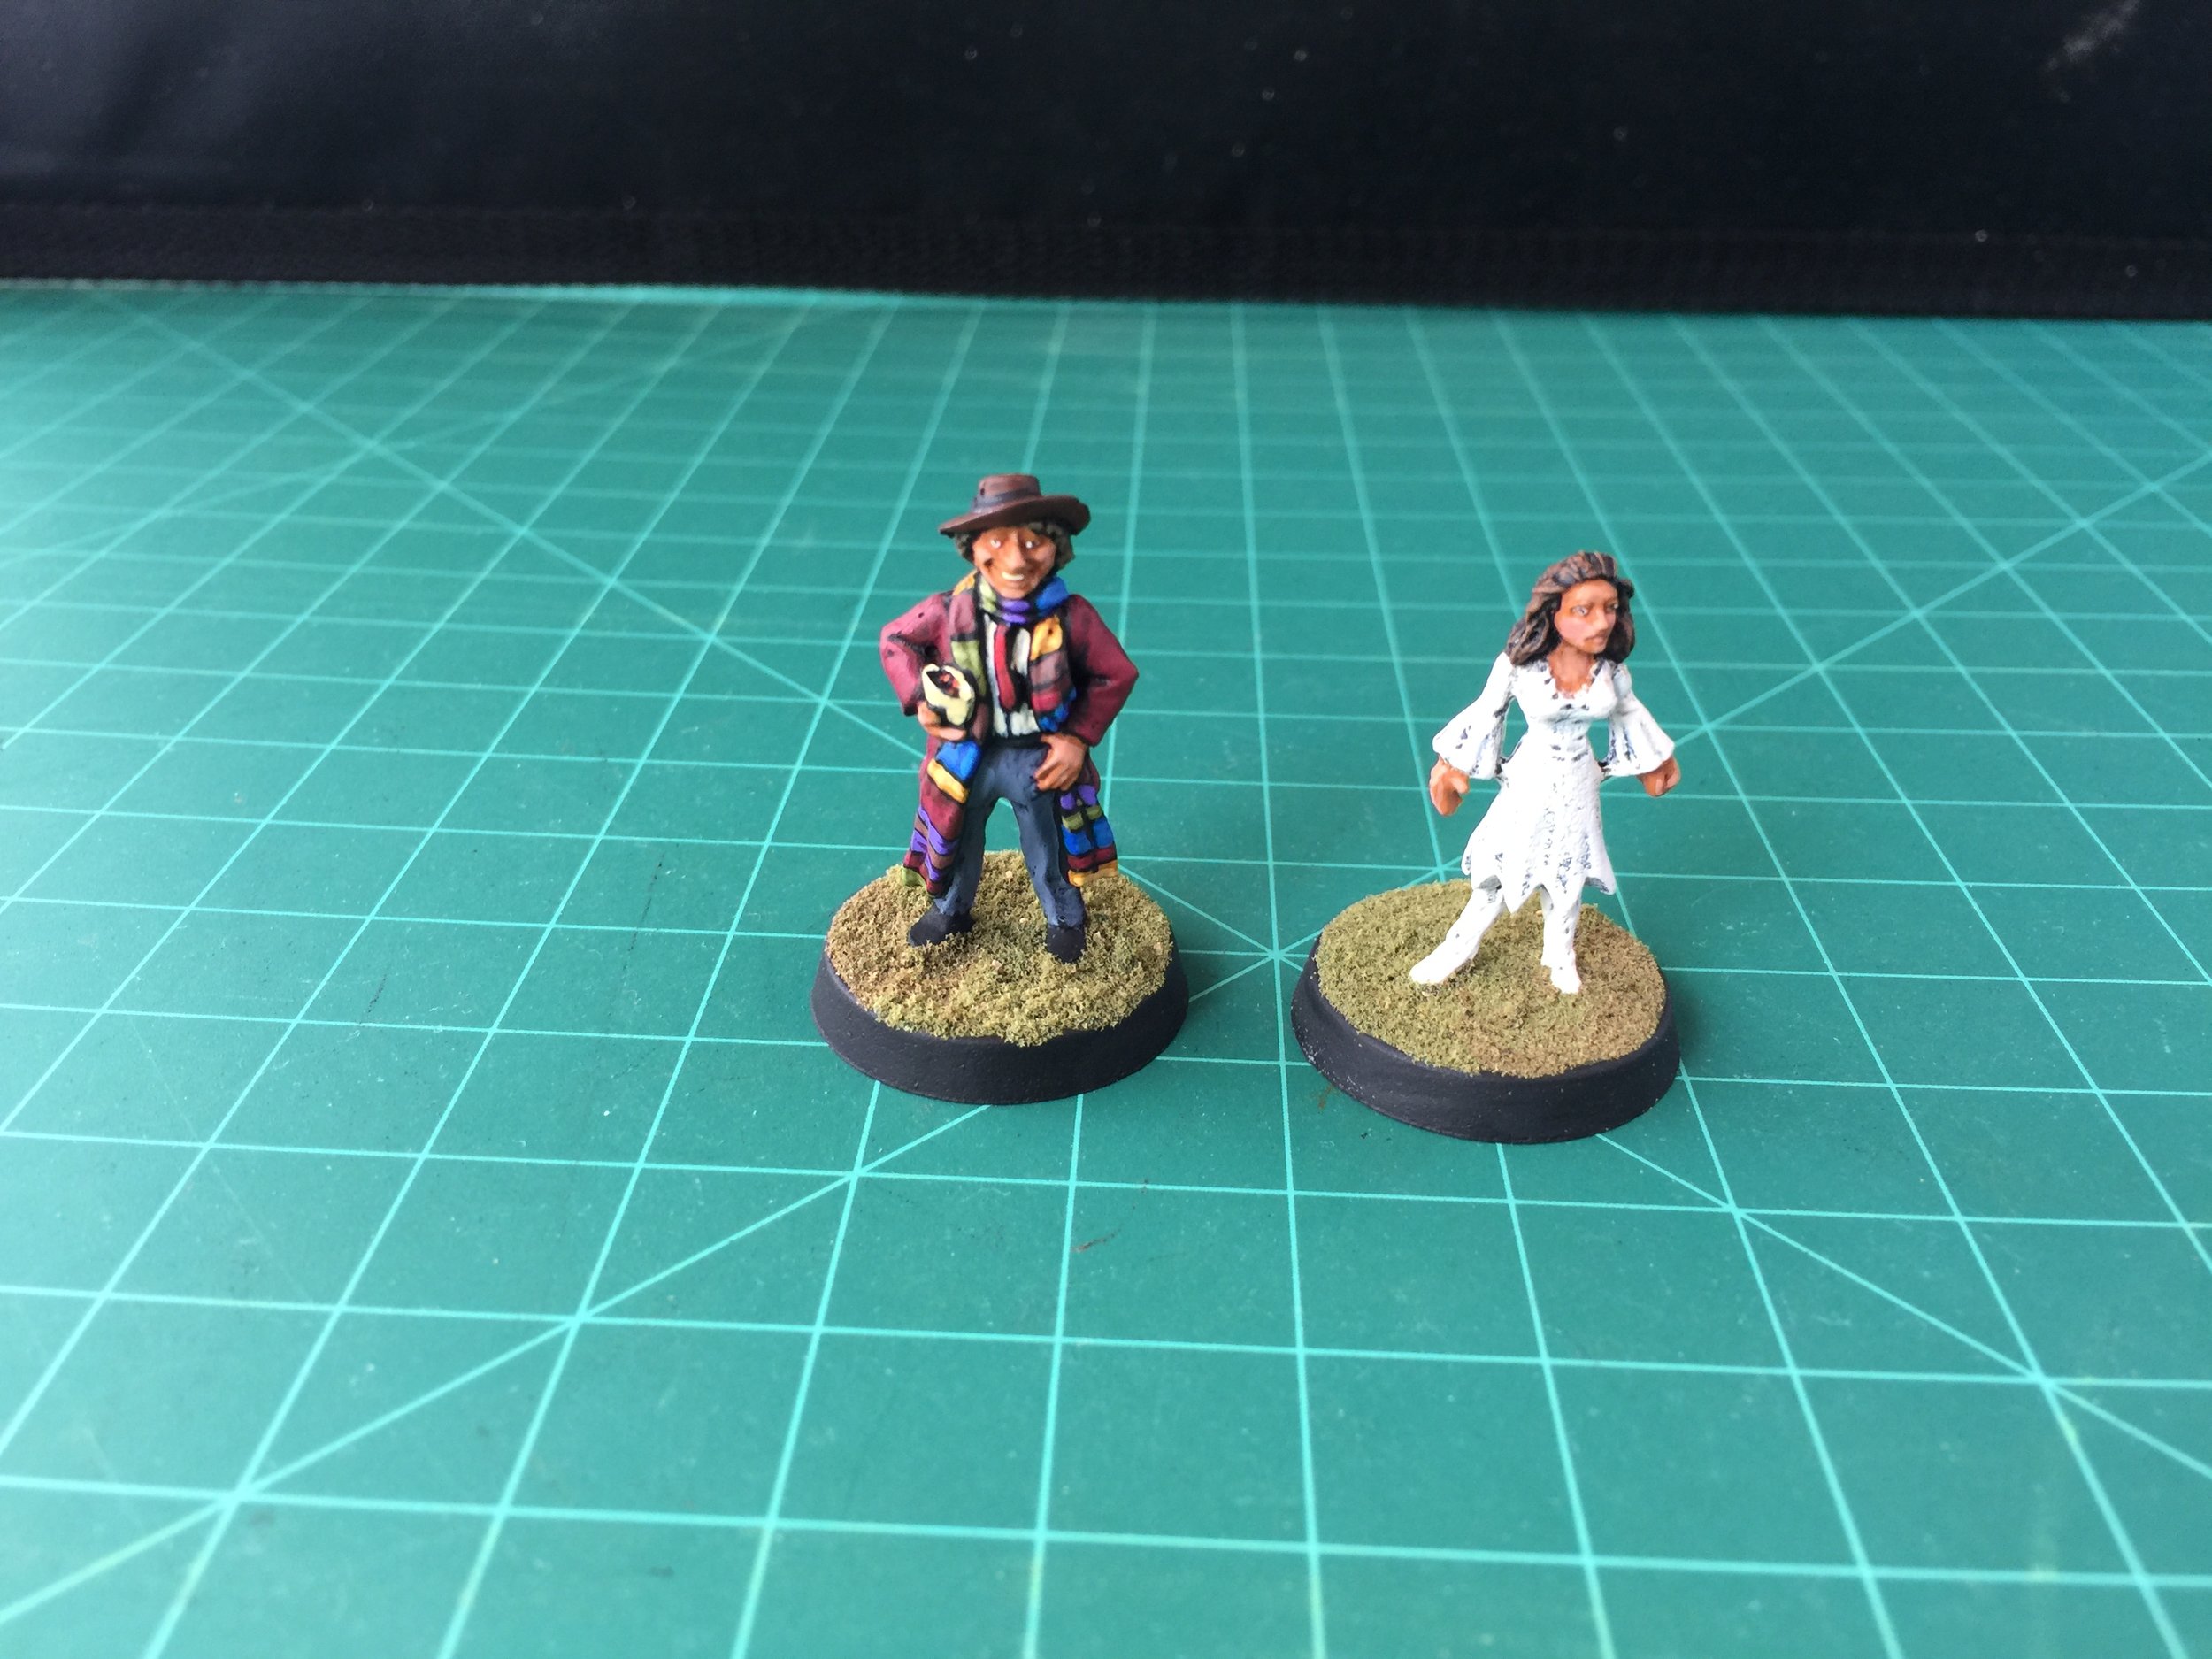
I began the week painting a second Romana and a second version of Dr. Who #4. The reason for the two different Dr. Who #4s is because I like them both. The second Romana was done because I wasn’t thrilled with the job I did on the first. Not really easy to see but I’m glad I had two and did both.
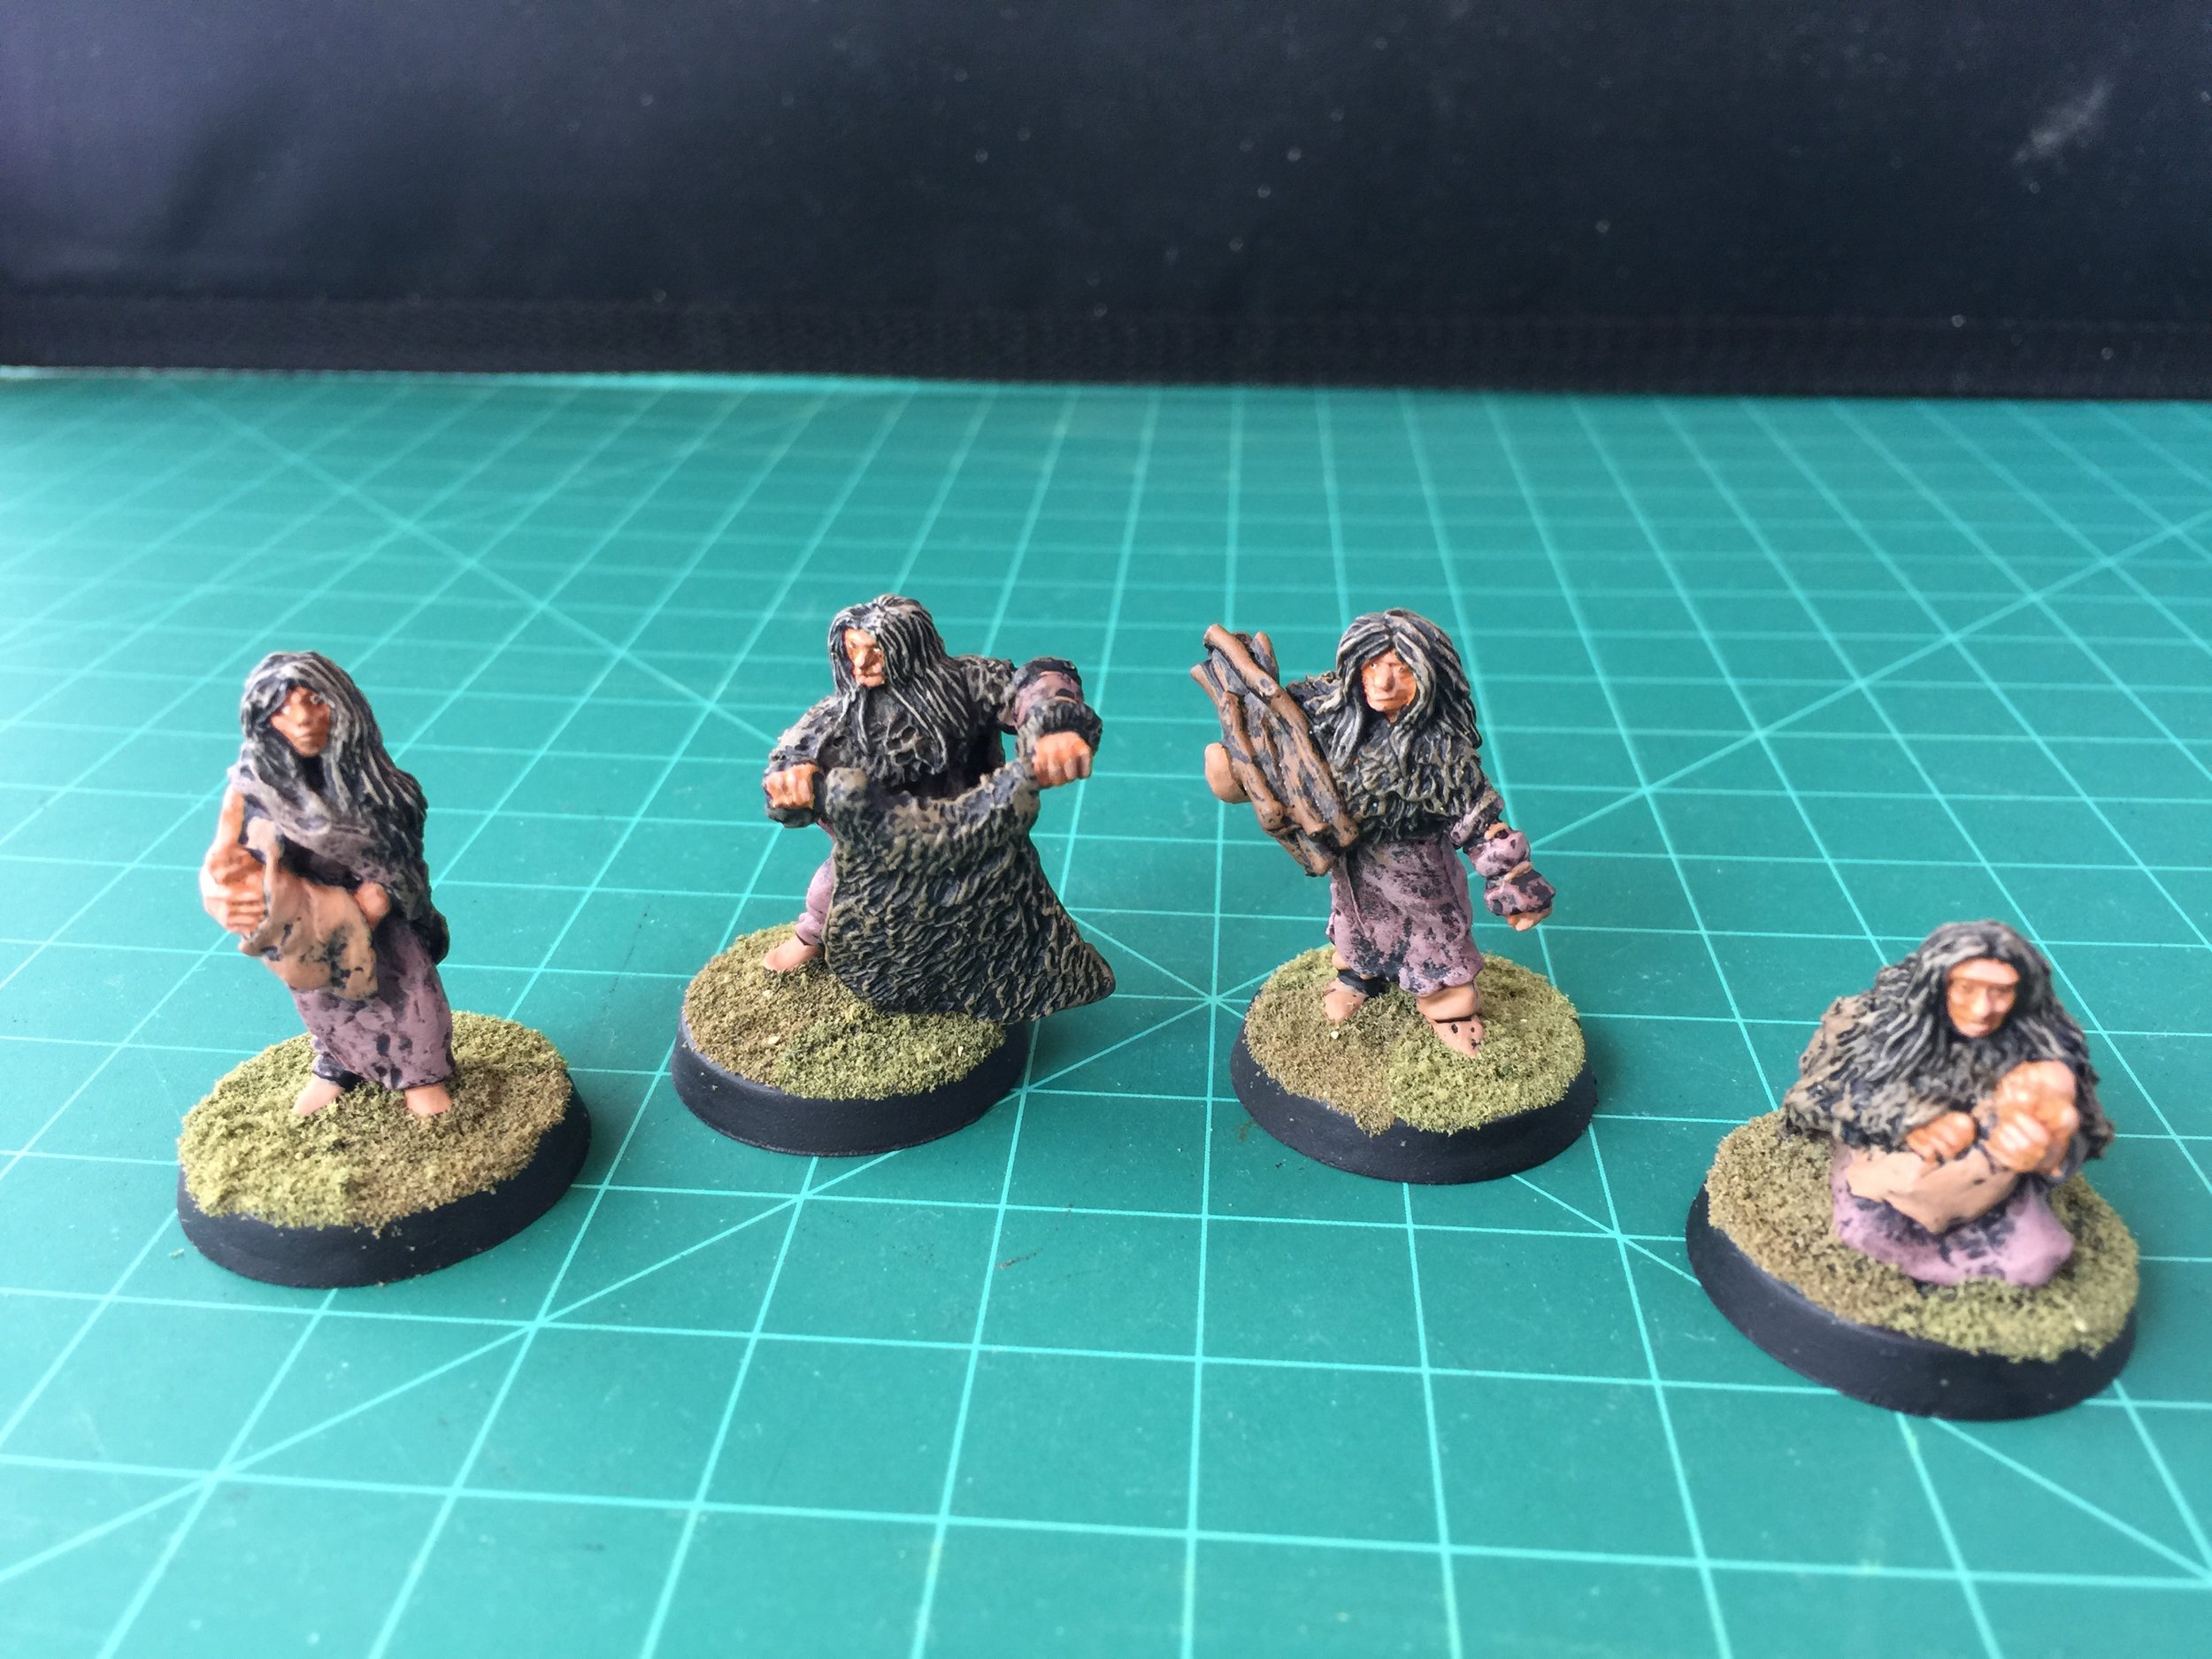
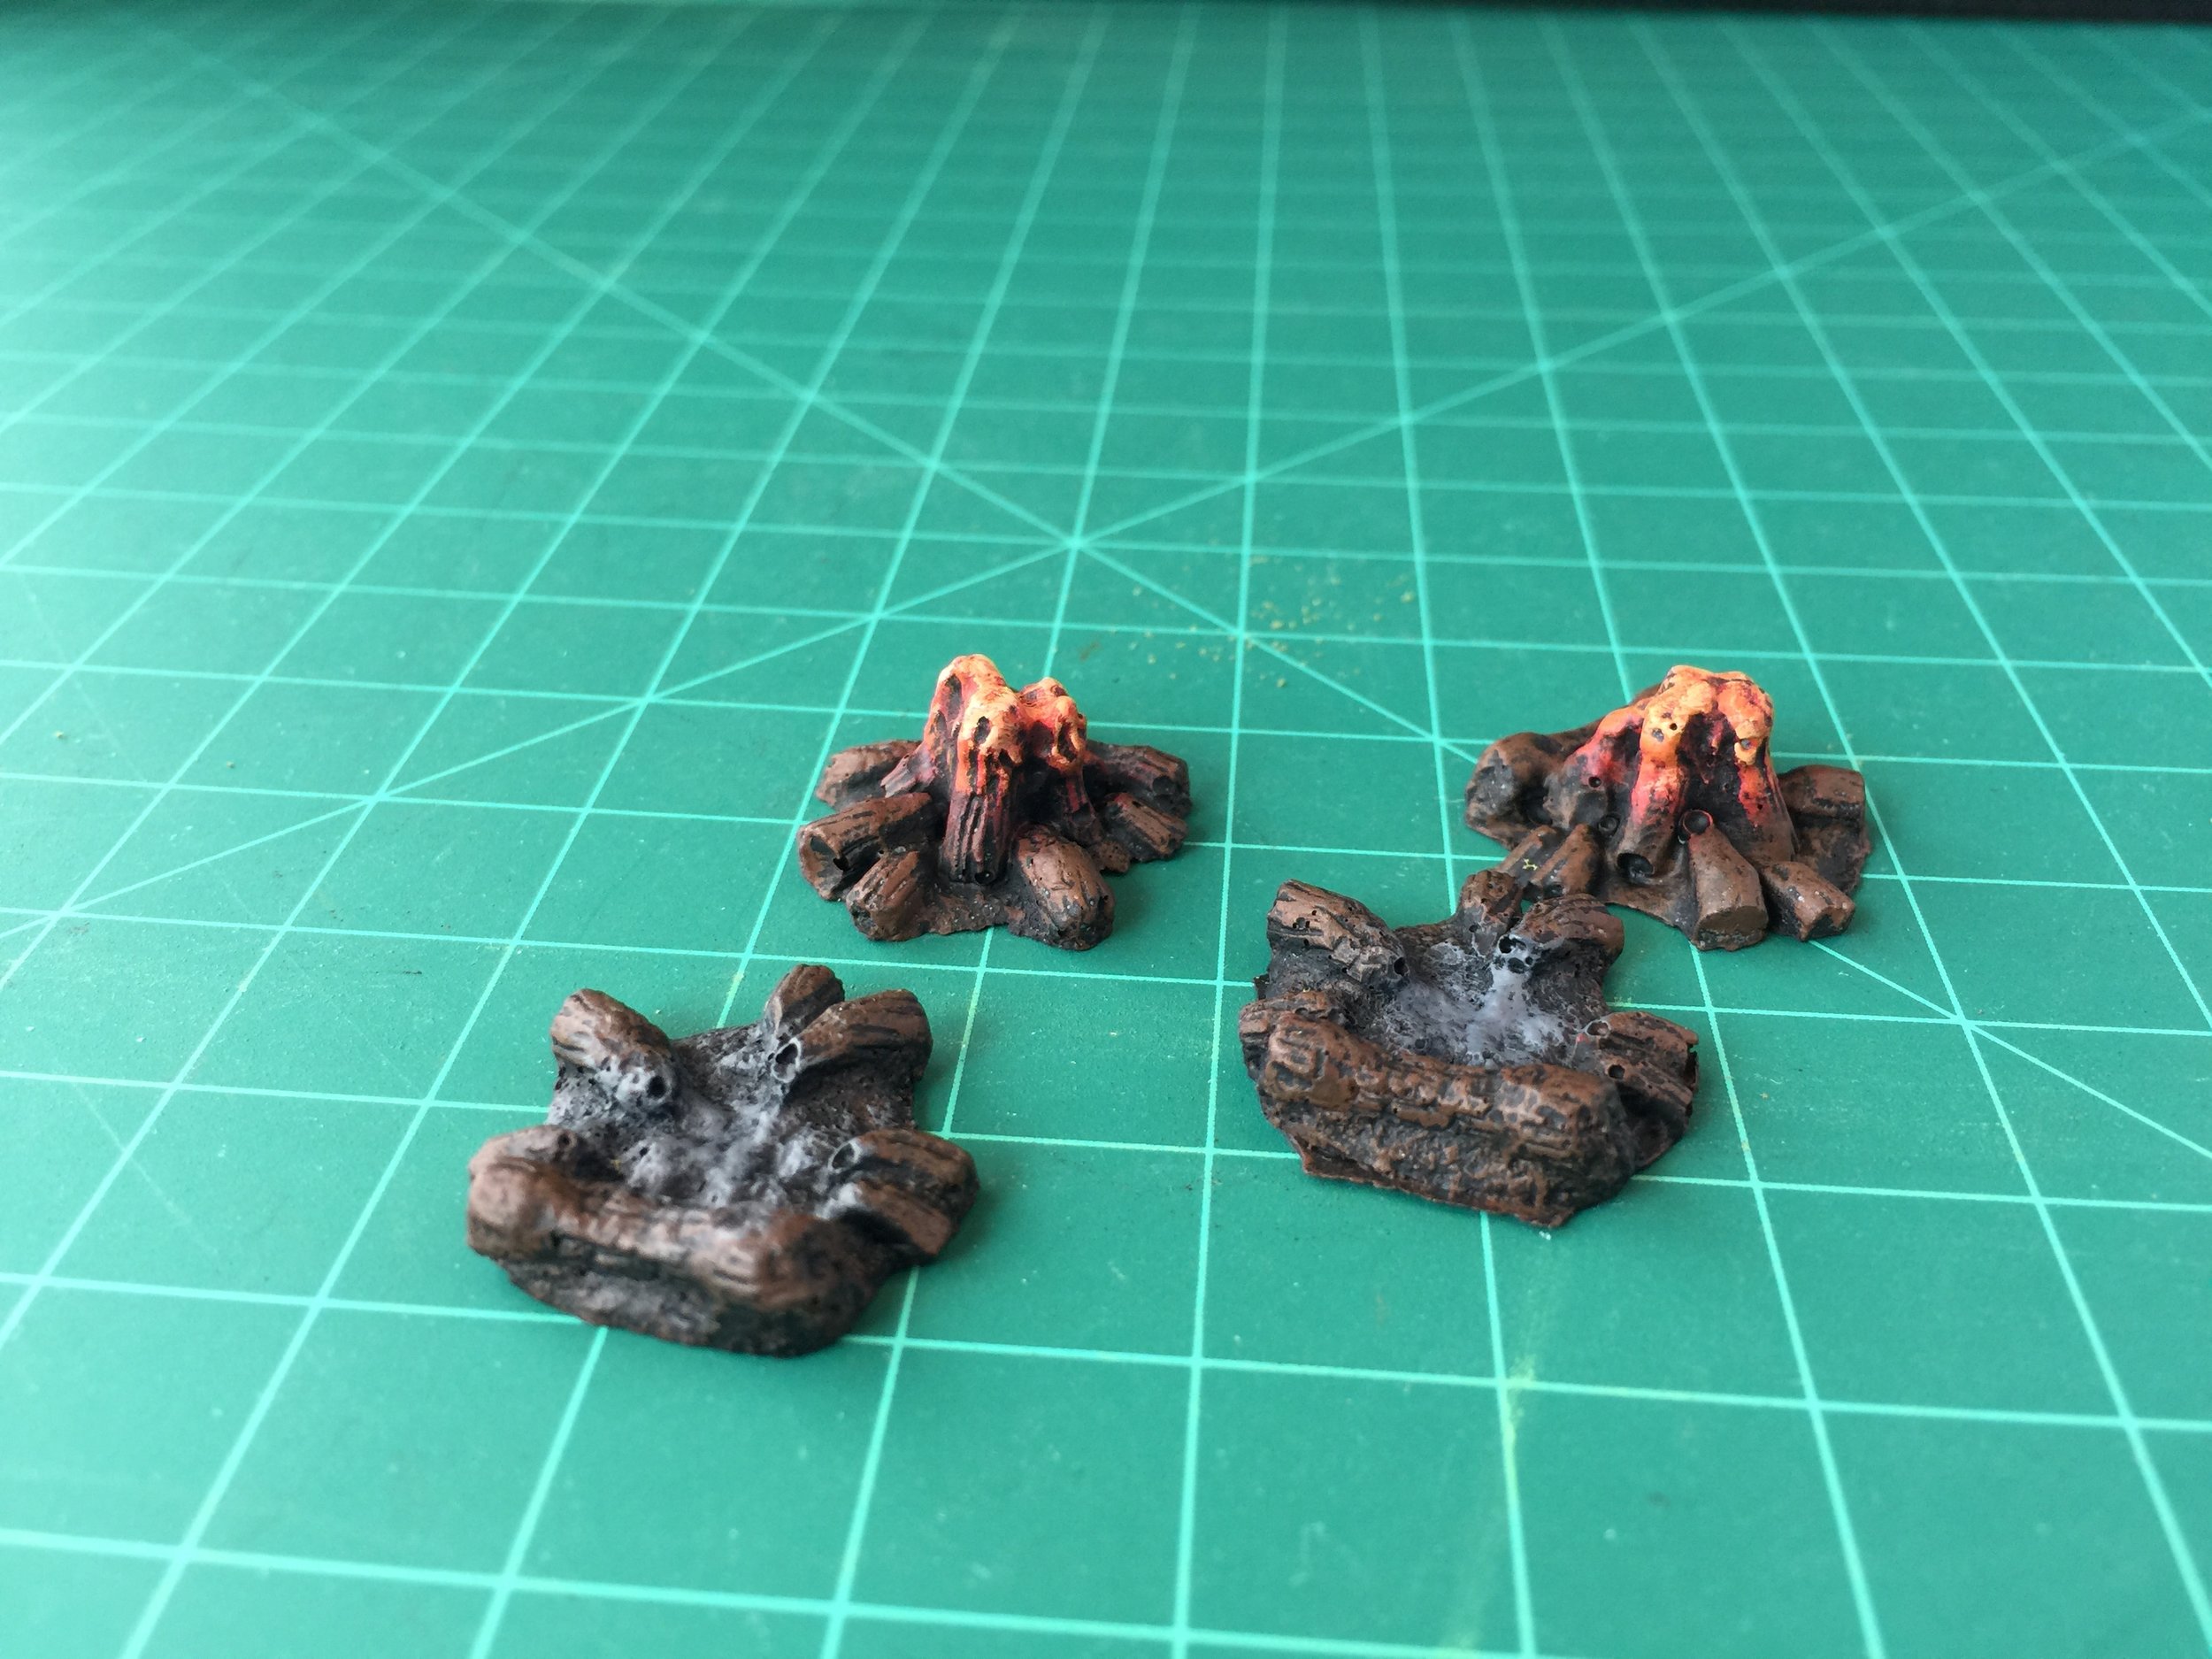
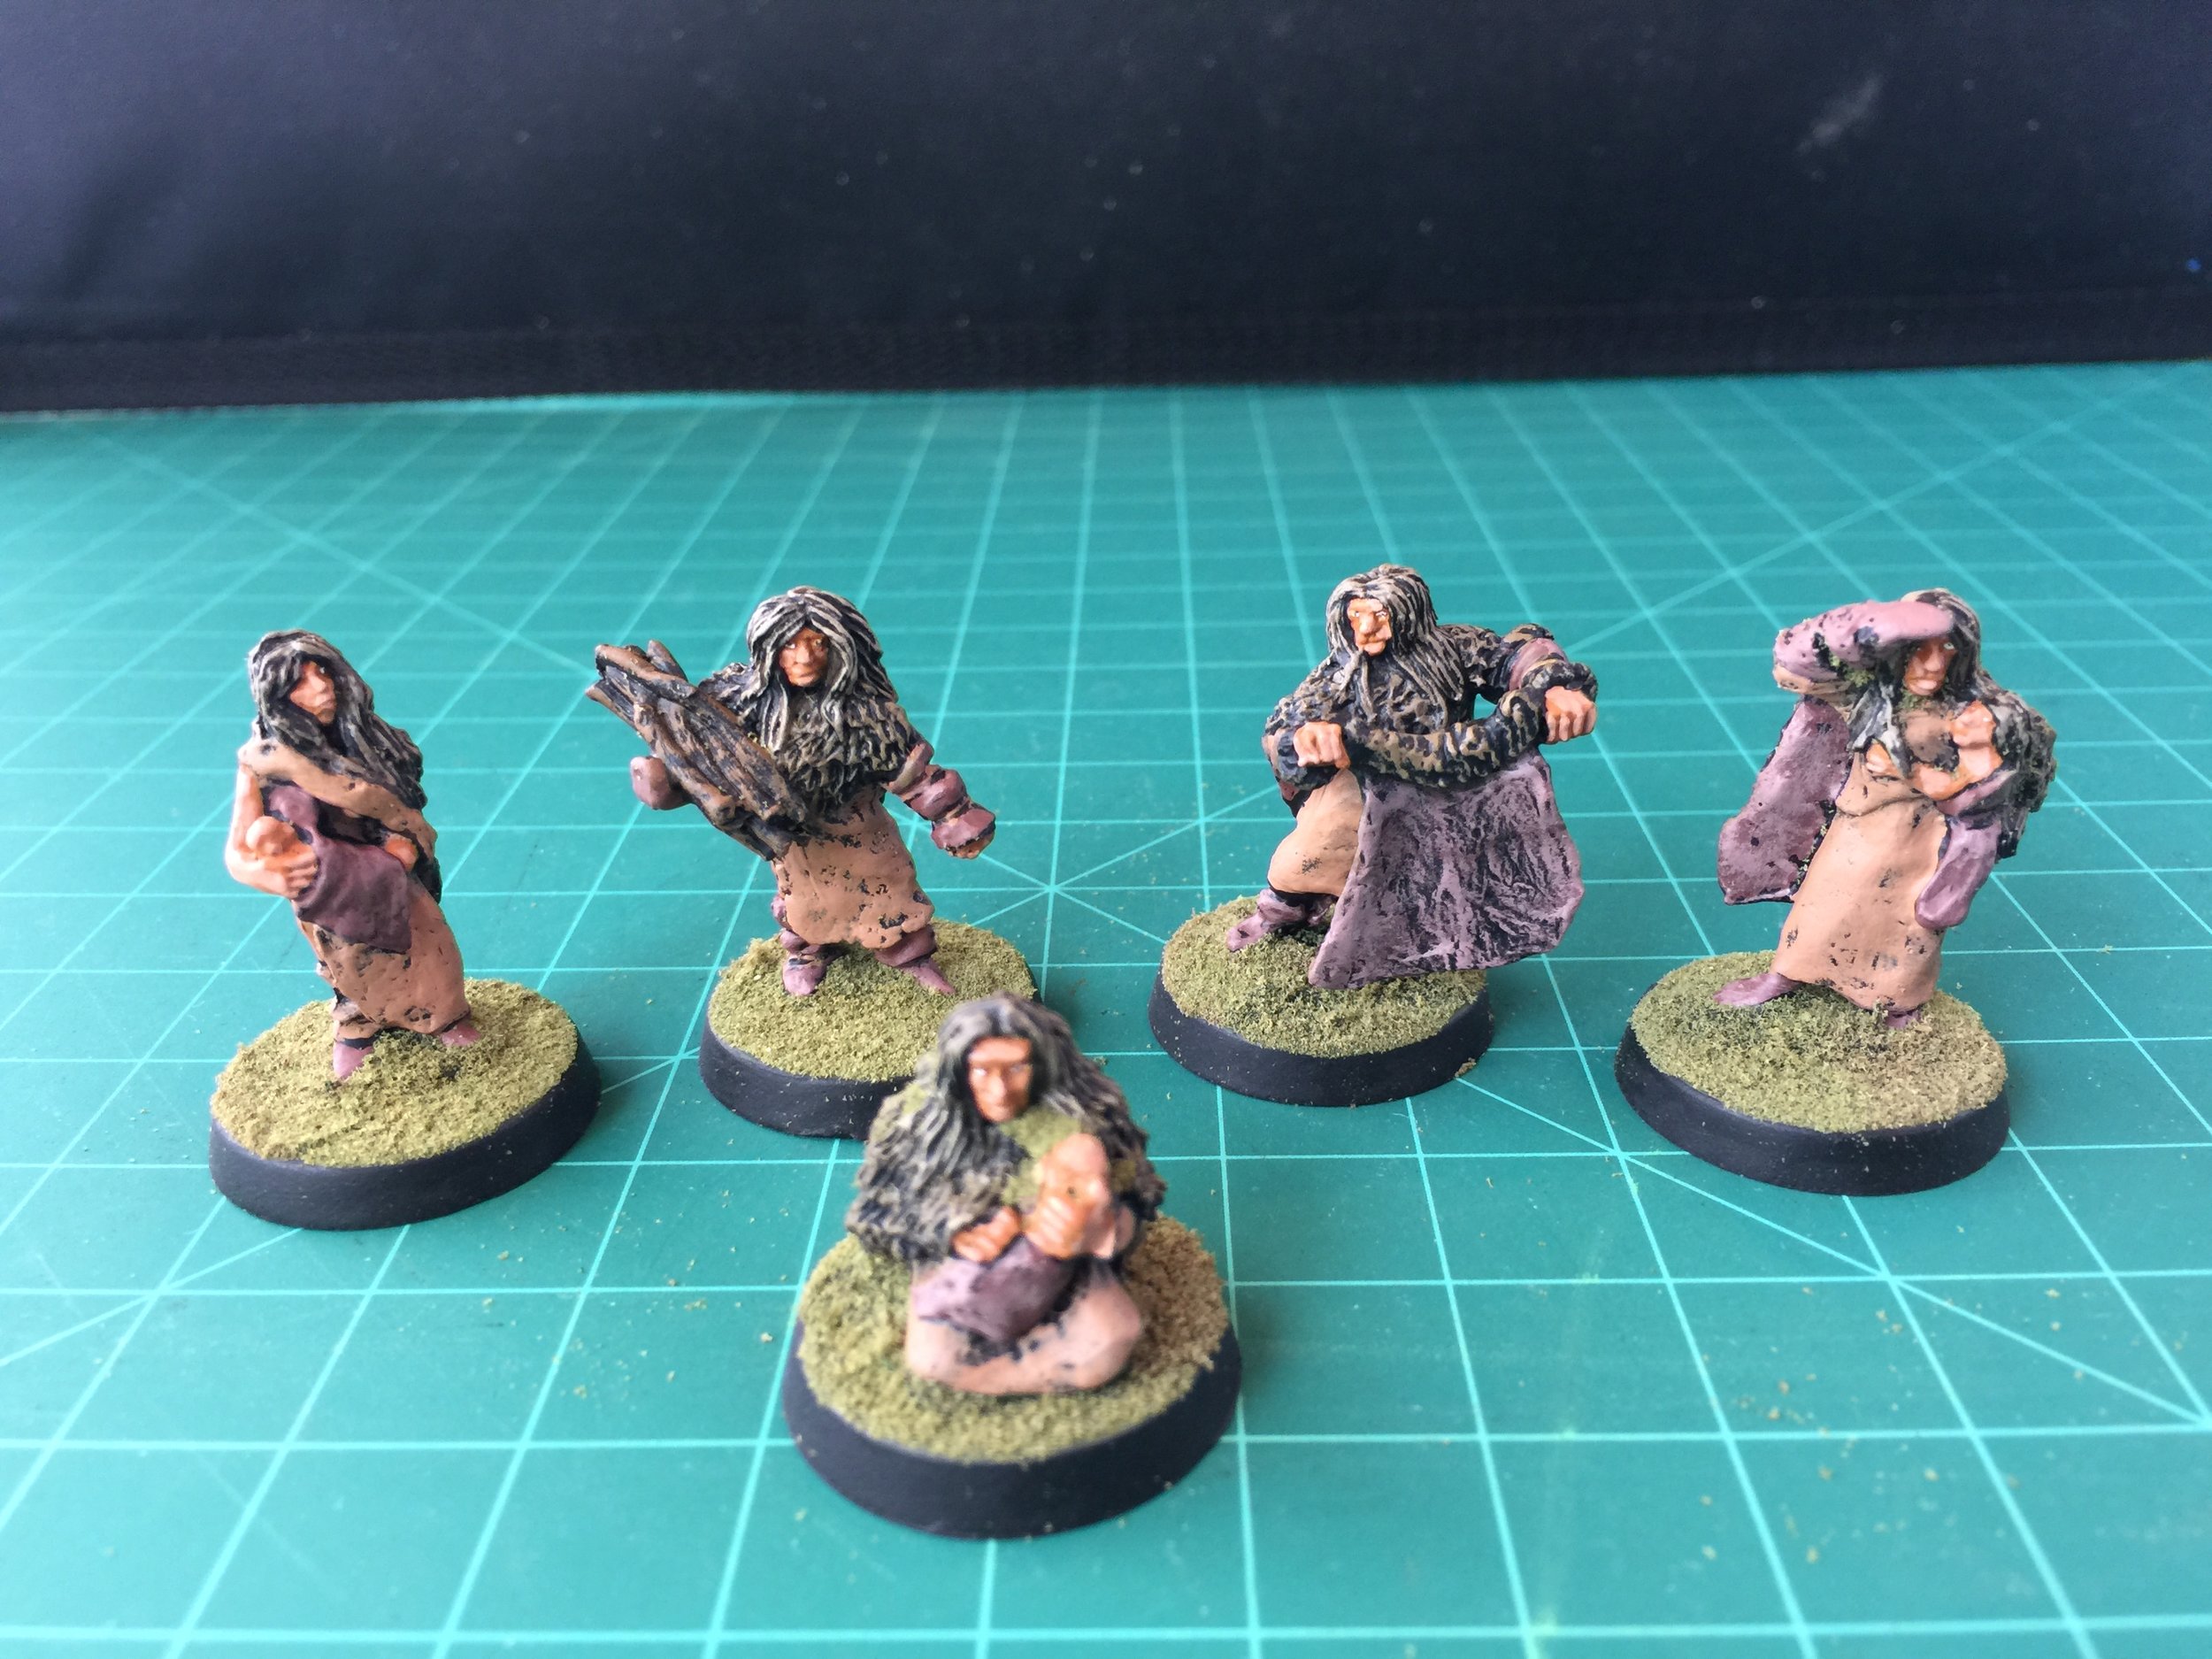
Next were four Acheson Creations’ prehistoric women. Note that I said four because one of the figures was missing from the pack. I didn’t bother contacting Acheson because I bought the pack about ten years ago and had no way of proving their error. This is significant because my prehistoric clan is short of females, so I ordered a second pack of females from them and painted them up just before the end of the week. I also painted some campfires from Legendary Realms.
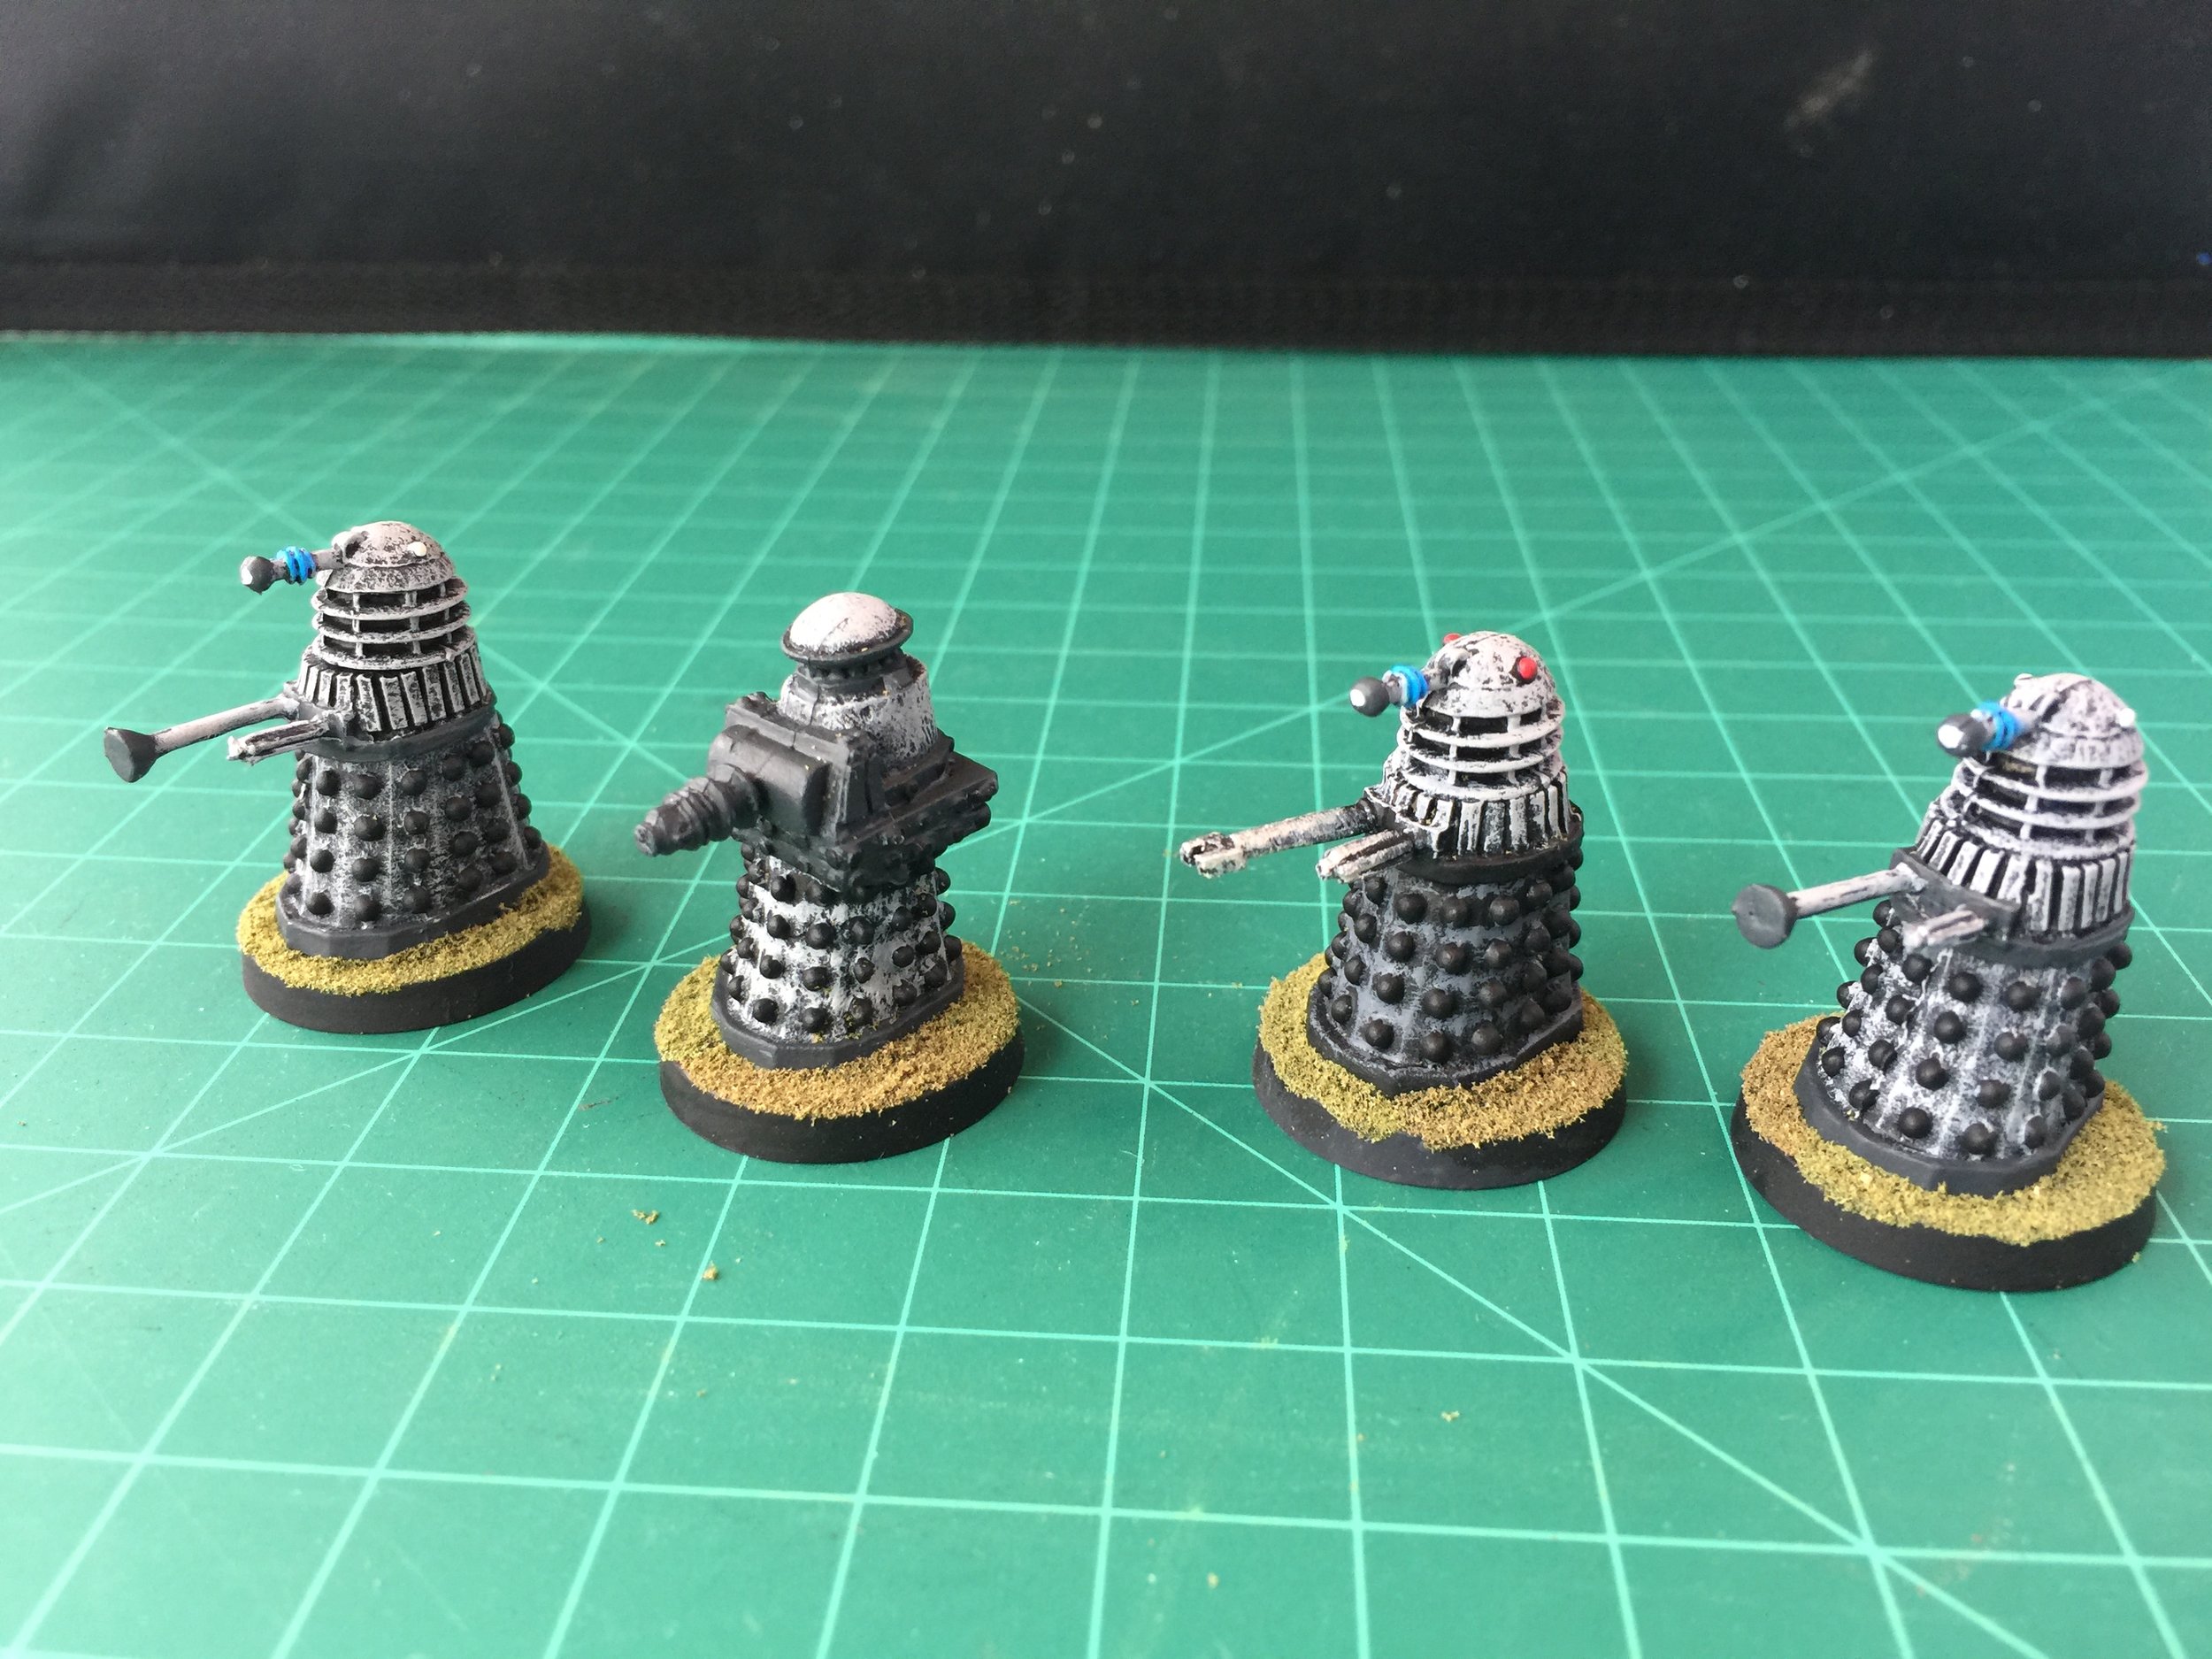
With the campfires done, I turned to my Dalek scout team… 8 Daleks (1 team leader, 1 engineer, 1 special weapons Dalek, and 5 soldiers). I did them in the color scheme common during the Dr. Who #4 era.
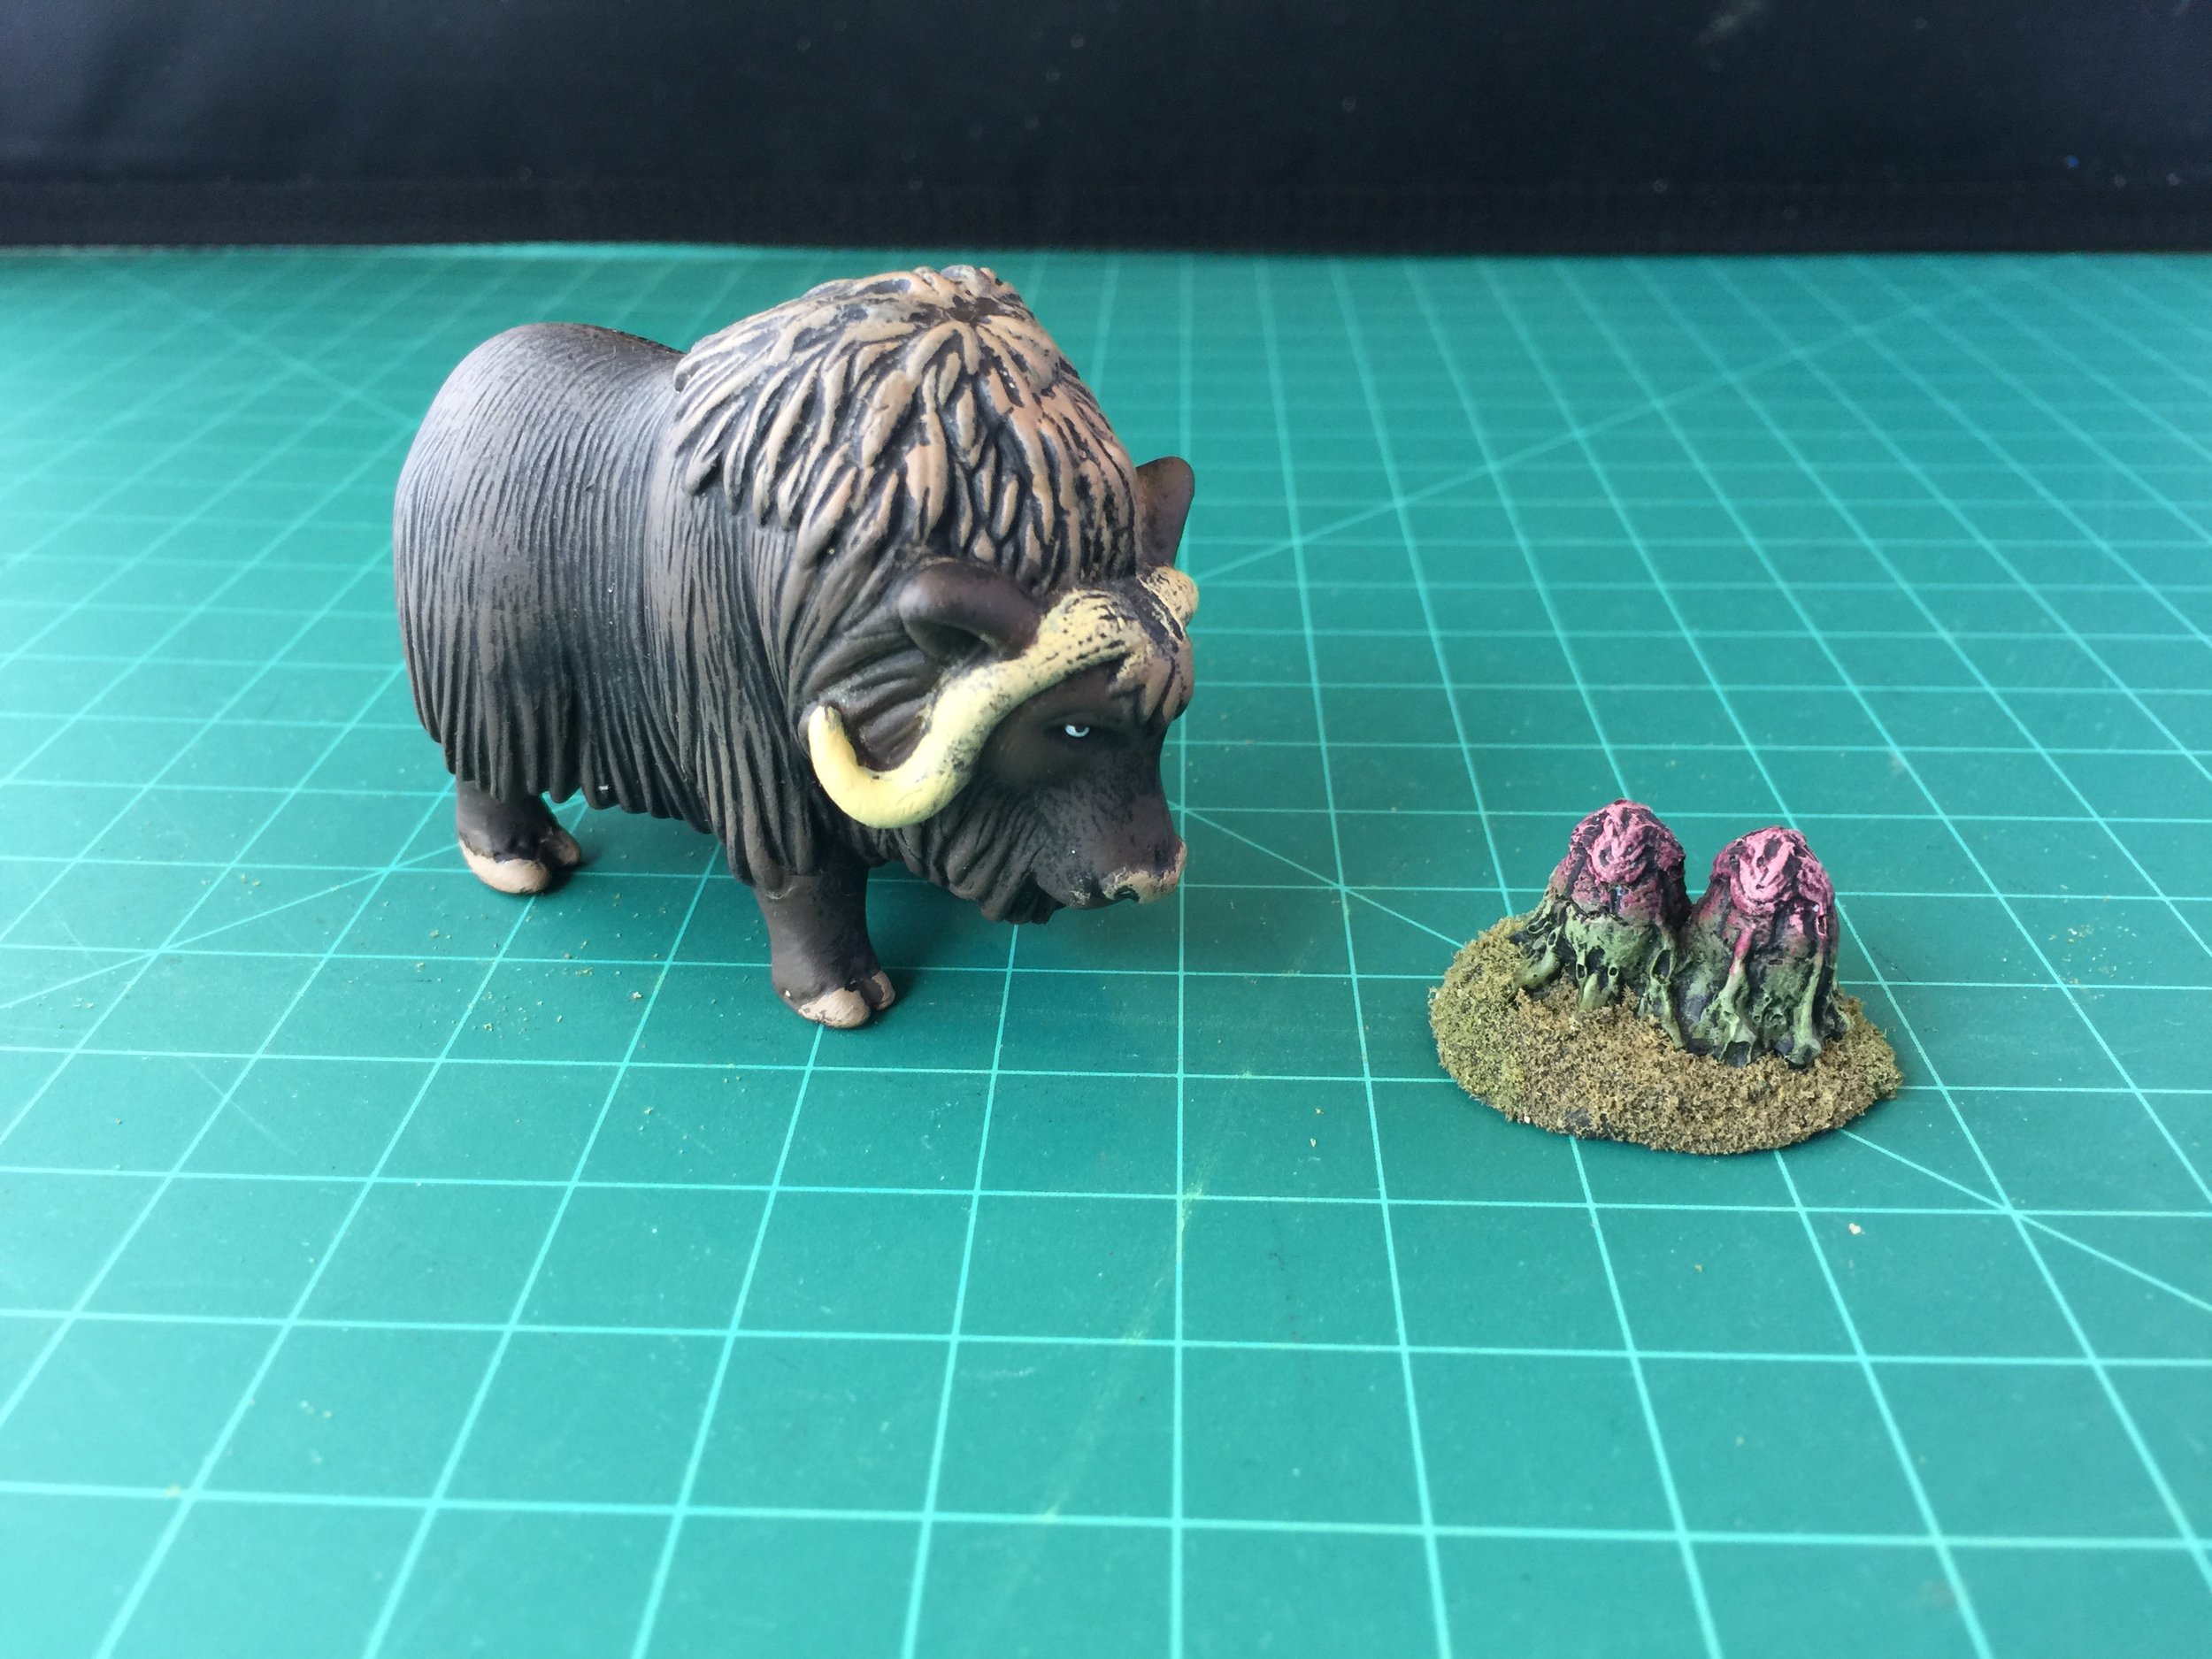
Since my prehistoric humanoids are generally wearing fur, and dinosaurs don’t seem to be furry, I purchased a few prehistoric furry creatures form Acheson Creations and painted them up as well. I also had a muskox (probably from The Ice Age movie) that I painted up, plus I found another pod and painted it as well.
Very close to the end of this project now. It went fast.